Connect with us

Air Purifier Guides

How to Clean Winix Air Purifier

Published

on

An image capturing the step-by-step cleaning process of a Winix Air Purifier

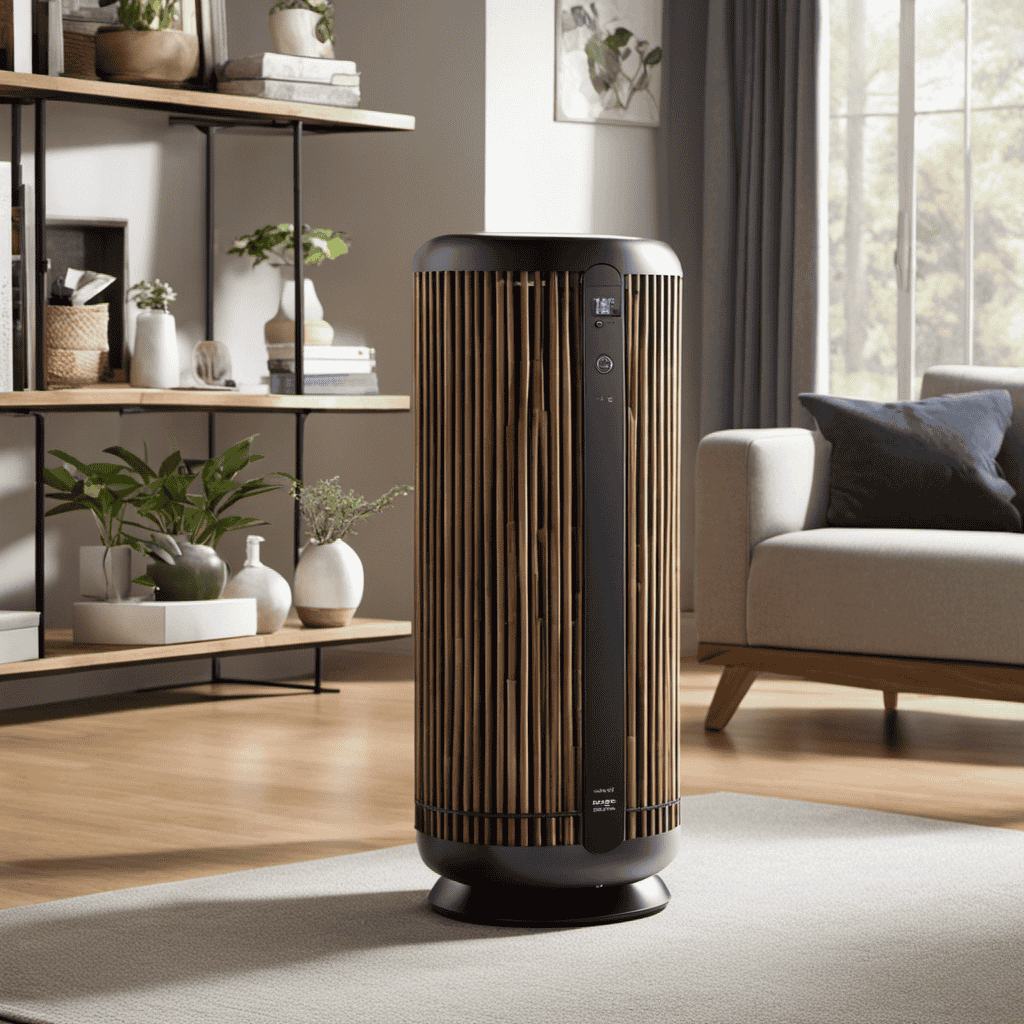
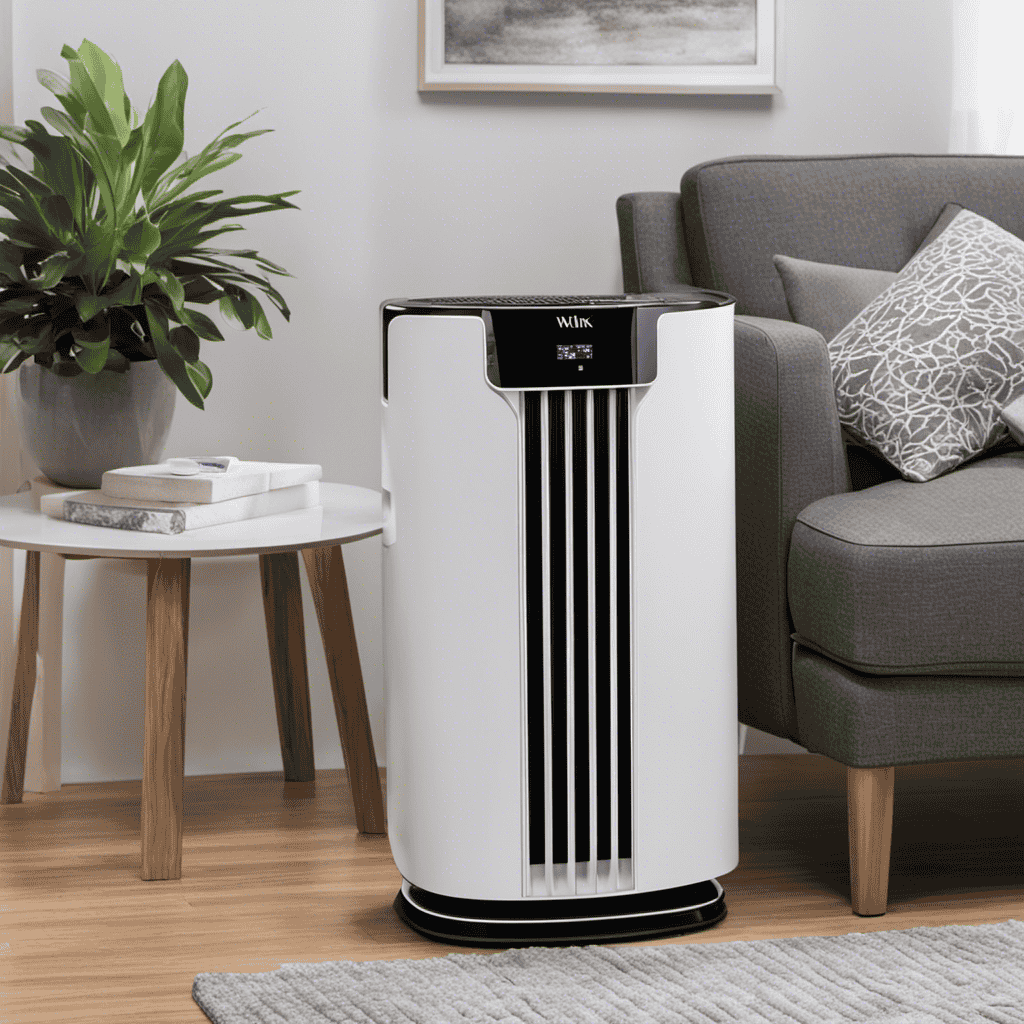
I’ve always wondered about the best way to clean my Winix air purifier.

After doing some research and experimenting, I’ve discovered a foolproof method that leaves my purifier looking and smelling like new.

In this article, I will walk you through the step-by-step process of cleaning your Winix air purifier.

From gathering the necessary supplies to reassembling the filters, you’ll have your purifier in top-notch condition in no time.

So let’s dive in and get your air purifier sparkling clean!

Advertisement

Key Takeaways

  • Cleaning an air purifier is essential for efficiency and longevity.
  • Neglecting regular cleaning can decrease performance and accumulate dust and pollutants.
  • Having the right tools, such as a vacuum cleaner and a soft cloth, is essential for proper cleaning.
  • Follow the manufacturer’s instructions for proper cleaning techniques.

Understanding the Cleaning Process

To clean the Winix air purifier, it’s important to understand the cleaning process. Cleaning an air purifier is essential for its efficiency and longevity. One of the common mistakes people make is neglecting regular cleaning, which can lead to a decrease in performance and an accumulation of dust and pollutants.

To avoid this, follow these cleaning tips.

First, make sure to unplug the unit before starting the cleaning process. Remove the front cover and gently wipe it with a soft cloth. Use a vacuum cleaner with a brush attachment to clean the pre-filter and HEPA filter. Be careful not to damage the filters.

Finally, wipe the exterior of the unit with a damp cloth.

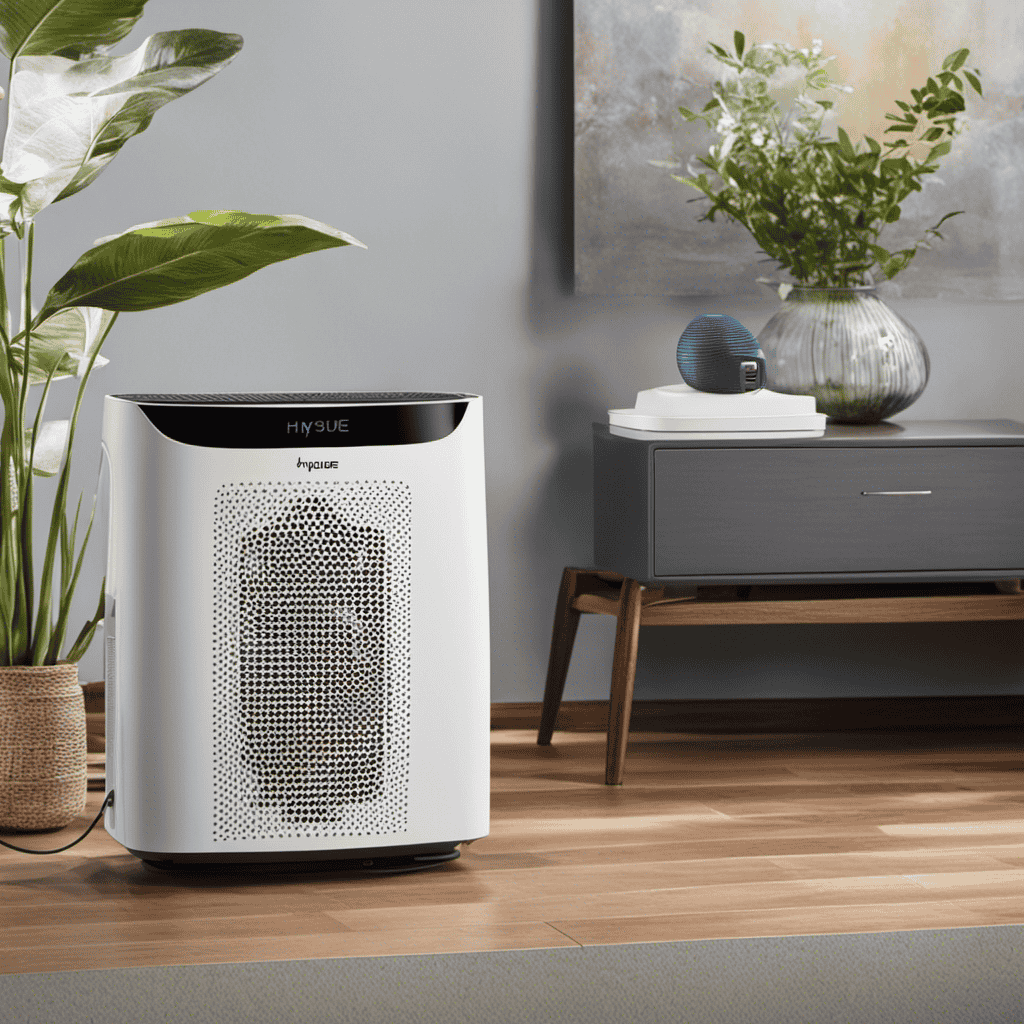
Gathering the Necessary Supplies

When it comes to cleaning, having the right tools is essential. In order to properly clean your winix air purifier, there are a few key cleaning tools that you will need.

Additionally, knowing the proper cleaning techniques will ensure that you effectively remove any dirt or debris from your air purifier.

Advertisement

Cleaning Tools Needed

To clean your Winix air purifier, you’ll need a vacuum cleaner and a soft cloth. It’s important to follow the manufacturer’s instructions for cleaning techniques. Start by turning off and unplugging the air purifier. Use the vacuum cleaner with a brush attachment to remove dust and debris from the exterior of the purifier. Pay close attention to the vents and grill where air enters and exits the unit.

Next, wipe down the surface of the purifier with a soft cloth dampened with water or a mild detergent solution. Remember to remove and clean the filters according to the maintenance tips provided in the user manual. Regular cleaning and maintenance are essential to ensure optimal performance and longevity of your Winix air purifier.

Proper Cleaning Techniques

It’s important to follow the manufacturer’s instructions for proper cleaning techniques of the Winix air purifier. Understanding maintenance is crucial in ensuring the longevity of your device.

To clean the air purifier, start by turning it off and unplugging it from the power source. Remove the front cover and gently wipe it down with a damp cloth.

Take out the filters and vacuum them to remove any dust or debris. If the filters are washable, rinse them with water and let them air dry completely before reinstalling.

Advertisement

Use a soft brush attachment to clean the inside of the purifier, removing any remaining dust. Finally, reassemble the purifier, ensuring all parts are securely in place.

Powering Off the Air Purifier

To power off the air purifier, simply press the ‘off’ button.

When powering on the air purifier, ensure that it is connected to a working power outlet.

If you are experiencing power issues, first check the power cord for any damage or loose connections. Make sure the power switch is in the ‘on’ position.

If the air purifier still does not turn on, try plugging it into a different outlet to rule out any issues with the current power source.

Advertisement

If none of these steps resolve the problem, it is recommended to contact customer support for further assistance.

Remember to always follow the manufacturer’s guidelines for troubleshooting power issues to avoid damaging the air purifier.

Removing the Front Cover

When removing the front cover, simply locate the small tabs on either side and gently press them inward to release the cover. Once the cover is off, you will have a clear view of the inner workings of the air purifier.

It is important to understand the panel to properly clean the fan. The panel consists of various components such as the fan, filters, and sensors.

Here are three important things to keep in mind while cleaning the fan:

Advertisement
  1. Use a soft brush or cloth to gently remove any dust or debris from the fan blades. Be careful not to damage the blades while cleaning.

  2. Check for any signs of wear or damage on the fan. If you notice any issues, it may be necessary to replace the fan to ensure optimal performance.

  3. Take note of the fan’s location and how it is attached to the air purifier. This will make it easier to reassemble the unit after cleaning.

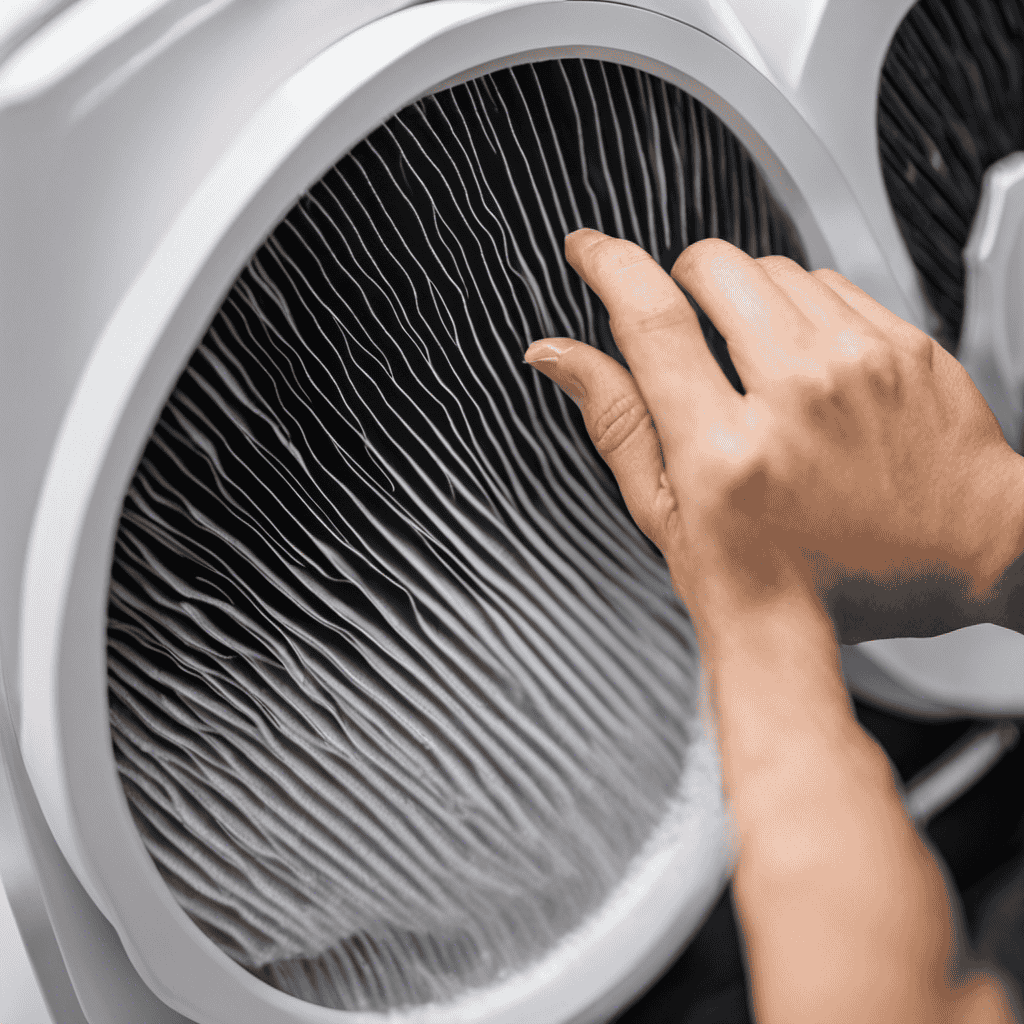
Taking Out the Filters

Make sure you have disconnected the power supply before you begin removing the filters. Understanding filter maintenance is crucial for keeping your air purifier running efficiently. Cleaning filter accessories is an important part of this maintenance routine.

To start, locate the filter compartment on your Winix air purifier. Open the compartment carefully and remove the filters one by one. Pay attention to any arrows or labels indicating the correct orientation of the filters.

Once the filters are out, gently tap them to remove excess dust and debris. For a deeper clean, you can rinse the filters with water or use a vacuum cleaner with a brush attachment. Allow the filters to dry completely before reinstalling them.

Remember to clean the filter accessories regularly to ensure optimal performance and longevity of your air purifier.

Cleaning the Pre-Filter

When it comes to maintaining the pre-filter of your Winix air purifier, there are a few key tips to keep in mind.

Advertisement

First, it is important to regularly check and clean the pre-filter to ensure optimal performance.

Secondly, the frequency of cleaning will depend on various factors such as the level of air pollution in your area and the usage of the purifier.

Lastly, following the manufacturer’s recommendations for cleaning frequency will help prolong the lifespan of the pre-filter and keep your air purifier running efficiently.

Pre-Filter Maintenance Tips

To maintain your Winix air purifier’s pre-filter, regularly vacuum it to remove any accumulated dust and debris. This simple step will ensure that your air purifier continues to work effectively and efficiently.

In addition to regular vacuuming, here are three important tips for pre-filter maintenance:

Advertisement
  1. Replace the pre-filter at least every three months. Over time, the pre-filter can become clogged with dust and other particles, reducing its ability to effectively capture airborne contaminants. By replacing it regularly, you can ensure that your air purifier is always operating at its best.

  2. Use a soft brush to gently remove any stubborn dust or debris from the pre-filter. This will help to prolong its lifespan and maintain its efficiency.

  3. If the pre-filter is heavily soiled or damaged, it may need to be cleaned or replaced more frequently. Pay attention to any noticeable changes in the filter’s appearance or performance, and take appropriate action.

Cleaning Frequency Recommendations

Regularly vacuuming the pre-filter of your air purifier is crucial to maintaining its effectiveness and efficiency. A cleaning schedule is necessary to ensure that the pre-filter is cleaned at the appropriate intervals. The frequency of cleaning depends on the air quality in your environment and the amount of pollutants it captures. Ideally, the pre-filter should be vacuumed every two weeks or when you notice a significant decrease in the air purifier’s performance.

Regular cleaning offers many benefits, such as prolonging the lifespan of the pre-filter and preventing clogs that can hinder the air purifier’s operation. It also ensures that the air purifier continues to effectively remove larger particles like dust, pet hair, and lint. By maintaining a consistent cleaning schedule, you can maximize the performance of your air purifier and enjoy cleaner air in your home.

Now, let’s move on to cleaning the carbon filter.

Cleaning the Carbon Filter

The carbon filter on the Winix air purifier should be cleaned regularly to maintain its effectiveness. Here are three reasons why proper carbon filter maintenance is crucial:

  1. Eliminating Odors: Over time, the carbon filter can accumulate odors from the air it purifies. By cleaning the filter, you can remove these odors and ensure that your air purifier continues to provide fresh, clean air throughout your home.

  2. Improving Air Quality: A dirty carbon filter can become clogged with particles, reducing its ability to effectively remove pollutants from the air. Regular cleaning helps to keep the filter free from debris and maintains its efficiency in capturing harmful particles, ensuring that you and your family breathe in clean, healthy air.

  3. Prolonging Filter Lifespan: Cleaning the carbon filter extends its lifespan, reducing the need for frequent replacements. This not only saves you money in the long run but also reduces waste, making your air purifier more environmentally friendly.

By cleaning the carbon filter, you not only remove filter odors but also ensure optimal performance for your Winix air purifier.

Advertisement

Now let’s move on to the next section about cleaning the true HEPA filter.

Cleaning the True HEPA Filter

Cleaning the True HEPA filter can greatly improve the air quality in your home. Understanding filter maintenance is crucial for extending the filter lifespan and ensuring its optimal performance.

The True HEPA filter is designed to capture 99.97% of airborne particles as small as 0.3 microns, including dust, pollen, pet dander, and mold spores.

To clean the filter, first, make sure the air purifier is turned off and unplugged. Gently remove the filter from the unit and use a soft brush or vacuum cleaner to remove any visible debris. Avoid using water or cleaning solutions on the filter as it may damage the delicate fibers. Once cleaned, reinstall the filter back into the air purifier and resume normal operation.

Now, let’s move on to cleaning the plasmawave technology, another essential component of your Winix air purifier.

Advertisement

Cleaning the PlasmaWave Technology

When maintaining your Winix air purifier, it’s important to properly care for the PlasmaWave technology. The PlasmaWave technology helps to neutralize pollutants and odors, ensuring that you have clean and fresh air in your home.

To keep the PlasmaWave technology functioning effectively, regular cleaning and maintenance are necessary. Here are three key steps to properly clean and maintain the PlasmaWave technology:

  1. Cleaning the ionizer: Gently remove the ionizer from the unit and wipe it with a soft, damp cloth. Be sure to remove any dust or debris that may have accumulated on the ionizer. Avoid using harsh chemicals or abrasive materials that could damage the ionizer.

  2. Maintenance of the PlasmaWave technology: Check the PlasmaWave unit regularly to ensure it is free from dust and debris. If you notice any buildup, use a soft brush or vacuum cleaner with a brush attachment to gently remove it. This will ensure that the PlasmaWave technology continues to work effectively.

  3. Replacing the PlasmaWave unit: Over time, the PlasmaWave unit may need to be replaced. Refer to the user manual for instructions on how to properly replace the unit. Regularly replacing the PlasmaWave unit will ensure optimal performance and longevity of your air purifier.

Cleaning the Sensor

When it comes to sensor maintenance, there are a few key tips that can help ensure optimal performance.

First, regularly check for any physical damage or obstructions that may affect the sensor’s functionality.

Second, troubleshoot any sensor issues by following the manufacturer’s guidelines and performing any necessary resets or recalibrations.

Advertisement

Lastly, regular cleaning is of utmost importance to prevent dust, dirt, or other debris from accumulating on the sensor and affecting its accuracy.

Sensor Maintenance Tips

To ensure proper sensor function, it’s important to regularly clean the exterior of your Winix air purifier. Neglecting this maintenance can lead to sensor error codes and inaccurate readings. Here are some sensor maintenance tips to keep your air purifier running smoothly:

  1. Clean the sensor housing: Use a soft cloth or brush to gently remove dust and debris from the sensor housing. Avoid using water or cleaning solutions, as they can damage the sensor.

  2. Check for sensor calibration: Periodically check the sensor calibration to ensure accurate readings. Consult the user manual for instructions on how to calibrate the sensor if necessary.

  3. Keep the surrounding area clean: Dust and dirt can accumulate around the air purifier, affecting sensor performance. Regularly clean the area around the purifier to prevent debris from entering the sensor.

Troubleshooting Sensor Issues

In order to ensure optimal performance of my Winix air purifier, I needed to troubleshoot any sensor issues that may arise. Sensor calibration is crucial for accurate detection of air quality and automatic adjustment of the purifier settings. To troubleshoot sensor issues, I employed the following techniques:

Troubleshooting Techniques Description
Check Power Supply Ensure the air purifier is properly connected to a power source.
Clean Sensor Gently wipe the sensor with a soft cloth to remove any dust or debris.
Reset the Unit Turn off the air purifier, unplug it, wait for a few minutes, and then plug it back in.
Contact Customer Support If the issue persists, reach out to Winix customer support for further assistance.

Importance of Regular Cleaning

Regular cleaning is essential for maintaining the optimal performance and longevity of your air purifier. It not only ensures that the unit effectively removes pollutants from the air, but also prevents the accumulation of dirt and debris that can hinder its functionality. By understanding the benefits of regular cleaning and implementing proper cleaning techniques, you can keep your air purifier running smoothly for years to come.

Here are three reasons why regular cleaning is important:

Advertisement
  1. Improved Air Quality: Regularly cleaning the filters and components of your air purifier removes trapped particles and allows it to efficiently purify the air, providing you with cleaner, fresher air to breathe.

  2. Enhanced Efficiency: A clean air purifier operates more efficiently, allowing it to effectively remove pollutants from the air faster and more effectively.

  3. Prolonged Lifespan: Cleaning your air purifier regularly prevents the buildup of dirt and debris, which can cause damage to the internal components and reduce the lifespan of the unit.

By regularly cleaning your air purifier, you can enjoy the full benefits of clean air and ensure its longevity.

Now, let’s move on to the next section, which covers the technique of wiping down the exterior.

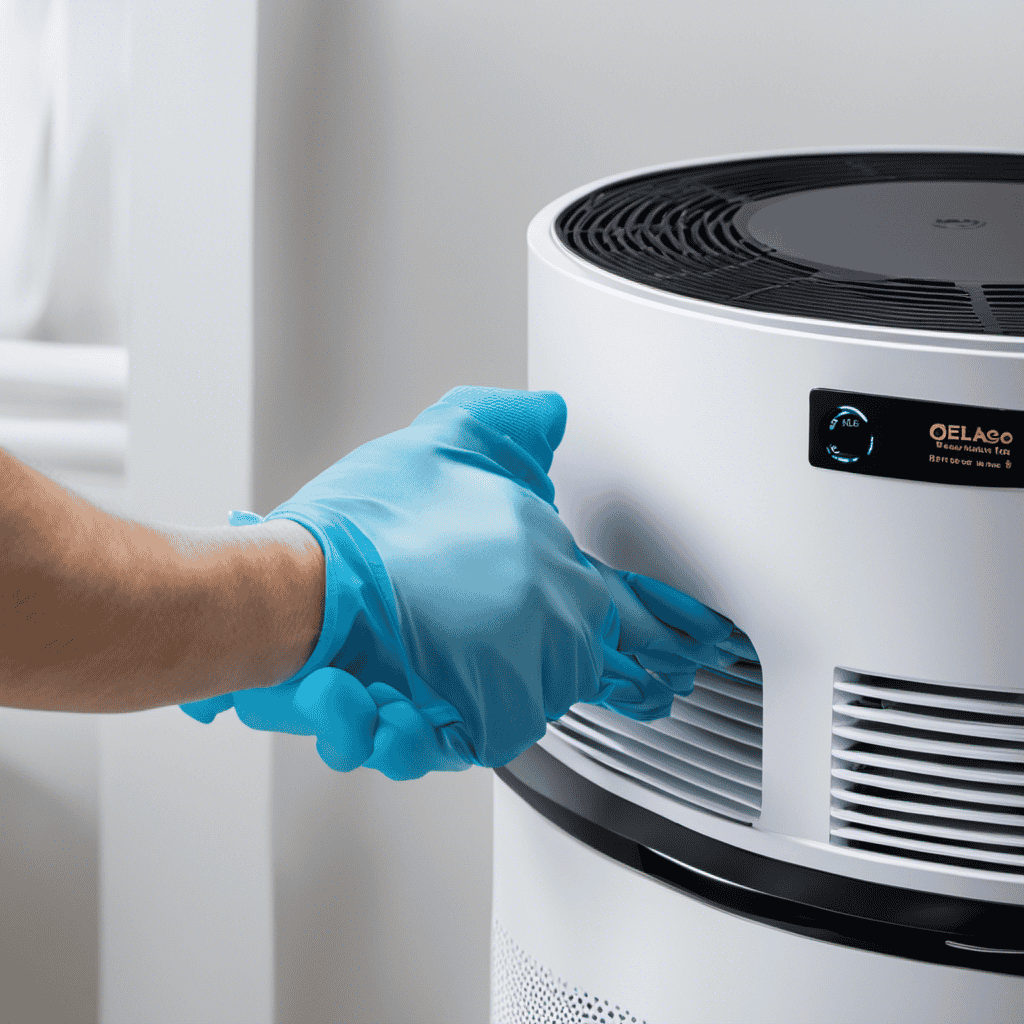
Wiping Down the Exterior

Start by wiping down the exterior of the Winix air purifier to remove any dust or debris. This is an important step in understanding cleaning techniques and maintaining the exterior cleanliness of your air purifier. A dirty exterior can hinder the performance of the device and affect the air quality in your home. To effectively clean the exterior, use a soft, lint-free cloth or microfiber cloth dampened with water or a mild, non-abrasive cleaner. Avoid using harsh chemicals or abrasive materials that can damage the surface. Gently wipe the entire exterior, including the control panel, buttons, and air vents. Pay attention to any crevices or edges where dust and dirt can accumulate. Refer to the table below for a quick summary of the cleaning process:

Step Cleaning Technique Tips
1 Wipe down exterior Use a soft, lint-free cloth or microfiber cloth dampened with water or mild cleaner.
2 Clean control panel and buttons Use a slightly damp cloth to wipe the control panel and buttons. Avoid getting water inside the device.
3 Remove dust from air vents Use a soft brush attachment on a vacuum cleaner or a can of compressed air to remove dust from the air vents.

Cleaning the Air Quality Indicator Light

To properly clean the indicator light, use a soft cloth lightly dampened with water or a mild cleaner. Gently wipe the surface of the light, being careful not to apply too much pressure. Avoid using harsh chemicals or abrasive materials, as they can damage the light.

Here are three reasons why cleaning the control panel and fan blades is important:

Advertisement
  1. Improved air quality: Dust and dirt can accumulate on the control panel and fan blades, reducing the efficiency of your air purifier. By regularly cleaning these areas, you can ensure that your purifier is working at its best, effectively removing pollutants from the air.

  2. Prolonged lifespan: Dust and debris can also clog the control panel and hinder the fan blades’ movement. This can lead to overheating and premature wear and tear on the components. Cleaning these parts regularly can help extend the lifespan of your air purifier.

  3. Aesthetics: A clean control panel and fan blades not only improve the performance of your air purifier but also enhance the overall appearance of the device. Keeping these areas clean can make your air purifier look well-maintained and presentable in your home.

Reassembling the Filters

When reassembling the filters in the Winix air purifier, it is important to ensure proper filter alignment to ensure efficient air purification. This involves carefully lining up the tabs and notches on the filters with the corresponding slots in the purifier unit.

Additionally, it is crucial to securely connect the filters to prevent any air leaks or loose connections. This can be achieved by firmly pressing the filters into place until they click into position.

Lastly, it is essential to handle the filters with care to avoid any damage, such as bending or tearing, as this can compromise their effectiveness in capturing airborne particles.

Proper Filter Alignment

Make sure you’re aligning the filters properly in your Winix air purifier. Proper filter installation is crucial for optimal performance and efficiency. Here are three common filter alignment mistakes to avoid:

  1. Misaligned filters can lead to air leakage, reducing the effectiveness of your air purifier. This can result in inadequate air filtration and poor indoor air quality, which can be detrimental to your health.

  2. If the filters are not securely aligned, they may not fit properly in the unit, causing gaps and air bypass. This can lead to the recirculation of unfiltered air and allow contaminants to escape back into your living space.

  3. Incorrect filter alignment can also put unnecessary strain on the motor and fan, leading to premature wear and tear and potential damage to your air purifier.

Ensuring proper filter alignment is the first step towards a cleaner and healthier indoor environment. Now, let’s move on to securing the filter connections.

Advertisement

Securing Filter Connections

Ensure that you’re securely connecting the filters to prevent any air leakage or contaminants from escaping into your living space. Properly securing filter connections is crucial for maintaining filter efficiency in your Winix air purifier.

To ensure a tight seal, start by aligning the filters correctly. Gently press the filters into their designated slots until they fit snugly. Make sure to check that the filters are securely in place by giving them a gentle tug. This will help prevent any air from bypassing the filters, ensuring that only clean, purified air is released into your home.

Maintaining filter efficiency is essential for maximizing the performance of your air purifier and ensuring that it effectively removes airborne pollutants. By securing filter connections, you can ensure that your air purifier operates at its optimal level and provides you with clean, fresh air.

Now, let’s move on to the next section about avoiding filter damage.

Avoiding Filter Damage

To prevent any damage to the filters, it’s important to handle them with care and avoid any rough handling or mishandling. Filters are delicate components of the air purifier that require regular maintenance to ensure optimal performance.

Advertisement

Here are three crucial tips for maintaining filters and preventing clogging:

  1. Regular cleaning: Clean the filters at least once a month to remove dust, pollen, and other particles that may accumulate. Use a soft brush or vacuum cleaner to gently remove the debris without damaging the filter material.

  2. Avoid moisture: Moisture can lead to the growth of mold and bacteria on the filters, reducing their effectiveness. Keep the filters dry and avoid exposing them to excessive humidity to prevent clogging and potential damage.

  3. Replace when necessary: Over time, filters can become clogged beyond cleaning. Check the manufacturer’s guidelines to determine when it’s time to replace the filters. Regular replacement ensures optimal air purification and prevents any potential damage from clogged filters.

Reattaching the Front Cover

Once you’ve finished cleaning the filters, it’s time to reattach the front cover of the Winix air purifier.

To do this, make sure the air purifier is turned off and unplugged for safety.

Start by aligning the tabs on the front cover with the slots on the main body of the purifier. Gently slide the front cover back into place until it fits snugly.

Next, locate the latch mechanism on the side of the purifier. Push the latch upward to engage it with the front cover. You should hear a click sound, indicating that the latch is securely locked.

Advertisement

Give the front cover a slight tug to ensure it is properly attached.

Once you’ve confirmed the front cover is securely in place, you can plug in the air purifier and turn it on to enjoy clean and fresh air.

Powering On and Testing the Purifier

Now that the front cover is securely reattached, let’s move on to powering on the Winix air purifier and testing its functionality. Follow these steps to ensure a smooth and successful activation:

  1. Connect the power cord: Locate the power cord at the back of the purifier and plug it into a nearby electrical outlet. Make sure the outlet is functioning properly.

  2. Press the power button: Look for the power button, usually located on the control panel or near the display. Press it once to turn on the purifier.

  3. Test the purifier: After powering on, the purifier should start running and you should hear the noise of the fan. You can also check the display or indicator lights for any error messages or warnings.

Testing the purifier is crucial to ensure that it is working effectively and providing clean air in your space. By following these powering on steps and purifier testing methods, you can be confident in the performance of your Winix air purifier.

Does a Clean Winix Air Purifier Work Faster?

Yes, a clean Winix air purifier will work faster in improving air quality. The air purifier effectiveness timeline will be shorter because there is no buildup of dust or pollutants hindering its performance. Regular cleaning ensures optimal operation and faster filtration of airborne particles.

Advertisement

Frequently Asked Questions

How Often Should I Clean My Winix Air Purifier?

I clean my Winix air purifier filters every 3 months or when I notice reduced airflow. Signs that my purifier needs cleaning include a dirty filter indicator or a noticeable decrease in air quality.

Can I Use Any Type of Cleaning Solution or Detergent to Clean the Filters?

Can I use any cleaning solution or detergent on my air purifier filters? It’s important to follow best practices for maintenance. Using the wrong cleaning solution can damage the filters and affect the performance of the air purifier.

Is It Safe to Clean the Exterior of the Air Purifier With a Damp Cloth?

Yes, it is safe to clean the exterior of the air purifier with a damp cloth. However, avoid using abrasive cleaning methods as they can damage the surface. There are alternative cleaning methods available for Winix air purifiers.

Do I Need to Replace the Filters After Cleaning Them?

Yes, you can reuse the same filters after cleaning them. To properly clean and maintain your air purifier filters, follow these steps… (proceed with the technical and detailed instructions on how to clean and maintain the filters).

How Long Does It Take for the Air Purifier to Start Working Effectively After Cleaning?

After cleaning my air purifier, it usually takes around 30 minutes for it to start working effectively again. Following the best practices for cleaning and regular air purifier maintenance ensures optimal performance.

Advertisement

Conclusion

In conclusion, cleaning a Winix air purifier is a straightforward process that can greatly improve the performance and lifespan of the device. By following the steps outlined in this article, you can easily remove and clean the filters, as well as the air quality indicator light.

Remember, a well-maintained air purifier is like a breath of fresh air in your home. So don’t neglect this important task, and enjoy the benefits of clean and purified air in your living space.

In the dynamic world of air purifiers and clean air advocacy, Aire stands out as a beacon of knowledge and passion. As the Editor in Chief of Aero Guardians, Aire has been instrumental in shaping the platform's voice and direction, ensuring that every piece of content resonates with clarity, authority, and authenticity.

Continue Reading
Advertisement

Air Purifier Guides

How to Clean My Air Purifier Filter

Published

on

By

An image depicting a hand gently removing the dirty air purifier filter

Did you know that indoor air can be up to five times more polluted than outdoor air? That’s why it is important to regularly clean your air purifier filter.

In this article, I will guide you through the step-by-step process of how to effectively clean your air purifier filter. By following these instructions, you’ll ensure that your air purifier continues to work efficiently, providing you with clean and fresh air in your home.

Let’s get started!

Key Takeaways

  • Cleaning the air purifier filter is important for maintaining optimal performance and improving indoor air quality.
  • Different types of filters require different cleaning methods, such as tapping or vacuuming pre-filters, washing electrostatic precipitator filters, and replacing carbon filters.
  • HEPA filters cannot be effectively cleaned and should be replaced periodically, but regular cleaning can prolong their lifespan and save money on replacements.
  • Signs that indicate the need for cleaning or replacement include reduced airflow, dust buildup, worsening allergies or respiratory symptoms, and unpleasant odors.

Understanding the Importance of Cleaning Your Air Purifier Filter

Understanding the importance of cleaning your air purifier filter can greatly improve the air quality in your home. Regular maintenance is essential for ensuring that your air purifier functions optimally and effectively removes pollutants from the air.

One of the key benefits of clean air filters is that they trap and remove dust, allergens, and other harmful particles, preventing them from circulating in your living space. This can help reduce respiratory issues, allergies, and asthma symptoms.

Additionally, clean air filters promote better overall indoor air quality, which is especially important for individuals with compromised immune systems or respiratory conditions.

Advertisement

Gathering the Necessary Tools and Supplies

When it comes to cleaning your air purifier filter, there are a few key points to keep in mind.

First, you’ll need the right cleaning equipment, such as a vacuum cleaner with a brush attachment, a soft cloth, and mild detergent.

Second, it’s important to use the proper cleaning technique, which usually involves gently vacuuming the filter and then wiping it down with a damp cloth.

Lastly, the frequency of filter cleaning will depend on factors such as the amount of pollutants in your area and the manufacturer’s recommendations, but generally, it’s recommended to clean the filter every 1-3 months for optimal performance.

Required Cleaning Equipment

To clean your air purifier filter, you’ll need a vacuum cleaner with a brush attachment and a damp cloth. Here are the required cleaning supplies:

Advertisement
  • Vacuum cleaner with brush attachment: This will help you remove dust, dirt, and debris from the surface of the filter. Make sure to use the brush attachment to gently brush off any particles without damaging the filter.

  • Damp cloth: This is essential for wiping down the filter and removing any remaining dirt or grime. Make sure the cloth is slightly damp, not wet, to avoid damaging the filter.

  • Mild detergent: In some cases, a mild detergent may be necessary to remove stubborn stains or odors from the filter. Dilute the detergent in water and use a cloth to gently scrub the filter.

  • Soft brush: A soft brush can be used to clean the fins or grilles of the air purifier. This will help remove any dust or debris that may have accumulated on these surfaces.

Remember to follow the manufacturer’s maintenance schedule for cleaning your air purifier filter to ensure optimal performance and longevity.

Proper Cleaning Technique

Make sure you gently vacuum the surface of the filter with a brush attachment to remove any dust, dirt, or debris. This step is crucial for air purifier maintenance and for maintaining clean indoor air.

After removing the filter from the air purifier, use a soft-bristle brush attachment on your vacuum to carefully clean the surface of the filter. Start from the top and work your way down, making sure to cover the entire surface. Be thorough in your cleaning, paying close attention to any stubborn areas where dirt may have accumulated.

Once you have finished vacuuming, inspect the filter for any remaining debris. If there are still particles present, use a soft cloth or a small brush to gently wipe or brush them off.

Frequency of Filter Cleaning

You should regularly check the condition of your filter to ensure it is effectively removing contaminants from your indoor air. Cleaning or replacing the filter at the right frequency is crucial for maintaining the efficiency of your air purifier.

Advertisement

Here are some signs that indicate your filter may need cleaning or replacement:

  • Reduced airflow: If you notice a decrease in the amount of air coming out of the purifier, it may be due to a clogged filter.

  • Dust buildup: A dirty filter will accumulate dust and debris over time, so if you see a visible layer of dirt on the surface, it’s time for cleaning.

  • Allergies worsening: If your allergies or respiratory symptoms worsen while the purifier is running, it could be a sign that the filter is not effectively removing allergens.

  • Unpleasant odors: A dirty filter can cause the air purifier to emit unpleasant odors instead of fresh, clean air.

Regularly monitoring these signs and promptly cleaning or replacing the filter when necessary will ensure your air purifier continues to provide clean and healthy indoor air.

Step-by-Step Guide to Removing the Filter

Before beginning, make sure the air purifier is unplugged and turned off.

Understanding filter specifications is crucial for maintaining the efficiency of your air purifier. Different filters have different specifications, such as the type of filtration media used and the recommended replacement frequency.

To troubleshoot common filter issues, start by checking if the filter is properly installed. Make sure it is securely in place and there are no gaps or loose connections.

Advertisement

If the filter appears dirty or clogged, it may need to be cleaned or replaced. Cleaning methods vary depending on the type of filter, so refer to the manufacturer’s instructions for specific guidance.

Regularly inspecting and maintaining your air purifier’s filter will ensure it continues to provide clean and fresh air for your home.

Preparing the Filter for Cleaning

To properly prepare the filter for cleaning, ensure that the air purifier is unplugged and turned off. This is a crucial step to ensure your safety while working on the filter.

Once the air purifier is switched off, follow these pre-cleaning steps:

  • Remove the filter cover by gently pulling it off.
  • Take out the filter from the unit and inspect it for any visible dirt or debris.
  • If there are any loose particles, use a soft brush or vacuum cleaner to gently remove them.
  • Check the manufacturer’s instructions for specific cleaning recommendations.

Once you have completed these pre-cleaning steps, you can proceed with the filter cleaning process.

Properly preparing the filter ensures that you have a clean and efficient air purifier, providing you with clean and fresh air in your living space.

Advertisement

Choosing the Right Cleaning Method for Your Filter Type

When it comes to cleaning my air purifier filter, there are two main methods to consider: dry or wet cleaning.

Dry cleaning involves using techniques such as vacuuming or brushing to remove surface debris.

Wet cleaning involves rinsing the filter with water or using a cleaning solution.

The choice between these methods depends on the type of filter I have and its specific cleaning requirements.

Dry or Wet Cleaning

You can either dry clean or wet clean your air purifier filter to ensure its optimal performance.

Advertisement

When it comes to wet cleaning, there are a few important things to consider.

First, make sure to use a cleaning solution specifically designed for air purifier filters. This will help remove any trapped pollutants and improve the filter’s efficiency.

Secondly, follow the manufacturer’s instructions on how to properly wet clean the filter. This may involve soaking the filter in the cleaning solution or using a soft brush to gently scrub away dirt and debris.

Lastly, always allow the filter to completely dry before re-installing it in the air purifier. This will prevent any moisture from causing mold or mildew growth.

Filter-Specific Cleaning Techniques

Using a cleaning solution made for air purifier filters helps remove trapped pollutants and improves the filter’s efficiency. When it comes to filter maintenance, it’s important to use the correct cleaning techniques.

Advertisement

Different types of filters require different methods of cleaning to ensure optimal performance. For a pre-filter, gently tapping or vacuuming the surface can remove larger particles.

Electrostatic precipitator filters should be washed with warm water and mild detergent to remove dirt and debris. Carbon filters should never be cleaned, as they lose their effectiveness. Instead, they should be replaced regularly.

High-efficiency particulate air (HEPA) filters should also be replaced periodically, as they cannot be effectively cleaned. Cleaning the filter with water and mild detergent is one way to maintain the filter’s efficiency and ensure clean, fresh air in your home.

Cleaning the Filter With Water and Mild Detergent

To clean your air purifier filter, start by rinsing it with water and a mild detergent. This method effectively removes dirt, dust, and other particles that may have accumulated on the filter. However, if you prefer to clean the filter without water, there are alternative methods you can try.

These methods are useful when water is not readily available or when the filter is not water-resistant. Here are some alternative cleaning methods:

Advertisement
  • Using a vacuum cleaner with a brush attachment, gently vacuum the filter to remove loose particles.
  • Using compressed air, blow air across the filter to dislodge trapped dust and debris.
  • Using a soft bristle brush, gently brush the filter to remove dirt and dust.
  • Using a damp cloth or sponge, carefully wipe the filter to remove any visible dirt or stains.

Remember to follow the manufacturer’s instructions and recommendations for cleaning your specific air purifier filter.

Using Compressed Air to Remove Dust and Debris

If compressed air is available, it effectively removes dust and debris from the filter. This method is quick and efficient, making it a popular choice for many air purifier owners. Compressed air can be purchased in cans or from an air compressor. Using it to clean your filter has several benefits. Firstly, it allows you to clean the filter without having to wash or rinse it, which can be time-consuming and messy. Secondly, compressed air reaches into the crevices and folds of the filter, ensuring a thorough cleaning. Finally, it is a convenient alternative to other cleaning methods, especially if you don’t have access to water or mild detergent.

Here is a table summarizing the benefits of using compressed air compared to alternative cleaning methods:

Benefits Compressed Air Water and Detergent Vacuum Cleaner
Quick and efficient ✔️ ✔️ ✔️
Thorough cleaning ✔️
Convenient ✔️ ✔️

As you can see, using compressed air offers several advantages over other methods. It is a reliable and effective way to keep your air purifier filter clean and functioning optimally.

How to Clean a HEPA Filter

When cleaning a HEPA filter, simply remove it from your air purifier and follow these steps:

  • Gently tap the filter to remove any loose debris.
  • Use a soft brush or vacuum cleaner with a brush attachment to remove dust and dirt.
  • If the filter is washable, rinse it with water. Do not use soap or other cleaning agents.
  • Allow the filter to air dry completely before reinstalling it.

Cleaning your HEPA filter regularly is essential for maintaining its effectiveness and prolonging its lifespan. By removing trapped particles, you ensure that your air purifier continues to provide clean and healthy air for you and your family.

Regular maintenance also prevents the filter from becoming clogged, which can reduce airflow and strain the air purifier’s motor. Additionally, cleaning your filter saves money by extending its lifespan and reducing the need for frequent replacements.

Advertisement

So, make sure to clean your HEPA filter regularly to enjoy the benefits of improved air quality and a more efficient air purifier.

Now, let’s move on to discuss the importance of regular filter maintenance.

Is the Cleaning Process Different for Different Types of Air Purifier Filters?

Yes, the cleaning process for different types of air purifier filters vary based on the filter material and design. HEPA filters may require vacuuming or washing, while carbon filters may need to be replaced. Pre-filters can be cleaned with a vacuum or rinsed as needed. Regular maintenance of cleaning air purifier filters is crucial for optimal performance.

The Importance of Regular Filter Maintenance

Regular maintenance is crucial for ensuring the effectiveness and longevity of your HEPA filter. By properly maintaining your air purifier, you can enjoy the full benefits of clean and fresh air in your home or office.

Air purifiers are designed to remove common air pollutants such as dust, pollen, pet dander, and smoke particles. These pollutants can have negative effects on our health, causing allergies, respiratory issues, and even triggering asthma attacks.

Advertisement

Regular maintenance of the HEPA filter includes cleaning or replacing it as recommended by the manufacturer. This ensures that the filter continues to trap and remove these pollutants effectively, improving indoor air quality.

Neglecting filter maintenance can lead to reduced air purifier performance and increased energy consumption. So, make sure to follow the maintenance guidelines to keep your air purifier working efficiently and providing you with clean and healthy air.

Frequently Asked Questions

Can I Use Any Type of Detergent to Clean My Air Purifier Filter?

I wouldn’t recommend using any type of detergent to clean your air purifier filter. It’s best to stick to the manufacturer’s cleaning instructions, as using the wrong cleaning agent could damage the filter and compromise its effectiveness.

How Often Should I Clean My Air Purifier Filter?

I clean my air purifier filter every 3 months to ensure optimal performance. Signs that indicate it needs cleaning include reduced airflow and a noticeable decrease in air quality.

Can I Clean My Air Purifier Filter With a Vacuum Cleaner?

Yes, you can clean your air purifier filter with a vacuum cleaner. It’s a convenient and effective method for air purifier maintenance. However, make sure to use a brush attachment to gently remove the dirt and dust.

Advertisement

Is It Necessary to Clean Both Sides of the Air Purifier Filter?

It is important to clean both sides of the air purifier filter for proper maintenance. Regular cleaning ensures optimal performance and extends the lifespan of the filter. Neglecting either side can compromise air quality.

Can I Clean My Air Purifier Filter With Bleach or Other Harsh Chemicals?

No, it is not recommended to clean your air purifier filter with bleach or other harsh chemicals. There are natural methods for cleaning the filter without using these chemicals, which can damage the filter and reduce its effectiveness.

Conclusion

In conclusion, cleaning your air purifier filter is crucial for ensuring its optimal performance and maintaining good indoor air quality. By following the step-by-step guide and using the right cleaning method for your filter type, you can effectively remove dust, debris, and allergens from the filter.

Regular maintenance is key to prolonging the lifespan of your filter and maximizing its efficiency. So, don’t procrastinate, grab your tools and get started on giving your air purifier filter some well-deserved TLC.

Remember, an ounce of prevention is worth a pound of cure!

Advertisement

Continue Reading

Air Purifier Guides

How to Clean Ionic Breeze Air Purifier

Published

on

By

An image showcasing the step-by-step process of cleaning an Ionic Breeze air purifier

Standing in front of my Ionic Breeze Air Purifier, I am drawn in by its modern design and the guarantee of pure, fresh air. However, in order to fully experience its advantages, I must start the cleaning process.

With the right tools and materials in hand, I will guide you through a step-by-step process to restore your purifier to its full potential. From wiping down the exterior to meticulously cleaning the ionizing wires, together we will ensure the longevity of this impressive machine.

Let’s get started.

Key Takeaways

  • The Ionic Breeze Air Purifier utilizes advanced ionic breeze technology to improve air quality and reduce allergies.
  • The cleaning process involves unplugging and removing the collection grid, using a small brush to remove dust, wiping down the grid with a mild cleaning solution, and allowing it to air dry before reattaching.
  • The exterior of the Ionic Breeze can be cleaned using a soft cloth and mild cleaning solution, avoiding getting cleaning solution into openings or vents.
  • Cleaning the ionizing wires with a soft cloth and mild cleaning solution is important for optimal performance, as accumulated dust and debris can hinder ionization.

Understanding the Ionic Breeze Air Purifier

To understand the Ionic Breeze Air Purifier, you’ll need to familiarize yourself with its unique technology and features.

The Ionic Breeze Air Purifier utilizes advanced ionic breeze technology to effectively remove airborne pollutants from your environment. This technology works by emitting negative ions into the air, which attach themselves to positively charged particles such as dust, pollen, and pet dander.

These particles then become too heavy to remain airborne and are subsequently pulled towards the purifier’s collection plates through an electrostatic attraction.

Advertisement

The benefits of using an air purifier like the Ionic Breeze include improved air quality, reduced allergies and asthma symptoms, and a cleaner living space.

Necessary Tools and Materials

First, you’ll need a soft cloth, a small brush, and a mild cleaning solution to effectively maintain your ionic breeze air purifier. Cleaning techniques for your ionic breeze air purifier are crucial to ensure optimal performance.

Start by turning off the unit and unplugging it from the power source. Gently wipe the exterior surfaces of the purifier with a soft cloth dampened with the mild cleaning solution. Be cautious not to wet the control panel or any electronic components.

For the interior, use the small brush to remove dust and debris from the ionizing wires and collection plates. If you encounter any issues, troubleshooting tips are available in the user manual provided with the purifier.

Following these cleaning techniques and troubleshooting tips will help keep your ionic breeze air purifier running efficiently.

Advertisement

Step-by-Step Cleaning Process

Make sure you have a soft cloth, small brush, and mild cleaning solution ready for the step-by-step cleaning process.

To begin deep cleaning your Ionic Breeze air purifier, start by unplugging the unit and removing the collection grid.

Use the small brush to gently remove any dust or debris from the grid’s surface.

Next, dampen the soft cloth with the mild cleaning solution and wipe down the collection grid thoroughly. Pay close attention to any stubborn stains or build-up.

Once the collection grid is clean, allow it to air dry completely before reattaching it to the purifier.

Advertisement

If you encounter any issues during the cleaning process, such as a malfunctioning fan or strange noises, consult the troubleshooting tips provided in the user manual or contact the manufacturer for assistance.

Cleaning the Exterior of the Ionic Breeze

When wiping down the exterior of your device, remember to use a soft cloth and mild cleaning solution. The exterior of your Ionic Breeze air purifier can collect dust, dirt, and other particles over time. To keep it looking clean and functioning properly, it is important to use the right cleaning techniques.

Start by unplugging the device and removing any loose debris with a dry cloth or brush. Then, dampen a soft cloth with a mild cleaning solution and gently wipe down the exterior surfaces. Be careful not to get the cleaning solution into any openings or vents. For tough stains, you can use a mixture of water and mild soap.

Once the exterior is clean, you can move on to cleaning the ionizing wires, which is the next step in the cleaning process.

Cleaning the Ionizing Wires

To effectively clean the ionizing wires, gently wipe them with a soft cloth dampened in a mild cleaning solution. It is important to keep the ionizing wires clean to ensure optimal performance of your Ionic Breeze air purifier. Over time, the wires can accumulate dust and debris, which can hinder their ability to effectively ionize the air. Cleaning the wires regularly will help maintain their efficiency and prolong the lifespan of your air purifier.

Advertisement

Here are some troubleshooting tips and common issues related to cleaning the ionizing wires:

Issue Solution
Wires not effectively ionizing the air Clean the wires using a soft cloth and mild cleaning solution. Ensure they are completely dry before reassembling.
Sparking or arcing from the wires Turn off the air purifier and unplug it from the power source. Clean the wires and check for any signs of damage or loose connections. If the issue persists, contact customer support.
Excessive noise during operation Clean the wires and check for any obstructions or damage. Ensure they are properly aligned and in contact with the collection plates.

Are the Cleaning Methods for the Ionic Breeze Air Purifier and Ikea Air Purifier Similar?

Yes, the cleaning methods for the Ionic Breeze Air Purifier and Ikea Air Purifier are quite similar. Both require regular maintenance and cleaning as per the clean ikea air purifier instructions provided by the manufacturer. It is essential to follow these instructions to ensure the effective and efficient performance of the air purifiers.

Maintenance and Care Tips for Longevity

When it comes to maintaining the longevity of your air purifier, two key factors to consider are cleaning frequency and proper filter replacement.

Cleaning frequency recommendations will ensure that your air purifier continues to perform at its best, removing pollutants and allergens from your indoor environment.

Additionally, proper filter replacement is crucial to ensure that your air purifier is effectively capturing and trapping particles, allowing for clean and fresh air circulation.

Advertisement

Cleaning Frequency Recommendations

You should clean your ionic breeze air purifier on a regular basis to ensure optimal performance. Cleaning techniques vary depending on the model, but there are some common mistakes to avoid.

First, always unplug the device before cleaning to prevent any electrical mishaps.

Next, remove the collection blades and wash them thoroughly with warm soapy water. Be sure to dry them completely before reinserting them into the unit.

Additionally, wipe down the exterior of the purifier with a damp cloth to remove any dust or dirt buildup.

It is important to note that cleaning frequency may vary based on usage and environmental factors. However, a general recommendation is to clean the unit every two to four weeks.

Advertisement

By following these cleaning techniques and avoiding common mistakes, you can ensure that your ionic breeze air purifier remains in top condition.

Proper filter replacement is also crucial to maintain the efficiency of your air purifier.

Proper Filter Replacement

Now that you know how often to clean your ionic breeze air purifier, let’s discuss the proper filter replacement.

Maintaining the filters is crucial for the optimal performance of your air purifier. Here are some troubleshooting tips and filter maintenance suggestions:

  • Check the user manual for the recommended filter replacement schedule.
  • Always use genuine replacement filters provided by the manufacturer.
  • Before replacing the filter, make sure to turn off and unplug the air purifier.
  • Follow the step-by-step instructions provided in the user manual to install the new filter correctly.

Proper filter replacement ensures that your air purifier continues to effectively remove pollutants from the air. It also helps prolong the lifespan of your device.

Remember to regularly clean and replace the filters to maintain the efficiency of your ionic breeze air purifier.

Advertisement

Frequently Asked Questions

Can I Use Any Type of Cleaning Solution to Clean the Exterior of the Ionic Breeze Air Purifier?

Yes, you can use a mild cleaning solution to clean the exterior of the Ionic Breeze air purifier. However, it is important to follow proper cleaning techniques to avoid damaging the unit.

How Often Should I Clean the Ionizing Wires of the Ionic Breeze Air Purifier?

I clean the ionizing wires of my Ionic Breeze Air Purifier often to maintain its performance. By doing so, I extend the lifespan of the wires. Here are some tips for maintenance and longevity.

Can I Wash the Ionizing Wires With Water?

No, washing the ionizing wires with water is not recommended. It can damage the components. Instead, use a dry cloth or brush to remove dust and debris. There are alternative cleaning methods available.

Is It Safe to Use the Ionic Breeze Air Purifier While Cleaning the Exterior or the Ionizing Wires?

It is not safe to use the ionic breeze air purifier while cleaning the exterior or the ionizing wires. The pros and cons of using the ionic breeze air purifier should be considered, as well as alternatives.

How Long Does the Cleaning Process Typically Take for the Ionic Breeze Air Purifier?

To clean the ionic breeze air purifier, follow these cleaning tips: unplug and disassemble the unit, wipe the exterior with a damp cloth, clean the ionizing wires with a soft brush, and vacuum the collection grid. The cleaning process typically takes about 30 minutes.

Advertisement

Conclusion

In conclusion, cleaning the Ionic Breeze air purifier is a necessary task to ensure its optimal performance and longevity. By following the step-by-step cleaning process, using the necessary tools and materials, and paying attention to the exterior and ionizing wires, you can maintain a clean and efficient air purifier.

Imagine a refreshing breeze flowing through your home, carrying away all the impurities and leaving behind only clean, crisp air. With proper maintenance and care, your Ionic Breeze will continue to provide you with a breath of fresh air for years to come.

Continue Reading

Air Purifier Guides

How to Clean Edenpure Air Purifier

Published

on

By

An image showcasing a pair of gloved hands carefully dismantling an Edenpure Air Purifier, wiping each filter with a microfiber cloth, and using a small brush to remove dust from the vents

Hey there! So, you have an Edenpure Air Purifier and it seems like it’s getting dusty, right? No need to fret, I’ve got you covered.

In this article, I’m going to walk you through the step-by-step process of cleaning your Edenpure Air Purifier, from the filter to the exterior and controls. By the end, you’ll have a sparkling clean purifier that’s ready to keep your air fresh and clean for years to come.

Let’s get started!

Key Takeaways

  • Regular maintenance is important for optimal performance of the Edenpure Air Purifier.
  • Cleaning the filter regularly helps improve indoor air quality and prevent mold or mildew development.
  • Gathering the necessary cleaning supplies, such as a soft cloth, brush, and mild detergent, is essential for proper maintenance.
  • Following a step-by-step guide to clean the filter and the exterior of the air purifier helps maintain efficiency and prolong the lifespan of the unit.

Understanding the Edenpure Air Purifier

To understand the Edenpure Air Purifier, you’ll need to familiarize yourself with its features and functions.

Regular maintenance is important for keeping your air purifier running efficiently and effectively. One common problem with air purifiers is the accumulation of dust and other particles on the filters. Over time, this buildup can hinder the purifier’s ability to clean the air and may even cause it to stop working altogether.

It is crucial to regularly clean or replace the filters to maintain optimal performance. Another common issue is the development of mold or mildew in the purifier’s internal components. This can occur if the unit is not properly cleaned and dried.

Advertisement

To prevent this, it is recommended to clean the purifier regularly, following the manufacturer’s instructions. By understanding the importance of regular maintenance and addressing common problems, you can ensure that your Edenpure Air Purifier works effectively to improve your indoor air quality.

Gathering the Necessary Cleaning Supplies

Before you start cleaning, make sure you have all the necessary supplies. Cleaning your Edenpure air purifier is an important step in maintaining its efficiency and ensuring the quality of the air in your home.

To clean your air purifier, you will need a few essential supplies. Firstly, you will need a soft, lint-free cloth or microfiber cloth to wipe down the exterior of the unit. Additionally, a small brush or vacuum with a brush attachment will be useful for cleaning the vents and removing any dust or debris.

It is recommended to clean your Edenpure air purifier every 2-3 months or as needed, depending on the level of air pollution in your environment. Regular cleaning will optimize the performance of your air purifier and help prolong its lifespan.

Step-by-Step Guide to Cleaning the Filter

Start by unplugging your unit and removing the filter for cleaning. Here is a step-by-step guide to cleaning the filter of your EdenPure air purifier:

Advertisement
  1. Gently tap the filter to remove any loose dirt or debris.
  2. Fill a basin with warm water and add a mild detergent.
  3. Submerge the filter in the soapy water and gently agitate it to remove dirt and stains.
  4. Rinse the filter thoroughly with clean water until all the soap residue is gone.

When removing stubborn stains, you can use a soft brush or sponge to gently scrub the affected areas. It’s important to be gentle to avoid damaging the filter. If you encounter any issues during the cleaning process, such as a filter that is difficult to remove or excessive dirt buildup, consult the manufacturer’s instructions or contact customer support for troubleshooting assistance.

Now that you have cleaned the filter, let’s move on to cleaning the exterior and controls of the air purifier.

Cleaning the Exterior and Controls of the Air Purifier

Now that you’ve finished cleaning the filter, let’s take a look at how to clean the exterior and controls of your air purifier.

To ensure optimal performance, it’s important to regularly clean the fan blades and remove any built-up dust. Start by unplugging the air purifier and locating the fan blades. Use a soft cloth or brush to gently wipe away any visible dust or debris. For stubborn dirt, you can use a mild detergent mixed with water. Remember to wipe the blades in the direction of the airflow to avoid damaging them.

Next, clean the exterior of the air purifier using a damp cloth. Pay special attention to the control panel, buttons, and vents.

Are the Cleaning Methods for Edenpure and Ionic Breeze Air Purifiers Similar?

When it comes to maintaining your clean ionic breeze purifier, the cleaning methods for Edenpure and Ionic Breeze air purifiers are not exactly similar. While both may involve removing and cleaning the filters and wiping down the exterior, the specific steps and materials required can vary between the two models.

Advertisement

Maintaining and Extending the Lifespan of Your Edenpure Air Purifier

To keep your Edenpure air purifier running smoothly for years to come, it’s essential to follow these maintenance tips.

  1. Regularly clean or replace the filters: The filters in your air purifier play a crucial role in removing pollutants from the air. Cleaning or replacing them on a regular basis will ensure optimal performance and extend their longevity.

  2. Keep the unit clean: Dust and dirt can accumulate on the exterior and vents of your air purifier, hindering its efficiency. Regularly wipe down the unit with a damp cloth and vacuum the vents to maintain proper airflow.

  3. Check the fan and motor: Over time, the fan and motor can become clogged with debris or dust, affecting their performance. Periodically inspect and clean these components to ensure smooth operation.

  4. Follow manufacturer’s instructions: Each Edenpure air purifier model may have specific maintenance requirements. Be sure to read and follow the manufacturer’s instructions for the proper maintenance techniques to maximize the lifespan of your air purifier.

Frequently Asked Questions

How Often Should I Clean My Edenpure Air Purifier?

I clean my Edenpure air purifier once every 3 months to maintain optimal performance. Following the manufacturer’s guidelines, I use a soft cloth to wipe the exterior and a vacuum to remove dust from the filters.

Can I Use Any Type of Cleaning Solution to Clean the Filter?

No, you shouldn’t use any type of cleaning solution to clean the filter. It’s important to follow the manufacturer’s recommended cleaning methods to ensure the longevity and effectiveness of your Edenpure Air Purifier.

Can I Wash the Exterior of the Air Purifier With Water?

Yes, you can wash the exterior of the air purifier with water. However, it is important to follow the necessary precautions and avoid getting any water inside the unit.

Is It Safe to Leave the Air Purifier Running While I Clean It?

It’s safe to leave the air purifier running while I clean it. Regular air purifier maintenance is important for optimal performance. Here are some cleaning tips to keep your air purifier functioning efficiently.

Advertisement

Are There Any Additional Maintenance Tasks I Should Perform Regularly to Keep My Edenpure Air Purifier in Good Condition?

To keep my Edenpure air purifier in good condition, I follow maintenance tips and consult the troubleshooting guide regularly. It ensures optimal performance and extends the lifespan of the purifier.

Conclusion

In conclusion, keeping your Edenpure Air Purifier clean is essential for maintaining its effectiveness and prolonging its lifespan. By following the step-by-step guide provided and regularly cleaning the filter, exterior, and controls, you can ensure that your air purifier continues to provide you with clean and fresh air.

Just like a well-tended garden, a clean air purifier blossoms with efficiency and purifies your indoor air, creating a healthier and more pleasant environment for you and your loved ones.

So, don’t neglect the cleanliness of your Edenpure Air Purifier and enjoy the benefits it brings.

Advertisement

Continue Reading

Trending