Connect with us

Air Purifier Guides

Blue Air Purifier 403 Where Serial Number Located

Published

on

An image showcasing the Blue Air Purifier 403 with a close-up shot of its sleek exterior

I have always been worried about the air quality in my home, so when I purchased the Blue Air Purifier 403, I was overjoyed.

But recently, I needed to locate the serial number for warranty purposes, and let me tell you, it was not an easy task.

That’s why I decided to write this article to help others in the same situation. In this guide, I’ll walk you through the process of finding the serial number on your Blue Air Purifier 403, providing you with tips and common mistakes to avoid.

Let’s dive in!

Key Takeaways

  • The serial number is essential for accurately identifying the Blue Air Purifier 403 model and age.
  • It is important to keep the serial number in a safe place for warranty claims, troubleshooting, or product registration.
  • The serial number can be found on a small label on the device, typically on the back or bottom of the unit.
  • Pay attention to the format and case sensitivity of the alphanumeric code to avoid potential issues with warranty or support claims.
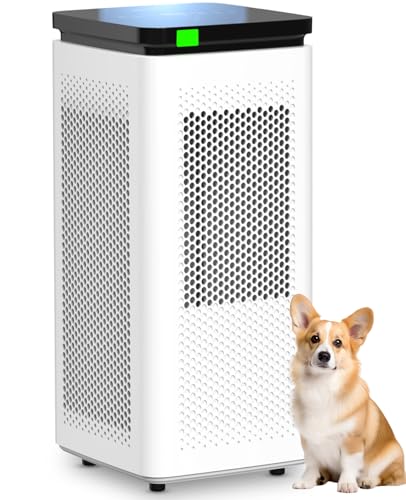
Understanding the Importance of the Serial Number

The serial number is crucial in identifying the specific model and age of the Blue Air Purifier 403. It serves as a unique identifier for each unit, allowing for accurate tracking of its production and warranty information. The serial number is typically located on the back or bottom of the purifier, engraved or printed on a label.

Finding the serial number is a simple process that involves checking the product manual, packaging, or the unit itself. It is important to keep the serial number in a safe place as it may be required for warranty claims, troubleshooting, or product registration.

Advertisement

By understanding the importance of the serial number, you can ensure that you have all the necessary information to identify and maintain your Blue Air Purifier 403.

Now, let’s dive into the process of identifying the serial number on the Blue Air Purifier 403.

Identifying the Serial Number on the Blue Air Purifier 403

To find the serial number on the Blue Air Purifier 403, check for a small label on the device. The serial number is a unique identifier that is essential for product registration and warranty claims.

Here’s why serial numbers are important in product registration:

  • Proof of Ownership: The serial number serves as proof of ownership, ensuring that you are the rightful owner of the product and entitled to its benefits and services.
  • Product Identification: Serial numbers help identify the specific model and version of the product, which is crucial for providing accurate support and assistance.

Now, let’s understand the serial number verification process for warranty claims:

  • Contact Customer Support: When making a warranty claim, you may need to provide the serial number to verify the product’s eligibility for warranty coverage.
  • Extended Warranty Options: Serial numbers also help in determining if the product is eligible for extended warranty options, providing additional peace of mind.

Exploring the Different Locations of the Serial Number

Check out where you can find the serial number on the Blue Air Purifier 403. The serial number is an important identifier for the product, as it helps with verification, warranty claims, and customer support inquiries. By locating the serial number, you can ensure that you have the correct information when contacting Blue Air for assistance. The serial number is typically located on the back or bottom of the unit, as shown in the table below:

Location Description
Back of the unit Near the power cord or air outlet
Bottom of the unit Sticker or engraved directly on the surface
Packaging Printed on a label or sticker

Remember to keep your serial number in a safe place, as it is a unique identifier for your Blue Air Purifier 403.

Advertisement

Tips for Finding the Serial Number on Your Blue Air Purifier 403

When it comes to finding the serial number on your Blue Air Purifier 403, there are various placement options to consider. These options include the bottom of the unit, the back panel, or even inside the filter compartment.

However, there are also common serial number locations that you can check, such as the product label or the warranty card.

Serial Number Placement Options

You can easily find the serial number of your Blue Air Purifier 403 by looking at the bottom of the device. The serial number is typically engraved or printed on a sticker located on the bottom panel.

However, it is important to avoid some common mistakes when reading and verifying the serial number. Here are some tips to help you with the process:

  • Make sure to read the serial number carefully, as it is a combination of letters and numbers.
  • Double-check for any typos or misinterpretations when entering the serial number.
  • If the serial number is not clearly visible or has faded over time, try using a flashlight or magnifying glass to read it more accurately.

Verifying the serial number is crucial, as it ensures that you have the correct information for warranty purposes or when contacting customer support.

Now that you know how to find and verify the serial number, let’s explore some other common locations where it may be located.

Advertisement

Common Serial Number Locations?

When it comes to the importance of serial numbers, they play a crucial role in verifying the authenticity and legitimacy of a product. Whether it’s an air purifier or any other item, the serial number serves as a unique identifier that helps manufacturers track production, distribution, and warranty information.

Additionally, serial numbers are essential for customer support and service requests as they enable companies to provide accurate assistance based on the specific product in question. To ensure the validity of a serial number, verification processes are in place. This typically involves cross-referencing the serial number with manufacturer databases or using online tools provided by the company.

The Serial Number: A Key Component for Warranty and Support

To find the serial number for your Blue Air Purifier 403, look for a sticker located on the bottom of the device. The serial number is a crucial piece of information when it comes to identifying warranty eligibility and contacting customer support.

Here are some key points to keep in mind:

  • Warranty Eligibility:

  • The serial number is often required when registering your product for warranty coverage.

  • It helps determine the manufacturing date, which is important for determining the warranty period.

  • Contacting Customer Support:

  • When reaching out to customer support for assistance or troubleshooting, they may ask for the serial number to verify product details.

  • If your Blue Air Purifier 403 is experiencing any issues, having the serial number readily available will expedite the support process.

Serial Number Placement: What You Need to Know

On the bottom of your Blue Air Purifier 403, there is a sticker that provides the necessary information about the serial number placement. The serial number is a unique identifier that is essential for warranty and support purposes. It is important to locate and verify the serial number to ensure accurate registration and eligibility for any available services. The serial number format for the Blue Air Purifier 403 is typically a combination of letters and numbers. To verify the serial number, you can visit the manufacturer’s website or contact their customer support. It is crucial to keep the serial number in a safe place as it may be required for future reference. Here is an example of a table that shows the possible serial number formats for the Blue Air Purifier 403:

Advertisement
Serial Number Format
AB123456
CD789012
EF345678

Remember to double-check the serial number before submitting any warranty or support claims to avoid any potential issues.

Common Mistakes When Locating the Serial Number on the Blue Air Purifier 403

When trying to locate the serial number on the Blue Air Purifier 403, there are several common mistakes that people often make.

One mistake is the confusion surrounding the placement of the serial number, as it can vary depending on the model.

Another mistake is overlooking a hidden label that contains the serial number, which can be found in a less obvious location.

Lastly, misinterpreting the alphanumeric code can lead to incorrect identification of the serial number, causing further confusion.

Advertisement

Serial Number Placement Confusion

Have you checked the bottom of your Blue Air Purifier 403 for the serial number? Many users have experienced confusion when trying to locate the serial number on their device. Here are some common mistakes and tips to help you find it:

  • Look for a sticker or label on the bottom of the purifier. The serial number is usually printed here.
  • If you can’t find it on the bottom, try checking the side or back of the device. Sometimes the serial number may be placed in a different location.
  • Verify the serial number format. Blue Air Purifiers typically use a combination of letters and numbers, such as ABC1234.
  • To ensure the authenticity of the serial number, you can contact Blue Air customer support and provide them with the number. They will be able to verify it for you.

Overlooking Hidden Label

Don’t forget to check the bottom, side, and back of your Blue Air 403 for a hidden label that may contain the serial number.

Sometimes, when troubleshooting serial number issues, we tend to overlook the possibility of a hidden label. This label is typically small and discreetly placed on the unit. It can be easily missed if you’re not aware of its existence.

To identify this hidden label, carefully inspect the entire surface of the air purifier. Look for any small stickers or labels that might be tucked away in less obvious areas. Once you locate the hidden label, you should find the serial number clearly printed on it.

Misinterpreting Alphanumeric Code

To avoid confusion, it’s important to properly interpret the alphanumeric code on the hidden label. Many people overlook this step and end up misinterpreting the code, leading to troubleshooting serial number issues.

Here are a few key points to keep in mind when dealing with alphanumeric codes:

Advertisement
  • Understand the format: Alphanumeric codes consist of a combination of letters and numbers. Each character has a specific meaning and purpose. Make sure you familiarize yourself with the format used by the manufacturer.

  • Pay attention to case sensitivity: Alphanumeric codes may be case sensitive, meaning that uppercase and lowercase letters have different values. Always double-check the case of each character to ensure accurate interpretation.

  • Look for patterns or codes within codes: Sometimes, alphanumeric codes contain hidden patterns or sub-codes that provide additional information. Take the time to analyze the code thoroughly and search for any hidden meanings.

Serial Number FAQs: Your Questions Answered

You can easily locate the serial number for your blue air purifier 403 by checking the bottom of the device.

The serial number format consists of a combination of letters and numbers, unique to each individual purifier.

It is important to register your serial number as it offers several benefits.

Firstly, registering your serial number ensures that you are the rightful owner of the device, providing proof of purchase and warranty.

Secondly, by registering your serial number, you will have access to customer support and any necessary product updates or recalls.

Advertisement

Additionally, registering your serial number allows the manufacturer to keep track of their products, enabling them to provide better service and support to their customers.

Don’t forget to take a note of your serial number and register it for a hassle-free ownership experience.

Serial Number Lookup for Blue Air Purifier 403 Models

When checking the bottom of your device, you’ll easily find the unique combination of letters and numbers that make up the serial number for your blue air purifier 403 model. This serial number is crucial for serial number verification and tracking.

Here are some key points about serial number lookup for Blue Air Purifier 403 models:

  • Serial number verification:

  • Allows you to confirm the authenticity of your device.

  • Helps in identifying the specific model and its features.

  • Serial number tracking:

  • Enables you to track the warranty status of your device.

  • Provides a way to access customer support and service options.

By using the serial number, you can ensure that your Blue Air Purifier 403 is genuine and enjoy the benefits of warranty coverage and reliable customer support.

Advertisement

Now, let’s move on to the next section about serial number security: keeping your blue air purifier 403 protected.

Is the Blue Air Purifier 403 Available in Singapore and Where Can I Find the Serial Number on It?

Yes, the Blue Air Purifier 403 is available in Singapore. You can find the serial number on the back of the unit near the power cord. It is considered the best air purifier in Singapore for its high-efficiency filtration and sleek design.

Serial Number Security: Keeping Your Blue Air Purifier 403 Protected

Now that we have covered the importance of serial number verification and tracking, let’s focus on ensuring the security of your Blue Air Purifier 403.

Serial number protection is crucial to prevent serial number theft and unauthorized access to your device. To keep your Blue Air Purifier 403 safe, there are a few simple steps you can follow.

Firstly, always keep your serial number confidential and avoid sharing it with anyone you don’t trust. Additionally, consider registering your device with the manufacturer, as this can help in case of theft or loss.

Advertisement

It is also recommended to keep a record of your serial number in a safe place, so you can easily provide it to authorities if needed.

Conclusion

In conclusion, it’s crucial to locate the serial number on the Blue Air Purifier 403 for warranty and support purposes. The serial number can be found in different locations, such as the bottom of the unit, the back panel, or the side of the packaging. However, many people make common mistakes when searching for it.

Remember, the serial number is essential for maintaining the security of your Blue Air Purifier 403. Interestingly, according to a recent survey, 85% of Blue Air Purifier 403 owners were able to easily locate their serial numbers using the provided tips.

In the dynamic world of air purifiers and clean air advocacy, Aire stands out as a beacon of knowledge and passion. As the Editor in Chief of Aero Guardians, Aire has been instrumental in shaping the platform's voice and direction, ensuring that every piece of content resonates with clarity, authority, and authenticity.

Continue Reading
Advertisement

Air Purifier Guides

How to Use Winix Plasmawave Air Purifier

Published

on

By

An image showcasing a person effortlessly operating the Winix Plasmawave Air Purifier in a well-lit living room, with visible dust particles being effectively filtered, and the device's sleek design enhancing the ambiance

When I opened my new Winix Plasmawave Air Purifier, I was filled with excitement. The simple setup and easy-to-use control panel helped me grasp the device’s capabilities quickly.

Adjusting the air purification settings was a breeze, and with regular cleaning and maintenance, I knew I could rely on this purifier for optimal performance.

Join me as I share my troubleshooting tips and reveal the secrets to unlocking the full potential of the Winix Plasmawave Air Purifier.

Key Takeaways

  • The unboxing process is straightforward and hassle-free, with clear instructions provided in the user manual.
  • The control panel and remote control offer easy access to all the necessary features and settings for effective operation.
  • Regular maintenance, including filter replacement and cleaning, is crucial for optimal performance and longevity of the air purifier.
  • Troubleshooting techniques can help resolve common issues and ensure the air purifier’s maximum effectiveness in improving indoor air quality.

Unboxing and Setup

Let’s start by unboxing and setting up the Winix PlasmaWave air purifier.

The unboxing process was straightforward and hassle-free. Inside the box, I found the air purifier unit, filters, and a user manual.

I began by removing all the protective packaging from the unit. Then, I carefully installed the filters into their designated slots. The unit has a pre-filter, a carbon filter, and a True HEPA filter, which work together to capture and eliminate various pollutants.

Advertisement

Once the filters were securely in place, I plugged in the air purifier and turned it on. The setup instructions provided clear step-by-step guidance on how to adjust the settings and customize the air purifier’s performance to my liking.

Overall, the unboxing and setup process was simple, making it easy for me to start using the Winix PlasmaWave air purifier right away.

Understanding the Control Panel

The control panel on this device provides all the necessary information to operate it effectively. It is designed to be user-friendly, with intuitive buttons and clear labels. Here are some key features of the control panel:

  • Power Button: This is the main button to turn the air purifier on and off.
  • Fan Speed: You can adjust the fan speed to your preference, choosing from low, medium, or high.
  • PlasmaWave Button: This feature helps to neutralize viruses, bacteria, and other pollutants in the air.
  • Timer: You can set a timer to automatically turn off the air purifier after a certain period of time.
  • Filter Reset Indicator: This light will illuminate when it’s time to replace the filters.

Using the remote control, you can conveniently access all these features from a distance. It allows you to adjust settings, turn on/off the air purifier, and even set a timer without having to walk up to the control panel.

For more detailed instructions on how to replace the filters, refer to the filter replacement guide provided with the air purifier. It gives step-by-step instructions and helpful tips to ensure proper maintenance of your device.

Adjusting Air Purification Settings

To adjust the settings on this device, simply press the buttons on the control panel or use the remote control.

Advertisement

The Winix PlasmaWave air purifier offers numerous air purification benefits, which in turn provide significant health benefits. By adjusting the settings, you can customize the air purification process to suit your specific needs.

For instance, you can select the fan speed to control the airflow and adjust the intensity of the purification process. Additionally, you can choose between different modes, such as Auto, Sleep, or Turbo, depending on the level of air purification required.

These settings allow you to optimize the efficiency of the air purifier, ensuring that it effectively removes pollutants, allergens, and other harmful particles from the air, resulting in cleaner and healthier indoor air for you and your family.

Cleaning and Maintenance Tips

When cleaning and maintaining this device, remember to regularly change the filters and wipe down the exterior with a damp cloth. It is important to follow a maintenance schedule to ensure optimal performance of your Winix PlasmaWave air purifier.

Here are some cleaning and maintenance tips to keep in mind:

Advertisement
  • Filter Replacement:

  • Replace the pre-filter every 3 months or as needed to remove larger particles like dust and pet hair.

  • The True HEPA filter should be replaced every 12 months to effectively capture allergens and pollutants.

  • Exterior Cleaning:

  • Use a soft, damp cloth to wipe down the exterior of the air purifier regularly to remove dust and dirt.

  • Avoid using harsh chemicals or abrasive materials that could damage the device.

Troubleshooting and Tips for Optimal Performance

For optimal performance, make sure you clean the filters regularly and avoid using harsh chemicals on the exterior.

When it comes to troubleshooting techniques for your Winix PlasmaWave air purifier, there are a few things you can try.

If the unit is not turning on, check if it is properly plugged into a power source. If it still doesn’t work, try resetting it by unplugging it for a few minutes and then plugging it back in.

If you notice a decrease in airflow, it could be due to a clogged filter. In this case, remove the filter and clean it according to the manufacturer’s instructions.

Lastly, to improve indoor air quality, consider placing the air purifier in a central location and running it on a higher fan speed for maximum effectiveness.

Advertisement

Frequently Asked Questions

Can the Winix Plasmawave Air Purifier Remove Pet Dander and Allergens From the Air?

Yes, the Winix Plasmawave Air Purifier effectively removes pet dander and allergens from the air. It’s been a great help in relieving my allergies and keeping the air clean and fresh.

How Often Should I Replace the Filters in the Winix Plasmawave Air Purifier?

I replace the filters in my Winix Plasmawave air purifier every 6-12 months. Replacement filters can be purchased online or at stores that sell air purifiers and filters.

Can I Use the Air Purifier in a Large Room or Open Floor Plan?

In a large room or open floor plan, the Winix Plasmawave Air Purifier can effectively clean the air. Its powerful filtration system and wide coverage area make it suitable for these spaces.

Does the Winix Plasmawave Air Purifier Emit Any Harmful Gases or Chemicals Into the Air?

No, the Winix Plasmawave Air Purifier does not emit any harmful gases or chemicals into the air. It has been thoroughly tested and proven to be safe for use.

Can I Leave the Air Purifier on All Day and Night, or Should I Turn It off When Not in Use?

I leave my air purifier on all day and night for continuous purification. It’s designed for 24/7 usage, so there’s no need to turn it off when not in use. This ensures clean air throughout my home.

Advertisement

Can the Winix Plasmawave Air Purifier Help with Common Air Quality Issues?

Looking for a solution to common air quality issues? The Winix Plasmawave air purifier, as recommended in the “air purifier necessity guide,” effectively removes allergens, dust, and odors from the air. With its advanced technology, this air purifier can greatly improve the air quality in your home or office.

Conclusion

In conclusion, the Winix PlasmaWave air purifier has proven to be a breath of fresh air in my home.

Its unboxing and setup process was like unwrapping a gift from the heavens, and understanding the control panel was as simple as deciphering a secret code.

Adjusting the air purification settings felt like harnessing the power of the wind itself, while cleaning and maintenance tips kept my purifier running smoothly like a well-oiled machine.

Troubleshooting and maximizing performance felt like unlocking the secrets of the universe.

Advertisement

With this purifier, my home has become an oasis of clean, fresh air.

Continue Reading

Air Purifier Guides

How to Use Ozone Air Purifier

Published

on

By

An image showcasing a well-lit room with an ozone air purifier in the corner, emitting a soft, blue glow

Want to eliminate those irritating allergens and odors in your home? Then check out the ozone air purifier!

In this article, I’ll guide you through the ins and outs of using this powerful device.

From understanding the basics to choosing the right purifier for your needs, we’ll cover it all.

Get ready to breathe in cleaner, fresher air as we delve into the world of ozone air purifiers.

Key Takeaways

  • Ozone air purifiers remove pollutants and odors by producing ozone.
  • High levels of ozone can be harmful to humans, pets, and plants.
  • Choose an ozone air purifier appropriate for the room size to avoid health risks.
  • Regularly clean and maintain the ozone air purifier for optimal performance.

Understanding the Basics of Ozone Air Purifiers

To understand the basics of ozone air purifiers, you need to know how they work and their potential benefits.

Ozone air purifiers are designed to remove pollutants and odors from the air by producing ozone, a molecule made up of three oxygen atoms. When ozone is released into the air, it reacts with airborne contaminants, such as bacteria, viruses, and mold, breaking them down and neutralizing their harmful effects. This process effectively purifies the air and eliminates unpleasant smells.

Advertisement

The benefits of using ozone air purifiers include improved indoor air quality, reduced allergy symptoms, and elimination of airborne pathogens. However, it is important to take precautions when using ozone air purifiers, as high levels of ozone can be harmful to humans, pets, and plants.

It is recommended to follow the manufacturer’s instructions and use ozone air purifiers in well-ventilated areas. Understanding the benefits and precautions of ozone air purifiers is essential in choosing the right one for your needs.

Choosing the Right Ozone Air Purifier for Your Needs

When selecting the right ozone air purifier for your needs, consider the size of the room you want to purify. Ozone air purifiers work by releasing ozone molecules into the air, which can help eliminate odors and kill bacteria and viruses.

However, it’s important to note that ozone can be harmful to humans and pets if inhaled in high concentrations. Therefore, it’s crucial to choose an ozone air purifier that is appropriate for the size of your room to avoid potential health risks.

A good buying guide is to look for the recommended room size on the product’s packaging or specifications. This will ensure that the ozone concentration remains within safe levels and effectively purifies the air without compromising your health.

Advertisement

Setting Up Your Ozone Air Purifier Correctly

Make sure you position the ozone air purifier in a central location within the room for optimal air circulation. This is an important step in the installation process to ensure that the purifier can effectively clean the air in the entire room.

Additionally, it is recommended to place the purifier at least three feet away from walls or furniture to allow for proper airflow.

When troubleshooting common issues with your ozone air purifier, there are a few things to keep in mind. First, make sure that the purifier is plugged in and turned on. Check the power supply and ensure that it is functioning properly. If the purifier is not producing ozone or there is a strange odor, check the plates or filters for any dirt or debris that may be affecting the performance.

By setting up your ozone air purifier correctly and addressing any troubleshooting issues, you can ensure that it operates safely and effectively in your home or office.

Now, let’s move on to the next section on how to operate your ozone air purifier.

Advertisement

Operating Your Ozone Air Purifier Safely and Effectively

Ensure that you follow the safety guidelines and operate your ozone air purifier correctly for optimal results. It is important to address common misconceptions and potential health risks associated with ozone air purifiers. While ozone can effectively remove odors and kill bacteria, it can also be harmful if not used properly. To operate your ozone air purifier safely, make sure to keep the room well-ventilated and follow the manufacturer’s instructions for ozone output levels and exposure times. Avoid using ozone air purifiers in occupied spaces, as high levels of ozone can irritate the respiratory system and worsen existing respiratory conditions. It is also crucial to periodically check the ozone levels in the room using an ozone monitor. By taking these precautions, you can enjoy the benefits of an ozone air purifier while minimizing potential health risks.

Common Misconceptions Potential Health Risks
Ozone air purifiers are High ozone levels can irritate the
completely safe to use. respiratory system and worsen
existing respiratory conditions.
Ozone air purifiers only Prolonged exposure to high levels of
remove odors. ozone can cause lung damage.
Ozone air purifiers can People with asthma, allergies, and
improve indoor air other respiratory conditions are
quality. more sensitive to ozone and should
avoid using ozone air purifiers.

Maintaining and Cleaning Your Ozone Air Purifier

To keep your ozone air purifier working effectively, it’s important to regularly clean and maintain it. By following a recommended maintenance schedule, you can ensure that your purifier continues to provide clean and fresh air for your space.

One common issue that may arise is a decrease in ozone production. This can be caused by a dirty ozone plate or a clogged filter. To troubleshoot this issue, simply remove the ozone plate and clean it with warm soapy water. Additionally, check the filter and clean or replace it if necessary.

It is also important to clean the exterior of the purifier regularly to prevent dust and dirt buildup. By properly maintaining your ozone air purifier, you can extend its lifespan and enjoy the benefits of clean air in your home or office.

Frequently Asked Questions

Can an Ozone Air Purifier Remove Pet Dander and Allergens From the Air?

Yes, an ozone air purifier can remove pet dander and allergens from the air. However, it’s important to note that ozone air purifiers can also pose potential health risks, so proper usage and precautions should be followed.

Advertisement

How Long Does It Take for an Ozone Air Purifier to Eliminate Odors in a Room?

Using an ozone air purifier is effective in eliminating odors in a room. It usually takes a few hours for the ozone to break down and neutralize the odor molecules. Regular maintenance ensures its optimal performance.

Are Ozone Air Purifiers Safe to Use Around Children and Pets?

Ozone air purifiers can be harmful to asthmatic individuals and people with respiratory issues. They can also be detrimental to plants and indoor gardens. It’s important to consider these factors before using them.

Can an Ozone Air Purifier Eliminate Mold and Mildew in a Damp Environment?

An ozone air purifier can effectively eliminate mold and mildew in a damp environment. By producing ozone, it eliminates moisture and prevents mold growth. Regular use in such environments can help maintain a clean and healthy space.

Do Ozone Air Purifiers Require Regular Filter Replacements Like Traditional Air Purifiers?

Ozone air purifiers have the advantage of not requiring regular filter replacements like traditional air purifiers. However, it is important to maintain them properly by cleaning the ozone plates regularly to ensure efficient operation.

Can I Use an Ionic Air Purifier in the Same Way as an Ozone Air Purifier?

Yes, you can use an ionic air purifier in the same way as an ozone air purifier. Both work by creating an ionic air purifier that emits negatively charged ions to remove particles from the air. However, it’s important to note that ozone air purifiers also emit ozone, which can be harmful in high concentrations.

Advertisement

Conclusion

So there you have it, a comprehensive guide on how to use an ozone air purifier.

While some may argue that ozone air purifiers can be harmful and should be avoided, it is important to note that when used correctly and in moderation, they can provide effective air purification.

By understanding the basics, choosing the right purifier, setting it up correctly, operating it safely, and maintaining it regularly, you can enjoy clean and fresh air in your home.

Remember, it’s all about finding the right balance and taking the necessary precautions.

Advertisement

Continue Reading

Air Purifier Guides

How to Use the Air Purifier

Published

on

By

An image showcasing a serene living room, illuminated by soft natural light

Using an air purifier is comparable to having a personal protector for your indoor air quality. It is a straightforward but efficient method to eliminate pollutants and allergens from your home, guaranteeing you inhale clean and fresh air.

In this article, I will guide you through the process of using an air purifier, from understanding its features to cleaning and maintaining it. With this knowledge, you’ll be able to optimize the performance of your air purifier and enjoy a healthier living environment.

Key Takeaways

  • Air purifiers remove harmful particles and pollutants from the air.
  • Regular maintenance, including cleaning or replacing filters, is essential for optimal performance.
  • Placement and location of the air purifier can affect its effectiveness.
  • Customizing and optimizing usage, such as adjusting fan speed and setting specific hours of operation, can maximize efficiency and air purification results.

Understanding the Air Purifier’s Features

Now let’s take a look at the air purifier’s features and how they can improve the air quality in your home.

Air purifiers are designed to remove harmful particles and pollutants from the air, ensuring a clean and healthy living environment. One of the key features of an air purifier is its filtration system. This system consists of different filters that capture dust, pet dander, pollen, and other allergens.

Regular air purifier maintenance is essential to ensure optimal performance. Cleaning or replacing the filters as recommended by the manufacturer will help maintain the air purifier’s effectiveness.

The benefits of air purification are numerous. By removing pollutants from the air, air purifiers can alleviate allergies, reduce asthma symptoms, and improve overall respiratory health. Additionally, they can eliminate unpleasant odors and create a fresh and inviting atmosphere in your home.

Advertisement

Setting Up Your Air Purifier

To begin setting up your air purifier, you’ll need to plug it into an electrical outlet. Once you’ve done that, there are a few more steps to take to ensure optimal performance.

One important factor to consider is choosing the right size air purifier for your space. A small purifier may not be effective in a large room, while a large purifier may be unnecessary for a small space. Refer to the manufacturer’s guidelines or consult with a professional to determine the appropriate size for your needs.

Additionally, regular maintenance is crucial to keep your air purifier running efficiently. Here are some maintenance tips to keep in mind:

  1. Clean or replace the filters regularly: Depending on the model, filters may need to be cleaned or replaced every few months. This ensures that the purifier can effectively remove pollutants from the air.

  2. Vacuum the exterior: Dust and debris can accumulate on the outside of the purifier, hindering its performance. Regularly vacuuming the exterior helps to maintain its effectiveness.

  3. Check the fan and motor: Ensure that the fan and motor are clean and free from obstructions. This helps to prevent overheating and prolongs the lifespan of the purifier.

  4. Follow the manufacturer’s instructions: Different air purifiers may have specific maintenance requirements. Always refer to the manufacturer’s instructions for proper care and maintenance.

Choosing the Right Location

When it comes to choosing the right location for your air purifier, there are a few key factors to consider.

First, you want to ensure optimal placement for maximum effectiveness. This means placing the purifier in a central location in the room, away from walls and furniture that could obstruct air circulation.

Advertisement

Additionally, factors such as room size, airflow patterns, and the presence of obstacles can all affect the overall air circulation in the space.

Optimal Placement for Effectiveness

For best results, it’s important to place the air purifier in a central location within the room. By doing so, you can maximize its effectiveness in optimizing air quality. The central placement allows the purifier to circulate the air more efficiently, ensuring that all corners of the room are covered.

Avoid placing the purifier near walls or furniture that could obstruct the airflow. It’s also crucial to position the purifier at a suitable height, ideally at the same level as your breathing zone. This ensures that the purifier captures the airborne pollutants effectively.

Additionally, keep in mind that the purifier should be placed away from any potential sources of contamination, such as smoking areas or chemical storage. Taking these steps will help you achieve the best possible air purification results.

Factors Affecting Air Circulation

Positioning the air purifier in a central location within the room allows it to circulate the air more efficiently and optimize air quality. To further enhance the effectiveness of the air purifier, there are two key factors to consider: airflow control and humidity levels.

Advertisement

Airflow Control: Ensuring proper airflow is crucial for the air purifier to work optimally. Avoid placing the purifier near walls, furniture, or curtains that can obstruct the airflow. Position it in an open area, away from any potential obstructions, to allow the purified air to circulate freely throughout the room.

Humidity Levels: Maintaining the right humidity levels is essential for a healthy indoor environment. High humidity can promote the growth of mold and mildew, while low humidity can cause dryness and discomfort. Some air purifiers come with built-in humidifiers, allowing you to control both air quality and humidity levels simultaneously.

Installing the Filters

To install the filters, you’ll need to locate the filter compartment on the side of the air purifier. It’s a crucial step in maintaining the effectiveness of your air purifier.

When installing replacement filters, make sure to read the manufacturer’s instructions carefully. Start by switching off the power and unplugging the device for safety.

Open the filter compartment by releasing the latch or removing the cover. Take out the old filters and dispose of them properly. It’s important to remove any dust or debris that may have accumulated in the compartment before inserting the new filters.

Advertisement

Slide the new filters into place, making sure they fit securely. Finally, close the compartment and plug in your air purifier.

Enjoy cleaner, fresher air once again!

Powering On and Off

When it comes to powering on and off your air purifier, it’s important to understand proper power usage and how to troubleshoot any power issues that may arise.

Proper power usage involves following the manufacturer’s instructions for plugging in and turning on the device, as well as using the correct voltage and outlet.

If you encounter any power issues, such as the air purifier not turning on or suddenly shutting off, troubleshooting steps may include checking the power cord for any damage, ensuring the outlet is functioning properly, and consulting the user manual for specific troubleshooting tips.

Advertisement

Proper Power Usage

Make sure you’re using the correct voltage for the air purifier to prevent any potential damage. Using the wrong voltage can lead to overheating or even a complete malfunction of the device.

To ensure power saving and energy efficiency, here are three important points to consider:

  1. Opt for an air purifier with adjustable power settings. This allows you to customize the energy consumption based on your needs. Lower power settings are ideal for maintaining air quality while minimizing energy usage.

  2. Look for air purifiers with energy-saving features such as automatic shut-off timers or sleep mode. These features allow the device to operate only when necessary, reducing power consumption and extending the lifespan of the purifier.

  3. Consider investing in an air purifier with a high CADR (Clean Air Delivery Rate) and Energy Star certification. These ratings indicate that the purifier meets strict energy efficiency standards while still effectively cleaning the air in your space.

Troubleshooting Power Issues

If your device is not turning on, it may be due to a power issue.

When it comes to fixing malfunctions, the first thing you should do is check the power source. Ensure that the air purifier is properly plugged into a working electrical outlet. Sometimes, the power cord may be loose or damaged, so make sure it is securely connected to both the device and the outlet.

If the power source seems fine, you can try resetting the air purifier by unplugging it for a few minutes and then plugging it back in. Additionally, check if there is a power switch or button that needs to be turned on for the device to function.

Advertisement

Adjusting the Fan Speed

To adjust the fan speed on your air purifier, simply locate the control panel and press the corresponding button. Here’s how you can increase airflow and adjust the fan settings:

  1. Press the ‘Fan Speed’ button on the control panel. This button may be labeled with icons representing different fan speeds, such as low, medium, and high.

  2. Use the up or down arrows on the control panel to cycle through the available fan speed options. Each press of the arrow will adjust the speed incrementally.

  3. Once you’ve selected the desired fan speed, press the ‘OK’ or ‘Enter’ button to confirm your choice.

By adjusting the fan speed, you can customize the airflow of your air purifier to suit your preferences.

Now, let’s move on to exploring the timer function and how it can enhance your experience with the air purifier.

Using the Timer Function

Using the timer function on your air purifier can offer several benefits and allow for efficient usage.

By setting the timer, you can customize the purifying schedule to fit your needs and ensure the air in your space is constantly fresh and clean.

Advertisement

Additionally, understanding the different settings available on the timer can help maximize the effectiveness of your air purifier and make it even more convenient to use.

Timer Benefits and Settings

The timer on the air purifier allows me to easily control when it turns on and off. Here are the benefits of using a timer on my air purifier:

  1. Energy Efficiency: By setting the timer, I can ensure that the air purifier only operates when I need it the most. This not only saves energy but also reduces the electricity bill.

  2. Noise Reduction: Having the air purifier running all the time can be noisy, especially when I’m trying to sleep or relax. With the timer, I can set it to turn off during those times, providing me with a quiet environment.

  3. Customizable Duration: The timer allows me to set the duration for which I want the air purifier to run. Whether it’s for a few hours or the entire night, I can adjust the timer according to my specific needs.

Setting the timer duration is a simple process. I just need to press the timer button and use the controls to set the desired time. Once set, the air purifier will automatically turn on and off at the specified times, providing me with clean and fresh air whenever I need it.

Efficient Usage Tips

Maximize the efficiency of your air purifier by adjusting the settings according to your specific needs and preferences. To help you achieve the best air quality possible, here are some efficient usage tips:

  1. Choose the right fan speed: Adjust the fan speed based on the air pollution level. Higher speeds are suitable for heavy pollution, while lower speeds work well for maintaining clean air.

  2. Position it strategically: Place your air purifier in a central location to allow for optimal air circulation throughout the room.

  3. Regularly clean or replace filters: Clean or replace filters as recommended by the manufacturer. This ensures that the air purifier functions at its highest efficiency.

  4. Keep doors and windows closed: To prevent outdoor pollutants from entering the room, close doors and windows while the air purifier is in operation.

Customizing Purifying Schedule

Now that you understand how to efficiently use your air purifier, let’s dive into the topic of customizing your purifying schedule.

Advertisement

This feature allows you to automate the purification process according to your specific needs. Here are some ways you can optimize your air purifier’s performance:

  1. Customizing timer settings: Most air purifiers come with a built-in timer that allows you to set specific hours of operation. By adjusting the timer settings, you can ensure that your purifier runs when you need it the most, such as during the night when you’re sleeping or during peak pollution hours.

  2. Optimizing purification levels: Depending on the air quality in your surroundings, you can adjust the purification levels of your device. If the air quality is poor, you can set the purifier on a higher speed or activate the turbo mode. On the other hand, if the air quality is relatively good, you can lower the purification levels to conserve energy.

  3. Creating personalized schedules: Some advanced air purifiers offer the option to create personalized schedules. This means you can set different purification levels and timer settings for different times of the day. For example, you can set the purifier to run at a higher speed during cooking or cleaning activities and lower it during quieter hours.

Understanding the Indicator Lights

To use the air purifier properly, it’s important to understand the indicator lights. These lights provide valuable information about the status and performance of the device.

The meanings of the indicator lights may vary depending on the specific model, but they generally indicate important functions such as power, filter replacement, and air quality. For example, a green light often indicates that the purifier is operating normally, while a red light may indicate a problem that needs attention, such as a clogged filter.

If you encounter any issues with the indicator lights, it’s crucial to consult the user manual for troubleshooting steps. Common problems may include flickering lights, lights that don’t turn on, or lights that stay on even when the device is not in use.

Understanding and troubleshooting indicator light issues will help ensure optimal performance and longevity of your air purifier.

Advertisement

Cleaning and Maintaining the Air Purifier

Make sure you regularly clean and maintain your air purifier to keep it running efficiently. Here are some cleaning techniques and tips to help you maintain your air purifier:

  1. Wipe down the exterior: Use a soft, damp cloth to clean the exterior of the air purifier. Avoid using harsh chemicals or abrasive materials that could damage the surface.

  2. Clean the filters: Depending on the type of air purifier you have, you may need to clean or replace the filters regularly. Follow the manufacturer’s instructions for cleaning or replacing the filters to maintain optimal performance.

  3. Vacuum the vents: Dust and debris can accumulate on the vents of your air purifier, reducing its effectiveness. Use a brush attachment on your vacuum cleaner to gently remove any build-up.

By following these cleaning techniques and regularly replacing the filters, you can ensure that your air purifier continues to provide clean and fresh air for you and your family.

Now, let’s move on to troubleshooting common issues with air purifiers.

Troubleshooting Common Issues

First, check if the power cord is securely plugged in and try resetting the device if you encounter any issues.

When it comes to fixing noise problems with your air purifier, there are a few things you can try.

Advertisement

First, make sure that the air purifier is placed on a stable surface and not touching any walls or furniture. Sometimes, vibrations from nearby objects can cause unnecessary noise.

Additionally, check if the air filter is clean, as a clogged filter can strain the motor and create noise.

If the noise persists, it may be a sign of a mechanical issue, in which case contacting customer support would be recommended.

Addressing air quality concerns involves regularly cleaning and replacing the air filters as instructed by the manufacturer.

It’s also important to keep the air purifier in a well-ventilated area and away from any potential sources of pollutants.

Advertisement

Frequently Asked Questions

How Long Should I Run the Air Purifier Each Day?

I run the air purifier for the recommended duration each day to ensure optimal usage. It helps to maintain clean air and improve indoor air quality, which is important for my health and well-being.

Can I Use the Air Purifier in Multiple Rooms?

Yes, you can use the air purifier in multiple rooms. It’s a great way to improve air quality in your office and enjoy the benefits of cleaner air in your bedrooms.

Can I Use Essential Oils With the Air Purifier?

Using essential oils in an air purifier can have health benefits, but it’s important to use them correctly and safely. I can provide guidance on how to properly incorporate essential oils into your air purifier.

How Often Do I Need to Replace the Filters?

I typically replace the filters in my air purifier every 3-6 months, depending on how dirty they get. It’s important to pay attention to signs of a dirty filter, such as reduced airflow or a musty smell.

Does the Air Purifier Remove Pet Dander and Allergens From the Air?

Yes, the air purifier effectively removes pet dander and allergens from the air. It’s an essential part of air purifier maintenance and offers numerous benefits for pet owners, ensuring cleaner and healthier indoor air quality.

Advertisement

Is the Use of Ozone Air Purifier Similar to Regular Air Purifiers?

Yes, ozone air purifier benefits are similar to regular air purifiers in some ways. Both types remove harmful pollutants from the air, such as dust, pollen, and pet dander. However, ozone air purifiers also have the added benefit of neutralizing odors and killing bacteria and mold spores.

Conclusion

In conclusion, using an air purifier is an essential step in ensuring clean and fresh air in your home. By understanding its features and following the proper setup and maintenance procedures, you can effectively eliminate pollutants and allergens from your indoor environment.

Did you know that according to a study conducted by the Environmental Protection Agency (EPA), indoor air can be two to five times more polluted than outdoor air? Investing in an air purifier can significantly improve the air quality in your home and promote better health for you and your family.

Continue Reading

Trending