
To change the filter in your Coway air purifier, first turn it off and unplug the device. Locate the filter compartment, usually behind a panel or cover, and open it carefully. Remove the old filter gently, avoiding dust escape. Insert the new filter, making sure it’s aligned properly. Close the cover securely, then turn on the purifier and reset the filter indicator if needed. If you want detailed steps, there’s more to follow.
Key Takeaways
- Turn off and unplug the air purifier before opening the filter compartment to ensure safety.
- Locate the filter door on the side or back of the unit and open it carefully.
- Remove the old filter gently, supporting its edges to prevent damage or dust escape.
- Clean the interior surfaces, then insert the new filter securely in the correct orientation.
- Close the filter cover, turn on the purifier, and reset the filter indicator if needed.
Gather the Necessary Tools and Replacement Filter
Before you begin changing the filter, gather all the tools and the replacement filter you’ll need. Proper air filter maintenance starts with having everything ready to make the process smooth. Check your Coway model’s manual to confirm the correct replacement filter and note the recommended replacement frequency—usually every 6 to 12 months, depending on usage and air quality. You’ll need the new filter, a soft cloth, and possibly a screwdriver if your model requires it. Having these tools on hand prevents interruptions and helps you complete the task efficiently. Making sure you have the right replacement filter also guarantees excellent air purification. Staying informed about best air purifiers can help you choose the most suitable model for your needs. Regular filter replacement is essential for maintaining air quality, ensuring your air purifier continues to operate at peak performance. Being prepared saves time and ensures you follow the manufacturer’s guidelines for maintaining your air purifier’s performance. Additionally, understanding the filter replacement process can help you troubleshoot any issues that may arise during maintenance. Remember that filter effectiveness depends on proper installation and regular upkeep to maximize your air purifier’s lifespan.
Turn Off and Unplug Your Coway Air Purifier
Before you start changing the filter, make sure to turn off your Coway air purifier. Then, unplug it from the outlet to guarantee it’s completely powered down. Taking these steps keeps you safe and prevents any accidental activation during the process. Additionally, ensuring the device is fully off helps protect data privacy by avoiding unintended data collection or transmission during maintenance. For optimal performance, consult your user manual to understand the filter replacement procedure specific to your model. Being aware of the company values can also guide your approach to maintenance and care. Remember that following proper procedures not only ensures safety but also aligns with the privacy and cookie policies that emphasize transparency and user control.
Power Down Safely
To guarantee safe handling during filter replacement, you should always turn off and unplug your Coway air purifier first. This step ensures power safety and minimizes the risk of electrical hazards. Before opening the unit, double-check that it’s completely powered down to prevent accidental activation. Disconnecting from the electrical outlet reduces the chance of electrical shocks or short circuits during maintenance. Always handle the device carefully, following manufacturer instructions. Remember, even when the unit is off, residual power might remain, so unplugging is vital. Taking these electrical precautions protects both you and the appliance. Understanding electrical safety is essential when performing maintenance on any electronic device. Once unplugged, you can safely proceed to remove and replace the filter without concerns about electrical current. Prioritizing electrical safety measures keeps your filter change quick, safe, and efficient. Additionally, consulting the user manual can provide specific guidance for your model, ensuring proper handling. Being aware of residual power can further help prevent accidental shocks during maintenance.
Unplug From Outlet
Always start by turning off your Coway air purifier and unplugging it from the electrical outlet. This step is essential for electrical safety and to prevent any accidental activation while you handle the filter. Carefully grasp the plug and pull it straight out of the power outlet, avoiding force that could damage the cord. Unplugging ensures the device is completely disconnected from power, reducing the risk of electrical shock. Never attempt to change the filter while the purifier is still plugged in, as residual electricity could cause harm. Taking this simple precaution protects you and keeps the process safe. Once unplugged, you can confidently proceed with opening your air purifier for filter replacement, knowing you’re prioritizing electrical safety.
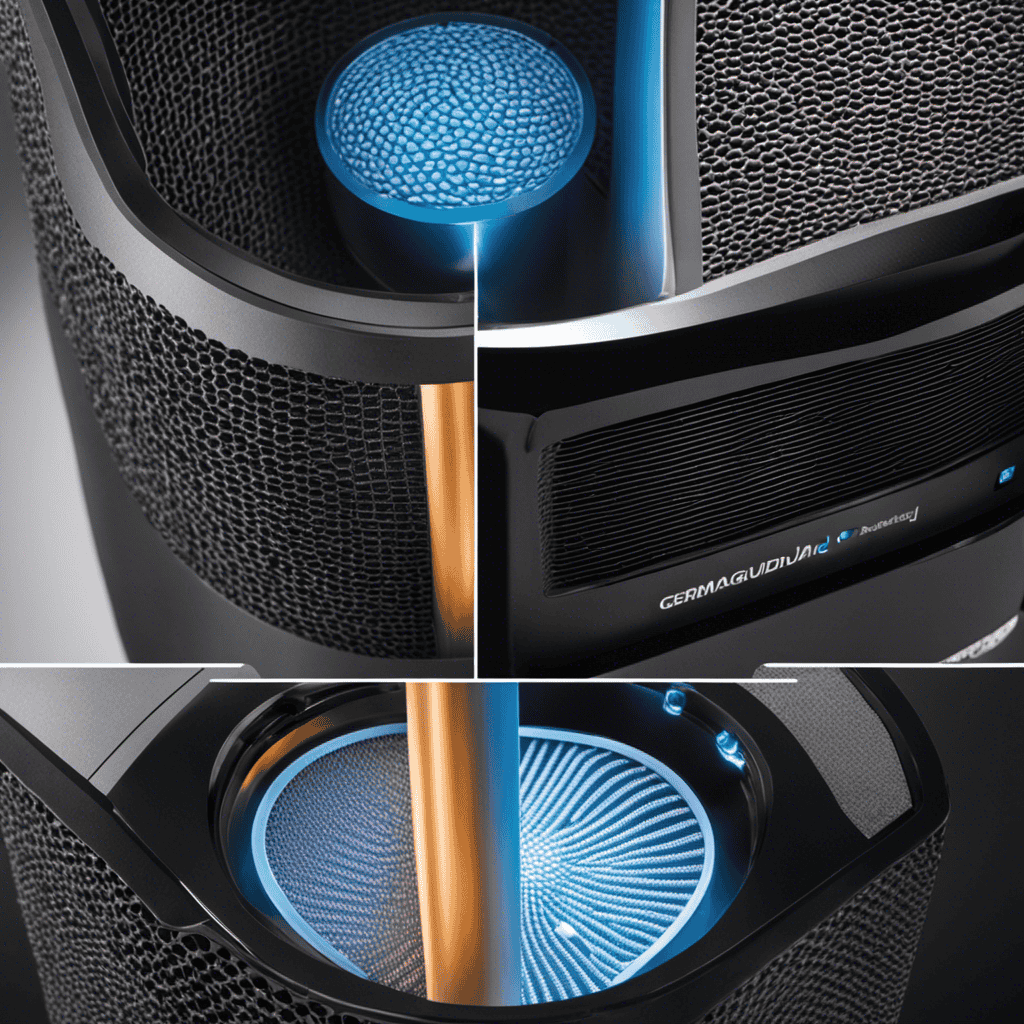
Locate the Filter Compartment
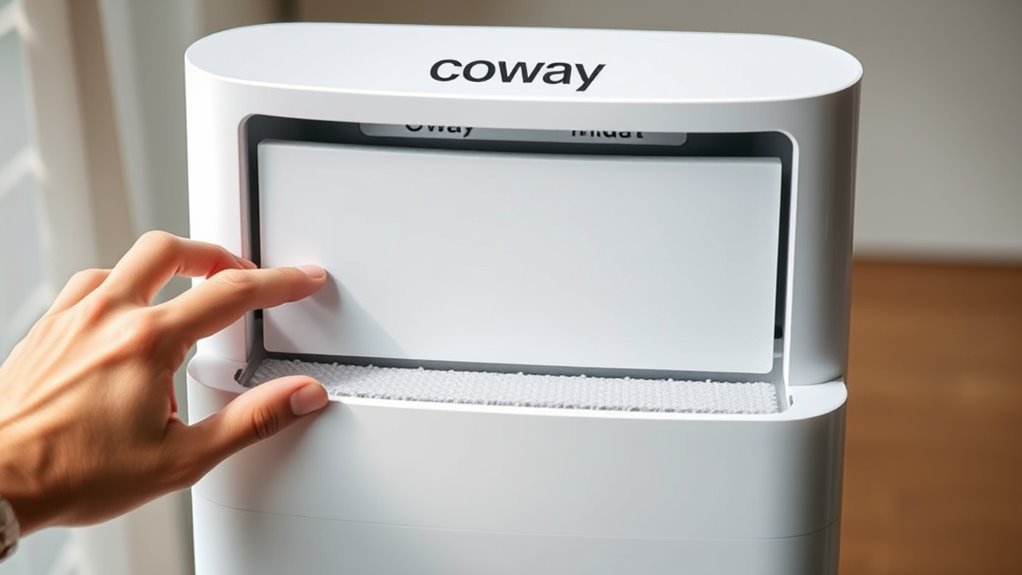
Start by finding the filter door on your Coway air purifier, which is usually on the side or back. Look for the compartment edge and any locking mechanisms that keep it closed. Once you spot these, you’ll be ready to open the compartment and access the filter. Creating designated zones can help organize your space for easier maintenance. Additionally, understanding the filter types used can ensure proper replacement and optimal performance. Being aware of AI safety measures in the design can help prevent malfunctions during operation. Proper knowledge of personal debt forgiveness programs can also assist in managing financial aspects related to maintenance costs.
Find the Filter Door
Locate the filter door on your Coway air purifier by inspecting the unit’s sides or back. The filter door is usually a small panel or latch that provides access to the filter compartment. You may need to look for a handle or a small opening to open the door easily. Knowing the filter location helps guarantee a smooth filter replacement process. Once you find the door, check for any symbols or labels indicating the filter compartment. Keep in mind that the filter door’s position can vary depending on your particular Coway model, so refer to your user manual if needed. Finding the filter door is a simple step that sets you up for an efficient filter change, ensuring your air purifier continues to perform at its best. Understanding air purifier models can help you better navigate your device’s features and maintenance requirements. Additionally, familiarizing yourself with the filter access points can streamline the replacement process and prevent potential damage. Proper knowledge of air purifier maintenance can also extend the lifespan of your device and improve air quality. For optimal performance, it’s beneficial to consult the manufacturer’s instructions specific to your model to ensure correct procedures. Being aware of filter replacement intervals can help you plan timely maintenance and keep your air purifier functioning effectively.
Identify the Compartment Edge
To identify the filter compartment edge, examine the area around the filter door carefully. Look for any seams or lines that mark the boundary of the filter compartment. The edge identification is vital because it guides you on where to open or lift the panel without forcing or damaging the unit. Most Coway air purifiers have a clearly defined edge around the filter compartment, often indicated by a slight groove or a change in material. Pay attention to any small tabs or indentations that may assist in opening the compartment. By accurately locating the filter compartment edge, you guarantee safe and efficient access to the filter for removal and replacement. Additionally, understanding the filter compartment design can help prevent damage during maintenance. Being aware of the filter type used can also streamline the replacement process and ensure compatibility. Recognizing the internal structure of the filter area can facilitate easier removal and reduce the risk of damaging other components. For example, some models have a specific filter orientation that must be maintained for optimal performance. Take your time to inspect the area thoroughly before proceeding to the next step.
Check for Locking Mechanisms
After identifying the filter compartment edge, look closely at the area around the door for any locking mechanisms. Many Coway air purifiers have a locking mechanism to secure the filter door in place. Check if there’s a latch, button, or switch that needs to be pressed or slid to free the filter door. Sometimes, the locking mechanism is integrated into the door handle or located nearby. If you find a latch, gently press or slide it to release the door. Make certain you understand how the locking mechanism works so you don’t force the filter door open, which could cause damage. Additionally, understanding the basic operations of your air purifier can help ensure proper handling during maintenance. Once released, you can carefully open the filter door and proceed with replacing the filter.
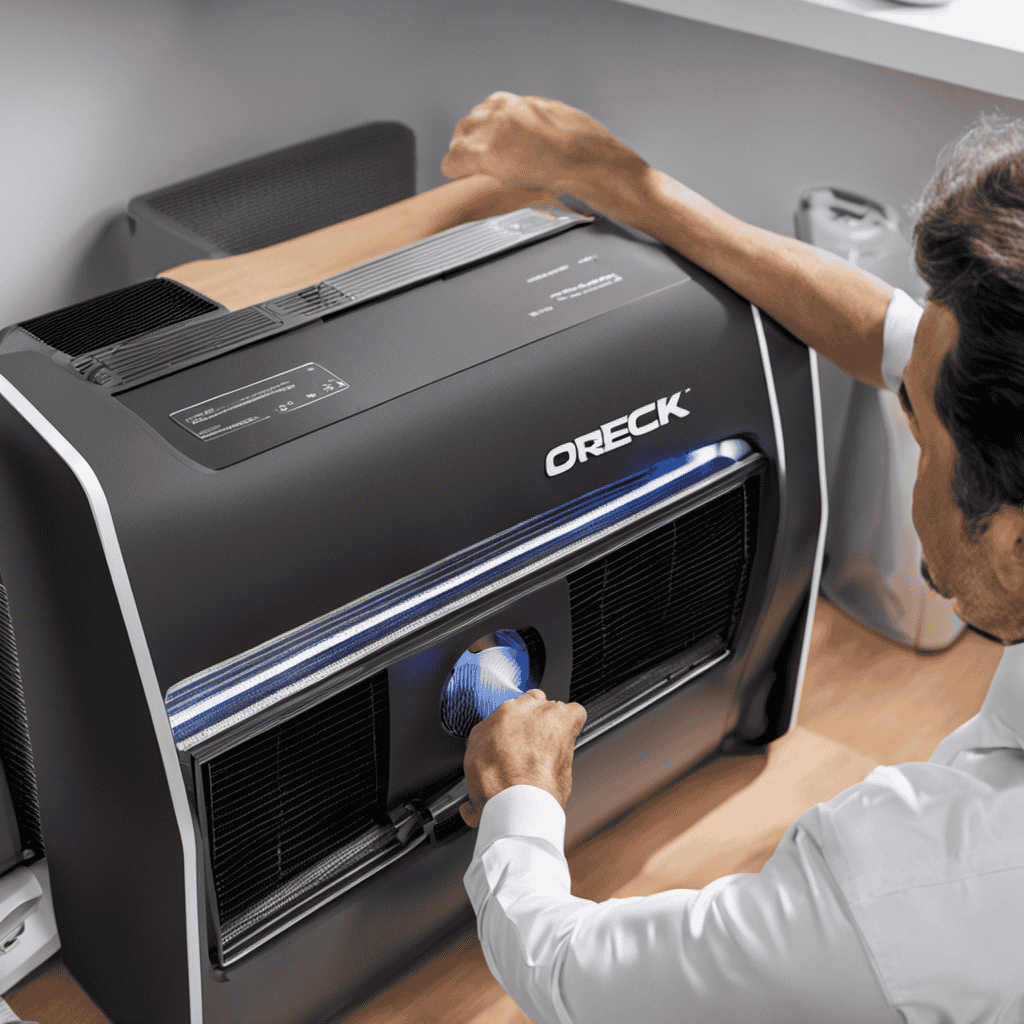
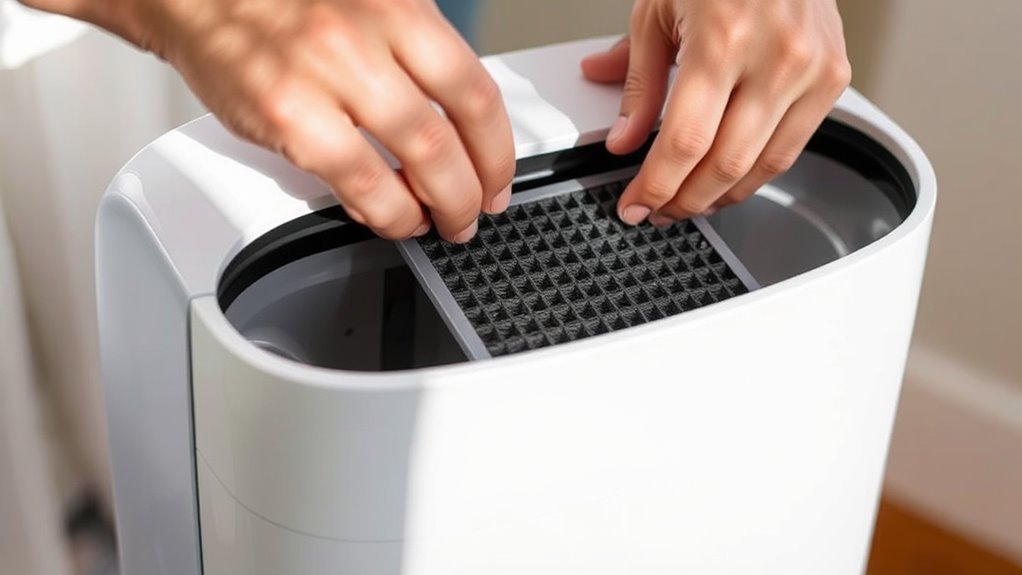
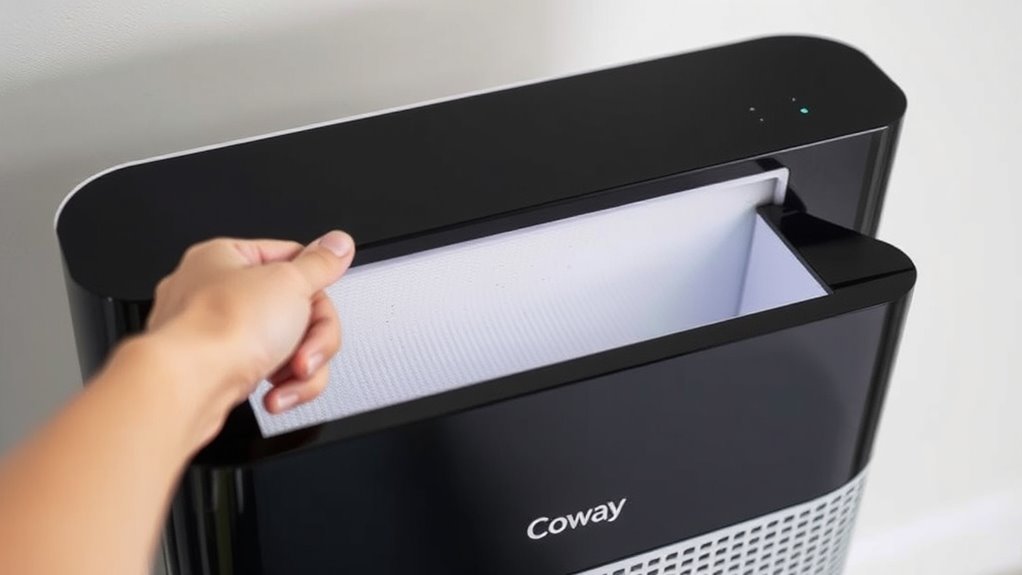
Open the Filter Cover or Panel
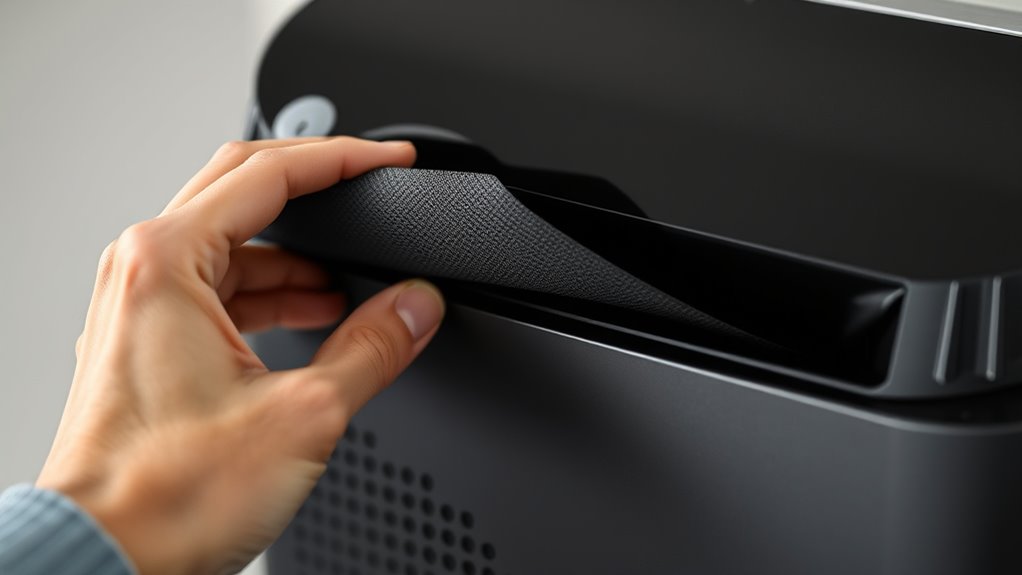
Before removing the filter, you’ll need to open the cover or panel that houses it. This step is vital for proper filter maintenance and ensures you can access the filter safely. Locate the cover or panel on your Coway air purifier, usually on the back or bottom, depending on the model. Gently unlock or unclip the cover, being careful not to force it and cause damage. Some models might have a latch or screws that need to be undone first. Once the cover is open, you’ll have clear access to the filter for removal and replacement. Opening the cover correctly is essential for smooth cover replacement and avoiding any damage to the unit. Make sure to follow your specific model’s instructions for this step. Proper access to the filter can also help prevent airflow problems and ensure your purifier functions efficiently. Additionally, understanding the filter types used in your model can help you choose the right replacement. Being aware of proper maintenance practices can extend the lifespan of your air purifier and maintain optimal air quality.
Remove the Used Filter Carefully
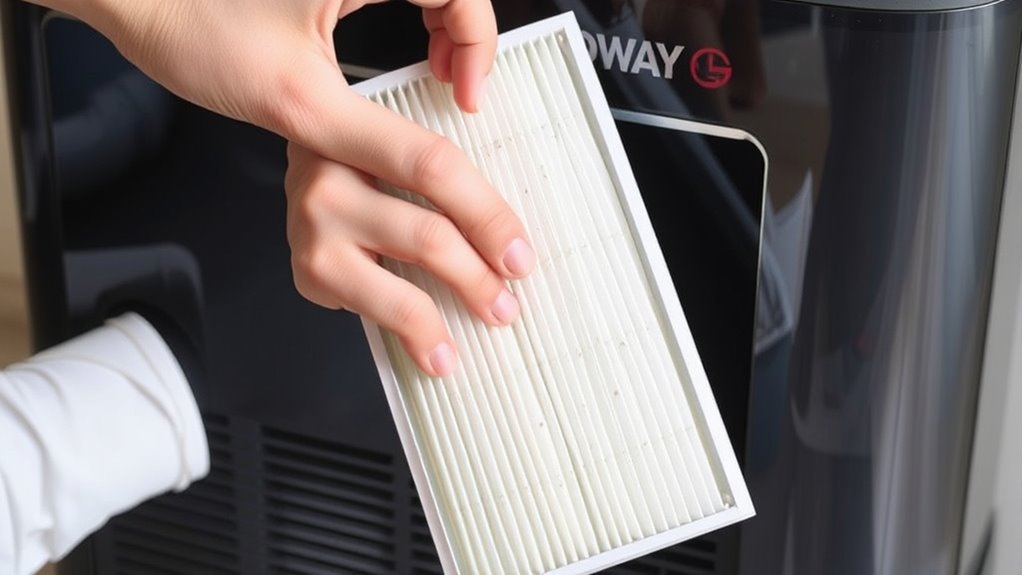
First, turn off and unplug the air purifier to guarantee safety. Open the filter compartment carefully, then gently lift out the used filter without forcing it. This approach helps prevent damage and makes the removal process smooth.
Turn Off and Unplug
To guarantee safety and prevent damage, you should turn off and unplug your Coway air purifier before removing the filter. This ensures no electric power is running through the device, reducing the risk of electrical shock or damage. Always follow safety precautions when handling filters and electrical appliances.
Here’s a quick checklist:
| Step | Action | Purpose |
|---|---|---|
| Turn off | Switch off the air purifier | Cut electric power |
| Unplug | Remove the power cord | Prevent electrical hazards |
| Wait a few minutes | Allow internal components to cool | Avoid injury |
| Inspect for damage | Check for cracks or issues | Ensure safety |
| Prepare for removal | Get ready to carefully remove filter | Safe handling |
Open Filter Compartment
Once the air purifier is turned off and unplugged, you can access the filter compartment. Carefully open the compartment cover, following the manufacturer’s instructions. During air filter maintenance, handle the used filter gently to prevent dust or debris from scattering. Use a clean, dry cloth to wipe around the compartment if needed. Be mindful of appliance safety; avoid forcing any parts open or using sharp tools that could damage the unit. Keep your workspace clean to prevent dirt from entering the purifier. Once open, prepare to remove the used filter without pulling or tearing it. Taking care during this step helps maintain the integrity of your air purifier and ensures it functions efficiently after replacing the filter.
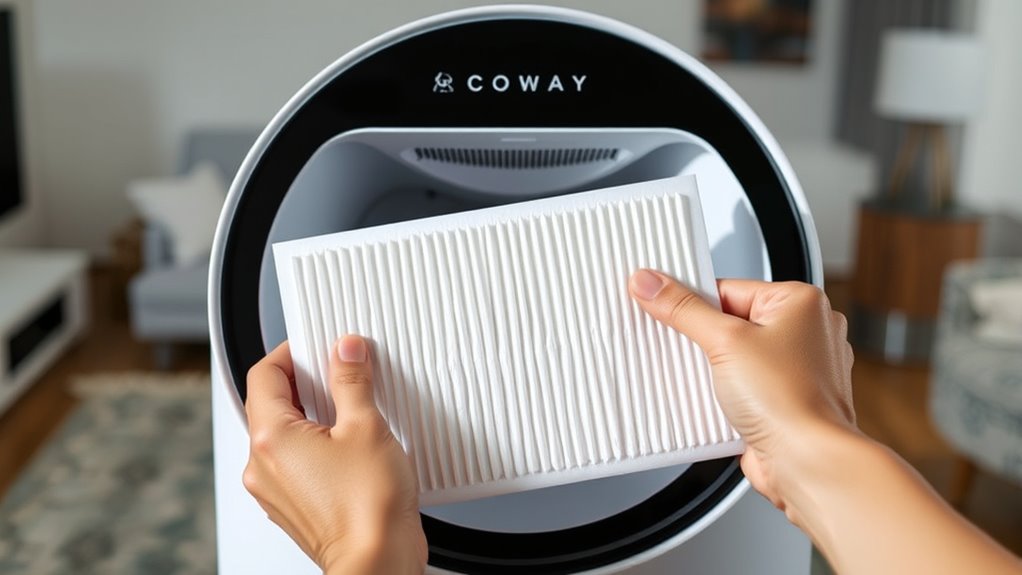
Gently Remove Filter
When removing the used filter, handle it gently to prevent dust from escaping or tearing the material. Proper filter maintenance relies on careful removal to avoid spreading dust and to keep the filter intact. Grip the filter firmly but carefully, supporting its edges as you lift it out. Pay attention to the filter placement so you can install the new one correctly afterward. Avoid forcing or twisting the filter, which could cause damage. If your model has multiple filters, note their positions before removal to ensure proper reinstallation. Taking your time during this step helps maintain air purifier efficiency and prolongs filter life. Once removed, dispose of the used filter according to manufacturer directions, and prepare for the installation of the fresh filter.
Clean the Inside of the Filter Compartment
Before installing a new filter, it’s important to clean out the inside of the filter compartment to remove dust and debris. This step is essential for proper filter maintenance and guarantees your air purifier works efficiently. Here’s what you should do:
- Turn off and unplug the device.
- Use a soft, damp cloth to wipe the interior surfaces.
- Gently vacuum any dust or debris from corners and vents.
- Check for and remove any accumulated dirt or residue.
This interior cleaning helps prevent dust buildup that could hinder airflow or compromise air quality. Regularly cleaning the filter compartment keeps your Coway air purifier running smoothly and maintains peak performance. Remember, a clean filter compartment is key to effective filter maintenance.
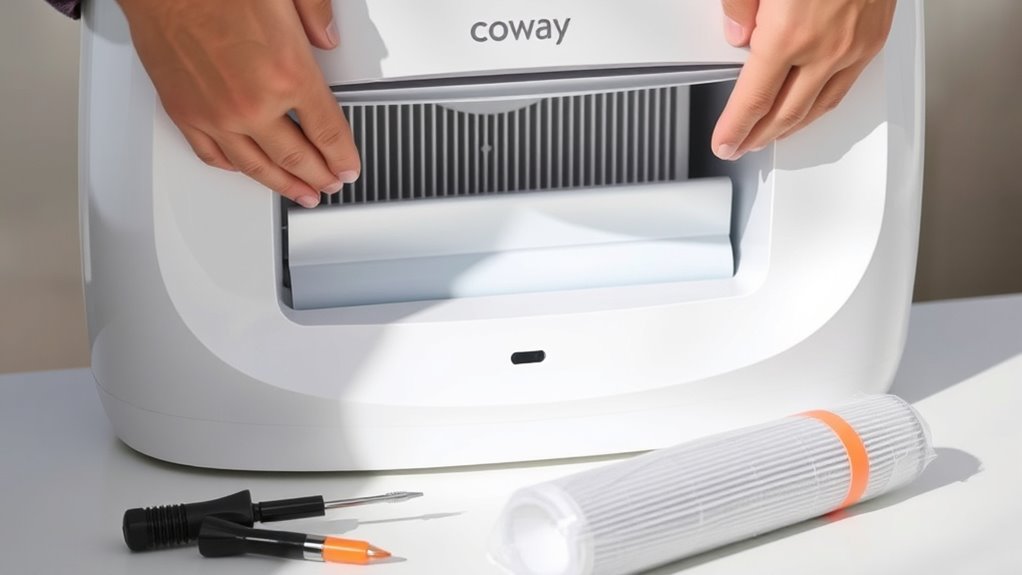
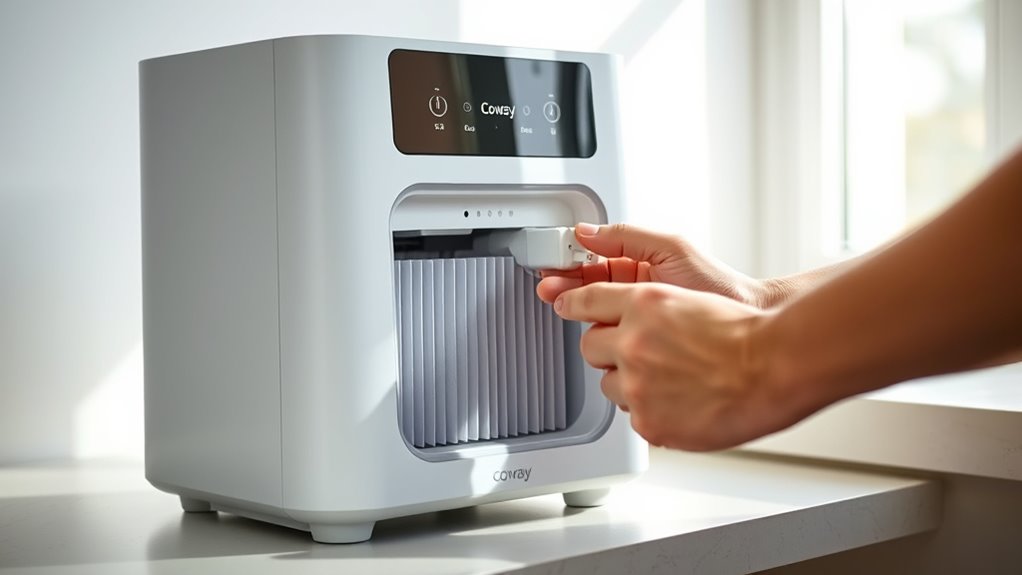
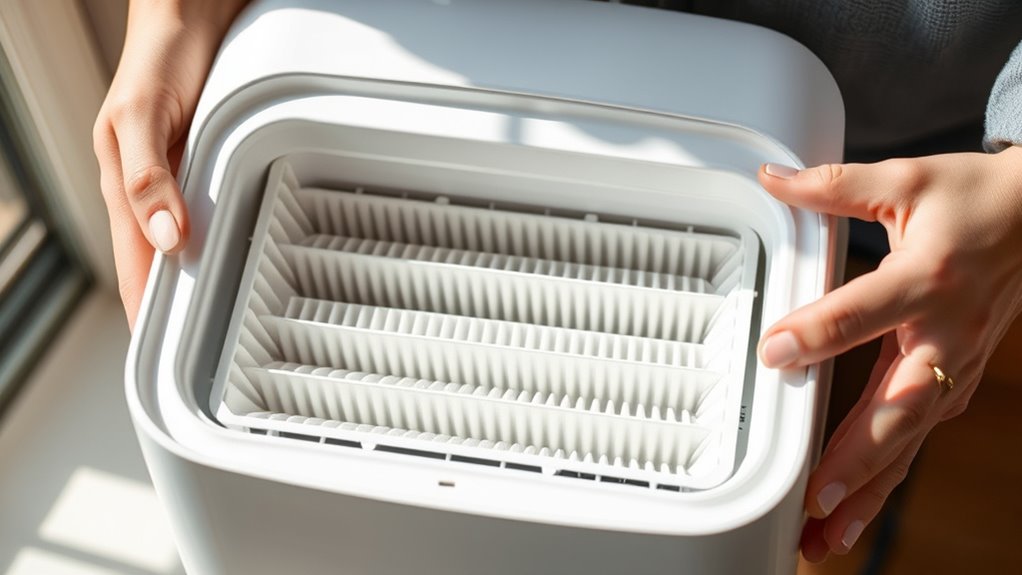
Prepare and Insert the New Filter
To guarantee your new filter fits properly and functions effectively, start by unpacking the replacement filter and inspecting it for any packaging debris or damage. Carefully remove the filter from its packaging, making sure not to tear or bend it. During filter installation, align the filter correctly according to the manufacturer’s instructions, ensuring it sits securely in the designated compartment. Take a moment to check that the filter is clean and undamaged before inserting it. Proper filter maintenance is essential for suitable air purifier performance, so don’t rush this step. Once aligned, gently slide the filter into place, making sure it seats fully and evenly. Correct preparation and careful insertion help maximize the lifespan and efficiency of your new filter.
Secure the Filter Cover or Panel Back in Place

After ensuring the filter is properly seated, you need to secure the filter cover or panel back in place. Proper securing panels is essential for effective filter maintenance and peak air purification. To do this:
- Align the cover or panel with the device’s housing.
- Press down firmly around the edges to ensure it clicks securely.
- Check that all clips or latches are engaged properly.
- Gently wiggle the cover to confirm it’s firmly in place.
Securing panels correctly prevents unfiltered air from bypassing the filter and maintains the purifier’s efficiency. Take care during this step to avoid forcing or misaligning parts. Properly secured covers also help prevent damage and ensure safe operation of your Coway air purifier.
Turn On and Reset Your Coway Air Purifier
Once you’ve securely reattached the filter cover, turning on and resetting your Coway air purifier is straightforward. Start by pressing the power button to turn it on. For proper air purifier maintenance, some models require a reset after filter replacement to ensure accurate operation. To reset, locate the reset button—usually behind the filter cover or on the control panel—and press and hold it for a few seconds until the indicator light blinks or turns off. This step helps your device recognize the new filter and optimize its performance. Remember, following filter replacement tips, like resetting properly, extends your air purifier’s lifespan and maintains air quality. Always refer to your specific model’s instructions for the exact reset procedure.
Check for Proper Operation and Airflow

Making sure your air purifier is working correctly after replacing the filter is essential for peak performance. To check proper operation and airflow, follow these steps:
Ensure your air purifier runs smoothly after replacing the filter by checking airflow and operation.
- Turn on your Coway and listen for consistent airflow; a sudden drop indicates a blockage.
- Observe the air output near the vents to ensure it feels strong and steady.
- Use the filter indicator or app to confirm the filter’s status, supporting airflow optimization.
- Regularly inspect the filter for dust build-up, which can reduce airflow and shorten the filter lifespan.
Frequently Asked Questions
How Often Should I Replace the Coway Air Purifier Filter?
You should replace your Coway air purifier filter based on its filter lifespan, which typically lasts about six months with regular use. Following the recommended replacement schedule ensures peak air quality. Keep an eye on the filter indicator light; it signals when it’s time for a replacement. Regularly changing the filter maintains your air purifier’s efficiency and keeps your indoor air clean and fresh.
Can I Use Third-Party Filters Instead of OEM Replacements?
They say “you get what you pay for,” and that’s true with air filters too. Using third-party filters might seem like a good idea, but filter compatibility issues can arise, reducing efficiency or damaging your purifier. Always check if third-party filters are compatible with your Coway model. For peak performance and air quality, sticking with OEM replacements is the safest choice.
What Should I Do if the Filter Doesn’t Fit Properly?
If your filter doesn’t fit properly, don’t force it. First, double-check that you’re using the correct filter model for your Coway air purifier. Sometimes, improper fit results from incorrect installation or misaligned parts. Follow troubleshooting tips like removing the filter and inspecting for damage or obstructions. Make sure all components are aligned correctly, and if it still doesn’t fit, contact Coway support for guidance to maintain proper fit and peak performance.
How Do I Reset the Filter Indicator After Replacing It?
After replacing the filter, you’ll want to perform a filter reset so the indicator light accurately reflects the new filter status. To do this, press and hold the filter reset button until the indicator light turns off or resets. This simple step guarantees your Coway air purifier tracks filter usage properly. Remember, performing a filter reset keeps your device running smoothly and maintains ideal air quality.
Is It Necessary to Clean the Filter Before Installing a New One?
While a new filter often needs no cleaning before installation, skipping filter cleaning can reduce efficiency. Think of it as a fresh start—clean filters ensure ideal air quality. You should clean the filter if it’s washable, removing dust and debris before disposal of the old filter. This step helps maintain your air purifier’s performance and prolongs its lifespan, making sure you breathe cleaner air every day.
Conclusion
Changing your Coway air purifier’s filter is like giving it a breath of fresh life. With a few simple steps, you transform your device from a tired, sluggish helper into a vibrant guardian of clean air. Just like turning a key to open a new chapter, your quick action guarantees your home stays a sanctuary of freshness. Breathe easy knowing you’ve kept your air purifier running smoothly—your lungs will thank you for it.