Connect with us

Air Purifier Guides

How Often to Replace Hepa Filter in Air Purifier

Published

on

An image showing a close-up of an air purifier with a partially covered HEPA filter, capturing the accumulation of dust particles and pollutants, indicating the need for timely replacement

As a fan of air purifiers, I have learned that keeping a HEPA filter well-maintained is essential for ensuring clean and healthy indoor air.

But how often should you replace this vital component?

In this article, we’ll delve into the factors affecting the lifespan of a HEPA filter, the importance of regular replacements, and the signs that indicate it’s time for a new one.

So sit back, relax, and let’s uncover the secrets to maintaining your air purifier’s efficiency.

Table of Contents

Key Takeaways

  • The lifespan of a HEPA filter in an air purifier can be affected by various factors such as the quality of the filter, air quality in the area, frequency of use, and adherence to manufacturer’s instructions.
  • Regular replacement of the HEPA filter is important as it ensures optimal air purifier performance by capturing up to 99.97% of airborne particles. Over time, accumulated particles in the filter can reduce its efficiency, making replacement every 6-12 months recommended.
  • HEPA filter degradation occurs as particles accumulate in the filter, leading to a loss of filtration capacity and decreased airflow. This can significantly impact the efficiency and performance of the air purifier, emphasizing the need for regular maintenance.
  • Signs indicating the need for HEPA filter replacement include decreased air quality, increased allergy symptoms, and the presence of a filter replacement indicator on the air purifier. Timely replacement not only improves air quality but also prolongs the lifespan of the filter.

Factors Affecting the Lifespan of a HEPA Filter

You should consider several factors that affect the lifespan of your HEPA filter.

Proper HEPA filter maintenance is crucial to ensure its optimal performance and longevity.

Advertisement

One of the key factors impacting filter efficiency is the air quality in your environment. If you live in an area with high levels of pollution, dust, or allergens, your filter may get clogged more quickly and require more frequent replacements.

Another factor to consider is the usage of your air purifier. If you use it constantly or in a heavily trafficked area, the filter will accumulate more particles and contaminants, reducing its lifespan.

Additionally, the quality of the filter itself plays a significant role. Cheap or low-quality filters may not last as long as higher quality ones.

Regularly cleaning and replacing your HEPA filter when necessary will ensure that your air purifier continues to provide clean and healthy air.

The Importance of Regular Filter Replacements

Regularly replacing the HEPA filter in an air purifier is crucial. A clean HEPA filter ensures that the air purifier functions at its optimum level, providing you with clean and healthy air.

Advertisement

HEPA filters are designed to capture up to 99.97% of airborne particles, including dust, pollen, pet dander, and even bacteria and viruses. Over time, these particles accumulate in the filter, reducing its efficiency and airflow.

To maintain the effectiveness of your air purifier, it is recommended to replace the HEPA filter every 6-12 months, depending on usage and air quality. Some recommended filter brands include Honeywell, Blueair, and Coway.

Understanding HEPA Filter Degradation

Understanding how HEPA filters degrade over time is essential for maintaining the efficiency of your air purifier. Here are three important factors to consider:

  1. Accumulation of Particles: HEPA filters work by trapping microscopic particles in the air. Over time, the filter becomes clogged with dust, pollen, pet dander, and other pollutants. As a result, the air quality degradation is noticeable, and the filter’s efficiency decreases.

  2. Loss of Filtration Capacity: As the filter becomes saturated with particles, its ability to capture new contaminants diminishes. This can lead to decreased filter efficiency, allowing more pollutants to circulate in the air, affecting air quality.

  3. Decreased Airflow: A clogged HEPA filter can restrict the airflow in your air purifier, causing the unit to work harder to maintain the desired air quality. This puts extra strain on the motor and may lead to decreased performance and higher energy consumption.

Understanding these aspects of HEPA filter degradation is crucial for ensuring that your air purifier functions optimally. Now, let’s explore the signs that indicate it’s time to replace your HEPA filter.

Signs That It’s Time to Replace Your HEPA Filter

As an air purification expert, I’ve noticed that many people are unaware of the importance of regularly replacing their HEPA filters. In this discussion, we will explore the key indicators that signal it’s time for a filter replacement.

Advertisement

Not only can a degraded filter result in decreased air quality, but it can also lead to increased allergy symptoms. This makes it crucial to stay on top of filter maintenance.

Filter Replacement Indicators

Have you checked if your air purifier has a filter replacement indicator? It’s a feature that can greatly benefit you when it comes to maintaining clean and healthy air in your home.

Here are three reasons why having a filter replacement indicator is essential:

  1. Timely replacement: With a filter replacement indicator, you’ll never have to guess when it’s time to change your air purifier’s filter. It will notify you when the filter needs to be replaced, ensuring that you always have optimal air purification.

  2. Prolonged filter lifespan: By replacing the filter at the right time, you can extend its lifespan. The indicator prevents you from replacing the filter too early or too late, saving you money in the long run.

  3. Improved air quality: Regularly changing the filter as indicated by the indicator guarantees that your air purifier is working efficiently. This means you’ll continuously enjoy clean air, free from pollutants and allergens.

Having a filter replacement indicator is crucial for maintaining a healthy and clean indoor environment. But what happens when the air quality starts to decline? Let’s explore that in the next section.

Decreased Air Quality

When your indoor air quality decreases, it’s important to identify the potential causes and take necessary actions to address them.

Advertisement

Poor air quality can have a significant impact on your overall well-being, leading to increased respiratory issues and other health problems.

There are several factors that can contribute to decreased air quality, such as inadequate ventilation, the presence of indoor pollutants, and a build-up of allergens and dust.

Inadequate ventilation can trap pollutants inside your home, while indoor pollutants, such as volatile organic compounds (VOCs) and pet dander, can worsen air quality.

Additionally, a build-up of allergens and dust can trigger allergies and respiratory problems.

To improve air quality, it is important to address these potential causes by ensuring proper ventilation, regularly cleaning and maintaining your living space, and using air purifiers or filters to remove contaminants from the air.

Advertisement

Increased Allergy Symptoms

During my research on the impact of decreased air quality, I discovered that one of the consequences is an increase in allergy symptoms. This is particularly evident during seasonal changes when there is an influx of allergens in the air.

To help you understand the severity of this issue, let me provide you with three important points:

  1. Increased air pollution: Seasonal changes can lead to an increase in air pollution due to factors such as pollen, dust, and mold spores. These pollutants can trigger allergic reactions and worsen existing symptoms.

  2. Impact of seasonal changes: When seasons change, different plants release their pollen, resulting in a higher concentration of allergens in the air. This can cause a spike in allergy symptoms, including sneezing, itchy eyes, and congestion.

  3. Need for air purification: Given the increased air pollution during seasonal changes, it becomes crucial to have an efficient air purifier with a HEPA filter. Regularly replacing the HEPA filter ensures that allergens are effectively captured, reducing allergy symptoms and improving indoor air quality.

Understanding the link between increased air pollution and the impact of seasonal changes on allergy symptoms emphasizes the importance of maintaining a clean and efficient air purifier.

How Long Does a HEPA Filter Typically Last

You should regularly replace the HEPA filter in your air purifier to ensure optimal performance. The lifespan of a HEPA filter can vary depending on several factors, such as the quality of the filter, the air quality in your area, and the frequency of use.

On average, a HEPA filter can last anywhere from six months to two years. However, it is important to note that these numbers are just estimates, and the actual lifespan may differ. To determine when to replace your HEPA filter, it is recommended to refer to the manufacturer’s instructions or guidelines.

Advertisement

Additionally, some air purifiers come with filter replacement indicators that can help you track the usage and indicate when it’s time for a new filter. Regularly replacing your HEPA filter will ensure that your air purifier continues to effectively remove allergens, pollutants, and other airborne particles from your indoor air.

Frequency of Filter Replacements for Different Air Purifier Brands

To ensure optimal performance, it’s important to check the manufacturer’s guidelines for different air purifier brands regarding how frequently you should replace the filters.

Here are three important factors that can affect the efficiency of air purifier filters:

  1. Filter Type: Different air purifier brands use various types of filters, such as HEPA (High-Efficiency Particulate Air) filters, activated carbon filters, or pre-filters. Each filter type has its own lifespan and efficiency level, so it’s crucial to follow the manufacturer’s recommendations for replacement.

  2. Air Pollution Levels: The level of air pollution in your environment greatly impacts the performance of the filters. High levels of pollutants, such as dust, pollen, pet dander, or smoke, can quickly clog the filters and reduce their efficiency. Regularly replacing the filters is necessary in areas with high pollution levels.

  3. Usage and Maintenance: The frequency of filter replacement also depends on how often the air purifier is used and how well it is maintained. If the purifier runs continuously or in heavily polluted environments, the filters may need to be replaced more frequently.

Considering these factors and the impact of air pollution on filter performance, it’s crucial to adhere to the manufacturer’s guidelines for replacement to maintain optimal efficiency and ensure clean air in your surroundings.

The Role of Air Quality in Determining Filter Replacement Frequency

By considering the level of air pollution in your environment, you can determine how frequently the filters in your air purifier need to be replaced.

Advertisement

Air pollution can have detrimental effects on our health, so it is crucial to maintain the efficiency of air purifier filters.

The filter efficiency measurement is a key factor in determining when to replace the filters. The efficiency of a filter is usually represented by its Minimum Efficiency Reporting Value (MERV) rating. The higher the MERV rating, the more efficient the filter is in capturing small particles. However, as the filter captures more particles, it becomes clogged and less effective over time.

Regularly monitoring the air pollution level and the filter efficiency measurement can help you determine when it is time to replace the filters in your air purifier and ensure that you are breathing clean and healthy air.

How to Check if Your HEPA Filter Needs to Be Replaced

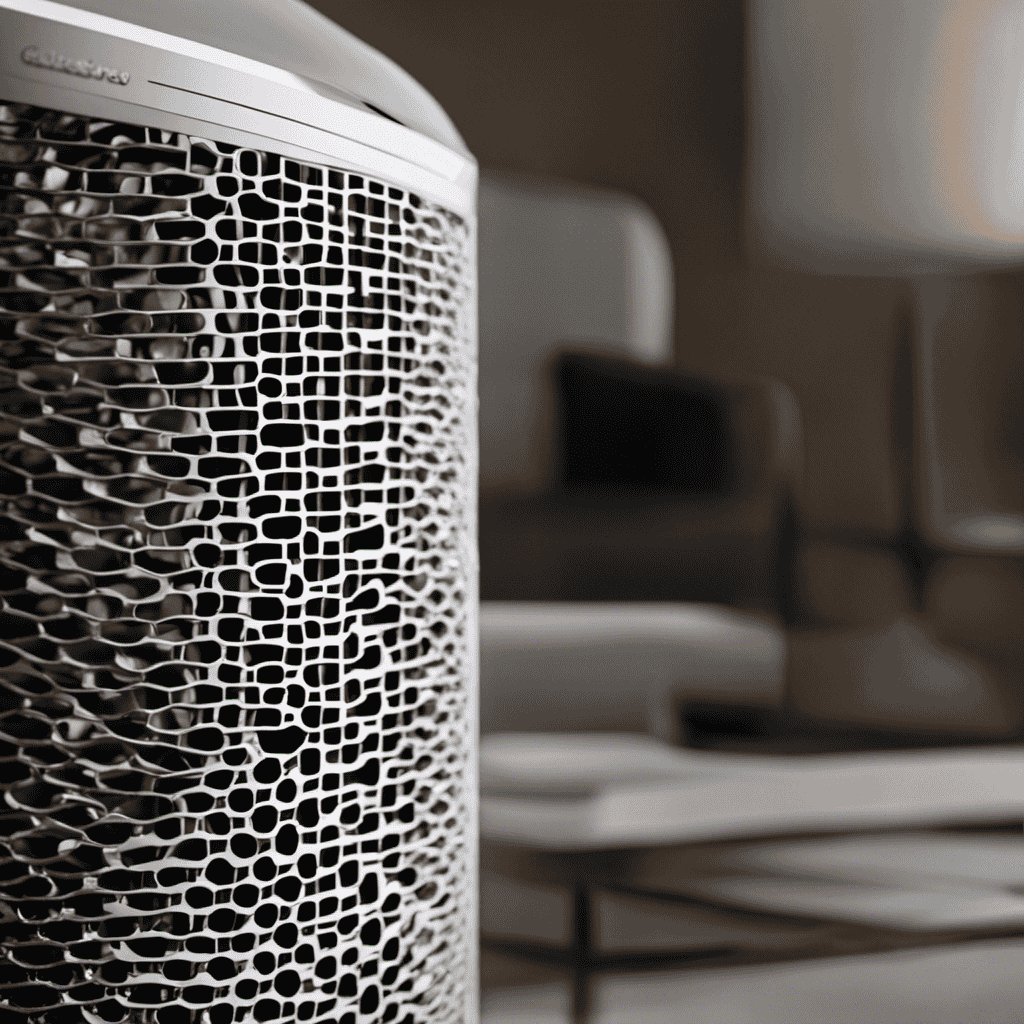
To determine if your HEPA filter needs replacement, check for any signs of discoloration or dirt accumulation on the filter surface. Here are three key indicators to look out for:

  1. Discoloration: If you notice any dark or brownish spots on your HEPA filter, it is likely a sign of dirt buildup. This can restrict airflow and reduce the filter’s effectiveness in capturing airborne particles.

  2. Reduced Airflow: A dirty HEPA filter can cause a decrease in the airflow emitted from your air purifier. If you notice a significant decrease in the air circulation, it may be time to replace the filter.

  3. Odor or Allergies: If you start experiencing unpleasant odors or allergy symptoms even with the air purifier running, it could be a sign that your HEPA filter is no longer effectively removing pollutants from the air.

Regular maintenance and cleaning can help prolong the lifespan of your HEPA filter. Vacuuming the surface gently or rinsing it with water can help remove dirt and debris, but eventually, replacement will be necessary to maintain optimal performance.

Advertisement

Tips for Extending the Lifespan of Your HEPA Filter

If you want to maximize the lifespan of your HEPA filter, remember to regularly clean and maintain it. Proper maintenance is crucial for extending the filter’s lifespan and maximizing its performance.

First, make sure to vacuum the outer surface of the filter regularly to remove any large particles or debris. This will prevent the filter from becoming clogged and reduce strain on the motor.

Additionally, consider using a soft brush or compressed air to clean the filter’s pleats and ridges. This will help remove any trapped dust or allergens, allowing for better airflow and improved filtration efficiency.

Lastly, be sure to replace the filter according to the manufacturer’s recommendations to ensure optimal performance.

The Impact of Indoor and Outdoor Pollution on Filter Longevity

In my previous discussion about extending the lifespan of HEPA filters, I mentioned some tips to keep them running efficiently for longer. However, it’s important to understand the impact of both indoor and outdoor pollution on the overall efficiency of these filters. Here are three key points to consider:

Advertisement
  1. Effect of air pollution on filter efficiency: HEPA filters are designed to capture small particles, but prolonged exposure to high levels of air pollution can clog the filter faster. Pollutants like dust, pollen, and smoke can significantly reduce its effectiveness over time.

  2. Impact of outdoor pollution on indoor air quality: Outdoor air pollution can easily penetrate indoor spaces, putting additional strain on HEPA filters. If you live in an area with high pollution levels, your filter may need to be replaced more frequently to maintain good indoor air quality.

  3. Regular monitoring and maintenance: To ensure optimal filter efficiency, it’s crucial to regularly monitor the air quality and check the filter for any signs of clogging. This can help you determine when it’s time to replace the filter and maintain a healthy indoor environment.

Recommended Maintenance Schedule for HEPA Filters

Make sure you regularly clean and vacuum the area around your HEPA filter to prevent dust and debris buildup. This is crucial for maintaining the efficiency and longevity of your air purifier. In addition to regular cleaning, it is important to understand the recommended maintenance schedule for HEPA filters. The lifespan of a HEPA filter can vary depending on usage and environmental factors. To help you gauge when to replace your filter, refer to the table below:

Filter Type Recommended Lifespan
Standard 6-12 months
Enhanced 9-18 months
Premium 12-24 months

It is important to note that these are general guidelines, and actual filter lifespan may vary. Factors such as pollutant levels, air quality, and usage patterns can all impact the filter’s lifespan. Keeping track of the filter’s usage and regularly checking its condition will help you determine when it needs replacement. By following a regular maintenance schedule, you can ensure that your air purifier continues to provide clean and healthy air for you and your family.

With regular maintenance and timely filter replacements, you can optimize the performance of your air purifier and ensure its longevity. However, it’s important to consider the cost implications of replacing HEPA filters. In the next section, we will explore the various factors that influence the cost of replacing HEPA filters and provide some tips to minimize expenses while maintaining the effectiveness of your air purifier.

The Cost Implications of Replacing HEPA Filters

To minimize expenses while maintaining the effectiveness of your device, consider factors that influence the cost of replacing HEPA filters. Here are three key aspects to keep in mind:

  1. Filter Lifespan: Understanding the lifespan of your HEPA filter is crucial. Different models have varying lifespans, typically ranging from 6 months to 2 years. Regularly checking the manufacturer’s recommendations will help you plan for replacements and avoid premature filter changes.

  2. Filter Type: The cost of replacing HEPA filters can vary depending on the specific type required for your air purifier. Some filters, such as carbon-activated or washable filters, may be more cost-effective in the long run compared to standard HEPA filters.

  3. DIY Filter Cleaning: Consider the option of cleaning and reusing your HEPA filter. This can be a cost-saving alternative, especially if your filter is washable. However, it is important to follow proper cleaning instructions to maintain the filter’s efficiency.

Differentiating Between HEPA Filter Cleaning and Replacement

When deciding between HEPA filter cleaning and replacement, you should consider the effectiveness and cost-effectiveness of each option.

Advertisement

HEPA filter maintenance is crucial to ensure the optimal performance of your air purifier. Cleaning the filter involves removing the accumulated dirt and debris from the surface. This can be done by gently vacuuming or washing the filter with water and mild detergent.

However, it is important to note that cleaning may not completely restore the filter’s efficiency, especially if it is heavily soiled or damaged. In such cases, replacement is recommended.

While cleaning can be a more cost-effective option in the short term, regular replacement ensures that your air purifier continues to provide clean and healthy air. Remember to follow the manufacturer’s guidelines for proper maintenance and replacement intervals to maximize the lifespan of your HEPA filter.

The Dangers of Using a Clogged or Expired HEPA Filter

As an air quality expert, I can’t stress enough the importance of regularly replacing your HEPA filter in your air purifier.

Using a clogged or expired filter can pose serious health risks. A clogged filter restricts airflow, reducing the purifier’s effectiveness and allowing harmful particles to linger in the air.

Advertisement

This can potentially lead to respiratory issues and allergies.

Health Risks of Clogged Filter

The health risks of a clogged filter can include decreased air quality and increased exposure to pollutants. Here are three key reasons why maintaining a clean filter is essential for your respiratory health:

  1. Reduced air circulation: A clogged filter restricts the flow of air, preventing it from effectively circulating throughout the room. This can lead to stagnant air and a buildup of harmful particles, such as dust, pet dander, and allergens.

  2. Increased allergen exposure: Without a properly functioning filter, allergens and other airborne pollutants can accumulate in your living space. This can trigger allergies, asthma attacks, and other respiratory issues, especially for individuals with pre-existing conditions.

  3. Decreased filter efficiency: Over time, a clogged filter loses its ability to effectively capture and trap pollutants. This means that even if you have an air purifier, it won’t be able to efficiently clean the air. Regularly replacing or cleaning your filter is crucial to maintain optimal air quality and protect your respiratory health.

To ensure the longevity and effectiveness of your filter, follow these filter maintenance tips:

  • Check the manufacturer’s recommendations for filter replacement frequency.
  • Vacuum or clean the filter regularly, depending on the type.
  • Keep an eye out for signs of a clogged filter, such as reduced airflow or a musty smell.

Importance of Filter Replacement

As I mentioned earlier, clogged filters can pose serious health risks. That’s why it’s crucial to understand the importance of filter replacement in air purifiers. Regularly replacing the filter ensures optimal performance and clean air quality in your indoor environment.

To better understand filter efficiency and the benefits of clean air, let’s take a look at the following table:

Filter Type Efficiency Rating (%) Benefits
HEPA 99.97 – Removes allergens, dust, and pet dander from the air.
Carbon Varies – Eliminates odors and harmful gases.
Pre-filter Varies – Extends the lifespan of the main filter.
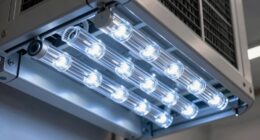
UV-C Varies – Kills bacteria and viruses.

Is Changing the Air Purifier Filter the Same as Replacing the Hepa Filter?

Changing the air purifier filter is not the same as replacing the HEPA filter. The air purifier filter change frequency depends on the type of filter used, while the HEPA filter specifically targets small particles and allergens. It’s important to follow the manufacturer’s guidelines for both to maintain air quality.

Advertisement

Other Factors to Consider When Determining Filter Replacement Frequency

When determining the frequency for replacing the HEPA filter in an air purifier, there are other factors to consider. Here are three important factors to keep in mind:

  1. Air Quality: The air quality of your environment plays a significant role in filter replacement frequency. If you live in a highly polluted area or have pets or smokers at home, the filter may need to be replaced more frequently.

  2. Usage: The frequency of filter replacement also depends on how often you use the air purifier. If it runs continuously or for extended periods, the filter will accumulate more pollutants and require more frequent replacements.

  3. Filter Quality: Different filter brands have varying lifespans. It is important to choose a recommended filter brand that offers high-quality filters. While they may cost more initially, they will last longer and provide better air purification, ultimately saving you money on filter replacement costs in the long run.

Considering these factors will help you determine the optimal frequency for replacing the HEPA filter in your air purifier.

Frequently Asked Questions

Can a HEPA Filter Be Cleaned and Reused Instead of Being Replaced?

Yes, a HEPA filter can be cleaned and reused, but it is recommended to replace it instead. Cleaning methods vary, but the benefits of using a new HEPA filter include improved air quality and better filtration efficiency.

Is It Possible to Extend the Lifespan of a HEPA Filter Without Compromising Its Effectiveness?

To maintain a HEPA filter’s effectiveness and extend its lifespan, it’s important to follow manufacturer guidelines for regular replacement. Common misconceptions about HEPA filter lifespan include trying to clean or reuse them, which can compromise their effectiveness.

Are There Any Health Risks Associated With Using a Clogged or Expired HEPA Filter?

Using a clogged or expired HEPA filter in an air purifier can pose health risks. Regular filter replacement is important to maintain effectiveness and prevent the buildup of pollutants, ensuring clean and healthy air.

Advertisement

Besides Air Quality, What Other Factors Should Be Considered When Determining the Frequency of HEPA Filter Replacements?

When determining the frequency of HEPA filter replacements, cost considerations and environmental impact should also be taken into account. It’s important to balance clean air with the financial and ecological consequences of frequent filter changes.

How Much Does It Typically Cost to Replace a HEPA Filter in an Air Purifier?

Replacing a HEPA filter in an air purifier typically costs around $20 to $50, depending on the brand and model. However, there are alternative options available, such as washable filters, which can save on long-term costs.

Conclusion

In conclusion, it’s crucial to regularly replace the HEPA filter in your air purifier. This will help maintain its effectiveness in removing harmful particles from the air. Studies have shown that a clogged or expired HEPA filter can reduce its efficiency by up to 50%. This statistic is alarming because it highlights the potential health risks associated with using a compromised filter.

By staying proactive and replacing your HEPA filter as recommended by the manufacturer, you can ensure that your air purifier continues to provide clean and healthy air for you and your family.

Advertisement

In the dynamic world of air purifiers and clean air advocacy, Aire stands out as a beacon of knowledge and passion. As the Editor in Chief of Aero Guardians, Aire has been instrumental in shaping the platform's voice and direction, ensuring that every piece of content resonates with clarity, authority, and authenticity.

Continue Reading
Advertisement

Air Purifier Guides

How to Clean Hathaspace Air Purifier

Published

on

By

An image showcasing a pair of gloved hands carefully removing the front panel of a Hathaspace Air Purifier, revealing a filter covered in dust

I have the definitive guide on how to clean your Hathaspace Air Purifier. This detailed tutorial will ensure your purifier appears and functions as good as new.

We’ll dive into the nitty-gritty of disassembling, cleaning, and maintaining all the important components, from the filters to the exterior.

With the right supplies and a little elbow grease, you’ll have your purifier running at optimum efficiency in no time.

Let’s get started!

Key Takeaways

  • Regular cleaning and maintenance of the Hathaspace Air Purifier is essential for optimal performance and longevity.
  • The components of the purifier, including the pre-filter, activated carbon filter, True HEPA filter, and UV-C light, all play important roles in capturing and removing pollutants from the air.
  • Proper cleaning supplies and techniques should be used to clean the exterior of the purifier, including mild detergents, soft cloths or sponges, and disinfectant options like isopropyl alcohol or hydrogen peroxide.
  • Cleaning the fan and vents, reassembling the purifier correctly, and troubleshooting any issues are crucial steps in ensuring the purifier continues to provide clean and fresh air.

Understanding the Components of the Hathaspace Air Purifier

The Hathaspace air purifier has various components that work together to effectively clean the air in your home. Understanding these components and their functions is crucial for proper cleaning techniques and best cleaning practices.

The main components of the Hathaspace air purifier include the pre-filter, activated carbon filter, True HEPA filter, and the UV-C light. The pre-filter captures large particles like dust and pet hair, while the activated carbon filter removes odors and harmful gases. The True HEPA filter traps microscopic particles such as pollen, mold spores, and pet dander. Lastly, the UV-C light kills bacteria and viruses.

Advertisement

To maintain the optimal performance of your air purifier, it is essential to clean and replace these components regularly. With this understanding, let’s move on to gathering the necessary cleaning supplies.

Gathering the Necessary Cleaning Supplies

To properly clean your Hathaspace air purifier, you’ll need a few essential supplies. First, gather a soft, lint-free cloth, preferably microfiber, to wipe down the exterior of the purifier. This will remove any dust or dirt that may have accumulated.

Next, you’ll need a small brush, such as a soft-bristled toothbrush, to clean the air intake vents and grille. This will ensure that the purifier can effectively draw in air and remove pollutants. Additionally, a mild, non-abrasive cleaner can be used to remove any stubborn stains or marks. Remember to avoid using harsh chemicals or abrasive materials as they can damage the purifier.

With these cleaning supplies and techniques, you can keep your Hathaspace air purifier in optimal condition and prolong its lifespan.

Now that you have gathered the necessary cleaning supplies, it’s time to learn how to safely power off the air purifier and begin the cleaning process.

Advertisement

Step-by-Step Guide to Safely Powering Off the Air Purifier

Now that you’ve gathered the necessary cleaning supplies, it’s important to know how to safely power off your air purifier before starting the cleaning process. Here’s a step-by-step guide to help you with this crucial step:

  1. Locate the power button on your air purifier and press it firmly. This will ensure that the device is completely turned off and disconnected from any power source.

  2. Unplug the air purifier from the wall outlet. This step is essential to prevent any accidental electric shocks while handling the device.

  3. Store the power cord in a safe and dry place. Proper storage of the cord will prevent any damage and ensure its longevity.

By following these steps, you can safely power off your air purifier and avoid any potential hazards.

Now, let’s move on to the next section, which covers removing and cleaning the pre-filter.

Removing and Cleaning the Pre-Filter

Before starting the cleaning process, make sure you’ve removed and cleaned the pre-filter of your Hathaspace air purifier. The pre-filter is responsible for capturing larger particles like dust, pet hair, and lint. It is important to clean the pre-filter regularly to maintain the efficiency of your air purifier.

To clean the pre-filter, gently remove it from the unit and use a vacuum cleaner or wash it with mild soap and water. Allow the pre-filter to dry completely before reattaching it to the air purifier. For proper storage, make sure the pre-filter is completely dry and stored in a clean, dry place.

Advertisement

If you are experiencing any issues with your air purifier, such as decreased performance or strange noises, it is recommended to contact the Hathaspace customer support team for troubleshooting tips.

Cleaning the Activated Carbon Filter

When it comes to maintaining the performance of your air purifier, proper maintenance techniques are crucial.

Regularly cleaning the activated carbon filter is an essential part of this maintenance routine.

Proper Maintenance Techniques

To properly maintain your Hathaspace air purifier, make sure to regularly clean the filters and wipe down the exterior with a damp cloth. This will help ensure optimal performance and prolong the lifespan of your unit.

When cleaning the filters, follow these proper cleaning techniques:

Advertisement
  • Gently remove the filters from the air purifier.
  • Use a soft brush or vacuum with a brush attachment to remove dust and debris.
  • Rinse the filters under running water to remove any remaining particles.

It is also important to consider disinfectant options to keep your air purifier clean and free from harmful bacteria. Here are some recommended options:

  • Use a mild detergent or dish soap to clean the filters.
  • Consider using a disinfectant spray specifically formulated for air purifiers.
  • Alternatively, you can create a homemade disinfectant solution using a mixture of water and vinegar.

Frequency of Filter Cleaning

Make sure you regularly check and clean the filters of your air purifier to maintain its efficiency and effectiveness. Cleaning the filters on a regular basis is essential for the proper functioning of your air purifier and to ensure that it continues to provide clean and fresh air. It is recommended to follow a cleaning schedule to ensure that you do not forget to clean the filters. The frequency of filter cleaning depends on various factors such as the level of air pollution in your area, the size of your air purifier, and the type of filters used. Here is a table that outlines the recommended cleaning schedule based on these factors:

Area Air Pollution Level Air Purifier Size Type of Filters Used Cleaning Frequency
Low Small HEPA Every 2-3 months
Medium Medium HEPA + Activated Carbon Every 3-4 months
High Large HEPA + Activated Carbon + Pre-filter Every 4-6 months

Importance of Regular Cleaning

Regular maintenance is crucial for keeping your Hathaspace air purifier in optimal condition. Not only does regular cleaning ensure that the purifier functions efficiently, but it also provides a range of benefits for your indoor air quality.

Here are some important reasons why regular cleaning and maintenance of your air purifier is essential:

  • Improved air quality: Regular cleaning removes accumulated dust, pollen, and other pollutants from the filters, ensuring that the air purifier can effectively trap and remove airborne contaminants.

  • Longer lifespan: By regularly cleaning and maintaining your air purifier, you can prolong its lifespan and prevent any potential issues or malfunctions due to dirt or clogged filters.

  • Cost-effective: Regular maintenance prevents the need for frequent filter replacements, saving you money in the long run.

Properly Maintaining the True HEPA Filter

One way to ensure the proper maintenance of the True HEPA filter is by regularly replacing it according to the manufacturer’s instructions. The frequency of filter replacement may vary depending on factors such as the air quality in your environment and the usage of the air purifier.

It is generally recommended to replace the filter every 6 to 12 months for optimal performance. However, if you notice a decrease in the air purifier’s efficiency or if it starts emitting unpleasant odors, it may be necessary to replace the filter sooner.

Troubleshooting common issues with the True HEPA filter includes checking for any loose connections, ensuring proper installation, and inspecting for any signs of damage or clogging.

Advertisement

By regularly replacing the filter and addressing any issues promptly, you can maintain the effectiveness of your air purifier.

Now, let’s move on to cleaning and disinfecting the air purifier’s exterior.

Cleaning and Disinfecting the Air Purifier’s Exterior

When it comes to cleaning and disinfecting the exterior of your air purifier, it is important to use proper techniques to ensure effective results.

Firstly, make sure to use a mild detergent or soap solution along with a soft cloth or sponge to gently wipe down the surface. Avoid using abrasive cleaners or scrub brushes as they can damage the unit.

Additionally, consider using disinfectant options such as isopropyl alcohol or hydrogen peroxide, which are effective in killing bacteria and viruses on surfaces.

Advertisement

Lastly, it is recommended to clean the exterior of your air purifier at least once every two weeks or more frequently if it is exposed to high levels of dust or pet dander.

Proper Cleaning Techniques

To ensure your Hathaspace air purifier is cleaned properly, make sure you follow these techniques.

Deep cleaning your air purifier is essential to maintain its efficiency and prolong its lifespan. Here are some effective deep cleaning techniques you can use:

  • Use a soft, damp cloth to wipe down the exterior of the air purifier, removing any dust or dirt buildup.

  • For stubborn stains or grime, mix a mild detergent with warm water and gently scrub the affected areas using a soft brush.

  • To clean the filters, carefully remove them from the unit and rinse them under running water. Allow them to air dry completely before reinserting them.

Following these steps will not only help remove stubborn stains and dirt, but also ensure that your Hathaspace air purifier continues to provide clean and fresh air for you and your family.

Disinfectant Options for Exterior

If you’re looking for options to disinfect the exterior of your Hathaspace air purifier, you can consider using mild disinfectant wipes or a mixture of vinegar and water. These are effective disinfecting methods that can help keep your air purifier clean and free from germs and bacteria.

Advertisement

Here are some recommended cleaning products for disinfecting the exterior of your Hathaspace air purifier:

Cleaning Products Description
Mild disinfectant wipes These wipes are specifically designed to kill germs and bacteria while being gentle on the surfaces. They are convenient and easy to use.
Mixture of vinegar and water Vinegar is a natural disinfectant that can effectively kill bacteria and viruses. Dilute vinegar with water in a 1:1 ratio for a safe and effective cleaning solution.

Using these cleaning products will ensure that your air purifier is thoroughly disinfected and free from harmful pathogens. Now, let’s move on to the next section where we will discuss the frequency of cleaning your Hathaspace air purifier.

Frequency of Cleaning

Regularly cleaning your air purifier helps maintain its efficiency and ensures that it continues to provide clean and fresh air. The importance of regular maintenance cannot be overstated, as a dirty air purifier can become less effective over time and may even release pollutants back into the air.

To ensure optimal performance, here are some cleaning techniques and tips:

  • Vacuum the exterior of the air purifier to remove dust and debris.
  • Clean the pre-filter regularly to prevent clogging and maintain airflow.
  • Use a mild detergent and warm water to clean the filters, ensuring they are completely dry before reinserting them.

Cleaning the Fan and Vents for Optimal Performance

Cleaning the fan and vents will help ensure optimal performance of your Hathaspace air purifier. Regular maintenance of these components is essential to keep your air purifier running efficiently.

To clean the fan and vents, follow these steps:

Advertisement
  1. Turn off and unplug the air purifier.
  2. Remove the front panel to access the fan and vents.
  3. Use a soft brush or vacuum cleaner with a brush attachment to gently remove dust and debris from the fan blades and vents.
  4. If necessary, use a damp cloth to wipe the fan blades and vents clean.
  5. Pay special attention to the control panel, cleaning it with a soft cloth and mild detergent if needed.
  6. Finally, maintain the ionizer by wiping it with a dry cloth to remove any accumulated dirt.

Once you have cleaned the fan and vents, you can proceed to reassemble the air purifier and power it on for continued clean and fresh air in your home.

Is there a specific cleaning routine for the Hathaspace Air Purifier?

Yes, there is a specific cleaning frequency for air purifiers, including the Hathaspace Air Purifier. It is recommended to clean the filters every 6-12 months, depending on usage. Additionally, wiping down the exterior casing periodically with a damp cloth can help maintain its effectiveness.

Reassembling and Powering On the Hathaspace Air Purifier

To reassemble and power on your Hathaspace air purifier, carefully follow these steps:

  • Ensure all parts are clean and dry before reassembling.
  • Insert the HEPA filter into the designated slot and secure it in place.
  • Attach the pre-filter by aligning the tabs and pressing firmly until it clicks into position.

Troubleshooting common issues:

  • If the air purifier does not power on, check if the power cord is securely plugged into a working outlet.
  • If the air purifier is making unusual noises, inspect the fan and vents for any obstructions or debris.
  • If the air purifier is not effectively cleaning the air, make sure the filters are properly installed and replace them if necessary.

Following these reassembling tips and troubleshooting common issues will ensure that your Hathaspace air purifier continues to provide you with clean and fresh air.

Frequently Asked Questions

Can I Use Any Type of Cleaning Solution on the Exterior of the Hathaspace Air Purifier?

Yes, you can use mild soap and water to clean the exterior of the Hathaspace air purifier. Avoid using harsh chemicals or abrasive cleaners as they may damage the surface. Regular cleaning helps maintain performance.

How Often Should I Clean the Fan and Vents for Optimal Performance?

How often should I clean the fan and vents for optimal performance? To maintain optimal performance of the Hathaspace Air Purifier, it is important to clean the fan and vents regularly. But how exactly do I clean them properly?

Can I Clean the True HEPA Filter With Water?

Yes, you can clean the true HEPA filter with water. However, it is recommended to use alternative cleaning methods, such as vacuuming or gently brushing off the dust. This helps maintain the filter’s effectiveness and prolong its lifespan.

Advertisement

Is It Necessary to Clean the Pre-Filter Before Cleaning the Activated Carbon Filter?

It is necessary to clean the pre-filter before cleaning the activated carbon filter. This is an important step in the cleaning process to ensure optimal performance and longevity of the air purifier. Maintenance tips are provided in the user manual.

What Should I Do if I Accidentally Damage a Component While Cleaning the Hathaspace Air Purifier?

If I accidentally damage a component while cleaning the Hathaspace Air Purifier, I should immediately stop using it and contact customer support for assistance. Attempting to fix it myself may further worsen the damage.

Conclusion

In conclusion, cleaning the Hathaspace Air Purifier is a straightforward process that requires attention to detail and the right tools. By following the step-by-step guide provided, you can ensure that each component of the purifier is properly cleaned and maintained.

From removing and cleaning the filters to disinfecting the exterior and cleaning the fan and vents, every aspect is covered. By regularly cleaning your air purifier, you can enjoy optimal performance and breathe in clean, fresh air.

Advertisement

Continue Reading

Air Purifier Guides

How to Clean Filter on Dyson Air Purifier

Published

on

By

An image showcasing the step-by-step process of cleaning the filter on a Dyson Air Purifier

Have you ever wondered how to maintain your Dyson Air Purifier for optimal performance? Look no further! This article will walk you through the process of cleaning the filter on your Dyson Air Purifier step by step.

With just a few simple materials and a little bit of time, you can ensure that your air purifier continues to remove those pesky allergens and pollutants from your home.

So, let’s get started and make sure your air is as clean as can be!

Key Takeaways

  • Regular cleaning of the Dyson Air Purifier filter improves air quality in your home.
  • Cleaning the filter ensures optimal performance and efficiency of the air purifier.
  • Accumulated particles on the filter reduce its effectiveness, so regular cleaning is necessary.
  • It is recommended to tap and rinse the filter with cold water and allow it to air dry completely before reinserting.

Understanding the Importance of Cleaning Your Dyson Air Purifier Filter

To understand the importance of cleaning your Dyson Air Purifier filter, you should know that regular maintenance can improve the air quality in your home.

Performing regular maintenance on your air purifier is crucial to ensure its optimal performance and efficiency.

The filter plays a critical role in capturing and trapping airborne particles, such as dust, pollen, pet dander, and even microscopic allergens.

Advertisement

Over time, these particles accumulate on the filter, reducing its effectiveness and potentially releasing them back into the air.

By regularly cleaning your filter, you can prevent this buildup and ensure that your air purifier continues to provide clean and fresh air for you and your family.

Proper maintenance not only extends the lifespan of your air purifier but also maximizes its performance, providing you with the benefits of a clean filter.

Now, let’s move on to gathering the necessary materials for cleaning.

Gathering the Necessary Materials for Cleaning

When it comes to cleaning your Dyson air purifier, there are a few key points to keep in mind. First and foremost, you will need a soft, lint-free cloth, a small brush, and a mild detergent. The soft cloth is essential for gently wiping down the exterior of the air purifier. The brush can be used to remove any dust or debris from the filter.

Advertisement

As for the proper cleaning technique, it is important to turn off and unplug the air purifier before beginning the cleaning process to ensure safety.

Required Cleaning Tools

You’ll need a soft cloth and a small brush to clean the filter on your Dyson air purifier. Cleaning the filter is an essential part of maintaining your air purifier’s performance and prolonging its lifespan. Here are some cleaning techniques and maintenance tips to keep in mind:

Tools Description
Soft Cloth Use a soft cloth to gently wipe away any dust or debris on the filter. Avoid using abrasive materials that could damage the filter.
Small Brush A small brush, such as a toothbrush or a soft-bristle brush, can be used to remove stubborn dirt or particles from the filter. Be careful not to apply too much pressure to avoid damaging the filter.
Compressed Air For a deeper clean, you can also use compressed air to blow away any trapped dust or debris from the filter. Make sure to follow the manufacturer’s instructions when using compressed air.

Proper Cleaning Technique

Using a soft cloth and a small brush, I gently wipe away any dust or debris from the surface of the device. This is an essential step in filter maintenance to ensure proper functioning of the Dyson air purifier.

When it comes to cleaning the filter, there are a few techniques that should be followed for optimal results. First, remove the filter from the unit according to the manufacturer’s instructions. Then, gently tap the filter to remove any loose particles.

Next, rinse the filter under cold water to remove any remaining dirt. Avoid using soap or cleaning agents as they may damage the filter. Finally, allow the filter to air dry completely before reinserting it into the device.

Advertisement

Following these filter cleaning techniques will keep your Dyson air purifier operating at its best.

Step-By-Step Guide to Removing the Filter From Your Dyson Air Purifier

First, make sure the Dyson air purifier is turned off and unplugged before attempting to remove the filter. Proper filter care is essential for maintaining the efficiency and longevity of your Dyson air purifier.

Regular filter cleaning offers numerous benefits, such as improving air quality, reducing allergens, and prolonging the lifespan of the unit.

To begin removing the filter, locate the filter cover on the back or side of the purifier. Gently press the release button or slide the cover to access the filter compartment. Carefully lift the filter out of its housing, ensuring not to damage the delicate pleated material.

Once removed, it’s time to prepare the filter for cleaning, which involves gently tapping it to remove any loose debris and dust. This will ensure optimal performance and efficiency when the filter is reinstalled.

Advertisement

Preparing the Filter for Cleaning

Before beginning the cleaning process, it’s important to ensure that the Dyson air purifier is turned off and unplugged. This is crucial for safety reasons and to prevent any damage to the purifier. Now, let’s move on to preparing the filter for cleaning. Understanding the benefits of cleaning the filter regularly is essential. It helps maintain the efficiency of the air purifier and ensures that it continues to provide clean and fresh air. However, there are common mistakes to avoid when cleaning the filter. These include using harsh chemicals, scrubbing too vigorously, or not allowing the filter to dry completely before reinstalling it. To help you easily grasp the dos and don’ts, here’s a table summarizing the proper cleaning methods for your Dyson air purifier filter:

DOs DON’Ts
Use mild soap and water Use harsh chemicals
Gently rinse the filter Scrub vigorously
Allow the filter to dry completely Reinstall the filter when wet
Follow the manufacturer’s instructions Use the purifier without a filter

Cleaning the Filter Manually

Proper filter maintenance is crucial for ensuring optimal performance and longevity of your air purifier. Regular cleaning of the filter is recommended to remove accumulated dust, allergens, and other particles that can hinder its efficiency.

The frequency of cleaning will vary depending on factors such as air quality, usage, and the specific model of your air purifier.

Proper Filter Maintenance

To keep your Dyson air purifier running efficiently, make sure you regularly clean the filter. Proper filter maintenance is essential for maintaining the performance and longevity of your device.

When it comes to filter replacement, it’s important to be aware of the filter’s lifespan. Dyson recommends replacing the filter every 6 to 12 months, depending on usage and air quality. This ensures that the filter continues to effectively capture pollutants and allergens from the air.

Advertisement

Regularly cleaning the filter can help extend its lifespan and maintain optimal performance. To clean the filter, gently tap it to remove any loose debris, then rinse it with cold water. Allow the filter to completely dry before reinstalling it into the air purifier.

Cleaning Frequency Recommendations

After understanding the importance of proper filter maintenance, it’s crucial to know how often you should clean your Dyson air purifier filter. Cleaning frequency recommendations depend on various factors, such as the air quality in your environment and the filter lifespan.

To help you visualize the recommended cleaning intervals, here’s a table outlining the general guidelines based on filter type:

Filter Type Cleaning Frequency
HEPA Filter Every 6-12 months
Carbon Filter Every 3-6 months
Pre-Filter Every 1-3 months
Washable Filter Every 3-6 months

These cleaning techniques will ensure that your Dyson air purifier operates at its best capacity and maintains clean air in your space. Remember to always refer to your user manual for specific instructions tailored to your model.

Using Water to Clean the Filter

You can easily clean the filter on your Dyson air purifier by using water. While there are alternative cleaning methods available, using water is a reliable and effective option.

Advertisement

It is important to note, however, that there are potential risks associated with this method. First, ensure that the filter is completely dry before reinstalling it to prevent the growth of mold or mildew. Second, be cautious of the water temperature and pressure used during the cleaning process. Excessive heat or high-pressure water can damage the filter, reducing its effectiveness.

To clean the filter, gently rinse it under running water, making sure to remove any visible dirt or debris. Allow the filter to dry completely before moving on to the next step of drying and reassembling the filter, which I will explain in the following section.

Drying and Reassembling the Filter

Ensure the filter is completely dry before proceeding with the reassembly process to avoid any potential damage. Proper drying techniques are crucial to maintain the efficiency and longevity of your Dyson air purifier.

Here are three steps to effectively dry and reassemble your filter:

  1. Air drying: After washing the filter, gently shake off any excess water and place it in a well-ventilated area. Allow it to air dry completely. Avoid using heat sources like hair dryers, as they can damage the filter’s delicate components.

  2. Time allowance: Depending on the humidity levels, the drying process may take anywhere from 24 to 48 hours. It’s important to be patient and ensure the filter is thoroughly dry before moving on to the next step.

  3. Reassembly: Once the filter is completely dry, carefully insert it back into the air purifier, following the manufacturer’s instructions. Make sure it is securely placed to ensure proper functioning.

Maintaining the Cleanliness of Your Dyson Air Purifier Filter

To keep your Dyson air purifier running efficiently, it’s important to regularly maintain the cleanliness of its filter. Cleaning the filter not only improves the cleaning efficiency of the purifier, but also helps in prolonging its lifespan.

Advertisement

To ensure proper maintenance, follow these steps:

  1. Frequency: Clean the filter every 1-2 months, or more frequently if you live in a highly polluted area.

  2. Preparation: Turn off and unplug the purifier before starting the cleaning process.

  3. Cleaning: Gently tap the filter to remove loose dust, then use a soft brush or vacuum cleaner with a brush attachment to remove remaining dirt.

  4. Rinsing: Rinse the filter under cold water until the water runs clear. Avoid using any cleaning agents.

By regularly cleaning your Dyson air purifier filter, you can maximize its cleaning efficiency and prolong its lifespan.

Now, let’s discuss some common issues that may arise during the filter cleaning process.

Is the Cleaning Process for Dyson Air Purifier Filters the Same for All Models?

Yes, the cleaning process for Dyson air purifier filters is the same for all models. To clean the filter, turn off the machine and unplug it. Then, carefully remove the filter and wash it with cold water. Let it dry completely before putting it back in. Follow the instructions for your specific model for best results.

Troubleshooting Common Issues With the Filter Cleaning Process

If you encounter any difficulties while cleaning, here are some troubleshooting tips to help you resolve common issues.

Advertisement
  1. Ensure proper disassembly: One common mistake is not fully disassembling the filter before cleaning. Make sure to follow the manufacturer’s instructions to remove all parts of the filter and clean them separately.

  2. Use the right cleaning method: Another common mistake is using the wrong cleaning method. Some filters may require simple rinsing with water, while others may need to be washed with a mild detergent. Check the manufacturer’s recommendations to determine the appropriate cleaning method for your specific filter.

  3. Allow proper drying time: After cleaning, it is important to allow the filter to fully dry before reassembling and reinstalling it. This prevents any moisture from getting trapped and potentially causing mold or mildew growth.

Frequently Asked Questions

How Often Should I Clean the Filter on My Dyson Air Purifier?

I clean the filter on my Dyson air purifier every few months to ensure optimal performance. Regular maintenance is important for the efficient operation of the purifier. Here are some tips for maintaining the filter.

Can I Use Any Type of Cleaning Solution to Clean the Filter?

Yes, you can use cleaning solutions to clean the filter on your Dyson Air Purifier. However, it is important to follow the manufacturer’s guidelines and avoid using any harsh chemicals that may damage the filter. There are also alternative methods available for cleaning the filter.

Is It Necessary to Dry the Filter Completely Before Reassembling It?

Yes, it is necessary to dry the filter completely before reassembling it. Not doing so can result in mold growth and reduced effectiveness of the air purifier. Regularly cleaning the filter is important for optimal performance.

Can I Clean the Filter in the Dishwasher?

Yes, it is possible to clean the filter in the dishwasher. However, it is not recommended by Dyson as it may damage the filter. There are alternative solutions, such as using a soft brush or rinsing it under running water.

What Should I Do if My Dyson Air Purifier Filter Is Damaged or Torn?

If my Dyson air purifier filter is damaged or torn, I should replace it immediately. It’s important to maintain the integrity of the filter to ensure optimal performance and clean air in my home.

Advertisement

Conclusion

In conclusion, cleaning the filter on your Dyson Air Purifier is essential for maintaining its effectiveness and prolonging its lifespan. By following the step-by-step guide provided, you can easily remove, clean, and reassemble the filter, ensuring that your air purifier continues to provide you with clean and fresh air.

Did you know that a dirty filter can reduce the airflow of your air purifier by up to 20%? Imagine the difference in air quality when you have a clean filter in place, allowing for maximum purification.

Keep your Dyson Air Purifier filter clean to enjoy optimal performance and breathe in pure air.

Continue Reading

Air Purifier Guides

How to Clean Blu Air Purifier

Published

on

By

An image showcasing the step-by-step process of cleaning a Blu Air Purifier

I have the ideal solution for maintaining your Blu air purifier in excellent condition! In this article, I will walk you through a detailed process of cleaning your air purifier to ensure it is operating at its peak performance.

We’ll start by assessing its condition and gathering the necessary supplies.

Then, we’ll dive into the step-by-step instructions, from removing and cleaning the pre-filter to tackling the HEPA filter and exterior.

By the end, you’ll have a sparkling clean air purifier that’ll keep your indoor air quality at its finest!

Key Takeaways

  • Visually inspect the exterior for dirt or dust accumulation
  • Check the air filters for signs of clogging or discoloration
  • Unplug the purifier before starting the cleaning process
  • Use mild dish soap or a water and vinegar mixture for cleaning

Assessing the Condition of the Air Purifier

Before starting the cleaning process, make sure you’re assessing the condition of the air purifier. This step is crucial as it allows you to evaluate its performance and determine the level of maintenance it requires.

Start by visually inspecting the exterior of the air purifier for any visible dirt or dust accumulation. Check the air filters for signs of clogging or discoloration, which may indicate the need for replacement. Additionally, listen for any unusual noises or vibrations when the purifier is turned on, as this could indicate a mechanical issue.

Advertisement

By thoroughly assessing the condition of your air purifier, you can identify any potential problems and address them accordingly.

Once the assessment is complete, you can move on to gathering the necessary cleaning supplies.

Gathering the Necessary Cleaning Supplies

When it comes to cleaning, having the right tools and products is essential for achieving optimal results. In order to ensure that you have all the necessary supplies, it is important to create a cleaning essentials checklist.

This checklist should include items such as microfiber cloths, a vacuum cleaner with various attachments, a mop and bucket, and an all-purpose cleaner.

Additionally, proper cleaning product selection is crucial for effectively removing dirt, grime, and bacteria. It is important to choose products that are specifically designed for the surfaces you will be cleaning, as well as those that are safe for both the environment and your health.

Advertisement

Cleaning Essentials Checklist

Make sure you’ve got all the cleaning essentials on hand for your blu air purifier.

When it comes to cleaning techniques, there are a few key steps to follow.

First, make sure to unplug the purifier from the power source before starting the cleaning process.

Then, remove the filters and gently vacuum them to remove any dust or debris.

For a more thorough cleaning, you can use a soft brush to remove stubborn dirt.

Advertisement

When it comes to suitable cleaning products, avoid using harsh chemicals or abrasive cleaners, as they can damage the purifier.

Instead, opt for mild dish soap or a mixture of water and vinegar.

Remember to dry the filters completely before reinserting them into the purifier.

Following these cleaning techniques and using suitable cleaning products will help keep your blu air purifier running efficiently.

Proper Cleaning Product Selection

Using mild dish soap or a mixture of water and vinegar is a great way to ensure you are selecting suitable cleaning products for your blu air purifier. When it comes to cleaning product safety and eco-friendly cleaning options, there are a few important factors to consider:

Advertisement
  1. Chemical-free: Opt for cleaning products that are free of harsh chemicals, such as ammonia or bleach. These chemicals can potentially damage the filters or other components of your air purifier.

  2. Non-toxic: Choose cleaning products that are non-toxic to ensure the safety of both your family and the environment. Look for labels that indicate the product is safe for indoor use and free of harmful ingredients.

  3. Sustainable packaging: Consider products that come in sustainable packaging, such as recyclable or biodegradable materials. This helps reduce waste and minimize the environmental impact.

  4. Certifications: Look for cleaning products that have been certified by reputable organizations, such as Green Seal or EcoLogo. These certifications ensure that the product meets strict environmental and health standards.

Turning off and Unplugging the Air Purifier

Before unplugging the air purifier, make sure to turn it off and let it cool down.

Assessing power consumption and following cleaning safety precautions are essential steps in maintaining your Blu air purifier.

To assess power consumption, refer to the user manual for specific instructions on power usage and energy-saving features. This will help you understand the power requirements and optimize the usage of your air purifier.

Additionally, it is crucial to follow cleaning safety precautions to ensure your safety and the longevity of the device. This may include wearing gloves, using mild detergent or cleaning solutions, and avoiding the use of abrasive materials that could damage the purifier.

By properly assessing power consumption and taking necessary safety precautions, you can ensure the optimal performance and longevity of your air purifier.

Advertisement

Now, let’s move on to the process of removing and cleaning the pre-filter.

Removing and Cleaning the Pre-Filter

To properly maintain the device, it’s important to regularly remove and clean the pre-filter. This step is crucial for ensuring the effectiveness and longevity of your Blu air purifier. Here’s how you can do it:

  1. Turn off and unplug the air purifier to ensure safety during the cleaning process.

  2. Locate the pre-filter compartment, usually at the front or top of the device.

  3. Gently remove the pre-filter from its housing by pulling it out.

  4. Assess the filter efficiency by inspecting it for any visible dirt, dust, or debris. Use a soft brush or vacuum cleaner to remove stubborn stains.

Once you have thoroughly cleaned the pre-filter, it’s time to move on to the next step – cleaning the HEPA filter.

Cleaning the HEPA Filter

Once you’ve finished cleaning the pre-filter, it’s important to also clean the HEPA filter to maintain the effectiveness of your device.

The HEPA filter is responsible for capturing and trapping small particles like dust, pollen, and pet dander.

Advertisement

To properly clean the HEPA filter, start by removing it from the air purifier. Check the manufacturer’s instructions for specific guidance on how to remove the filter.

Once removed, gently tap the filter to dislodge any loose particles. Avoid using water or any cleaning agents on the filter, as this can damage its effectiveness.

Instead, use a soft brush or vacuum cleaner with a brush attachment to remove any remaining debris.

It’s crucial to follow these proper cleaning techniques to ensure your HEPA filter continues to perform at its best.

Cleaning the Activated Carbon Filter

When cleaning the activated carbon filter, be sure to follow the manufacturer’s instructions to ensure proper maintenance. Activated carbon filters are designed to remove odor-causing particles from the air, and it is essential to clean them regularly to maintain their effectiveness.

Advertisement

Here are four important steps to clean the activated carbon filter effectively:

  1. Turn off the air purifier and unplug it from the power source.
  2. Remove the activated carbon filter from the purifier following the manufacturer’s instructions.
  3. Gently vacuum the filter to remove any loose particles and debris.
  4. Rinse the filter with warm water and mild detergent, ensuring all sides are thoroughly cleaned. Allow it to air dry completely before reinstalling it.

Regularly assessing the filter’s effectiveness and cleaning it as needed will ensure that your air purifier continues to efficiently remove odor-causing particles, providing you with clean and fresh air in your home.

Cleaning the Air Purifier’s Exterior

When it comes to cleaning the exterior of an air purifier, it is important to use suitable cleaning products that will effectively remove dirt and dust without damaging the device.

I recommend using mild, non-abrasive cleaners such as a mixture of warm water and mild dish soap or a gentle all-purpose cleaner.

Additionally, it is important to follow the manufacturer’s guidelines for cleaning frequency to ensure optimal performance and longevity of the air purifier.

Suitable Cleaning Products

You can use mild soap and water to clean your Blu Air Purifier. Here are some cleaning product recommendations and proper cleaning techniques to keep your air purifier in top condition:

Advertisement
  1. Mild soap: Use a gentle, non-abrasive soap to avoid damaging the surface of your air purifier.
  2. Warm water: Mix the soap with warm water to create a cleaning solution.
  3. Soft cloth: Use a soft, lint-free cloth to wipe down the exterior of the air purifier. This will help remove any dust or dirt that has accumulated.
  4. Avoid harsh chemicals: Avoid using harsh chemicals or abrasive cleaners as they can damage the air purifier’s sensitive components.

By following these cleaning product recommendations and proper cleaning techniques, you can ensure that your Blu Air Purifier remains clean and efficient.

Now, let’s move on to discussing the recommended cleaning frequency.

Cleaning Frequency Recommendations?

To maintain peak performance, it’s important to regularly clean your air purifier according to the recommended frequency. Cleaning your air purifier not only ensures that it continues to effectively remove pollutants from the air, but also prolongs its lifespan. The recommended cleaning frequency varies depending on the model and usage, but generally, it is advised to clean the air purifier every 3-6 months. However, if you have pets, smoke, or live in a highly polluted area, it may be necessary to clean it more frequently, such as every 1-3 months. Regular cleaning helps to prevent the build-up of dust, dirt, and other particles on the filters, which can hinder the purifier’s performance. By following these cleaning methods and best practices, you can ensure that your air purifier continues to provide you with clean and fresh air.

Frequency General Usage High Pollutant Area Pet Owners Smokers
Every 3-6 months Every 6 months Every 3 months Every 2 months Monthly

Cleaning the Air Intake and Outlet Vents

Make sure you’re regularly cleaning the air intake and outlet vents on your Blu air purifier. Neglecting to clean these vents can lead to reduced performance and increased energy consumption.

Here are some steps to help you clean the vents effectively:

  1. Turn off the air purifier and unplug it from the power source.
  2. Gently remove the front cover to access the fan blades and vents.
  3. Use a soft brush or vacuum cleaner with a brush attachment to remove dust particles from the fan blades. Be careful not to damage the blades.
  4. Wipe down the vents with a damp cloth to remove any accumulated dust or debris.

Regularly cleaning the fan blades and removing dust particles from the air intake and outlet vents will help maintain the efficiency of your Blu air purifier and ensure that it continues to provide clean and fresh air for your space.

Reassembling the Air Purifier

After cleaning the vents, it’s time to reassemble your air purifier. Carefully put the front cover back in place and secure it. Make sure all the components are aligned correctly before tightening the screws.

Advertisement

Here are some reassembling tips to ensure a smooth process:

  1. Refer to the user manual: It provides step-by-step instructions specific to your model.

  2. Take pictures: Before disassembling, take pictures of the components to ensure proper placement during reassembly.

  3. Organize the screws: Use a small container to keep the screws organized and prevent loss.

  4. Check for damaged parts: Inspect all parts for any damage or wear and replace if necessary.

  5. Troubleshooting tips: If your air purifier doesn’t turn on after reassembling, check the power cord, ensure the filters are properly installed, and contact customer support if needed.

Remember to follow these tips for a successful reassembly and optimal performance of your air purifier.

Is Cleaning the Pre Filter Necessary for Properly Cleaning the Blu Air Purifier?

Yes, cleaning the blue air purifier pre filter is necessary for properly cleaning the Blu Air Purifier. The pre filter acts as the first line of defense, trapping larger particles and extending the life of the main filter. Regular cleaning ensures optimal performance and air quality.

Testing and Maintaining the Cleaned Air Purifier

When it comes to maintaining and cleaning an air purifier, there are two key points to consider: the frequency of maintenance and the cleaning techniques to be used.

As a user, it is important to have a clear understanding of how often the air purifier needs to be maintained in order to ensure its optimal performance.

Advertisement

Additionally, knowing the proper cleaning techniques is crucial to effectively remove dirt, dust, and other particles from the purifier’s filters and components.

Frequency of Maintenance

To keep your blu air purifier working efficiently, you should regularly clean the filters and replace them as needed. Maintaining a proper cleaning schedule is crucial for the optimal performance of your air purifier. Here are some maintenance tips to help you keep your blu air purifier in top condition:

  1. Monthly filter cleaning: Clean the pre-filter and HEPA filter with a soft brush or vacuum cleaner. This will remove any dust or debris that may have accumulated on the filters.

  2. Quarterly deep cleaning: Take apart the air purifier and clean each component thoroughly. Use mild soap and water to clean the housing, and wipe down the filters with a damp cloth. Allow everything to dry completely before reassembling.

  3. Annual filter replacement: Depending on your usage and air quality, you may need to replace the filters annually. Refer to the user manual for specific guidance on when to replace the filters.

  4. Regular inspection: Check the air purifier for any signs of damage or wear and tear. Replace any worn-out parts promptly to ensure the continued efficiency of your air purifier.

Cleaning Techniques

Regularly maintaining your blu air purifier is essential for keeping it in top condition and ensuring it provides clean and healthy air. Cleaning techniques and maintenance tips are crucial for the longevity and effectiveness of your air purifier. Here are some techniques and tips to follow:

Cleaning Techniques Maintenance Tips
Regularly replace filters Clean the exterior with a damp cloth
Vacuum the pre-filter Check for any clogs or blockages
Wipe down the sensor Keep the purifier in a clean and dust-free area
Clean the fan blades Follow the manufacturer’s instructions for specific cleaning procedures
Clean the air intake Schedule routine maintenance to avoid build-up of pollutants

Frequently Asked Questions

How Often Should I Clean My Blu Air Purifier?

I clean my Blu Air Purifier every 3 months to maintain its performance. To clean it effectively, I follow these steps: unplug, remove filters, vacuum, wipe with a damp cloth, and let dry before reassembling.

Can I Use Any Cleaning Solution or Do I Need to Use a Specific One?

I can use any cleaning solution, but it’s recommended to use a specific one for the Blu Air Purifier. The recommended cleaning method involves wiping the exterior with a damp cloth and cleaning the filters regularly.

Advertisement

Can I Clean the Filters With Water or Do I Need to Use a Different Method?

I can clean the filters of the Blu Air Purifier with water. However, it is recommended to use a specific cleaning method for best results. Here are the best practices for cleaning the filters.

Is It Safe to Use the Air Purifier While Cleaning?

Yes, it is safe to use the air purifier while cleaning. However, it is important to note that using the purifier during the cleaning process may temporarily impact the air quality.

How Long Does It Take for the Air Purifier to Dry After Cleaning?

After cleaning the Blu Air Purifier, it is important to allow it to dry completely before using it again. The drying time can vary depending on the cleaning method used, but it is recommended to wait at least 24 hours to ensure it is fully dry. It is also important to follow the manufacturer’s instructions for best cleaning practices to avoid any damage to the purifier.

Conclusion

After carefully cleaning every part of the Blu Air Purifier, I can’t help but feel a sense of satisfaction. The process was meticulous, but necessary to ensure the optimal performance of this device.

As I reassemble the purifier, I am filled with anticipation to see the results of my efforts. Will the air feel crisper? Will the allergies subside? These questions linger in my mind, making me eager to test and maintain the freshly cleaned air purifier.

Advertisement

Finally, the moment of truth is here, and I am ready to breathe in the purest air possible.

Continue Reading

Trending