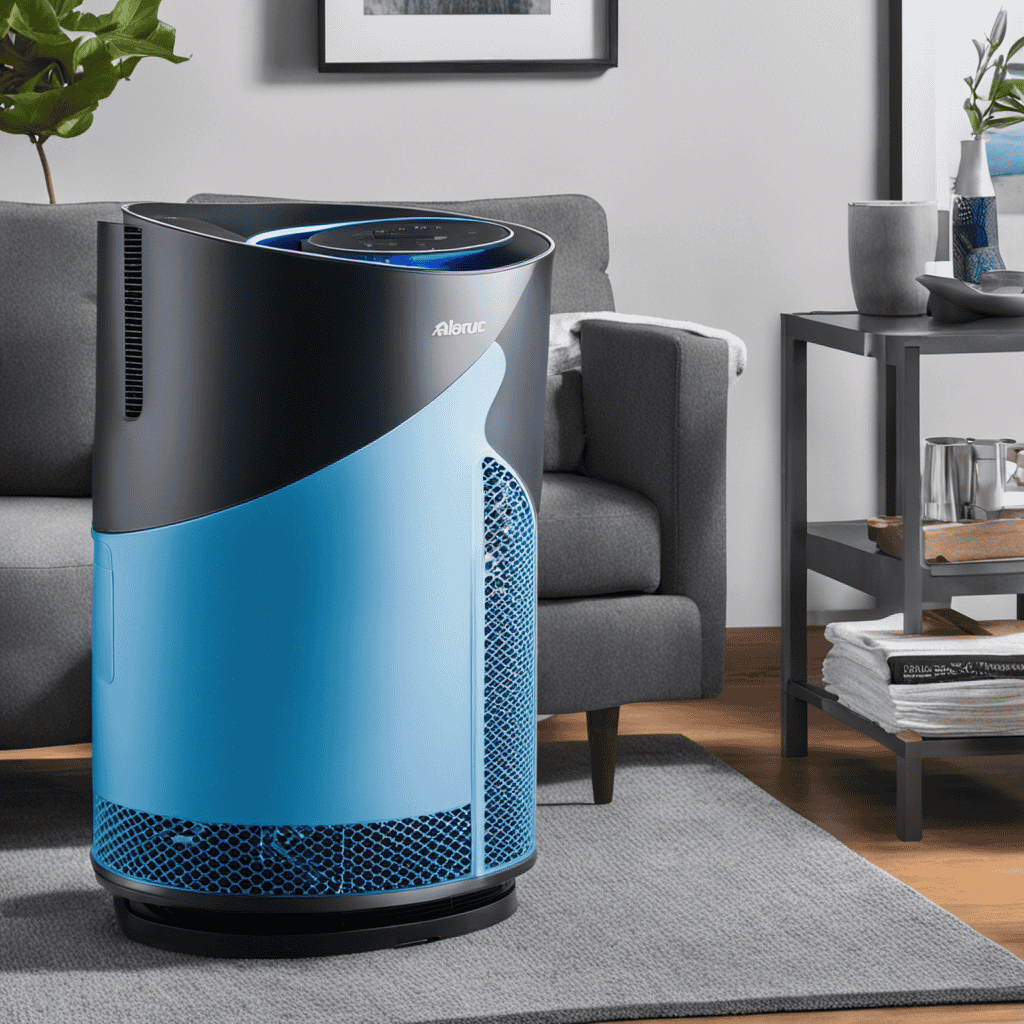
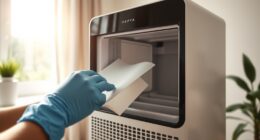
I have always been very particular about having clean air in my home, which is why I decided to purchase a Blue Air Purifier. However, I recently noticed that it wasn’t performing as well as it used to. That’s when I realized it was time to give it a deep cleaning.
In this article, I’ll walk you through the step-by-step process of cleaning your Blue Air Purifier, from gathering the necessary supplies to reassembling it. Trust me, once you’ve followed these instructions, you’ll be breathing in fresh, clean air again in no time.
Key Takeaways
- Regular cleaning and maintenance of the Blue Air Purifier is crucial for optimal function and clean air.
- Cleaning the pre-filter, activated carbon filter, True HEPA filter, and ionizer plates (if applicable) are important steps in maintaining the air purifier.
- Regularly cleaning and replacing filters as recommended by the manufacturer extends the lifespan of the Blue Air Purifier.
- Establishing a regular cleaning routine and following the proper cleaning techniques will ensure the Blue Air Purifier’s optimal performance.
Understanding the Importance of Cleaning Your Blue Air Purifier
Understanding the importance of cleaning your blue air purifier is crucial for maintaining its effectiveness. Regular maintenance plays a significant role in ensuring that your air purifier continues to function optimally and provides you with clean and fresh air.
Cleaning your air purifier not only helps to remove dust, allergens, and other pollutants from the air, but it also enhances its lifespan. To extend the lifespan of your air purifier, here are a few helpful tips.
Firstly, make sure to clean or replace the filters regularly as recommended by the manufacturer.
Secondly, wipe down the exterior of the purifier using a soft cloth to remove any dust buildup.
Lastly, vacuum the surrounding area to prevent any dust or debris from entering the purifier.
Gathering the Necessary Cleaning Supplies
To get started, you’ll need to gather all the supplies you’ll need for the cleaning process.
Cleaning your blue air purifier regularly is essential to maintain its effectiveness and ensure clean air in your home. The frequency of cleaning depends on the manufacturer’s recommendations, but generally, it is recommended to clean the purifier every 3 to 6 months.
Using proper cleaning techniques is crucial to avoid damaging the purifier or reducing its efficiency. For cleaning, you’ll need a soft cloth or sponge, mild dish soap or vinegar, and water. It’s important to read the manufacturer’s instructions for specific guidance on cleaning your blue air purifier.
Now that you have your supplies ready, let’s move on to the next step: turning off and unplugging your blue air purifier.
Turning Off and Unplugging Your Blue Air Purifier
When it comes to turning off and unplugging your Blue Air Purifier, there are a few safety precautions that you should keep in mind.
First, always make sure to turn off the power before unplugging the device to avoid any potential electrical hazards.
Additionally, it is important to handle the plug and cord with care to prevent any damage or fraying.
Turning off your air purifier not only ensures safety but also provides benefits such as saving energy and extending the lifespan of the device.
Safety Precautions When Unplugging
Before unplugging the blue air purifier, make sure you’ve turned off the power switch to avoid any potential risks. Taking safety precautions when dealing with electrical appliances is crucial for preventing electrical hazards and ensuring personal safety. Here are five important things to keep in mind when unplugging your air purifier:
- Always use dry hands and stand on a dry surface.
- Make sure the plug is firmly inserted into the outlet.
- Avoid pulling the cord forcefully to disconnect it.
- Check for any signs of damage on the power cord or plug.
- Ensure that the air purifier is properly grounded to prevent electric shocks.
By following these safety measures, you can minimize the chances of accidents or injuries while unplugging your blue air purifier.
Now, let’s explore the benefits of turning off your device before cleaning or maintenance.
Benefits of Turning off
One of the benefits of powering down is that it helps reduce the risk of electrical accidents. Regular cleaning is essential for maintaining the efficiency of your air purifier and ensuring that it functions optimally. By turning off the device before cleaning, you eliminate the chance of accidentally coming into contact with any electrical components and potentially getting injured. Additionally, regular cleaning removes dust, debris, and allergens that accumulate in the air purifier over time. This not only improves the air quality in your home but also maximizes the efficiency of the device. To further enhance the performance of your air purifier, it is recommended to clean the filters regularly and replace them as needed. By practicing these maintenance routines, you can prolong the lifespan of your air purifier and enjoy cleaner air in your living space.
| Benefit of Regular Cleaning | Maximizing Air Purifier Efficiency |
|---|---|
| Removes dust and allergens | Improves air quality |
| Prolongs lifespan | Enhances device performance |
| Reduces risk of illness | Eliminates odors |
Removing and Cleaning the Pre-Filter
To clean the pre-filter, you’ll need to first remove it from the blue air purifier. The pre-filter plays a crucial role in maintaining the efficiency of your air purifier and ensuring clean air in your surroundings. Here’s a step-by-step guide on how to clean the pre-filter:
- Turn off the air purifier and unplug it from the power source.
- Locate the pre-filter compartment on the front or back of the unit.
- Gently remove the pre-filter by pulling it out of the compartment.
- Use a vacuum cleaner or a soft brush to remove any visible dust or debris from the pre-filter.
- If the pre-filter is heavily soiled, rinse it under running water and allow it to air dry completely before reinstalling it.
Regular pre-filter maintenance is essential for optimal performance. However, if the pre-filter becomes damaged or loses its effectiveness, it’s recommended to replace it with a new one to ensure efficient air purification.
Cleaning the Activated Carbon Filter
Make sure you unplug the device and find the compartment where the activated carbon filter is located. Cleaning the activated carbon filter is an important part of maintaining your Blue air purifier. The activated carbon filter helps to remove odors and harmful gases from the air, so it’s crucial to keep it clean for optimal performance.
To clean the activated carbon filter, follow these simple steps:
- Remove the activated carbon filter from the compartment.
- Gently tap the filter to remove any loose particles.
- Rinse the filter with warm water to remove any trapped debris.
- Allow the filter to air dry completely before placing it back into the compartment.
It’s recommended to clean the activated carbon filter every 3 to 6 months, depending on the level of pollutants in your environment. Regular cleaning will ensure that your Blue air purifier continues to provide you with clean and fresh air.
Cleaning the True HEPA Filter
Cleaning the True HEPA filter is essential for maintaining the optimal performance of your device. It helps to capture particles as small as 0.3 microns and improve the air quality in your environment. To ensure the longevity of your filter and keep your air purifier running efficiently, here are some maintenance tips:
- Regularly vacuum the outer surface of the filter to remove large particles and debris.
- Gently wipe the filter with a soft cloth or brush to remove any remaining dust or dirt.
- Avoid using water or any liquid cleaners on the filter, as it may damage the filtration material.
- Clean the fan blades using a damp cloth to remove any dust buildup that can affect airflow.
- Replace the True HEPA filter as recommended by the manufacturer to maintain optimal performance.
By following these simple maintenance tips, you can prolong the life of your True HEPA filter and ensure that your air purifier continues to provide you with clean and fresh air.
Now, let’s move on to cleaning the ionizer plates (if applicable).
Cleaning the Ionizer Plates (If Applicable
When it comes to maintaining the efficiency of an air purifier, it is important to pay attention to the cleanliness of the ionizer plates, if applicable. Over time, these plates can accumulate residue from the air pollutants they capture, which can hinder their performance.
To remove this residue, it is crucial to follow proper cleaning techniques recommended by the manufacturer, ensuring that the plates are thoroughly cleaned without causing any damage. The frequency of maintenance will vary depending on factors such as the air quality and usage of the purifier, but a general guideline is to clean the ionizer plates every 3-6 months to ensure optimal performance and longevity.
Removing Ionizer Plate Residue
To remove the ionizer plate residue, you’ll need to follow these steps:
- Turn off the blue air purifier and unplug it from the power source.
- Locate the ionizer plates, which are usually located at the back of the air purifier.
- Gently remove the ionizer plates from the unit.
- Prepare a mixture of warm water and mild dish soap.
- Use a soft cloth or sponge to gently clean the ionizer plates, making sure to remove any residue or buildup.
Cleaning the ionizer plates regularly is an important part of preventive maintenance for your blue air purifier. Accumulated residue can affect the efficiency of the purifier and may lead to decreased air quality.
If you notice that the ionizer plates are not effectively removing airborne particles, cleaning them will be one of the troubleshooting tips to try. Make sure to follow these steps carefully to ensure the best results and to keep your blue air purifier functioning optimally.
Proper Cleaning Techniques
For optimal performance, it’s important to regularly maintain and clean your ionizer plates. Proper cleaning techniques not only ensure the longevity of your Blue Air Purifier but also improve its efficiency in removing airborne pollutants. To clean the ionizer plates, follow these steps:
- Turn off the purifier and unplug it from the power source.
- Remove the front grill and locate the ionizer plates.
- Gently remove the plates and place them in a sink filled with warm water and mild detergent.
- Use a soft brush or sponge to scrub away any residue or buildup on the plates.
- Rinse the plates thoroughly with clean water and allow them to air dry completely before reassembling.
During the drying process, it’s crucial to ensure the plates are completely dry to prevent any damage. If you encounter any issues or have troubleshooting tips, refer to the table below for guidance:
| Issue | Troubleshooting Tips |
|---|---|
| No power | Check if the purifier is properly plugged in and the power source is working. |
| Strange odor | Clean the ionizer plates and replace any worn-out filters. |
| Decreased airflow | Clean or replace the filters, and check for any obstructions in the air intake. |
Frequency of Maintenance
Now that we know the proper cleaning techniques for the Blue air purifier, let’s discuss the frequency of maintenance.
Establishing a cleaning schedule is crucial to ensure that your air purifier continues to function optimally. Here are some important points to consider:
-
Check the manufacturer’s guidelines: Refer to the user manual or the manufacturer’s website for specific recommendations on how often you should clean your Blue air purifier.
-
Monitor the air quality: If you live in a highly polluted area or have pets, you may need to clean your purifier more frequently.
-
Observe the filter indicator: Many Blue air purifiers have a filter replacement indicator that will alert you when it’s time to clean or replace the filters.
-
Troubleshoot common maintenance issues: Familiarize yourself with common problems such as strange noises or decreased performance, and troubleshoot accordingly.
-
Regularly inspect the unit: Look for any signs of damage or wear and tear, and address them promptly.
By establishing a cleaning schedule and troubleshooting common maintenance issues, you can ensure that your Blue air purifier functions effectively.
Now, let’s move on to the next section about cleaning the air purifier housing and exterior.
Cleaning the Air Purifier Housing and Exterior
You’ll want to start by unplugging the air purifier and removing the housing cover. Cleaning the air purifier filters is an important maintenance task that ensures optimal performance. To clean the filters, carefully remove them from the purifier and gently tap them to remove any loose debris.
For stubborn stains, you can use a mixture of mild dish soap and warm water to gently scrub the filters. Rinse thoroughly and allow them to air dry completely before inserting them back into the purifier.
When it comes to removing stubborn stains from the housing cover, use a soft cloth dampened with a mild cleaning solution to gently wipe away the stains. Avoid using harsh chemicals or abrasive materials that could damage the surface.
Cleaning the Air Intake Vents
When it comes to cleaning the air intake vents of an air purifier, there are a few key points to keep in mind.
Firstly, dust removal techniques are crucial in order to maintain the efficiency of the purifier. This can be done by using a soft brush or vacuum to gently remove any dust or debris that may have accumulated on the vents.
Secondly, preventing blockage and buildup is essential to ensure proper airflow. Regularly checking and cleaning the vents can help prevent any obstructions that may hinder the purifier’s performance.
Lastly, it is recommended to clean the air intake vents at least once every few months, or more frequently if the purifier is used in a particularly dusty environment. This will help maintain the overall effectiveness and longevity of the air purifier.
Dust Removal Techniques
To effectively remove dust from your blue air purifier, start by wiping down the exterior with a microfiber cloth. This will ensure that the surface is clean and free from any loose particles.
After that, follow these dust removal techniques to keep your air purifier running efficiently:
- Use a soft brush attachment on your vacuum cleaner to gently remove dust from the vents and grilles.
- For stubborn dust, use a can of compressed air to blow it away without causing any damage.
- Clean the filters regularly to prevent dust buildup. Refer to the manufacturer’s instructions for the specific cleaning method.
- Consider using a dust cover or placing your air purifier in a dust-free area to minimize dust accumulation.
- Use a damp cloth to wipe down the interior components, such as the fan blades and sensors, to remove any remaining dust.
Preventing Blockage and Buildup
Regular maintenance is essential for preventing blockage and buildup in your device. Neglecting the maintenance of your air purifier can lead to various blocking issues, affecting its performance and efficiency. To ensure optimal functioning, it is important to follow a regular maintenance schedule. Here is a table summarizing the key maintenance tasks and their recommended frequency:
| Maintenance Task | Frequency |
|---|---|
| Clean the pre-filter | Every 2 weeks |
| Replace the carbon filter | Every 3-6 months |
| Clean the HEPA filter | Every 6-12 months |
Cleaning the pre-filter regularly will prevent dust and larger particles from clogging the air purifier. Replacing the carbon filter as recommended ensures that odors and gases are effectively removed. Cleaning the HEPA filter periodically removes trapped allergens and pollutants, maintaining the air purifier’s performance. By following this maintenance schedule, you can prevent blockage and buildup, prolong the lifespan of your device, and enjoy cleaner and healthier air in your home.
Cleaning Frequency Recommendations
Following the recommended cleaning schedule will ensure that your device maintains optimal performance and efficiency. Regular maintenance is crucial for keeping your Blue Air Purifier in top shape.
Here are some key cleaning techniques and a maintenance schedule to follow:
- Vacuuming the exterior and vents regularly to remove dust and debris buildup.
- Cleaning the pre-filter every month to prevent clogging and maintain airflow.
- Washing the particle filter every three to six months to remove trapped particles.
- Deep cleaning the activated carbon filter every six months to eliminate odors.
- Replacing the filters according to the manufacturer’s recommendations to maintain filtration efficiency.
Cleaning the Air Outlet Vents
Start by gently wiping the air outlet vents with a soft cloth to remove any dust or debris. This will ensure that the air purifier continues to function effectively. However, if there are stubborn stains or dirt on the vents, additional cleaning methods may be required. One effective drying method is to use a hairdryer on a low setting to remove any excess moisture. This will prevent the growth of mold or mildew. To remove stubborn stains, create a solution of warm water and mild detergent. Dip a cloth into the solution and gently scrub the stained area. Rinse the cloth and wipe away any residue. Finally, use a dry cloth to ensure that the vents are completely dry before reassembling the air purifier.
| Drying Method | Steps |
|---|---|
| Hairdryer | 1. Set hairdryer to low setting. 2. Gently blow dry the vents. |
| Air-drying | 1. Remove vents from the air purifier. 2. Place vents in a well-ventilated area. 3. Allow vents to air dry completely. |
| Towel-drying | 1. Gently pat the vents dry with a clean towel. 2. Ensure all moisture is removed. |
Cleaning the Control Panel and Buttons
Now that we have cleaned the air outlet vents, let’s move on to cleaning the control panel and buttons of the Blue Air purifier. This step is important to ensure the proper functioning of the device and maintain its overall cleanliness. Here are some key points to keep in mind:
- Use a soft, lint-free cloth to gently wipe the control panel and buttons.
- Avoid using harsh cleaning agents or abrasive materials that could damage the surface.
- Pay special attention to the filter indicator, which may accumulate dust over time. Wipe it carefully to ensure accurate readings.
- If the control panel or buttons are not responding properly, try cleaning them with a slightly damp cloth. Be sure to dry them thoroughly afterward.
- If the issue persists, consult the user manual or contact the manufacturer for further troubleshooting steps.
Cleaning the Air Quality Sensor (If Applicable
If applicable, make sure to gently wipe the air quality sensor with a soft, lint-free cloth to maintain its accuracy. Understanding sensor maintenance is crucial for the proper functioning of your air purifier.
The air quality sensor is responsible for detecting pollutants in the air and adjusting the purification settings accordingly. Over time, dust and debris can accumulate on the sensor, affecting its accuracy.
To clean it, turn off the air purifier and unplug it from the power source. Locate the air quality sensor, which is usually located near the control panel. Carefully wipe the sensor with a soft, lint-free cloth to remove any dirt or debris. Avoid using harsh chemicals or abrasive materials, as they may damage the sensor.
Once cleaned, plug the air purifier back in and turn it on to ensure the sensor is working properly. Troubleshooting common sensor issues may involve resetting the device or contacting the manufacturer for further assistance.
Reassembling Your Blue Air Purifier
After wiping the air quality sensor, carefully reassemble the different parts of your Blue Air Purifier. Reassembling the purifier is an important step to ensure it functions properly and effectively.
Here are some reassembling techniques and troubleshooting tips to help you along the way:
- Check all the parts: Make sure you have all the components before starting the reassembly process.
- Follow the manual: Refer to the user manual for specific instructions on how to correctly reassemble your Blue Air Purifier.
- Use proper tools: Use the recommended tools to avoid damaging any parts during reassembly.
- Pay attention to connectors: Ensure all connectors are properly aligned and securely attached.
- Test the purifier: Once reassembled, test the purifier to make sure it is functioning as expected.
Testing and Checking for Proper Functionality
To ensure your purifier is functioning properly, check all the connectors and run a test to confirm its functionality.
When it comes to testing methods for your Blue Air purifier, there are a few techniques you can use to troubleshoot any potential issues.
Firstly, make sure all the power cords are securely connected to the purifier and the power outlet. Check for any loose connections or frayed wires.
Next, inspect the air filters to ensure they are clean and free from any debris. If necessary, replace the filters according to the manufacturer’s instructions.
Finally, run a test mode on your purifier to confirm that all the functions are working correctly. This will help identify any malfunctions or performance issues.
Establishing a Regular Cleaning Routine for Your Blue Air Purifier
Make sure you establish a regular cleaning routine for your Blue Air purifier to maintain its optimal performance. Cleaning your air purifier regularly is essential to ensure that it continues to provide you with clean and fresh air.
Here is a simple maintenance checklist to help you keep your Blue Air purifier in top condition:
-
Check the filter: Regularly inspect the filter and clean or replace it as needed. A dirty or clogged filter can hinder the purifier’s efficiency.
-
Clean the exterior: Wipe down the exterior of the purifier with a soft cloth and mild detergent to remove any dust or dirt buildup.
-
Clean the vents: Use a vacuum or a soft brush attachment to remove any dust or debris from the vents.
-
Check the fan: Inspect the fan and clean it if necessary. A dirty fan can affect the airflow and performance of the purifier.
-
Follow a cleaning schedule: Set a regular cleaning schedule to ensure that you don’t forget to maintain your Blue Air purifier.
Frequently Asked Questions
Can I Use Any Type of Cleaning Solution to Clean My Blue Air Purifier?
Yes, you can use any type of cleaning solution to clean your Blue Air Purifier. However, it’s important to follow proper cleaning techniques to ensure the purifier is not damaged and continues to function effectively.
How Often Should I Clean the Pre-Filter of My Blue Air Purifier?
I clean the pre-filter of my Blue air purifier every 3 months. Regular cleaning helps maintain its efficiency and prolongs the lifespan of the purifier. It also ensures that the air is properly filtered.
Is It Safe to Clean the Control Panel and Buttons With Water?
Yes, it is safe to clean the control panel and buttons of the Blue Air Purifier with water. However, it is important to make sure the unit is unplugged and thoroughly dried before using it again.
Do I Need to Clean the Ionizer Plates if My Blue Air Purifier Doesn’t Have an Ionizer Function?
I don’t need to clean the ionizer plates if my Blue Air Purifier doesn’t have an ionizer function. However, for cleaning techniques and maintenance tips, it’s important to follow the manufacturer’s instructions.
Can I Clean the Air Intake and Outlet Vents With a Vacuum Cleaner?
Yes, you can clean the air intake and outlet vents of your Blue Air Purifier with a vacuum cleaner. It’s one of the easiest and most effective cleaning tips. However, there are alternative methods too.
Is Cleaning the Blue Air Purifier Necessary Before Resetting It?
Yes, it is important to clean and reset blue air purifier regularly to maintain its efficiency. Clean the filter and outer casing with a soft cloth and follow the manufacturer’s instructions for resetting the device. This ensures that the air purifier continues to effectively remove pollutants from the air.
Conclusion
After following these steps and establishing a regular cleaning routine for your Blue Air Purifier, you can breathe easy knowing that your air is clean and fresh.
By taking the time to properly clean and maintain your purifier, you are ensuring its optimal functionality and longevity.
So, don’t wait any longer – grab your cleaning supplies and get started on giving your Blue Air Purifier the attention it deserves.
You’ll be amazed at the difference it can make in the air you breathe.
