Maintenance and Tips
How to Clean the Oreck Airpcb Air Purifier
I’ll show you how to clean the Oreck Airpcb Air Purifier, step by step. It’s important to keep your air purifier clean to ensure it functions at its best.
By following these instructions, you’ll be able to remove and clean the filters, as well as clean the exterior of the purifier. Don’t worry, it’s not as complicated as it sounds.
Let’s get started and have your air purifier looking and working like new in no time.
Key Takeaways
- Regularly clean the pre-filter and Truman Cell to remove dust and particles.
- Troubleshoot common issues using the user manual.
- Gather the necessary cleaning supplies, including a microfiber cloth, vacuum cleaner with brush attachment, compressed air canister, mild detergent diluted in water, and water spray bottle.
- Take necessary safety precautions by turning off and unplugging the air purifier before cleaning and proper storage after cleaning.
Understanding the Oreck Airpcb Air Purifier
To understand the Oreck Airpcb Air Purifier, you need to read the user manual. The manual provides comprehensive information on how to properly maintain and troubleshoot the device.
Regular maintenance is essential to ensure the optimal performance of the air purifier. It is recommended to clean the pre-filter and Truman Cell regularly to remove dust and particles. The pre-filter can be vacuumed or washed with warm soapy water, while the Truman Cell can be washed with water and mild detergent.
Additionally, the manual provides troubleshooting steps for common issues such as a blinking light indicator or a decrease in airflow.
Gathering the Necessary Cleaning Supplies
First, you’ll need to gather all the supplies you’ll need to clean your Oreck air purifier. To ensure effective cleaning, it’s important to have the right cleaning supplies. Here’s a checklist of the items you’ll need:
-
Microfiber cloth: This soft cloth is ideal for wiping down the exterior of the purifier and removing dust and dirt.
-
Vacuum cleaner with brush attachment: Use this to remove any loose debris from the air intake vents.
-
Compressed air canister: This will help you blow out any stubborn dust particles from the vents and filters.
-
Mild detergent: Dilute a small amount of detergent in water to clean the plastic parts of the purifier.
-
Water spray bottle: Fill this with clean water to rinse off any soap residue.
Remember to unplug your purifier before cleaning and avoid using harsh chemicals or abrasive materials.
Following these tips for effective cleaning will keep your Oreck air purifier in top-notch condition.
Turning Off and Unplugging the Air Purifier
Before diving into the cleaning process, it’s crucial to take the necessary safety precautions when unplugging your Oreck Air Purifier. This includes making sure the unit is turned off and unplugging it from the power source to avoid any electrical accidents.
Once unplugged, it’s important to properly store the air purifier after cleaning to prevent any damage or dust accumulation.
Safety Precautions When Unplugging
Make sure you’re careful when unplugging the Oreck AirPCB air purifier. Unplugging electronic devices can pose certain risks if not done properly.
To ensure your safety, it is essential to follow some precautions and practice safe unplugging practices.
First and foremost, always make sure to turn off the air purifier before unplugging it. This prevents any potential electrical shock or damage to the device.
Secondly, never pull the plug out by its cord as it can cause fraying or damage. Instead, firmly grasp the plug and pull it straight out of the outlet.
Lastly, avoid unplugging the air purifier with wet hands or in wet conditions, as this increases the risk of electric shock.
Importance of Turning off
To ensure your safety, it’s crucial that you always remember to turn off the device before unplugging it. This step is essential to prevent any electrical accidents or damage to the air purifier.
Apart from safety concerns, regularly turning off the air purifier also plays a significant role in its proper maintenance. By turning off the device, you allow it to cool down before cleaning, reducing the risk of burns or injuries. Additionally, it’s important to turn off the air purifier to conserve energy and extend the lifespan of the device.
Proper Storage After Cleaning
After you’ve finished cleaning, it’s important to store the device properly to maintain its functionality. Here are some proper storage tips to prevent dust buildup:
-
Cover the device: Use a dust cover or a clean cloth to protect the air purifier from dust and other particles when not in use.
-
Keep in a dry area: Moisture can damage the internal components of the air purifier. Store it in a dry area to prevent any potential water damage.
-
Avoid direct sunlight: Direct sunlight can cause discoloration and damage to the device’s exterior. Store it in a shaded area to protect it from harsh UV rays.
Properly storing your air purifier will help ensure its longevity and efficiency. By following these tips, you can prevent dust buildup and maintain a clean and healthy indoor environment.
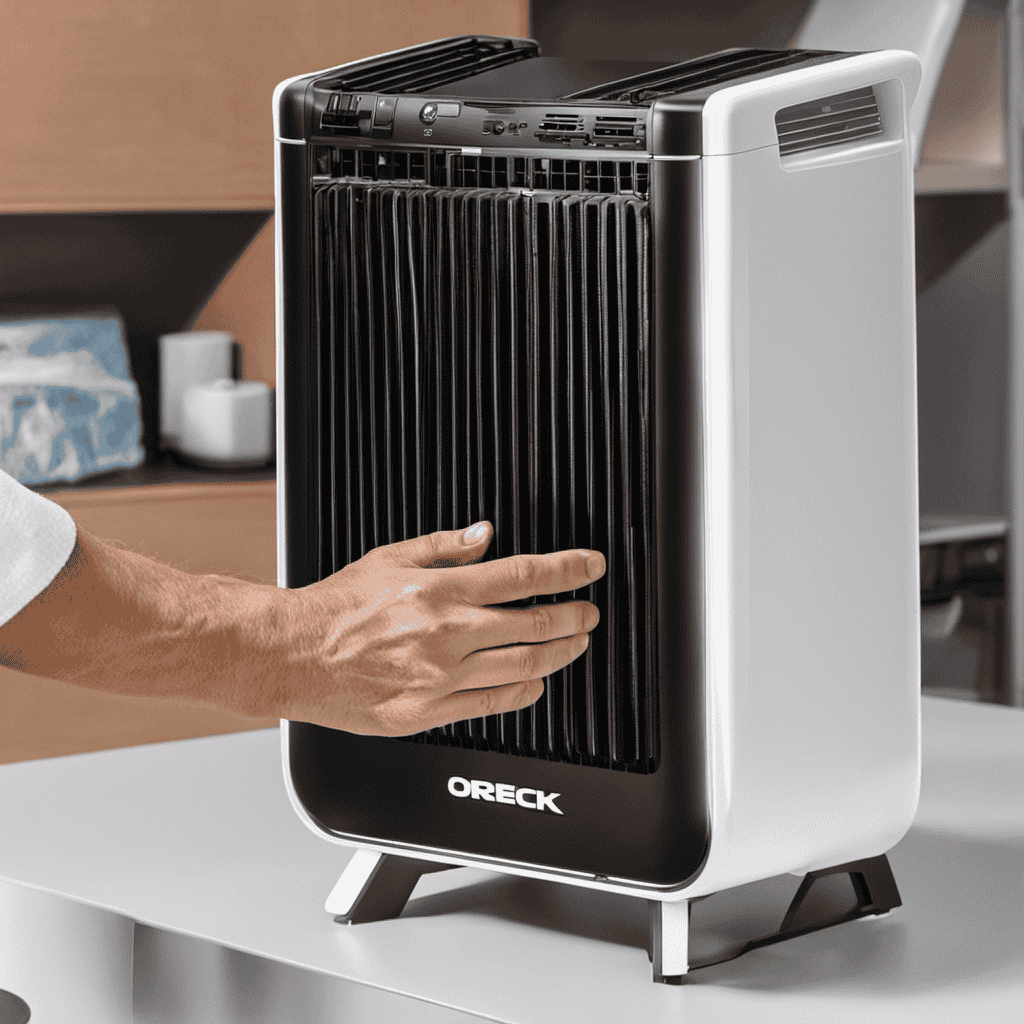
Removing and Cleaning the Pre-Filter
First, you’ll need to unplug the Oreck airpcb air purifier before removing and cleaning the pre-filter.
Proper pre filter maintenance is essential for optimal performance and longevity of your air purifier.
To remove the pre-filter, locate the tabs on the sides of the unit and gently pull them towards you. Once the pre-filter is removed, inspect it for any visible dirt or debris. If it appears dirty, it’s time for a replacement.
Oreck recommends replacing the pre-filter every 3-6 months to ensure efficient air purification.
To clean the pre-filter, simply rinse it under running water until the water runs clear. Allow it to air dry completely before reinstalling.
With the pre-filter properly maintained, you can now move on to cleaning the HEPA filter for even better air quality.
Cleaning the HEPA Filter
Now, you’ll want to inspect the HEPA filter for any visible dirt or debris to ensure optimal air quality in your Oreck air purifier. The HEPA filter plays a crucial role in trapping airborne particles, allergens, and pollutants, so it’s important to keep it clean.
Here’s how to clean the HEPA filter:
- Remove the HEPA filter from the air purifier.
- Gently vacuum the filter using a soft brush attachment to remove surface dust.
- If the filter is heavily soiled, rinse it with lukewarm water. Avoid using hot water or harsh cleaning agents.
- Allow the filter to air dry completely before reinstalling it.
- Consider replacing the HEPA filter every 6-12 months to maintain optimal air purification performance.
Regularly cleaning and replacing the HEPA filter not only ensures cleaner air but also helps prolong the lifespan of your Oreck air purifier.
Enjoy the benefits of clean air in your home or office with a properly maintained HEPA filter.
Cleaning the Carbon Filter
When it comes to maintaining the filters in your air purifier, there are a few key points to keep in mind.
First, it’s important to regularly clean and maintain the filters to ensure optimal performance and air quality.
Second, the frequency of cleaning will depend on factors such as the level of air pollution in your area and the usage of the air purifier.
Lastly, to ensure the best cleaning practices, it is recommended to follow the manufacturer’s instructions and guidelines for cleaning the filters.
Filter Maintenance Tips
To keep your Oreck air purifier running efficiently, make sure you regularly clean and replace the filters. The filters play a crucial role in capturing and removing airborne particles, allergens, and odors from your indoor air.
Here are some filter maintenance tips to help you maximize the performance of your air purifier:
-
Filter Replacement:
-
Check the user manual for the recommended filter replacement schedule.
-
Purchase genuine Oreck replacement filters to ensure optimal performance.
-
Follow the manufacturer’s instructions for proper installation of the new filters.
-
Troubleshooting Tips:
-
If you notice a decrease in air purifier performance, check the filters for excessive dirt or damage.
-
Clean reusable filters according to the manufacturer’s instructions.
-
If the air purifier still doesn’t work properly after cleaning or replacing the filters, contact Oreck customer support for further assistance.
Cleaning Frequency Recommendations
It’s important to regularly clean and replace the filters in order to maintain the efficiency and effectiveness of your Oreck air purifier. Following a proper cleaning schedule is essential for optimal performance.
The frequency of cleaning depends on various factors such as the air quality in your environment and the usage of the purifier. As a general guideline, it is recommended to clean the pre-filter every 2-3 months and replace it every 6-12 months. The carbon filter should be replaced every 3-6 months, while the HEPA filter should be replaced every 12-18 months.
Regular cleaning ensures that the filters are free from dust, allergens, and other particles, allowing the purifier to work at its best and provide you with clean and fresh air. By maintaining a consistent cleaning schedule, you can enjoy the long-lasting benefits of improved air quality and a healthier living environment.
Best Cleaning Practices
Regularly maintaining and replacing the filters in your Oreck air purifier is crucial for optimal performance and improved air quality. To ensure the best cleaning practices, follow these steps:
-
Use a soft, dry cloth to wipe down the exterior of the air purifier regularly.
-
Every 1-3 months, depending on usage, clean the pre-filter by gently vacuuming or rinsing it with water and mild soap. Allow it to dry completely before reinserting.
-
Replace the HEPA filter every 6-12 months, or when the filter indicator light turns on. Remove the old filter and insert the new one, making sure it fits securely.
-
Use only recommended cleaning products, such as Oreck’s Air Purifier Cleaner, to clean the inner components of the air purifier.
-
Avoid using harsh chemicals or abrasive materials that could damage the purifier.
Cleaning the Ionizer Plates
Cleaning the ionizer plates is an essential step in maintaining the Oreck airpcb air purifier. These plates are responsible for attracting and trapping airborne particles, keeping the air in your home clean and fresh. Over time, the ionizer plates can become dirty and covered in dust and debris, reducing their effectiveness. To clean the ionizer plates, follow these simple steps:
- Turn off the air purifier and unplug it from the power source.
- Remove the front panel to access the ionizer plates.
- Gently brush off any visible dust or debris using a soft brush or cloth.
- Fill a basin with warm water and a mild detergent.
- Submerge the ionizer plates in the soapy water and let them soak for a few minutes.
- Use a soft brush or cloth to scrub the plates gently.
- Rinse the plates thoroughly with clean water and let them air dry completely before reassembling the air purifier.
By regularly cleaning the ionizer plates, you can ensure optimal performance and longevity of your Oreck air purifier. If you encounter any issues or have further questions, refer to the troubleshooting tips provided in the table below:
Problem | Solution |
---|---|
Lack of airflow | Check and clean the air intake and filters. |
Strange odor | Replace the filters and clean the ionizer plates. |
Loud noise | Check for loose parts and tighten or replace as necessary. |
Remember to always refer to the user manual for specific cleaning techniques and troubleshooting tips for your model of Oreck air purifier.
Cleaning the Exterior of the Air Purifier
To maintain the performance and appearance of your Oreck air purifier, make sure to regularly wipe down the exterior using a soft cloth. Cleaning the exterior of your air purifier is essential to remove dust, dirt, and other contaminants that may accumulate over time.
Here are some cleaning techniques and recommended products to effectively clean the exterior of your Oreck air purifier:
- Use a soft, lint-free cloth to wipe down the exterior surfaces.
- For stubborn stains or dirt, dampen the cloth with mild soapy water and gently clean the affected areas.
- Avoid using harsh chemicals, abrasive cleaners, or solvents as they may damage the finish of the air purifier.
By following these cleaning techniques and using the recommended cleaning products, you can ensure that your Oreck air purifier remains in top condition.
Now, let’s move on to the next section on reassembling and testing the air purifier.
Reassembling and Testing the Air Purifier
Once you have finished wiping down the exterior, it’s time to reassemble and test your air purifier. Follow these reassembling tips to ensure everything is properly put back together. First, refer to the user manual for specific instructions on how to reassemble each component. Use the table below as a reference to keep track of the parts and their placement.
Component | Placement |
---|---|
Filters | Insert into designated slots |
Pre-filter | Securely attach to the main unit |
Fan | Align and attach to the motor |
Front grille | Snap into place |
After reassembling, it’s crucial to conduct a thorough testing process to ensure the air purifier is functioning correctly. Turn on the unit and check if the fan is spinning properly. Listen for any unusual noises or vibrations. Also, make sure that the air purifier is effectively removing pollutants from the air by monitoring the air quality indicators or using a separate air quality monitor. If everything looks and sounds good, congratulations! Your air purifier is ready to purify the air in your space once again.
Frequently Asked Questions
Can I Use Soap and Water to Clean the Filters of the Oreck Airpcb Air Purifier?
Yes, soap and water can be used to clean the filters of the Oreck Airpcb Air Purifier. However, there are alternatives such as using a vacuum cleaner or compressed air to remove dust and debris.
How Often Should I Clean the Exterior of the Air Purifier?
I should clean the exterior of the Oreck Airpcb Air Purifier every few weeks to remove dust and debris. It’s important to maintain a clean surface to ensure optimal performance and longevity of the device.
Is It Safe to Use a Vacuum Cleaner to Clean the Pre-Filter?
Using a vacuum cleaner to clean the pre-filter of the Oreck Airpcb Air Purifier has its pros and cons. It can remove larger particles effectively, but may not be able to fully clean fine dust. Alternatives include using compressed air or a soft brush.
Can I Reuse the Carbon Filter After Cleaning It?
Yes, you can reuse the carbon filter after cleaning it. It is important to clean the carbon filter regularly to maintain its effectiveness in removing odors and chemicals from the air.
What Should I Do if the Air Purifier Doesn’t Turn on After Reassembling It?
If the air purifier doesn’t turn on after reassembling it, troubleshooting is necessary. Common issues with air purifiers include improper assembly or electrical problems. Check connections, ensure proper reassembly, and contact customer support if necessary.
Conclusion
In conclusion, cleaning the Oreck Airpcb Air Purifier is a simple and important task to maintain its optimal performance.
By following the step-by-step instructions provided, you can ensure that your air purifier remains efficient in eliminating airborne particles and improving indoor air quality.
Remember to gather the necessary cleaning supplies, turn off and unplug the device, and thoroughly clean each component, including the pre-filter, HEPA filter, carbon filter, and ionizer plates.
Finally, reassemble the air purifier and test it to enjoy fresh and clean air in your home.
At Aero Guardians, where every piece of information aims to make the world a breath fresher, Samuela’s role as an author has been nothing short of transformative. With a penchant for weaving stories around the science of air purification, Samuela has enriched the platform with content that is both enlightening and captivating.
Maintenance and Tips
How to Choose a Room Air Purifier
When it comes to ensuring clean air in my home, I aim to have the top-quality room air purifier. With numerous options available, it can be daunting to select the perfect one.
That’s why I’ve put together this guide on how to choose a room air purifier. I’ll walk you through understanding your air quality needs, considering room size and coverage area, evaluating different technologies, and more.
Let’s clear the air and find the perfect purifier for you.
Key Takeaways
- Understanding air quality needs and identifying specific pollutants helps select the right air purifier.
- Considerations for room size and coverage area are important when choosing an air purifier.
- Evaluate different types of air purification technologies to find the most suitable one.
- Consider noise level, energy efficiency, and maintenance requirements when selecting an air purifier.
Understanding Your Air Quality Needs
Understanding your air quality needs is essential when choosing a room air purifier. Air quality monitoring plays a crucial role in determining the type of purifier that will best suit your needs.
By monitoring the air quality in your home, you can identify specific pollutants or allergens that may be affecting your health. This knowledge allows you to select an air purifier with the appropriate filtration system to target those specific contaminants.
Moreover, investing in a high-quality air purifier can provide numerous health benefits. It helps remove harmful particles such as dust, pollen, pet dander, and mold spores from the air, reducing the risk of respiratory issues and allergies.
Breathing cleaner air can also improve overall well-being, leading to better sleep and increased productivity.
Consider the Room Size and Coverage Area
When it comes to choosing a room air purifier, it’s important to consider the size of the room and the coverage area of the purifier.
The room size is crucial because it determines the effectiveness of the purifier in cleaning the air.
Additionally, the coverage area is important because it indicates how much square footage the purifier can effectively clean.
Therefore, it’s essential to choose a purifier based on the dimensions of the room and the desired coverage area.
Room Size Importance
The size of the room is crucial when selecting an air purifier. It determines the effectiveness of the purifier in providing clean and fresh air. To choose the right air purifier based on room size, consider the square footage of the room and the air quality requirements.
Room Size | Air Quality Requirements | Recommended Air Purifier |
---|---|---|
Small | Low to Moderate | Compact air purifier |
Medium | Moderate to High | Medium-sized air purifier |
Large | High | Large air purifier |
For smaller rooms, a compact air purifier is sufficient to maintain a healthy environment. In medium-sized rooms, a medium-sized air purifier is recommended to effectively remove allergens and pollutants. For larger rooms, a larger air purifier with higher filtration capacity is necessary to ensure optimal air quality. By selecting the right air purifier based on your room size and air quality requirements, you can create a healthier and cleaner living space.
Coverage Area Considerations
To effectively determine the coverage area of an air purifier, consider the square footage of the room and the desired level of air purification.
The size of the room is crucial as it directly affects the effectiveness of the purifier. A larger room will require a more powerful purifier to ensure optimal air quality. Additionally, the layout of the room and the placement of furniture can impact the air circulation.
It is important to choose a purifier that can effectively circulate the air in the room, reaching all corners and removing pollutants.
The desired level of air purification also plays a role in determining the coverage area. If you have severe allergies or respiratory conditions, you may require a purifier with a larger coverage area to ensure thorough purification.
Choosing Based on Dimensions
Consider the dimensions and layout of your space to ensure the purifier fits properly and circulates air effectively.
When choosing a room air purifier, it is important to take into account the size of the room. The purifier should be able to effectively clean the air in the entire space.
If the room is too large for the purifier’s coverage area, it may not be able to effectively remove pollutants and improve air quality. On the other hand, if the purifier is too large for the room, it may consume unnecessary energy and create a drafty environment.
It is recommended to check the manufacturer’s specifications for the purifier’s coverage area and compare it to the dimensions of your room to ensure a proper fit and optimal air purification.
Evaluating Different Types of Air Purification Technologies
When evaluating different types of air purification technologies, it’s important to understand their specific benefits and limitations. One of the key factors to consider is evaluating performance and comparing effectiveness.
Different technologies, such as HEPA filters, activated carbon filters, and ionizers, have their own strengths and weaknesses. HEPA filters are highly effective at capturing small particles but may not be as effective against odors and gases. Activated carbon filters excel at removing odors and gases, but may not be as effective at capturing smaller particles. Ionizers can effectively remove particles from the air but may produce ozone as a byproduct.
By understanding the strengths and limitations of each technology, you can choose the most suitable air purification technology for your specific needs.
Now, let’s move on to the next important factors to consider: noise level and energy efficiency.
Noise Level and Energy Efficiency
Understanding the noise level and energy efficiency of different air purification technologies can help you make a more informed decision. When considering which air purifier to choose, it’s important to take into account the noise level analysis and energy efficiency standards. Here are four key factors to consider:
-
Noise level: Some air purifiers can be quite noisy, especially on higher settings. Look for models with noise reduction features or low decibel ratings for a quieter operation.
-
Energy efficiency: Check the energy efficiency rating of the air purifier to ensure it won’t consume excessive electricity. Look for models with Energy Star certification for optimal energy savings.
-
Adjustable settings: Consider air purifiers with adjustable fan speeds or automatic modes to customize the noise level and energy usage based on your needs.
-
Sleep mode: Look for air purifiers with a sleep mode feature that operates at a lower noise level and consumes less energy during nighttime use.
Understanding the noise level and energy efficiency of air purifiers can help you find the right balance between effectiveness and convenience.
Now, let’s move on to comparing filter types and maintenance requirements.
Comparing Filter Types and Maintenance Requirements
Let’s take a look at the different filter types and maintenance requirements for air purifiers.
When it comes to comparing effectiveness, there are three main types of filters commonly used in air purifiers: HEPA filters, activated carbon filters, and ionizers.
HEPA filters are highly effective in capturing airborne particles as small as 0.3 microns.
Activated carbon filters are great for removing odors and chemicals from the air.
Ionizers work by releasing negatively charged ions that attach to airborne particles, making them heavy and causing them to fall to the ground.
As for maintenance requirements, most air purifiers require regular filter replacement.
HEPA filters typically need to be replaced every 6-12 months, while activated carbon filters and ionizers may need replacement every 3-6 months.
It is important to consider the filter replacement costs when choosing an air purifier to ensure that it fits within your budget.
Budgeting and Cost Considerations
When it comes to choosing a room air purifier, there are a few key points to consider.
First, think about price vs. performance. You want to ensure that you’re getting the best value for your money.
Next, consider the long-term maintenance costs, such as filter replacements. This can help you determine the overall cost of owning and operating the air purifier.
Lastly, take a look at the energy efficiency ratings. This will give you an idea of how much energy the purifier will consume, which can impact your electricity bills in the long run.
Price Vs. Performance
You should consider the trade-off between price and performance when choosing a room air purifier. It’s important to find a balance between the cost and the effectiveness of the purifier. Here are some factors to consider:
-
Price range: Determine your budget for an air purifier. Prices can vary greatly depending on the brand, features, and size of the unit. Consider how much you are willing to spend before making a decision.
-
Performance comparison: Look for air purifiers that have high CADR (Clean Air Delivery Rate) ratings. This indicates how efficiently the purifier can remove pollutants from the air. Compare the CADR ratings of different models to find the most effective one for your needs.
-
Filter replacement cost: Consider the ongoing cost of replacing filters. Some air purifiers have expensive filters that need to be replaced frequently, while others have more affordable options. Factor in the cost of filter replacements when evaluating the overall price of the purifier.
-
Energy efficiency: Check the energy consumption of the air purifier. Look for models with an Energy Star certification, as they are designed to be more energy-efficient and can save you money on your electricity bills.
Long-Term Maintenance Costs
Considering the ongoing expenses, it’s important to factor in the long-term maintenance costs of an air purifier. One significant aspect of maintenance is filter replacement. Depending on the model and usage, filters may need to be replaced every few months to a year. It’s crucial to estimate the lifespan of the filters to budget for future expenses. To give you an idea, here’s a table showcasing the estimated lifespan of common air purifier filters:
Filter Type | Lifespan Estimation |
---|---|
Pre-filter | 3-6 months |
HEPA filter | 6-12 months |
Carbon filter | 6-12 months |
UV-C bulb | 9-12 months |
Energy Efficiency Ratings
When it comes to maintaining an air purifier, there are a few key things to keep in mind.
Regular maintenance is important to ensure the device is working effectively and efficiently.
Here are some tips for air purifier maintenance:
-
Cleaning the filters: Most air purifiers have filters that need to be cleaned or replaced regularly. Follow the manufacturer’s instructions to ensure proper maintenance.
-
Checking the air quality sensors: Some air purifiers are equipped with air quality sensors that detect the level of pollutants in the air. It’s important to check these sensors and clean them if necessary to maintain accurate readings.
-
Dusting and vacuuming the unit: Dust and debris can accumulate on the surface of the air purifier, hindering its performance. Regularly dust and vacuum the unit to keep it clean.
-
Regularly inspecting and cleaning the fan: The fan in the air purifier helps to circulate the air. Make sure to inspect and clean the fan regularly to prevent any blockages.
Frequently Asked Questions
Can an Air Purifier Eliminate All Types of Pollutants From the Air?
An air purifier can effectively eliminate many types of pollutants from the air, such as dust, pollen, pet dander, and smoke. However, it may not be able to remove all pollutants, like certain gases or chemicals.
Are There Any Specific Air Purifiers Recommended for People With Allergies or Asthma?
As an expert, I recommend the best air purifiers for pet owners and those with allergies or asthma. The benefits of HEPA filters are immense for allergy sufferers, providing clean air and reducing symptoms.
How Often Should I Change the Filters in My Air Purifier?
I change the filters in my air purifier every 3-6 months. Regular filter changes ensure optimal performance and help remove pollutants from the air, providing the benefits of cleaner, healthier indoor air.
Can an Air Purifier Remove Odors From the Air?
Yes, an air purifier can remove odors from the air. It uses filters to trap and eliminate odor-causing particles, improving indoor air quality. This is one of the many benefits of using an air purifier.
Are There Any Air Purifiers That Can Be Controlled Remotely Through a Smartphone App?
Yes, there are air purifiers that can be controlled remotely through a smartphone app. This feature allows for convenient and easy control of the purifier from anywhere, providing benefits of remote control functionality.
Conclusion
In conclusion, choosing the right room air purifier requires careful consideration of several factors.
By understanding your air quality needs, evaluating the room size and coverage area, and comparing different types of air purification technologies, you can make an informed decision.
Don’t forget to take into account noise level and energy efficiency, as well as filter types and maintenance requirements.
Lastly, budgeting and cost considerations are important.
Remember, finding the perfect air purifier is like finding a breath of fresh air for your home.
Maintenance and Tips
How to Clean a Holmes Desk Air Purifier
Sitting at my desk, enveloped in a cloud of dust and allergens, I find myself longing for fresher, cleaner air. Luckily, I have found the solution to refreshing my workspace – by cleaning my Holmes Desk Air Purifier.
In this article, I will guide you through the step-by-step process of rejuvenating your air purifier, ensuring it functions at its best.
So, let’s roll up our sleeves and embark on this journey to a healthier and more invigorating environment!
Key Takeaways
- Regular cleaning or replacement of the filter is essential for maintaining effectiveness.
- The pre-filter acts as the first line of defense, trapping larger particles.
- Proper filter maintenance is crucial for optimal air purification performance.
- Cleaning the exterior and maintaining the fan and motor helps prevent issues like reduced performance or overheating.
Understanding the Components of a Holmes Desk Air Purifier
To understand the components of your Holmes Desk Air Purifier, you’ll need to familiarize yourself with the filter, pre-filter, and control panel.
The filter is the main part of the purifier that captures and removes airborne particles such as dust, pollen, and pet dander. It is essential to clean or replace the filter regularly to maintain the purifier’s effectiveness.
The pre-filter, on the other hand, acts as the first line of defense, trapping larger particles before they reach the main filter. Understanding the functionality of the pre-filter helps in troubleshooting common issues like reduced airflow or foul odors.
Lastly, the control panel allows you to adjust settings such as fan speed and timer. Familiarizing yourself with these components will ensure proper maintenance and optimal performance of your Holmes Desk Air Purifier.
Preparing for the Cleaning Process
Before starting the cleaning process, make sure you’ve unplugged the device. This is a crucial step to ensure your safety and avoid any electrical hazards.
Now, let’s talk about the pre-cleaning steps you need to take before diving into cleaning your Holmes desk air purifier. Firstly, remove the front grill by gently pulling it towards you. Next, take out the filter and set it aside. It’s important to check if the filter needs to be replaced or can be reused after cleaning.
Now, let’s gather the necessary cleaning supplies. You’ll need a soft brush or cloth to remove dust and debris from the grill and filter. Additionally, mild soap or detergent and warm water will be required for cleaning the grill and filter thoroughly.
Removing and Cleaning the Air Filters
When it comes to maintaining air purifiers, proper filter maintenance is crucial. It ensures that the filters are working efficiently to remove pollutants from the air.
In this discussion, I will explore the various cleaning techniques for filters and the frequency at which they should be cleaned to maintain optimal performance.
Proper Filter Maintenance
Regular filter maintenance is important for keeping your Holmes desk air purifier working effectively. Neglecting filter maintenance can lead to reduced air purification performance and potential damage to your device.
Here are some key steps to ensure proper filter maintenance:
- Check the filter regularly for signs of dirt, dust, or debris buildup.
- Replace the filter according to the manufacturer’s recommendations to maintain optimal air quality.
- Troubleshoot common issues, such as a clogged filter, by gently cleaning it with a soft brush or vacuum cleaner.
- Keep spare filters on hand to minimize downtime during filter replacement.
Cleaning Techniques for Filters
To maintain optimal performance, make sure you regularly inspect and replace the filters in your Holmes desk air purifier. Cleaning techniques for filters are essential to ensure the longevity and efficiency of your purifier.
Begin by turning off and unplugging the device. Gently remove the filter from the unit, following the manufacturer’s instructions. If the filter is washable, rinse it under running water to remove dust and debris. Allow the filter to air dry completely before placing it back into the purifier.
For non-washable filters, use a soft brush or vacuum cleaner to remove any accumulated dirt or particles. It’s important to clean or replace the filters every three to six months, depending on usage and air quality.
Regular maintenance will help your Holmes desk air purifier function at its best, providing you with clean and fresh air.
Frequency of Filter Cleaning
When it comes to the frequency of filter cleaning for your Holmes desk air purifier, it is important to consider the manufacturer’s recommendations. In general, it is recommended to clean the filters every 2 to 3 months for optimal performance. However, this can vary depending on factors such as air quality and usage.
Regular maintenance is crucial to ensure that your air purifier continues to function effectively.
To clean the filters, you will need the following recommended cleaning products:
- Mild detergent: A gentle detergent will help remove dust and debris from the filters without causing any damage.
- Soft-bristle brush: This will help you gently scrub the filters and loosen any trapped particles.
- Vacuum cleaner: Use a vacuum with a brush attachment to remove loose dirt and debris from the filters.
- Microfiber cloth: This will be useful for wiping down the exterior of the air purifier and removing any dust or fingerprints.
Cleaning the Exterior of the Air Purifier
Cleaning the exterior of the air purifier is as simple as wiping it down with a damp cloth. However, it is important to use the right cleaning solutions and drying methods to ensure optimal performance and longevity of the device.
When choosing a cleaning solution, avoid harsh chemicals or abrasive cleaners that could damage the surface or affect the air quality. Instead, opt for mild soap and water or a solution of vinegar and water.
After wiping down the exterior, make sure to thoroughly dry the unit before plugging it back in to prevent any water damage. Taking these precautions will help maintain the air purifier and ensure it continues to operate effectively.
Moving on to maintaining the fan and motor…
Maintaining the Fan and Motor
Now that we have cleaned the exterior of the air purifier, let’s move on to maintaining the fan and motor. This is an important step in keeping your Holmes desk air purifier running efficiently.
Here are some key steps to follow:
- Regularly clean the fan blades to remove dust and debris buildup.
- Check the motor for any signs of damage or wear.
- Lubricate the motor bearings if necessary to ensure smooth operation.
- Inspect the airflow vents and filters for any blockages that may restrict the airflow.
By maintaining the airflow and troubleshooting common issues, you can prevent problems like reduced performance or overheating.
Now, let’s move on to reassembling and testing the Holmes desk air purifier to complete the cleaning process.
Reassembling and Testing the Holmes Desk Air Purifier
To put everything back together and make sure it’s working properly, you’ll need to reassemble and test the air purifier. Here are some reassembling tips to help you with this process.
First, refer to the user manual for specific instructions on how to reassemble the different components correctly. Take your time and be gentle to avoid any damage. Make sure all the parts fit snugly and securely.
Once you have reassembled the air purifier, it’s important to test it to ensure everything is functioning as it should. Common issues that may arise during testing include a noisy fan, weak airflow, or an error message on the display. Troubleshooting these issues can often be resolved by double-checking the assembly, cleaning the filters, or contacting customer support for further assistance.
Conclusion
In conclusion, cleaning a Holmes Desk Air Purifier is a simple yet essential task to ensure its efficiency and longevity. By understanding the components, preparing for the cleaning process, and following the steps to remove, clean, and maintain the air filters, exterior, fan, and motor, you can keep your air purifier in optimal condition.
Remember, a well-maintained air purifier is like a breath of fresh air, purifying your surroundings and creating a harmonious atmosphere. So, don’t neglect this important maintenance routine and enjoy clean and healthy air every day.
At Aero Guardians, where every piece of information aims to make the world a breath fresher, Samuela’s role as an author has been nothing short of transformative. With a penchant for weaving stories around the science of air purification, Samuela has enriched the platform with content that is both enlightening and captivating.
Maintenance and Tips
How to Change Filter on Bls12k Air Purifier
I will demonstrate the simplest method to replace the filter on your Bls12k air purifier. Believe me, you will be amazed at how easy it is!
With just a few tools and a little bit of know-how, you’ll have your air purifier running like new in no time. Follow my step-by-step guide and you’ll be breathing cleaner, fresher air before you know it.
So let’s get started and say goodbye to those pesky airborne particles once and for all!
Key Takeaways
- Proper maintenance and regular cleaning or replacement of the filter ensures optimal performance and cleaner air in your home.
- It is important to turn off and unplug the air purifier before performing any maintenance and to handle the filters carefully to avoid damage.
- Accessing the filter compartment involves locating the latch on the side of the device and gently pressing and holding it to release the compartment door.
- When removing the old filter, make sure to turn off and unplug the air purifier, gently pull out the filter from the sides, and dispose of it properly according to local regulations.
Tools Required for Filter Replacement
To change the filter on your BLS12K air purifier, you’ll need a screwdriver and a clean cloth. Proper maintenance is essential for prolonging the lifespan of your air purifier filters. Regularly cleaning or replacing the filters ensures optimal performance and cleaner air in your home.
When changing the filters, there are common mistakes that you should avoid. Firstly, make sure to turn off the air purifier and unplug it from the power source before attempting any maintenance. Secondly, handle the filters carefully to avoid any damage. Lastly, always follow the manufacturer’s instructions for the specific model of your air purifier.
These maintenance tips and common mistakes to avoid will help ensure smooth filter replacement and prevent any damage to your BLS12K air purifier. Now let’s move on to the step-by-step guide to accessing the filter compartment.
Step-by-Step Guide to Accessing the Filter Compartment
First, locate the latch on the side of the device to access the filter compartment. The latch is typically located towards the bottom of the air purifier.
Once you’ve found the latch, gently press and hold it to release the compartment door. It should open easily, revealing the filter inside.
If you’re having trouble locating the latch or if it’s not opening smoothly, try troubleshooting common filter issues by checking the user manual or contacting customer support.
Proper maintenance is crucial for prolonging filter life, so make sure to clean or replace the filter regularly according to the manufacturer’s instructions.
Now that you’ve accessed the filter compartment, let’s move on to the next step of removing the old filter safely.
Removing the Old Filter Safely
Once you’ve successfully accessed the filter compartment, you can safely remove the old filter. Here’s how to do it:
-
Turn off the air purifier and unplug it from the power source to ensure your safety.
-
Open the filter compartment carefully, following the instructions provided in the user manual specific to your BLS12K air purifier model.
-
Gently pull out the old filter, making sure to hold it from the sides to avoid touching the dirty surface.
-
Dispose of the old filter properly according to your local regulations. Some areas may have recycling programs for air filters, so look into that as an alternative option.
When disposing of old filters, it is important to consider alternative filter options. Look for filters that are eco-friendly, such as reusable or washable filters, which can help reduce waste and save money in the long run.
Installing the New Filter Correctly
When installing the new filter correctly, make sure to follow the specific instructions provided in the user manual for your BLS12K model. This will ensure that the filter is installed properly and functions effectively.
To prolong the lifespan of your air purifier, here are some tips to keep in mind.
Firstly, always handle the filter with clean hands to prevent any dirt or oil from transferring onto it.
Secondly, make sure to replace the filter regularly as recommended by the manufacturer. Neglecting to do so can lead to decreased performance and a shorter lifespan for the air purifier.
Lastly, avoid common mistakes such as forcing the filter into place or not properly aligning it with the filter housing.
Taking these precautions will help maintain the longevity and efficiency of your BLS12K air purifier.
Testing the Air Purifier After Filter Replacement
To ensure that the new filter replacement is working properly, you should test the air purifier by checking the airflow and monitoring any changes in the air quality. Here are some important points to consider during the testing process:
-
Check the airflow: After replacing the filter, turn on the air purifier and feel the airflow coming out of the unit. Make sure it is strong and consistent. Weak or uneven airflow could indicate a problem with the filter or the purifier itself.
-
Monitor air quality: Keep an eye on the air quality in the room where the purifier is located. If you notice a significant improvement in the air quality, such as reduced dust or odors, it indicates that the new filter is effectively capturing pollutants.
-
Regular maintenance: Regularly testing the air purifier after filter replacement is crucial for maintaining its efficiency and effectiveness. It ensures that the purifier is working optimally to keep the air clean and healthy.
-
Signs for filter replacement: Common signs that indicate a need for filter replacement include reduced airflow, increased noise, and persistent odors or allergens in the air. Regularly monitoring these signs can help you determine when it is time to replace the filter.
By following these testing guidelines, you can ensure that your air purifier is functioning properly and providing clean, fresh air for your space.
Remember the importance of regular air purifier maintenance to prolong its lifespan and maintain optimal performance.
Conclusion
In conclusion, changing the filter on the BLS12K air purifier is a simple and crucial maintenance task.
By following the step-by-step guide and using the necessary tools, you can easily access the filter compartment, remove the old filter safely, and install the new filter correctly.
Don’t forget to test the air purifier after the replacement to ensure it is working effectively.
Remember, proper filter maintenance is essential for maintaining clean and fresh indoor air.
So, take charge of your air quality and keep your BLS12K air purifier running smoothly.
In the dynamic world of air purifiers and clean air advocacy, Aire stands out as a beacon of knowledge and passion. As the Editor in Chief of Aero Guardians, Aire has been instrumental in shaping the platform’s voice and direction, ensuring that every piece of content resonates with clarity, authority, and authenticity.
-
Air Purifier Guides9 months ago
How to Reset Filter on Miko Air Purifier
-
FAQs - Advanced Queries6 months ago
What Do the Numbers on My Air Purifier Mean
-
Air Purifier Guides6 months ago
How to Make a Homemade Ozone Generator (Air Purifier
-
Types of Air Purifiers9 months ago
What Is an Air Purifier
-
Vetted8 months ago
Aera Mini Review: Smart Home Fragrance Diffuser With Hypoallergenic Scent Technology (2023)
-
Maintenance and Tips11 months ago
How to Reset Filter Light on Winix Plasmawave Air Purifier
-
FAQs - Advanced Queries1 month ago
When to Use Ionizer on Coway Air Purifier
-
Air Purifier Guides4 weeks ago
How to Dispose of Air Purifier Filter Levoit