Connect with us

Air Purifier Guides

How to Fix a Sharper Image Ionic Air Purifier With Bricken Switch

Published

on

An image showcasing a close-up shot of a dismantled Sharper Image Ionic Air Purifier, revealing a broken switch with visible cracks

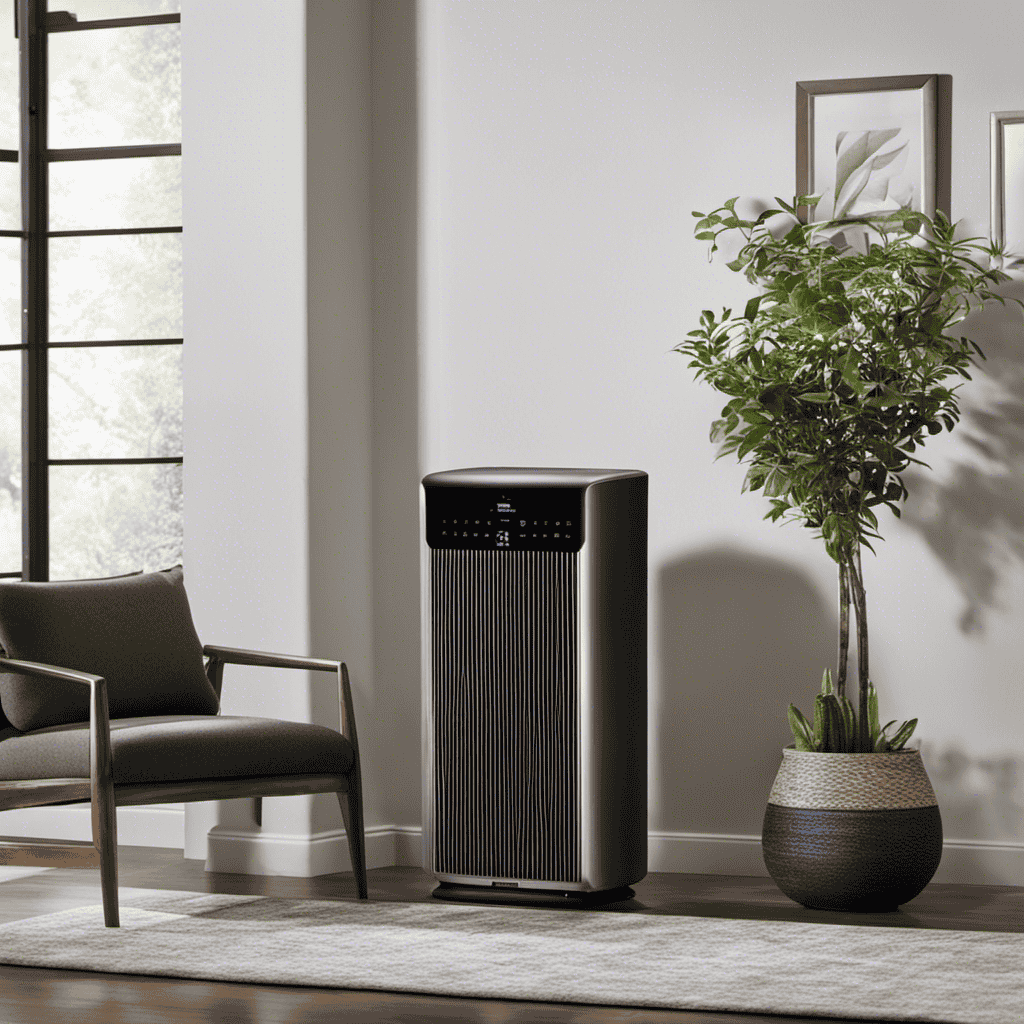
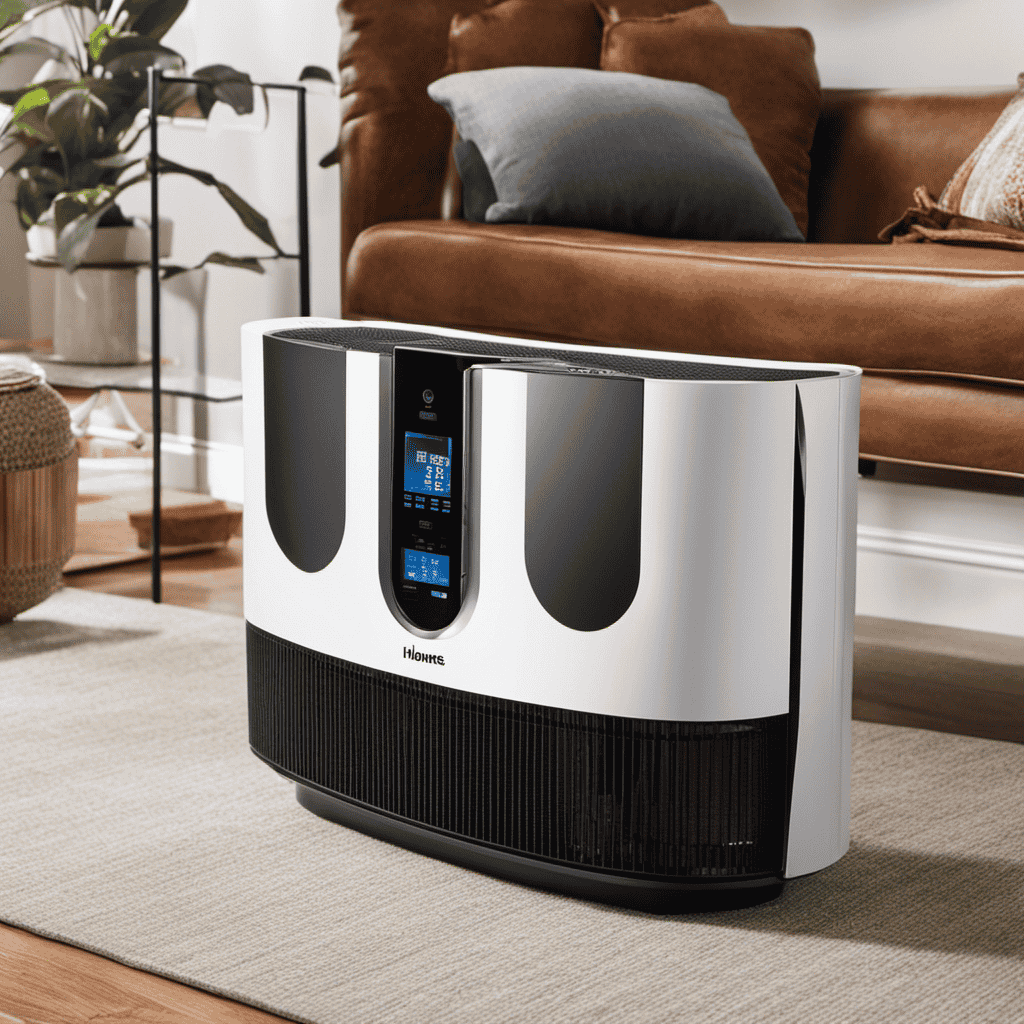
I am facing an issue with my Sharper Image Ionic Air Purifier, and I must say, it has put me in a tough spot. However, do not worry, as I have conducted my research and am here to provide you with a solution.

In this article, I’ll guide you through the process of fixing a faulty Bricken switch in your air purifier. With a little know-how and the right tools, we’ll have your purifier up and running in no time.

So let’s dive in and get this problem sorted!

Key Takeaways

  • Troubleshooting the air purifier involves checking the power supply, connections, and switch for loose connections or damage.
  • Cleaning or replacing dirty filters and clearing any clogs in the air intake can help improve the air purifier’s performance.
  • Understanding the functionality of the bricken switch is crucial for effective troubleshooting and it can be replaced if faulty.
  • Gathering the necessary tools such as a screwdriver set, multimeter, soldering iron, wire cutters, and wire strippers is important for repairing the air purifier.

Identifying the Issue With Your Sharper Image Ionic Air Purifier

You’ll need to identify the issue with your Sharper Image Ionic Air Purifier before attempting to fix it. Troubleshooting techniques can help you pinpoint the problem and save you time and effort.

Advertisement

One common issue is a malfunctioning switch, which can prevent the air purifier from turning on or off. To troubleshoot this, first, check the power supply and ensure it is properly connected. If the power supply is fine, inspect the switch for any signs of damage or loose connections.

Another common issue is poor air purification performance. This could be caused by dirty filters or a clogged air intake. Regularly cleaning and replacing the filters can help resolve this problem.

Understanding the Functionality of the Bricken Switch

To understand how the bricken switch works, it’s important to know its functionality.

The bricken switch is a crucial component of the Sharper Image Ionic Air Purifier. It controls the power supply and allows the user to turn the device on or off.

The switch is designed to be durable and reliable, but like any electronic component, it can encounter problems. Common switch problems include a loose connection, a faulty switch mechanism, or a broken internal component.

Advertisement

Troubleshooting techniques for these issues involve checking the wiring connections, testing the switch with a multimeter, and inspecting for any visible damage.

If the switch is found to be faulty, it can be replaced with a compatible replacement part. Understanding the functionality of the bricken switch is essential for effective troubleshooting and resolving common switch problems.

Gathering the Necessary Tools for the Repair

Before starting the repair, make sure you have all the necessary tools. It’s important to be prepared in order to successfully fix your Sharper Image ionic air purifier with a broken switch. Here is a checklist of the tools you will need:

Advertisement
  • Screwdriver set: You will need a variety of screwdrivers to remove the screws holding the purifier’s casing together.
  • Multimeter: This tool is essential for testing the electrical connections and determining if the switch is faulty.
  • Soldering iron: If the switch needs to be replaced, you’ll need a soldering iron to remove the old switch and solder in the new one.
  • Wire cutters and strippers: These tools will be necessary for cutting and stripping wires if any repairs need to be made.

Once you have gathered all these tools, you’ll be ready to begin the repairing process.

Step-by-Step Guide to Disassembling the Air Purifier

Once you’ve gathered the necessary tools, you can start disassembling the air purifier following these step-by-step instructions.

Disassembling an air purifier may seem daunting, but with the right techniques, it can be a straightforward process.

The first step is to unplug the purifier from the power source and remove the front cover. Be careful not to force any parts or use excessive pressure, as this can lead to damage.

Next, detach the filters and set them aside. Then, remove any screws or clips holding the housing together, taking note of their respective positions. It’s important to avoid common mistakes like losing small screws or mishandling delicate components.

Once you have successfully disassembled the air purifier, you can move on to repairing or replacing the faulty bricken switch.

Advertisement

Repairing or Replacing the Faulty Bricken Switch

When it comes to troubleshooting a faulty switch on your Air Purifier, there are a few key points to consider.

First, you’ll want to identify the source of the problem by checking the connections and testing the switch with a multimeter.

Once you’ve determined that the switch is indeed the issue, you’ll have a few repair options available, such as cleaning or replacing the switch.

Advertisement

If all else fails, finding replacement switches that are compatible with your Air Purifier model can be a viable solution to get your device back up and running smoothly.

Troubleshooting the Switch

If the switch on your sharper image ionic air purifier is not working, try checking the connections first. Troubleshooting techniques can often help identify and fix common switch problems.

Here are some steps you can take to troubleshoot the switch:

  • Check the power source: Ensure that the air purifier is plugged into a functioning electrical outlet.

  • Inspect the switch connections: Verify that the switch is securely connected to the wires and there are no loose or damaged connections.

  • Clean the switch: Dust or debris may prevent the switch from functioning properly. Use a soft cloth or compressed air to clean the switch thoroughly.

  • Test the switch with a multimeter: A multimeter can help determine if the switch is faulty by measuring the continuity of the electrical circuit.

Repair Options Available

To resolve any issues with your device, you have several repair options available.

When it comes to repairing an electronic device like a Sharper Image Ionic Air Purifier with a broken switch, it’s important to consider whether repair or replacement is the better option.

Advertisement

In many cases, repairing the device can be a cost-effective solution.

There are several ways to go about repairing the broken switch.

One option is to contact the manufacturer for assistance. They may be able to provide guidance on how to fix the switch or offer repair services.

Another option is to take the device to a professional repair technician who specializes in electronic devices. They can diagnose the issue and provide a cost estimate for the repair.

It’s important to weigh the cost of the repair against the cost of a new device to determine the most cost-effective solution.

Advertisement

Finding Replacement Switches

After exploring the various repair options available for the Sharper Image Ionic Air Purifier with a broken switch, let’s now focus on finding replacement switches. When it comes to fixing electronic devices, it’s essential to locate compatible parts to ensure a successful repair.

Here are a couple of methods to find the right switch for your air purifier:

  1. Manufacturer’s Website: Visit the official website of the Sharper Image brand and navigate to their support or parts section. Look for the specific model of your air purifier and check if they offer replacement switches.

  2. Third-Party Suppliers: Search online marketplaces or electronic parts stores for compatible switches. Make sure to verify the compatibility with your model before making a purchase.

Reassembling the Air Purifier and Testing for Functionality

Once you’ve reassembled the air purifier, it’s time to test it for functionality.

There are a few testing methods you can use to ensure that your Sharper Image ionic air purifier is working properly.

First, plug in the purifier and turn it on. Check if the indicator lights are functioning correctly and if the purification process starts.

Advertisement

Next, place a piece of tissue or a smoke source near the purifier to see if it effectively removes particles from the air.

Additionally, listen for any unusual noises that may indicate a problem with the motor or fan.

Common issues you might encounter during testing include a faulty power switch, insufficient airflow, or ineffective purification. By addressing these issues, you can ensure that your air purifier is working optimally.

Moving on to maintenance tips to prevent future issues with your air purifier…

Maintenance Tips to Prevent Future Issues With Your Air Purifier

To prevent future issues with your air purifier, it’s important to regularly clean or replace the filters according to the manufacturer’s instructions. Neglecting this crucial step can result in decreased efficiency and potential damage to your purifier.

Advertisement

Here are some maintenance tips to help prevent dust buildup and extend the lifespan of your air purifier:

  • Regularly clean or replace the filters: Dust and debris can accumulate on the filters, reducing their effectiveness. Cleaning or replacing them as recommended will ensure optimal performance.

  • Keep the surrounding area clean: Dust and dirt can settle on surfaces and find their way into the air purifier. Regularly dusting and vacuuming the room will minimize the amount of debris entering the purifier.

  • Place your air purifier in the appropriate location: Avoid placing the purifier in areas with high levels of dust or near potential sources of pollutants, such as smoking areas or kitchens.

Frequently Asked Questions

Can I Use Any Type of Switch to Replace the Faulty Bricken Switch?

I can use alternative switches to replace the faulty bricken switch. Troubleshooting the bricken switch involves identifying the issue, disconnecting power, removing the old switch, and connecting the new one properly.

How Often Should I Clean the Filter in My Sharper Image Ionic Air Purifier?

I clean the filter in my Sharper Image Ionic Air Purifier regularly to ensure its optimal performance. Signs that indicate the filter needs cleaning or replacing include reduced airflow and a noticeable decrease in air quality.

Can I Use the Air Purifier Without the Bricken Switch?

Sure, you can use the air purifier without the bricken switch, but it may not function optimally. To troubleshoot, check for alternative solutions like cleaning the filter and ensuring proper power supply.

Are There Any Potential Dangers or Risks Involved in Repairing the Air Purifier Myself?

There can be potential risks and safety concerns involved in repairing an air purifier yourself. It is important to have the necessary knowledge and expertise to avoid any accidents or further damage to the device.

Advertisement

What Should I Do if the Air Purifier Still Doesn’t Function Properly After Following the Repair Steps?

If the air purifier still doesn’t function properly after following the repair steps, I would suggest exploring alternative repair methods and troubleshooting common issues. It’s important to thoroughly investigate the problem and consider seeking professional assistance if needed.

Conclusion

In conclusion, repairing a Sharper Image Ionic Air Purifier with a bricken switch issue requires careful disassembly, repair or replacement of the faulty switch, and reassembling the unit.

By following the step-by-step guide and using the necessary tools, you can restore the functionality of your air purifier.

Remember to perform regular maintenance to prevent future issues.

With a little know-how and attention to detail, you can enjoy the benefits of cleaner air in your home.

Advertisement

In the dynamic world of air purifiers and clean air advocacy, Aire stands out as a beacon of knowledge and passion. As the Editor in Chief of Aero Guardians, Aire has been instrumental in shaping the platform's voice and direction, ensuring that every piece of content resonates with clarity, authority, and authenticity.

Continue Reading
Advertisement

Air Purifier Guides

How to Use Winix Plasmawave Air Purifier

Published

on

By

An image showcasing a person effortlessly operating the Winix Plasmawave Air Purifier in a well-lit living room, with visible dust particles being effectively filtered, and the device's sleek design enhancing the ambiance

When I opened my new Winix Plasmawave Air Purifier, I was filled with excitement. The simple setup and easy-to-use control panel helped me grasp the device’s capabilities quickly.

Adjusting the air purification settings was a breeze, and with regular cleaning and maintenance, I knew I could rely on this purifier for optimal performance.

Join me as I share my troubleshooting tips and reveal the secrets to unlocking the full potential of the Winix Plasmawave Air Purifier.

Key Takeaways

  • The unboxing process is straightforward and hassle-free, with clear instructions provided in the user manual.
  • The control panel and remote control offer easy access to all the necessary features and settings for effective operation.
  • Regular maintenance, including filter replacement and cleaning, is crucial for optimal performance and longevity of the air purifier.
  • Troubleshooting techniques can help resolve common issues and ensure the air purifier’s maximum effectiveness in improving indoor air quality.

Unboxing and Setup

Let’s start by unboxing and setting up the Winix PlasmaWave air purifier.

The unboxing process was straightforward and hassle-free. Inside the box, I found the air purifier unit, filters, and a user manual.

I began by removing all the protective packaging from the unit. Then, I carefully installed the filters into their designated slots. The unit has a pre-filter, a carbon filter, and a True HEPA filter, which work together to capture and eliminate various pollutants.

Advertisement

Once the filters were securely in place, I plugged in the air purifier and turned it on. The setup instructions provided clear step-by-step guidance on how to adjust the settings and customize the air purifier’s performance to my liking.

Overall, the unboxing and setup process was simple, making it easy for me to start using the Winix PlasmaWave air purifier right away.

Understanding the Control Panel

The control panel on this device provides all the necessary information to operate it effectively. It is designed to be user-friendly, with intuitive buttons and clear labels. Here are some key features of the control panel:

  • Power Button: This is the main button to turn the air purifier on and off.
  • Fan Speed: You can adjust the fan speed to your preference, choosing from low, medium, or high.
  • PlasmaWave Button: This feature helps to neutralize viruses, bacteria, and other pollutants in the air.
  • Timer: You can set a timer to automatically turn off the air purifier after a certain period of time.
  • Filter Reset Indicator: This light will illuminate when it’s time to replace the filters.

Using the remote control, you can conveniently access all these features from a distance. It allows you to adjust settings, turn on/off the air purifier, and even set a timer without having to walk up to the control panel.

For more detailed instructions on how to replace the filters, refer to the filter replacement guide provided with the air purifier. It gives step-by-step instructions and helpful tips to ensure proper maintenance of your device.

Adjusting Air Purification Settings

To adjust the settings on this device, simply press the buttons on the control panel or use the remote control.

Advertisement

The Winix PlasmaWave air purifier offers numerous air purification benefits, which in turn provide significant health benefits. By adjusting the settings, you can customize the air purification process to suit your specific needs.

For instance, you can select the fan speed to control the airflow and adjust the intensity of the purification process. Additionally, you can choose between different modes, such as Auto, Sleep, or Turbo, depending on the level of air purification required.

These settings allow you to optimize the efficiency of the air purifier, ensuring that it effectively removes pollutants, allergens, and other harmful particles from the air, resulting in cleaner and healthier indoor air for you and your family.

Cleaning and Maintenance Tips

When cleaning and maintaining this device, remember to regularly change the filters and wipe down the exterior with a damp cloth. It is important to follow a maintenance schedule to ensure optimal performance of your Winix PlasmaWave air purifier.

Here are some cleaning and maintenance tips to keep in mind:

Advertisement
  • Filter Replacement:

  • Replace the pre-filter every 3 months or as needed to remove larger particles like dust and pet hair.

  • The True HEPA filter should be replaced every 12 months to effectively capture allergens and pollutants.

  • Exterior Cleaning:

  • Use a soft, damp cloth to wipe down the exterior of the air purifier regularly to remove dust and dirt.

  • Avoid using harsh chemicals or abrasive materials that could damage the device.

Troubleshooting and Tips for Optimal Performance

For optimal performance, make sure you clean the filters regularly and avoid using harsh chemicals on the exterior.

When it comes to troubleshooting techniques for your Winix PlasmaWave air purifier, there are a few things you can try.

If the unit is not turning on, check if it is properly plugged into a power source. If it still doesn’t work, try resetting it by unplugging it for a few minutes and then plugging it back in.

If you notice a decrease in airflow, it could be due to a clogged filter. In this case, remove the filter and clean it according to the manufacturer’s instructions.

Lastly, to improve indoor air quality, consider placing the air purifier in a central location and running it on a higher fan speed for maximum effectiveness.

Advertisement

Frequently Asked Questions

Can the Winix Plasmawave Air Purifier Remove Pet Dander and Allergens From the Air?

Yes, the Winix Plasmawave Air Purifier effectively removes pet dander and allergens from the air. It’s been a great help in relieving my allergies and keeping the air clean and fresh.

How Often Should I Replace the Filters in the Winix Plasmawave Air Purifier?

I replace the filters in my Winix Plasmawave air purifier every 6-12 months. Replacement filters can be purchased online or at stores that sell air purifiers and filters.

Can I Use the Air Purifier in a Large Room or Open Floor Plan?

In a large room or open floor plan, the Winix Plasmawave Air Purifier can effectively clean the air. Its powerful filtration system and wide coverage area make it suitable for these spaces.

Does the Winix Plasmawave Air Purifier Emit Any Harmful Gases or Chemicals Into the Air?

No, the Winix Plasmawave Air Purifier does not emit any harmful gases or chemicals into the air. It has been thoroughly tested and proven to be safe for use.

Can I Leave the Air Purifier on All Day and Night, or Should I Turn It off When Not in Use?

I leave my air purifier on all day and night for continuous purification. It’s designed for 24/7 usage, so there’s no need to turn it off when not in use. This ensures clean air throughout my home.

Advertisement

Can the Winix Plasmawave Air Purifier Help with Common Air Quality Issues?

Looking for a solution to common air quality issues? The Winix Plasmawave air purifier, as recommended in the “air purifier necessity guide,” effectively removes allergens, dust, and odors from the air. With its advanced technology, this air purifier can greatly improve the air quality in your home or office.

Conclusion

In conclusion, the Winix PlasmaWave air purifier has proven to be a breath of fresh air in my home.

Its unboxing and setup process was like unwrapping a gift from the heavens, and understanding the control panel was as simple as deciphering a secret code.

Adjusting the air purification settings felt like harnessing the power of the wind itself, while cleaning and maintenance tips kept my purifier running smoothly like a well-oiled machine.

Troubleshooting and maximizing performance felt like unlocking the secrets of the universe.

Advertisement

With this purifier, my home has become an oasis of clean, fresh air.

Continue Reading

Air Purifier Guides

How to Use Ozone Air Purifier

Published

on

By

An image showcasing a well-lit room with an ozone air purifier in the corner, emitting a soft, blue glow

Want to eliminate those irritating allergens and odors in your home? Then check out the ozone air purifier!

In this article, I’ll guide you through the ins and outs of using this powerful device.

From understanding the basics to choosing the right purifier for your needs, we’ll cover it all.

Get ready to breathe in cleaner, fresher air as we delve into the world of ozone air purifiers.

Key Takeaways

  • Ozone air purifiers remove pollutants and odors by producing ozone.
  • High levels of ozone can be harmful to humans, pets, and plants.
  • Choose an ozone air purifier appropriate for the room size to avoid health risks.
  • Regularly clean and maintain the ozone air purifier for optimal performance.

Understanding the Basics of Ozone Air Purifiers

To understand the basics of ozone air purifiers, you need to know how they work and their potential benefits.

Ozone air purifiers are designed to remove pollutants and odors from the air by producing ozone, a molecule made up of three oxygen atoms. When ozone is released into the air, it reacts with airborne contaminants, such as bacteria, viruses, and mold, breaking them down and neutralizing their harmful effects. This process effectively purifies the air and eliminates unpleasant smells.

Advertisement

The benefits of using ozone air purifiers include improved indoor air quality, reduced allergy symptoms, and elimination of airborne pathogens. However, it is important to take precautions when using ozone air purifiers, as high levels of ozone can be harmful to humans, pets, and plants.

It is recommended to follow the manufacturer’s instructions and use ozone air purifiers in well-ventilated areas. Understanding the benefits and precautions of ozone air purifiers is essential in choosing the right one for your needs.

Choosing the Right Ozone Air Purifier for Your Needs

When selecting the right ozone air purifier for your needs, consider the size of the room you want to purify. Ozone air purifiers work by releasing ozone molecules into the air, which can help eliminate odors and kill bacteria and viruses.

However, it’s important to note that ozone can be harmful to humans and pets if inhaled in high concentrations. Therefore, it’s crucial to choose an ozone air purifier that is appropriate for the size of your room to avoid potential health risks.

A good buying guide is to look for the recommended room size on the product’s packaging or specifications. This will ensure that the ozone concentration remains within safe levels and effectively purifies the air without compromising your health.

Advertisement

Setting Up Your Ozone Air Purifier Correctly

Make sure you position the ozone air purifier in a central location within the room for optimal air circulation. This is an important step in the installation process to ensure that the purifier can effectively clean the air in the entire room.

Additionally, it is recommended to place the purifier at least three feet away from walls or furniture to allow for proper airflow.

When troubleshooting common issues with your ozone air purifier, there are a few things to keep in mind. First, make sure that the purifier is plugged in and turned on. Check the power supply and ensure that it is functioning properly. If the purifier is not producing ozone or there is a strange odor, check the plates or filters for any dirt or debris that may be affecting the performance.

By setting up your ozone air purifier correctly and addressing any troubleshooting issues, you can ensure that it operates safely and effectively in your home or office.

Now, let’s move on to the next section on how to operate your ozone air purifier.

Advertisement

Operating Your Ozone Air Purifier Safely and Effectively

Ensure that you follow the safety guidelines and operate your ozone air purifier correctly for optimal results. It is important to address common misconceptions and potential health risks associated with ozone air purifiers. While ozone can effectively remove odors and kill bacteria, it can also be harmful if not used properly. To operate your ozone air purifier safely, make sure to keep the room well-ventilated and follow the manufacturer’s instructions for ozone output levels and exposure times. Avoid using ozone air purifiers in occupied spaces, as high levels of ozone can irritate the respiratory system and worsen existing respiratory conditions. It is also crucial to periodically check the ozone levels in the room using an ozone monitor. By taking these precautions, you can enjoy the benefits of an ozone air purifier while minimizing potential health risks.

Common Misconceptions Potential Health Risks
Ozone air purifiers are High ozone levels can irritate the
completely safe to use. respiratory system and worsen
existing respiratory conditions.
Ozone air purifiers only Prolonged exposure to high levels of
remove odors. ozone can cause lung damage.
Ozone air purifiers can People with asthma, allergies, and
improve indoor air other respiratory conditions are
quality. more sensitive to ozone and should
avoid using ozone air purifiers.

Maintaining and Cleaning Your Ozone Air Purifier

To keep your ozone air purifier working effectively, it’s important to regularly clean and maintain it. By following a recommended maintenance schedule, you can ensure that your purifier continues to provide clean and fresh air for your space.

One common issue that may arise is a decrease in ozone production. This can be caused by a dirty ozone plate or a clogged filter. To troubleshoot this issue, simply remove the ozone plate and clean it with warm soapy water. Additionally, check the filter and clean or replace it if necessary.

It is also important to clean the exterior of the purifier regularly to prevent dust and dirt buildup. By properly maintaining your ozone air purifier, you can extend its lifespan and enjoy the benefits of clean air in your home or office.

Frequently Asked Questions

Can an Ozone Air Purifier Remove Pet Dander and Allergens From the Air?

Yes, an ozone air purifier can remove pet dander and allergens from the air. However, it’s important to note that ozone air purifiers can also pose potential health risks, so proper usage and precautions should be followed.

Advertisement

How Long Does It Take for an Ozone Air Purifier to Eliminate Odors in a Room?

Using an ozone air purifier is effective in eliminating odors in a room. It usually takes a few hours for the ozone to break down and neutralize the odor molecules. Regular maintenance ensures its optimal performance.

Are Ozone Air Purifiers Safe to Use Around Children and Pets?

Ozone air purifiers can be harmful to asthmatic individuals and people with respiratory issues. They can also be detrimental to plants and indoor gardens. It’s important to consider these factors before using them.

Can an Ozone Air Purifier Eliminate Mold and Mildew in a Damp Environment?

An ozone air purifier can effectively eliminate mold and mildew in a damp environment. By producing ozone, it eliminates moisture and prevents mold growth. Regular use in such environments can help maintain a clean and healthy space.

Do Ozone Air Purifiers Require Regular Filter Replacements Like Traditional Air Purifiers?

Ozone air purifiers have the advantage of not requiring regular filter replacements like traditional air purifiers. However, it is important to maintain them properly by cleaning the ozone plates regularly to ensure efficient operation.

Can I Use an Ionic Air Purifier in the Same Way as an Ozone Air Purifier?

Yes, you can use an ionic air purifier in the same way as an ozone air purifier. Both work by creating an ionic air purifier that emits negatively charged ions to remove particles from the air. However, it’s important to note that ozone air purifiers also emit ozone, which can be harmful in high concentrations.

Advertisement

Conclusion

So there you have it, a comprehensive guide on how to use an ozone air purifier.

While some may argue that ozone air purifiers can be harmful and should be avoided, it is important to note that when used correctly and in moderation, they can provide effective air purification.

By understanding the basics, choosing the right purifier, setting it up correctly, operating it safely, and maintaining it regularly, you can enjoy clean and fresh air in your home.

Remember, it’s all about finding the right balance and taking the necessary precautions.

Advertisement

Continue Reading

Air Purifier Guides

How to Use the Air Purifier

Published

on

By

An image showcasing a serene living room, illuminated by soft natural light

Using an air purifier is comparable to having a personal protector for your indoor air quality. It is a straightforward but efficient method to eliminate pollutants and allergens from your home, guaranteeing you inhale clean and fresh air.

In this article, I will guide you through the process of using an air purifier, from understanding its features to cleaning and maintaining it. With this knowledge, you’ll be able to optimize the performance of your air purifier and enjoy a healthier living environment.

Key Takeaways

  • Air purifiers remove harmful particles and pollutants from the air.
  • Regular maintenance, including cleaning or replacing filters, is essential for optimal performance.
  • Placement and location of the air purifier can affect its effectiveness.
  • Customizing and optimizing usage, such as adjusting fan speed and setting specific hours of operation, can maximize efficiency and air purification results.

Understanding the Air Purifier’s Features

Now let’s take a look at the air purifier’s features and how they can improve the air quality in your home.

Air purifiers are designed to remove harmful particles and pollutants from the air, ensuring a clean and healthy living environment. One of the key features of an air purifier is its filtration system. This system consists of different filters that capture dust, pet dander, pollen, and other allergens.

Regular air purifier maintenance is essential to ensure optimal performance. Cleaning or replacing the filters as recommended by the manufacturer will help maintain the air purifier’s effectiveness.

The benefits of air purification are numerous. By removing pollutants from the air, air purifiers can alleviate allergies, reduce asthma symptoms, and improve overall respiratory health. Additionally, they can eliminate unpleasant odors and create a fresh and inviting atmosphere in your home.

Advertisement

Setting Up Your Air Purifier

To begin setting up your air purifier, you’ll need to plug it into an electrical outlet. Once you’ve done that, there are a few more steps to take to ensure optimal performance.

One important factor to consider is choosing the right size air purifier for your space. A small purifier may not be effective in a large room, while a large purifier may be unnecessary for a small space. Refer to the manufacturer’s guidelines or consult with a professional to determine the appropriate size for your needs.

Additionally, regular maintenance is crucial to keep your air purifier running efficiently. Here are some maintenance tips to keep in mind:

  1. Clean or replace the filters regularly: Depending on the model, filters may need to be cleaned or replaced every few months. This ensures that the purifier can effectively remove pollutants from the air.

  2. Vacuum the exterior: Dust and debris can accumulate on the outside of the purifier, hindering its performance. Regularly vacuuming the exterior helps to maintain its effectiveness.

  3. Check the fan and motor: Ensure that the fan and motor are clean and free from obstructions. This helps to prevent overheating and prolongs the lifespan of the purifier.

  4. Follow the manufacturer’s instructions: Different air purifiers may have specific maintenance requirements. Always refer to the manufacturer’s instructions for proper care and maintenance.

Choosing the Right Location

When it comes to choosing the right location for your air purifier, there are a few key factors to consider.

First, you want to ensure optimal placement for maximum effectiveness. This means placing the purifier in a central location in the room, away from walls and furniture that could obstruct air circulation.

Advertisement

Additionally, factors such as room size, airflow patterns, and the presence of obstacles can all affect the overall air circulation in the space.

Optimal Placement for Effectiveness

For best results, it’s important to place the air purifier in a central location within the room. By doing so, you can maximize its effectiveness in optimizing air quality. The central placement allows the purifier to circulate the air more efficiently, ensuring that all corners of the room are covered.

Avoid placing the purifier near walls or furniture that could obstruct the airflow. It’s also crucial to position the purifier at a suitable height, ideally at the same level as your breathing zone. This ensures that the purifier captures the airborne pollutants effectively.

Additionally, keep in mind that the purifier should be placed away from any potential sources of contamination, such as smoking areas or chemical storage. Taking these steps will help you achieve the best possible air purification results.

Factors Affecting Air Circulation

Positioning the air purifier in a central location within the room allows it to circulate the air more efficiently and optimize air quality. To further enhance the effectiveness of the air purifier, there are two key factors to consider: airflow control and humidity levels.

Advertisement

Airflow Control: Ensuring proper airflow is crucial for the air purifier to work optimally. Avoid placing the purifier near walls, furniture, or curtains that can obstruct the airflow. Position it in an open area, away from any potential obstructions, to allow the purified air to circulate freely throughout the room.

Humidity Levels: Maintaining the right humidity levels is essential for a healthy indoor environment. High humidity can promote the growth of mold and mildew, while low humidity can cause dryness and discomfort. Some air purifiers come with built-in humidifiers, allowing you to control both air quality and humidity levels simultaneously.

Installing the Filters

To install the filters, you’ll need to locate the filter compartment on the side of the air purifier. It’s a crucial step in maintaining the effectiveness of your air purifier.

When installing replacement filters, make sure to read the manufacturer’s instructions carefully. Start by switching off the power and unplugging the device for safety.

Open the filter compartment by releasing the latch or removing the cover. Take out the old filters and dispose of them properly. It’s important to remove any dust or debris that may have accumulated in the compartment before inserting the new filters.

Advertisement

Slide the new filters into place, making sure they fit securely. Finally, close the compartment and plug in your air purifier.

Enjoy cleaner, fresher air once again!

Powering On and Off

When it comes to powering on and off your air purifier, it’s important to understand proper power usage and how to troubleshoot any power issues that may arise.

Proper power usage involves following the manufacturer’s instructions for plugging in and turning on the device, as well as using the correct voltage and outlet.

If you encounter any power issues, such as the air purifier not turning on or suddenly shutting off, troubleshooting steps may include checking the power cord for any damage, ensuring the outlet is functioning properly, and consulting the user manual for specific troubleshooting tips.

Advertisement

Proper Power Usage

Make sure you’re using the correct voltage for the air purifier to prevent any potential damage. Using the wrong voltage can lead to overheating or even a complete malfunction of the device.

To ensure power saving and energy efficiency, here are three important points to consider:

  1. Opt for an air purifier with adjustable power settings. This allows you to customize the energy consumption based on your needs. Lower power settings are ideal for maintaining air quality while minimizing energy usage.

  2. Look for air purifiers with energy-saving features such as automatic shut-off timers or sleep mode. These features allow the device to operate only when necessary, reducing power consumption and extending the lifespan of the purifier.

  3. Consider investing in an air purifier with a high CADR (Clean Air Delivery Rate) and Energy Star certification. These ratings indicate that the purifier meets strict energy efficiency standards while still effectively cleaning the air in your space.

Troubleshooting Power Issues

If your device is not turning on, it may be due to a power issue.

When it comes to fixing malfunctions, the first thing you should do is check the power source. Ensure that the air purifier is properly plugged into a working electrical outlet. Sometimes, the power cord may be loose or damaged, so make sure it is securely connected to both the device and the outlet.

If the power source seems fine, you can try resetting the air purifier by unplugging it for a few minutes and then plugging it back in. Additionally, check if there is a power switch or button that needs to be turned on for the device to function.

Advertisement

Adjusting the Fan Speed

To adjust the fan speed on your air purifier, simply locate the control panel and press the corresponding button. Here’s how you can increase airflow and adjust the fan settings:

  1. Press the ‘Fan Speed’ button on the control panel. This button may be labeled with icons representing different fan speeds, such as low, medium, and high.

  2. Use the up or down arrows on the control panel to cycle through the available fan speed options. Each press of the arrow will adjust the speed incrementally.

  3. Once you’ve selected the desired fan speed, press the ‘OK’ or ‘Enter’ button to confirm your choice.

By adjusting the fan speed, you can customize the airflow of your air purifier to suit your preferences.

Now, let’s move on to exploring the timer function and how it can enhance your experience with the air purifier.

Using the Timer Function

Using the timer function on your air purifier can offer several benefits and allow for efficient usage.

By setting the timer, you can customize the purifying schedule to fit your needs and ensure the air in your space is constantly fresh and clean.

Advertisement

Additionally, understanding the different settings available on the timer can help maximize the effectiveness of your air purifier and make it even more convenient to use.

Timer Benefits and Settings

The timer on the air purifier allows me to easily control when it turns on and off. Here are the benefits of using a timer on my air purifier:

  1. Energy Efficiency: By setting the timer, I can ensure that the air purifier only operates when I need it the most. This not only saves energy but also reduces the electricity bill.

  2. Noise Reduction: Having the air purifier running all the time can be noisy, especially when I’m trying to sleep or relax. With the timer, I can set it to turn off during those times, providing me with a quiet environment.

  3. Customizable Duration: The timer allows me to set the duration for which I want the air purifier to run. Whether it’s for a few hours or the entire night, I can adjust the timer according to my specific needs.

Setting the timer duration is a simple process. I just need to press the timer button and use the controls to set the desired time. Once set, the air purifier will automatically turn on and off at the specified times, providing me with clean and fresh air whenever I need it.

Efficient Usage Tips

Maximize the efficiency of your air purifier by adjusting the settings according to your specific needs and preferences. To help you achieve the best air quality possible, here are some efficient usage tips:

  1. Choose the right fan speed: Adjust the fan speed based on the air pollution level. Higher speeds are suitable for heavy pollution, while lower speeds work well for maintaining clean air.

  2. Position it strategically: Place your air purifier in a central location to allow for optimal air circulation throughout the room.

  3. Regularly clean or replace filters: Clean or replace filters as recommended by the manufacturer. This ensures that the air purifier functions at its highest efficiency.

  4. Keep doors and windows closed: To prevent outdoor pollutants from entering the room, close doors and windows while the air purifier is in operation.

Customizing Purifying Schedule

Now that you understand how to efficiently use your air purifier, let’s dive into the topic of customizing your purifying schedule.

Advertisement

This feature allows you to automate the purification process according to your specific needs. Here are some ways you can optimize your air purifier’s performance:

  1. Customizing timer settings: Most air purifiers come with a built-in timer that allows you to set specific hours of operation. By adjusting the timer settings, you can ensure that your purifier runs when you need it the most, such as during the night when you’re sleeping or during peak pollution hours.

  2. Optimizing purification levels: Depending on the air quality in your surroundings, you can adjust the purification levels of your device. If the air quality is poor, you can set the purifier on a higher speed or activate the turbo mode. On the other hand, if the air quality is relatively good, you can lower the purification levels to conserve energy.

  3. Creating personalized schedules: Some advanced air purifiers offer the option to create personalized schedules. This means you can set different purification levels and timer settings for different times of the day. For example, you can set the purifier to run at a higher speed during cooking or cleaning activities and lower it during quieter hours.

Understanding the Indicator Lights

To use the air purifier properly, it’s important to understand the indicator lights. These lights provide valuable information about the status and performance of the device.

The meanings of the indicator lights may vary depending on the specific model, but they generally indicate important functions such as power, filter replacement, and air quality. For example, a green light often indicates that the purifier is operating normally, while a red light may indicate a problem that needs attention, such as a clogged filter.

If you encounter any issues with the indicator lights, it’s crucial to consult the user manual for troubleshooting steps. Common problems may include flickering lights, lights that don’t turn on, or lights that stay on even when the device is not in use.

Understanding and troubleshooting indicator light issues will help ensure optimal performance and longevity of your air purifier.

Advertisement

Cleaning and Maintaining the Air Purifier

Make sure you regularly clean and maintain your air purifier to keep it running efficiently. Here are some cleaning techniques and tips to help you maintain your air purifier:

  1. Wipe down the exterior: Use a soft, damp cloth to clean the exterior of the air purifier. Avoid using harsh chemicals or abrasive materials that could damage the surface.

  2. Clean the filters: Depending on the type of air purifier you have, you may need to clean or replace the filters regularly. Follow the manufacturer’s instructions for cleaning or replacing the filters to maintain optimal performance.

  3. Vacuum the vents: Dust and debris can accumulate on the vents of your air purifier, reducing its effectiveness. Use a brush attachment on your vacuum cleaner to gently remove any build-up.

By following these cleaning techniques and regularly replacing the filters, you can ensure that your air purifier continues to provide clean and fresh air for you and your family.

Now, let’s move on to troubleshooting common issues with air purifiers.

Troubleshooting Common Issues

First, check if the power cord is securely plugged in and try resetting the device if you encounter any issues.

When it comes to fixing noise problems with your air purifier, there are a few things you can try.

Advertisement

First, make sure that the air purifier is placed on a stable surface and not touching any walls or furniture. Sometimes, vibrations from nearby objects can cause unnecessary noise.

Additionally, check if the air filter is clean, as a clogged filter can strain the motor and create noise.

If the noise persists, it may be a sign of a mechanical issue, in which case contacting customer support would be recommended.

Addressing air quality concerns involves regularly cleaning and replacing the air filters as instructed by the manufacturer.

It’s also important to keep the air purifier in a well-ventilated area and away from any potential sources of pollutants.

Advertisement

Frequently Asked Questions

How Long Should I Run the Air Purifier Each Day?

I run the air purifier for the recommended duration each day to ensure optimal usage. It helps to maintain clean air and improve indoor air quality, which is important for my health and well-being.

Can I Use the Air Purifier in Multiple Rooms?

Yes, you can use the air purifier in multiple rooms. It’s a great way to improve air quality in your office and enjoy the benefits of cleaner air in your bedrooms.

Can I Use Essential Oils With the Air Purifier?

Using essential oils in an air purifier can have health benefits, but it’s important to use them correctly and safely. I can provide guidance on how to properly incorporate essential oils into your air purifier.

How Often Do I Need to Replace the Filters?

I typically replace the filters in my air purifier every 3-6 months, depending on how dirty they get. It’s important to pay attention to signs of a dirty filter, such as reduced airflow or a musty smell.

Does the Air Purifier Remove Pet Dander and Allergens From the Air?

Yes, the air purifier effectively removes pet dander and allergens from the air. It’s an essential part of air purifier maintenance and offers numerous benefits for pet owners, ensuring cleaner and healthier indoor air quality.

Advertisement

Is the Use of Ozone Air Purifier Similar to Regular Air Purifiers?

Yes, ozone air purifier benefits are similar to regular air purifiers in some ways. Both types remove harmful pollutants from the air, such as dust, pollen, and pet dander. However, ozone air purifiers also have the added benefit of neutralizing odors and killing bacteria and mold spores.

Conclusion

In conclusion, using an air purifier is an essential step in ensuring clean and fresh air in your home. By understanding its features and following the proper setup and maintenance procedures, you can effectively eliminate pollutants and allergens from your indoor environment.

Did you know that according to a study conducted by the Environmental Protection Agency (EPA), indoor air can be two to five times more polluted than outdoor air? Investing in an air purifier can significantly improve the air quality in your home and promote better health for you and your family.

Continue Reading

Trending