
I was feeling annoyed when my Hills air purifier stopped working, but I didn’t let it discourage me. By doing some troubleshooting and basic maintenance, I successfully repaired it on my own.
In this article, I’ll guide you through the step-by-step process of repairing your broken Hills air purifier. From checking the power source to replacing faulty parts, I’ll provide you with the knowledge and skills you need to bring your purifier back to life.
Let’s get started!
Key Takeaways
- Troubleshooting techniques can help identify and resolve common problems with the broken Hills air purifier.
- Checking the power source, including the power cord and connections, is important to ensure proper functionality.
- Regularly cleaning or replacing clogged air filters can improve efficiency and prolong the filter lifespan.
- Replacing faulty parts and resetting the purifier can resolve common issues and restore default settings.
Understanding the Problem
You need to figure out what’s wrong with your broken Hills air purifier.
Troubleshooting techniques can help identify and resolve common air purifier issues.
First, check the power source to ensure the unit is properly plugged in. If it still doesn’t turn on, inspect the power cord for any damage or loose connections.
Another common problem is a clogged air filter, which can hinder airflow and reduce efficiency. Remove the filter and clean or replace it if necessary.
Additionally, check the fan and motor for any obstructions or signs of wear.
If the air purifier emits strange odors, it may be due to a dirty or faulty carbon filter.
Regular maintenance, such as cleaning and replacing filters, can prevent many common issues and keep your air purifier running smoothly.
Troubleshooting Steps
To troubleshoot the issue, try following these steps.
-
Check the power source: Ensure that the air purifier is properly plugged in and receiving power. Sometimes, a loose power cord can cause issues with the device’s functionality.
-
Clean or replace the filters: Clogged or dirty filters can hinder the air purifier’s performance. Clean or replace them according to the manufacturer’s instructions.
-
Remove any obstructions: Make sure there are no objects blocking the air intake or outlet vents. Blocked vents can restrict airflow and reduce the purifier’s effectiveness.
-
Reset the device: Some air purifiers have a reset button or option in the settings menu. Try resetting the device to restore it to its default settings.
-
Consult the user manual: If the above steps don’t resolve the issue, refer to the user manual for troubleshooting tips specific to your air purifier model.
Understanding air pollution and the common air purifier issues can help you effectively troubleshoot and fix any problems you may encounter.
Checking the Power Source
When it comes to troubleshooting power outlets, there are a few key points to keep in mind.
First, it’s important to inspect the power outlet itself for any visible damage or loose connections.
Additionally, checking the cord and plug for any signs of wear or fraying is crucial to ensuring a safe and reliable power source.
Power Outlet Troubleshooting
If the air purifier isn’t turning on, the first thing to check is the power outlet. This is a common issue that can be easily overlooked. To troubleshoot the power outlet, follow these steps:
- Make sure the power outlet is receiving electricity by plugging in another device.
- Check if there is a power surge protection device connected to the outlet. It’s important to have surge protection to prevent damage to electronic appliances.
- Ensure that the outlet isn’t overloaded with too many devices plugged in at once. This can cause the circuit to trip and result in no power.
- Inspect the outlet for any visible damage or loose connections. If there are any issues, it’s best to consult a professional electrician for repairs.
- Always prioritize electrical safety precautions when working with power outlets. Remember to turn off the power before inspecting or making any repairs.
Cord and Plug Inspection
Inspect the cord and plug for any visible damage or loose connections before proceeding with any further troubleshooting steps. A damaged cord or loose plug can cause the Hills air purifier to malfunction or not work at all. Start by visually examining the cord for any cuts, fraying, or exposed wires. If you notice any damage, it is important to replace the cord immediately.
Similarly, check the plug for any signs of wear or loose connections. If the plug is loose, it may need to be repaired or replaced. Remember, safety is crucial when dealing with electrical components, so always unplug the device before inspecting or repairing the cord or plug.
Once you have ensured the cord and plug are in good condition, you can move on to the next step of cleaning the air filters.
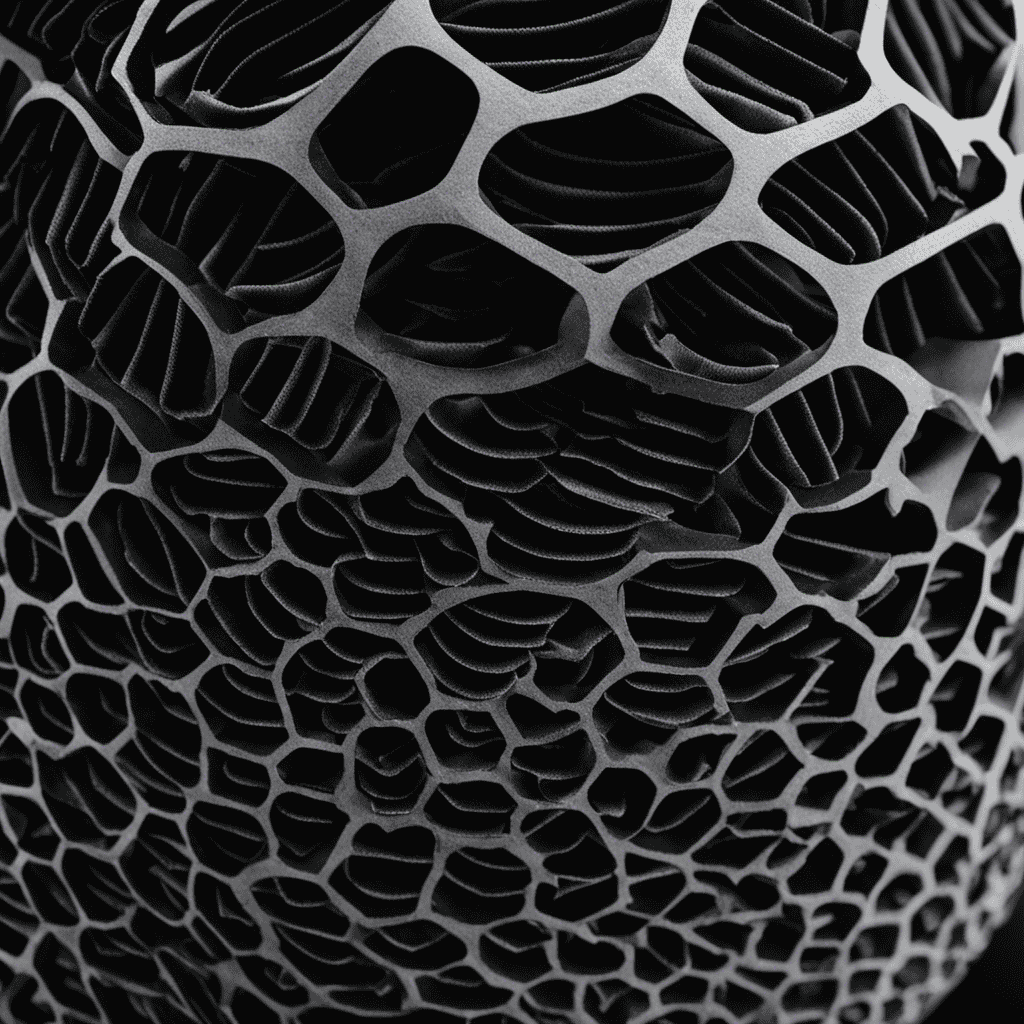
Cleaning the Air Filters
Proper filter maintenance is crucial for maintaining the efficiency and performance of your air purifier. In this discussion, we will explore the necessary cleaning techniques for filters to ensure optimal air quality.
Additionally, we will delve into the frequency of filter cleaning to ensure that your air purifier continues to function effectively.
Proper Filter Maintenance
To keep your air purifier working effectively, make sure you’re regularly changing the filters. Filter maintenance is crucial for optimal performance and longevity of your air purifier. Here are some important points to consider:
-
Frequency: Replace the filters as recommended by the manufacturer. Typically, it’s every 6-12 months, but it may vary depending on usage and air quality.
-
Type of Filters: Identify the specific filters your air purifier requires. Common types include pre-filters, HEPA filters, and activated carbon filters.
-
Installation: Follow the manufacturer’s instructions carefully when installing new filters. Proper installation ensures a tight seal and prevents air leakage.
-
Monitoring: Regularly check the filters for dirt, debris, and discoloration. If they appear excessively dirty or damaged, it’s time for a replacement.
-
Filter Reset: After changing the filters, don’t forget to reset the filter indicator on your air purifier. This helps you keep track of when the next replacement is due.
Cleaning Techniques for Filters
Now that we’ve discussed the importance of proper filter maintenance, let’s dive into some cleaning techniques you can use to keep your Hills air purifier in top condition. Regular cleaning is essential to ensure the longevity and efficiency of your air purifier. Here are some DIY techniques you can employ:
- Vacuuming: Use a vacuum cleaner with a brush attachment to gently remove dust and debris from the filter surface.
- Rinsing: For washable filters, rinse them under running water to remove dirt and grime. Be sure to let them dry completely before reinstalling.
- Brushing: Use a soft brush to gently dislodge stubborn particles from the filter. Be careful not to damage the filter material.
- Compressed Air: If available, use compressed air to blow away dust and dirt from the filter. Hold the canister at least 6 inches away to avoid damaging the filter.
By following these proper maintenance and DIY techniques, you can ensure your Hills air purifier continues to provide clean and fresh air for years to come.
| Technique | Description |
|---|---|
| Vacuuming | Use a vacuum cleaner with a brush attachment to remove dust and debris from the filter surface. |
| Rinsing | For washable filters, rinse them under running water to remove dirt and grime. |
| Brushing | Gently dislodge stubborn particles from the filter using a soft brush. |
| Compressed Air | Use compressed air to blow away dust and dirt from the filter, holding the canister 6 inches away. |
| Maintenance | Regularly clean the filters to ensure longevity and efficiency of the air purifier. |
Frequency of Filter Cleaning
Regular filter cleaning is crucial for maintaining the efficiency and longevity of your air purifier. Not only does it ensure that the air purifier is able to effectively remove pollutants from the air, but it also prevents the build-up of dirt and debris that can impede airflow.
Here are five key reasons why regular filter cleaning is important:
-
Improved air quality: A clean filter allows the air purifier to effectively remove pollutants, allergens, and odors from the air, ensuring cleaner and healthier indoor air.
-
Energy efficiency: A dirty filter can restrict airflow, causing the air purifier to work harder and consume more energy. Regular cleaning helps maintain optimal performance and energy efficiency.
-
Prolonged filter lifespan: Cleaning the filter regularly prevents clogging and extends the lifespan of the filter, reducing the need for frequent filter replacement.
-
Cost savings: By extending the lifespan of the filter, regular cleaning helps save money on filter replacements.
-
Overall system performance: A clean filter ensures that the air purifier functions optimally, providing maximum benefit in terms of air purification and improving the overall performance of the system.
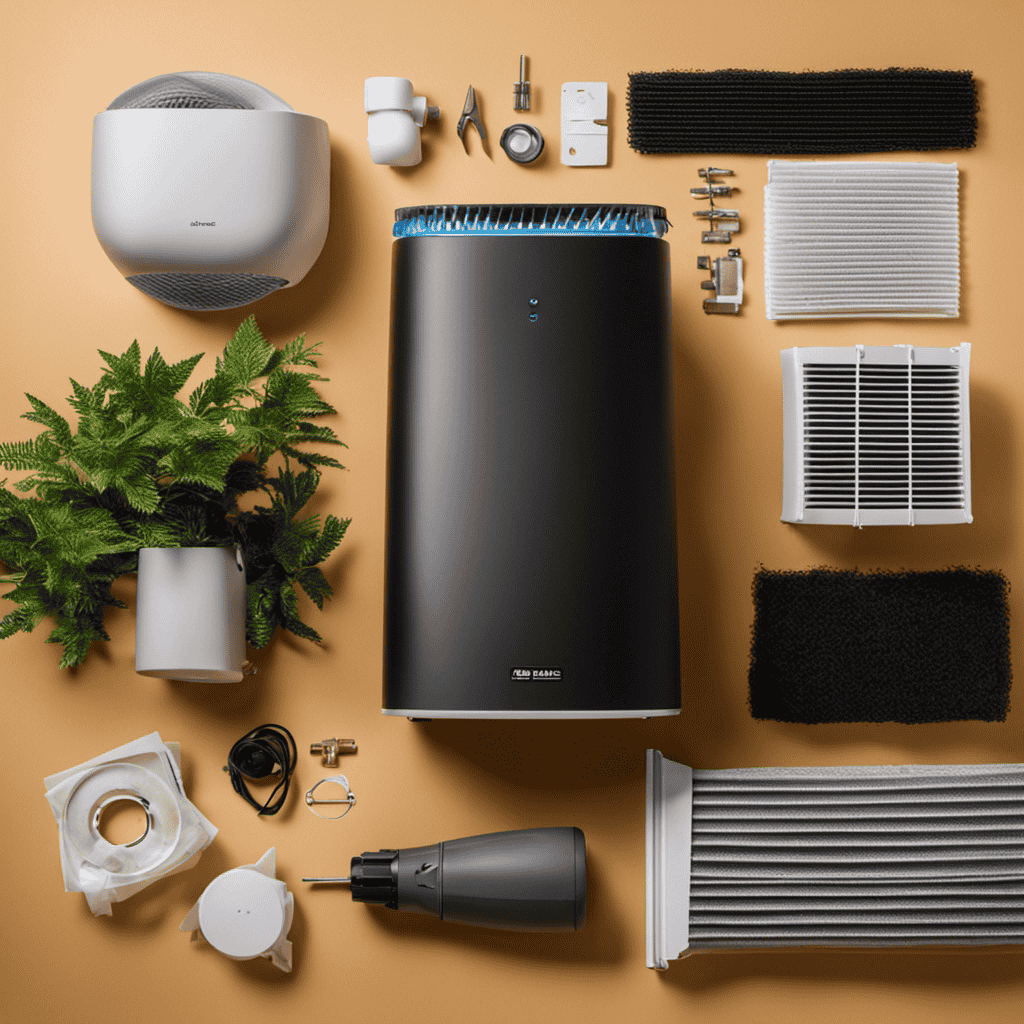
Replacing Faulty Parts
First, you’ll need to identify the faulty parts of your broken Hills air purifier. To begin with, check the power supply and ensure it is properly connected. If the purifier still doesn’t work, it may be necessary to replace damaged components.
Start by unplugging the purifier and removing the outer casing. Inspect the internal components, such as the fan, motor, and filters, for any signs of damage or wear. If you find any faulty parts, you can order replacements from the manufacturer or a trusted supplier. When replacing damaged components, be sure to follow the manufacturer’s instructions and use the correct tools.
Troubleshooting techniques can also help identify the specific problem and guide you in the process. After replacing the faulty parts, you can proceed to the next step of resetting the purifier.
Resetting the Purifier
To reset your purifier, simply locate the reset button on the control panel and press it for at least five seconds. This will restore the purifier’s default settings and resolve any issues you may be experiencing. Resetting the purifier is often a simple and effective solution for common problems.
Here are some common issues that can be resolved by resetting the purifier:
-
Slow fan speed: If your purifier’s fan is not running at its maximum speed, a reset can help restore it to its proper functioning.
-
Error codes: Sometimes, the purifier may display error codes indicating a malfunction. Resetting the purifier can clear these codes and allow the purifier to operate normally again.
-
Unresponsive controls: If the control panel buttons are not responding, resetting the purifier can help resolve this issue and restore control functionality.
-
Filter replacement reminder: After replacing the filters, resetting the purifier will ensure that the filter replacement reminder is reset and accurately reflects the new filter’s lifespan.
-
Power issues: If the purifier is not turning on or experiencing power interruptions, a reset can help troubleshoot and resolve these power-related problems.
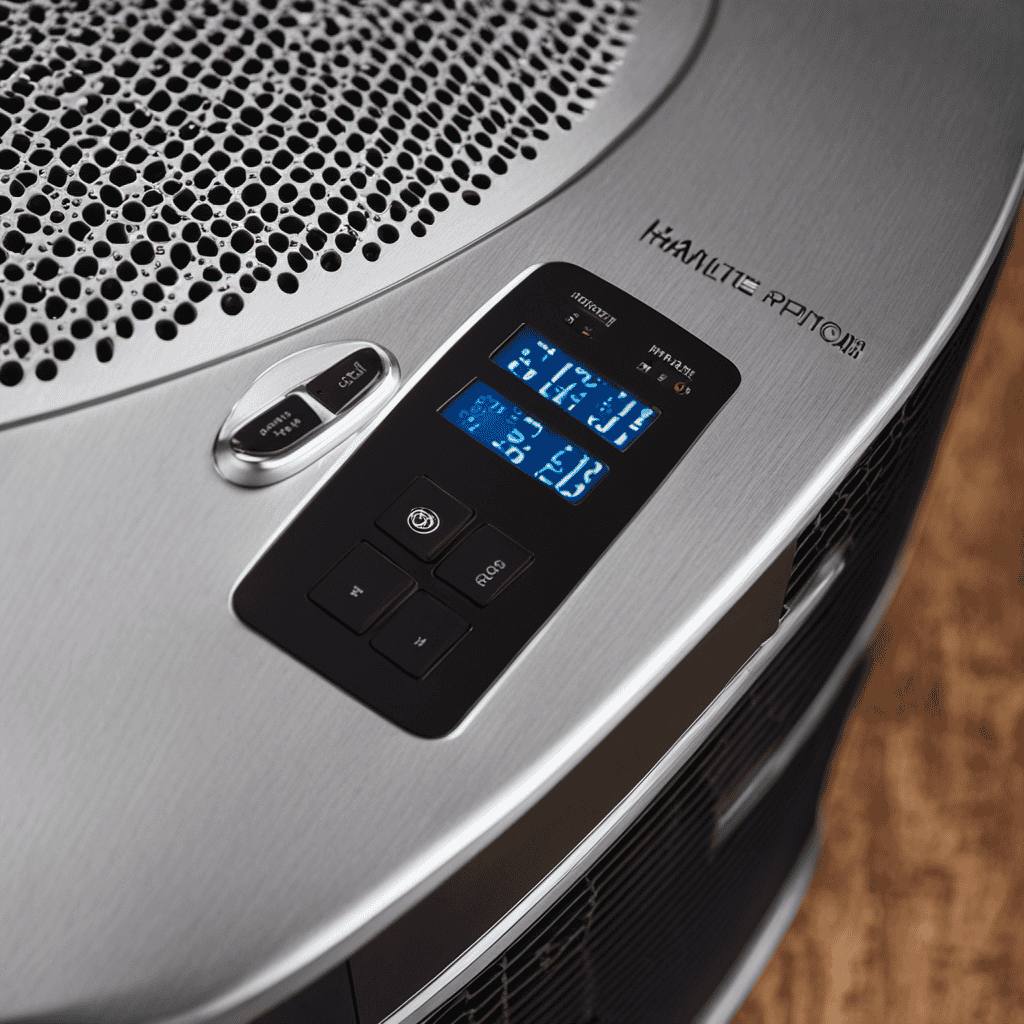
Calibrating the Sensor
After successfully resetting the purifier, the next step in fixing the broken Hills air purifier is calibrating the sensor.
Sensor calibration is crucial for accurate air quality measurement. To begin, locate the sensor on the purifier, usually located on the front or top panel. Ensure that the sensor is clean and free from any debris or dust.
Next, refer to the user manual for specific instructions on how to calibrate the sensor. This may involve pressing certain buttons or navigating through the control panel. Follow the steps carefully and precisely to ensure accurate calibration.
Once the sensor is calibrated, it will provide precise readings of the air quality, allowing the purifier to adjust its settings accordingly.
Ensuring Proper Ventilation
Ensuring proper ventilation is essential for maintaining good indoor air quality. Proper airflow not only helps to remove pollutants and odors from the air, but it also helps to regulate temperature and humidity levels. Here are five important benefits of clean air and ensuring proper airflow:
- Improved respiratory health: Clean air reduces the risk of respiratory issues such as allergies, asthma, and lung infections.
- Enhanced cognitive function: Breathing clean air can improve concentration, productivity, and overall mental well-being.
- Reduced risk of illness: Clean air helps to prevent the spread of airborne diseases and viruses.
- Odor control: Proper ventilation eliminates unpleasant odors, keeping your indoor environment fresh and inviting.
- Increased energy efficiency: Good airflow helps to distribute conditioned air evenly, reducing the load on your HVAC system and lowering energy costs.
By ensuring proper ventilation and clean air, you can create a healthier and more comfortable living or working environment.
Now, let’s discuss some maintenance tips to help you maintain optimal indoor air quality.
Maintenance Tips
Make sure you regularly clean and replace your HVAC filters to maintain optimal indoor air quality. Understanding maintenance and troubleshooting techniques for your HVAC system is essential for keeping it running smoothly.
One important maintenance task is cleaning or replacing the air filters. These filters help to remove dust, allergens, and other pollutants from the air, ensuring that you and your family breathe clean and healthy air. Over time, these filters can become clogged with dirt and debris, reducing their effectiveness. By regularly cleaning or replacing them, you can ensure that your HVAC system continues to provide optimal air quality.
Additionally, understanding troubleshooting techniques can help you identify and fix common problems with your HVAC system, such as uneven cooling or strange noises. However, if you are unable to resolve the issue on your own, it may be time to seek professional help.
Seeking Professional Help
When it comes to troubleshooting air purifier issues, there are a few DIY techniques that can be useful. However, in some cases, it may be necessary to seek professional help.
It’s important to consider the cost of professional services and weigh it against the potential benefits of DIY troubleshooting.
DIY Troubleshooting Techniques
If you’re having trouble with a broken Hills air purifier, try some DIY troubleshooting techniques to identify and fix the issue. Here are some troubleshooting tips to help you get started:
-
Check the power source: Make sure the air purifier is properly plugged in and that the outlet is functioning correctly.
-
Clean or replace the filters: Clogged or dirty filters can affect the performance of the air purifier. Clean or replace them as needed.
-
Inspect the fan and motor: A malfunctioning fan or motor can cause the air purifier to stop working. Check for any visible damage or signs of wear and tear.
-
Reset the settings: Sometimes, resetting the air purifier to its default settings can resolve minor issues.
-
Contact customer support: If all else fails, reach out to the manufacturer’s customer support for further assistance.
By following these troubleshooting tips, you can often resolve common issues with your Hills air purifier on your own.
However, if the problem persists, it may be time to consider the cost of professional services to get your air purifier back in working order.
Cost of Professional Services
After exploring some DIY troubleshooting techniques for fixing my broken Hills air purifier, I realized that some issues require professional assistance. This led me to consider the cost of professional services as the next subtopic.
When it comes to repairing appliances like air purifiers, seeking professional help can be a wise decision. However, it’s important to consider the associated costs. While professional services can be more expensive than DIY solutions, they often provide a higher level of expertise and efficiency.
To explore cost-saving options, one alternative solution is to compare prices and services offered by different repair companies. It’s beneficial to obtain multiple quotes and evaluate the reputation and experience of each provider before making a decision. Additionally, some companies may offer discounts or promotions that can help reduce costs.
Another alternative is to check if the air purifier is still under warranty. If it is, contacting the manufacturer for repairs can be a cost-saving option, as they may offer free or discounted services.
Considering these alternative solutions can help in making an informed decision about the cost of professional services for fixing a broken Hills air purifier.
Frequently Asked Questions
How Much Does It Cost to Replace a Faulty Part in the Hills Air Purifier?
Replacing a faulty part in the Hills air purifier can vary in cost depending on the specific part. To determine the cost, it is recommended to contact the manufacturer or consult a professional technician for accurate pricing. Additionally, troubleshooting tips may help identify and resolve the issue.
Can I Use the Hills Air Purifier Without Calibrating the Sensor?
I wouldn’t recommend using the Hills air purifier without calibrating the sensor. It’s like driving a car without a functioning speedometer. Troubleshooting the purifier and calibrating the sensor ensures optimal performance and cleaner air.
How Often Should I Clean the Air Filters in the Hills Air Purifier?
I clean the air filters in the Hills air purifier regularly to ensure optimal performance. The recommended frequency for cleaning is every 3 months. It helps maintain clean air and prolong the lifespan of the purifier.
What Are Some Common Maintenance Tips for the Hills Air Purifier?
When it comes to air purifier maintenance, there are a few troubleshooting tips to keep in mind. Regularly cleaning or replacing the filters, checking for any blockages, and ensuring proper ventilation are all essential for optimal performance.
Is It Safe to Use the Hills Air Purifier in a Room Without Proper Ventilation?
It’s not safe to use the Hills air purifier in a room without proper ventilation. The dangers include a buildup of pollutants and reduced effectiveness. Proper ventilation ensures the purifier works efficiently and maintains clean air quality.
Conclusion
In conclusion, fixing a broken Hills air purifier is not as daunting as it may seem. By following the troubleshooting steps outlined in this article, you can easily identify and resolve the issue.
Remember to check the power source, clean or replace the air filters, and calibrate the sensor if necessary. It is also crucial to ensure proper ventilation and perform regular maintenance to keep your air purifier functioning efficiently.
Interestingly, studies have shown that using an air purifier can reduce indoor air pollutants by up to 99%. So, don’t hesitate to fix your broken Hills air purifier and enjoy clean and fresh air in your home.