Connect with us

Air Purifier Guides

How to Reset Mooka Air Purifier

Published

on

An image showcasing the step-by-step process of resetting the Mooka Air Purifier: a hand reaching towards the device's control panel, pressing and holding the reset button, and finally, the purifier powering off and on again

I have a solution for those experiencing issues with their Mooka Air Purifier. In this article, I will demonstrate the steps on how to reset it.

Whether you need to reset the timer function, sleep mode, fan speed settings, or the ionizer function, I’ve got you covered.

By following these step-by-step instructions, you’ll have your Mooka Air Purifier back up and running in no time.

So, let’s dive in and get your air purifier working like new again!

Key Takeaways

  • Resetting the Mooka air purifier resolves issues such as frozen display or unresponsive buttons.
  • Disconnecting the power supply before resetting is crucial to avoid incomplete resets or potential damage.
  • Holding down the reset button for at least 10 seconds ensures a successful reset.
  • Resetting restores the purifier to its default settings, erasing previous configurations.

Understanding the Reset Process

To reset the Mooka air purifier, you’ll need to follow a specific process. Understanding the reset benefits and avoiding common reset mistakes is crucial.

Resetting the air purifier can help resolve issues such as a frozen display, unresponsive buttons, or error messages. It restores the purifier to its default settings, erasing any previous configurations.

Advertisement

One common mistake users make is not disconnecting the power supply before initiating the reset process. This can lead to incomplete resets or potential damage to the device. Another mistake is not holding down the reset button for the recommended duration. It is essential to hold it for at least 10 seconds to ensure a successful reset.

Now that you understand the reset process, let’s move on to the next step of powering off the Mooka air purifier.

Powering Off the Mooka Air Purifier

When you’re ready to turn off the Mooka air purifier, simply press the power button.

Follow these steps to troubleshoot power issues or if you’re experiencing a power button malfunction:

  1. Check the power source: Ensure that the air purifier is properly plugged into a functioning electrical outlet. Verify that the power cord is securely connected.

  2. Reset the circuit breaker: If the air purifier suddenly stops working, check the circuit breaker or fuse box to see if the breaker has tripped or the fuse has blown. Reset or replace as necessary.

  3. Contact customer support: If the power button continues to malfunction or the air purifier does not power off, it may require professional assistance. Reach out to the Mooka customer support team for further troubleshooting guidance.

Now that you have tried troubleshooting power issues, let’s move on to locating the reset button.

Advertisement

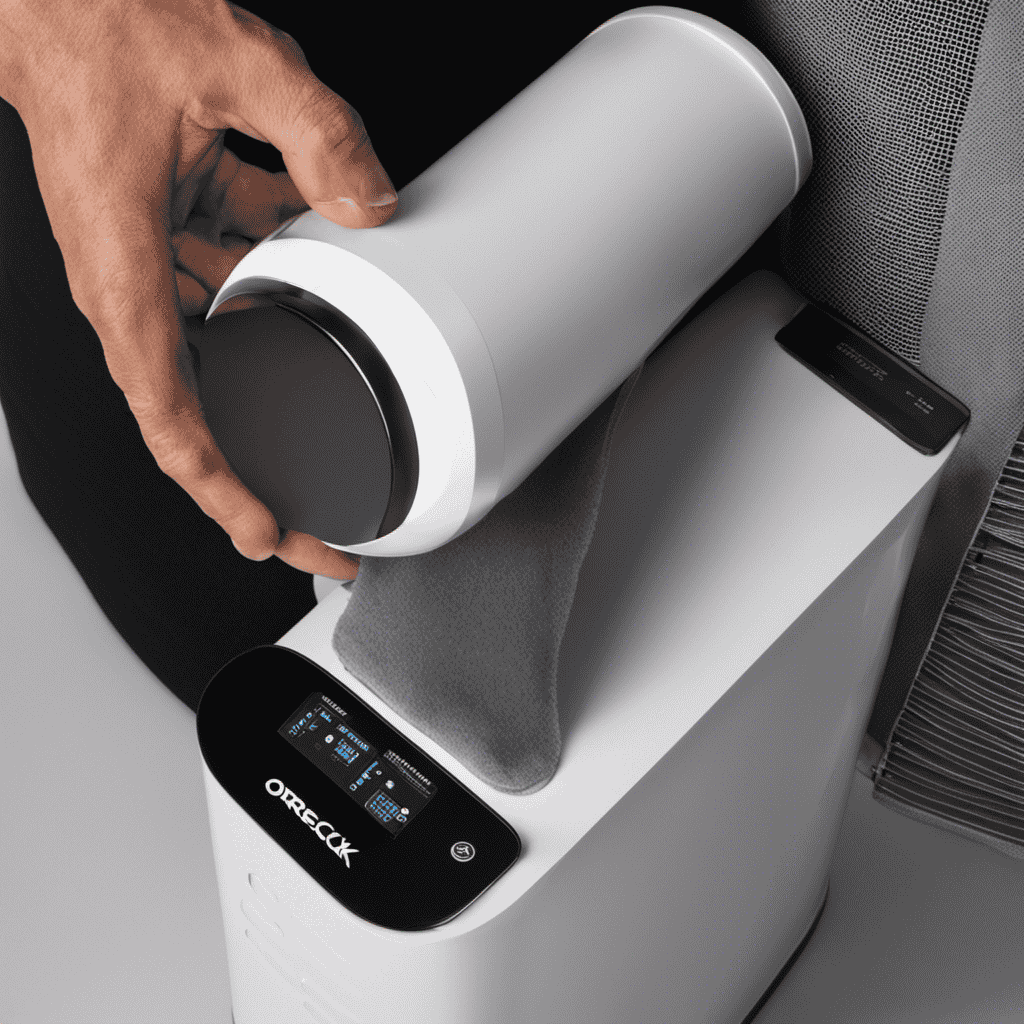
Locating the Reset Button

When it comes to resetting the Mooka Air Purifier, one of the key steps is locating the reset button.

The reset button is an essential component that allows users to restore the purifier to its default settings.

In this discussion, I’ll guide you through the process of finding the reset button and effectively resetting your Mooka Purifier.

Reset Button Location

The reset button’s location can be easily found on the Mooka air purifier. It is conveniently located on the back panel of the device, near the power cord.

To reset the timer function, follow these simple steps:

Advertisement
  1. Locate the reset button on the back panel of the Mooka air purifier.
  2. Press and hold the reset button for 10 seconds.
  3. Release the reset button when you see the timer on the display reset to zero.

Troubleshooting reset problems:

  1. Ensure that the Mooka air purifier is plugged into a power source.
  2. Check if the power cord is securely connected to the device.
  3. If the reset button does not work, try unplugging the device from the power source, waiting for a few minutes, and then plugging it back in.

Finding Reset Button

You can easily locate the reset button on the back panel of the Mooka air purifier. To reset the air purifier, first, unplug it from the power source. Then, locate the reset button on the back panel, usually near the power cord. Press and hold the reset button for about 10 seconds. After releasing the button, plug the air purifier back into the power source. The reset process is now complete.

If you are experiencing any issues while resetting the air purifier, there are a few troubleshooting steps you can try. Firstly, make sure that the power source is working properly by plugging another device into the same outlet. If the issue persists, check if the power cord is securely connected to both the air purifier and the power source. Additionally, ensure that the air purifier is not in sleep mode or any other mode that may prevent the reset from taking place.

If these steps do not resolve the issue, consult the user manual or contact the manufacturer for further assistance.

Resetting Mooka Purifier

After locating the reset button on my Mooka air purifier, I now need to understand the benefits of resetting and troubleshoot any errors that may occur during the process. Here’s what I’ve learned:

Understanding Reset Benefits:

  • Resetting the air purifier helps restore it to its original factory settings.
  • It clears any stored data or settings that may be causing performance issues.
  • It allows the purifier to recalibrate and optimize its functions for better air quality.

Troubleshooting Reset Errors:

  • If the purifier doesn’t reset, ensure it is plugged in and powered on.
  • Check the user manual for specific reset instructions or contact customer support.
  • If the purifier continues to have issues after resetting, consider seeking professional assistance.

Pressing and Holding the Reset Button

To reset the Mooka air purifier, start by pressing and holding the reset button. This simple action can help resolve various issues and bring your purifier back to its optimal performance. Understanding the reset benefits and troubleshooting reset complications are essential for maintaining the functionality of your air purifier.

Here is a table that provides a clear overview of the reset button and its functions:

Advertisement
Button Function Duration
Reset Button Resets the air purifier Hold for 5 seconds

Release the Reset Button

After pressing and holding the reset button on my Mooka air purifier, I can now release it to complete the reset process. It is important to understand the reset steps, especially when resetting after a power outage.

Here are the steps to release the reset button:

  1. Ensure that the power is still connected to the air purifier.
  2. Hold the reset button for approximately 10 seconds until the indicator light starts flashing.
  3. Release the reset button and wait for the air purifier to restart.

By following these steps, you can effectively reset your Mooka air purifier and restore it to its default settings. This is particularly helpful after a power outage, as it allows the air purifier to recalibrate and resume its normal operation.

Remember to consult the user manual for specific instructions related to your Mooka air purifier model.

Confirming the Reset

You can verify that the reset process was successful by checking if the indicator light is no longer flashing. If the indicator light remains steady or turns off completely, it means that the reset has been confirmed.

However, if the light continues to flash, it indicates that there might have been an error during the reset process. In such cases, troubleshooting reset errors is necessary.

Advertisement

To troubleshoot, first, make sure that you followed the reset instructions correctly. Double-check if you held the reset button for the specified duration and released it at the right time.

If the error persists, try performing the reset again. If the problem still persists, consult the user manual or contact customer support for further assistance.

Resetting the Filter Life Indicator

When it comes to resetting the filter life indicator on your air purifier, there are a few key points to keep in mind.

First, it’s important to understand how to properly reset the indicator to ensure accurate readings.

However, there may be instances where the indicator does not reset as expected, leaving you wondering what to do next.

Advertisement

In such cases, you can refer to the manual reset instructions provided by the manufacturer for guidance.

Resetting Filter Indicator

To reset the filter indicator on your Mooka air purifier, simply press and hold the reset button for five seconds. This will clear the current filter usage data and reset the indicator to zero.

It is important to reset the filter indicator after replacing the filter to ensure accurate tracking of filter life. Here are the steps to reset the filter indicator:

  1. Locate the reset button on your Mooka air purifier.
  2. Press and hold the reset button for five seconds.
  3. Release the reset button when the filter indicator light blinks or turns off.

By following these steps, you can easily reset the filter indicator on your Mooka air purifier and ensure that the maintenance schedule is accurate.

Additionally, clearing the error codes will help you maintain optimal performance and prolong the lifespan of your air purifier.

Indicator Not Resetting

If the indicator isn’t resetting, try pressing and holding the reset button for a longer duration. This is a common troubleshooting step for indicator issues. Sometimes, a quick press might not be enough to reset the indicator.

Advertisement

By holding the reset button for a few seconds, you can ensure that the indicator is properly reset.

Additionally, if the indicator still doesn’t reset after trying this, it could be an indication of a power issue. In such cases, check if the air purifier is properly plugged into a functioning power outlet. Also, make sure that the power button is turned on.

If the indicator issue persists even after these troubleshooting steps, it may be necessary to follow the manual reset instructions. These instructions provide a detailed guide on how to reset the air purifier’s indicator.

Manual Reset Instructions?

For the manual reset instructions, you can consult the user manual that came with your device. However, if you’re having trouble finding the manual or it doesn’t provide clear instructions, there are alternative reset methods you can try. Here are three options:

  1. Power cycle: Disconnect the power cord from the air purifier and wait for about 10 seconds before plugging it back in. This can sometimes resolve minor issues and restore the purifier to its default settings.

  2. Button combination: Some air purifiers have specific button combinations that can trigger a manual reset. Check the user manual or manufacturer’s website for the correct combination to use.

  3. Contact customer support: If the above methods don’t work or you’re unsure about attempting a manual reset, reach out to the manufacturer’s customer support for guidance and assistance.

Now, let’s move on to the next section about restoring factory settings.

Advertisement

Restoring Factory Settings

Simply press and hold the reset button to restore your Mooka air purifier to its factory settings. Restoring default settings is a straightforward process that ensures your air purifier functions optimally.

When you reset your Mooka air purifier, it not only reverts back to its original settings but also clears any customized preferences you may have set. This is particularly useful if you want to start fresh or if you are experiencing issues with the device.

Additionally, resetting the air quality sensor can also be done through the same reset button. By doing so, you can recalibrate the sensor and ensure accurate readings of the air quality in your environment.

Restoring factory settings and resetting the air quality sensor are essential steps in maintaining the performance and accuracy of your Mooka air purifier.

Troubleshooting Reset Issues

When it comes to resetting your mooka air purifier, it can be frustrating when the reset function is not working as expected.

Advertisement

In this discussion, we will explore the common issues that can prevent the reset from functioning properly and provide troubleshooting steps to resolve these problems.

Reset Not Working

If the reset button isn’t working, try unplugging the Mooka air purifier and plugging it back in. This can often resolve common reset issues.

Here are some troubleshooting steps to help you with reset failures:

  1. Check the power source: Ensure that the air purifier is properly connected to a working power outlet. Sometimes, a loose or faulty connection can prevent the reset button from functioning correctly.

  2. Allow time for power discharge: After unplugging the air purifier, wait for at least 30 seconds to allow any residual power to discharge. This can help reset the internal components and resolve any temporary issues.

  3. Reset the circuit breaker: If the reset button still isn’t working, check the circuit breaker for your power outlet. Reset it by turning it off and then back on.

Troubleshooting Reset Problems

To troubleshoot reset problems, start by checking the power source and ensuring a proper connection to a working outlet. If the air purifier is not resetting properly, it could be due to a power issue. Make sure that the power cord is securely plugged into both the air purifier and the outlet.

If the power source is confirmed to be working, the next step is to perform a manual reset. Locate the reset button on the air purifier and press and hold it for a few seconds. This should reset the device and resolve any issues.

Advertisement

If the problem persists, refer to the user manual for further troubleshooting solutions.

Now, let’s move on to resetting the Wi-Fi connection.

Resetting the Wi-Fi Connection

Resetting the Wi-Fi connection on the Mooka air purifier is simple and can be done in just a few steps. If you are having trouble connecting to your Wi-Fi network or need to reset the device password, follow these steps:

  1. Power off the Mooka air purifier by unplugging it from the power source.

  2. Locate the reset button on the back of the device and press it using a small, pointed object like a paperclip.

  3. Hold the reset button for about 10 seconds until the Wi-Fi indicator light starts flashing rapidly.

Once the Wi-Fi indicator light stops flashing and remains solid, it means that the Wi-Fi connection has been reset successfully. You can then proceed to set up the Wi-Fi connection again by following the instructions in the user manual or using the Mooka mobile app.

Resetting the Child Lock Feature

When it comes to the child lock feature on the Mooka air purifier, understanding how to activate it and reset it without the manual is crucial.

Advertisement

Activating the child lock ensures that young children cannot tamper with the settings or accidentally turn off the purifier.

However, if you find yourself needing to reset the child lock without the manual, it’s important to know the proper steps to do so.

Child Lock Activation

The child lock feature on the Mooka air purifier can be activated to prevent accidental button presses. This feature is especially useful when you have young children at home who might unknowingly tamper with the air purifier settings.

If you encounter any issues with the child lock feature, here are some troubleshooting steps to follow:

  1. Ensure that the child lock is properly activated by checking the display panel for the lock symbol.

  2. If the child lock is not working, try disabling and reactivating it by pressing and holding the designated button for a few seconds.

  3. If the issue persists, refer to the user manual for further instructions or contact Mooka customer support for assistance.

Now that we have covered the child lock activation and troubleshooting, let’s move on to the next section about resetting the Mooka air purifier without a manual.

Advertisement

Resetting Without Manual

If you don’t have the manual, you can easily perform a reset on your Mooka air purifier by following these steps.

To reset the air purifier without power, first unplug the device from the electrical outlet. Then, locate the reset button on the control panel. Press and hold the reset button for 10 seconds. After releasing the button, plug the air purifier back into the power source.

This alternative reset method will restore the air purifier to its default settings and clear any error codes or malfunctions.

Now that you know how to reset your Mooka air purifier without the manual, let’s move on to the next section about resetting the timer function.

Resetting the Timer Function

To reset the timer function on your Mooka air purifier, simply press and hold the ‘Timer’ button for 5 seconds. This will allow you to start fresh with your timer schedule and make any necessary adjustments.

Advertisement

Resetting the timer function is useful when you want to change the air purification settings or reset the timer schedule. Here are the steps to reset the timer function:

  1. Press and hold the ‘Timer’ button for 5 seconds.
  2. Release the button when the display flashes or the timer digits reset to zero.
  3. Adjust the timer settings as desired using the ‘Up’ and ‘Down’ buttons.

Resetting the Sleep Mode

When you want to adjust or disable the sleep mode on your device, simply hold down the ‘Sleep’ button for a few seconds. This will reset the sleep mode and allow you to make any necessary changes.

Sleep mode is designed to conserve power and reduce screen brightness when the device is not in use. However, sometimes you may encounter issues with sleep mode, such as the device not waking up properly or the screen staying dimmed.

If you are experiencing any sleep mode issues, try troubleshooting by checking the device’s power settings, ensuring that the latest software updates are installed, and restarting the device. If the problem persists, contacting customer support for further assistance may be necessary.

Resetting the Fan Speed Settings

The fan speed on your device can be adjusted by using the control panel. If you are experiencing issues with your fan speed or want to restore the default settings, follow these steps:

  1. Check the power supply: Ensure that the device is properly plugged in and receiving power.

  2. Clean the fan: Dust and debris can affect the fan speed. Clean the fan blades using a soft cloth or brush.

  3. Reset the settings: To restore the default fan speed settings, locate the reset button on the control panel and press it for a few seconds.

By troubleshooting these common fan speed issues and restoring the default settings, you can ensure optimal performance of your device.

Advertisement

Now, let’s move on to resetting the ionizer function for further troubleshooting and maintenance.

Resetting the Ionizer Function

After cleaning the fan, you can easily restore the default ionizer settings by pressing the reset button on the control panel.

The ionizer function in the Mooka air purifier is responsible for releasing negative ions into the air to neutralize harmful pollutants. However, there may be instances where you need to reset the ionizer function.

To do this, locate the reset button on the control panel, usually marked with a small circular arrow symbol. Press and hold the reset button for a few seconds until you see the ionizer light turn off and then back on. This indicates that the ionizer function has been successfully reset.

If you encounter any issues with the reset process, ensure that the air purifier is properly plugged in and try again. If the problem persists, consult the user manual or contact customer support for further troubleshooting assistance.

Advertisement

Additionally, if you want to reset the timer function, refer to the user manual for specific instructions.

Frequently Asked Questions

Can I Reset the Mooka Air Purifier Without Using the Reset Button?

Yes, the Mooka Air Purifier can be reset without using the reset button. There are alternative reset methods available. It is important to follow the proper resetting procedure to ensure proper functionality.

How Often Should I Reset the Filter Life Indicator?

The filter life indicator should be reset after every filter change to ensure accurate monitoring. Resetting it regularly can extend the filter lifespan. However, it does not directly affect the air purifier’s performance.

What Should I Do if the Reset Button Does Not Seem to Be Working?

If the reset button on the Mooka Air Purifier is not working, there are alternative reset methods you can try. Troubleshooting the reset button may involve checking the power source, ensuring proper connections, or contacting customer support.

Will Resetting the Mooka Air Purifier Erase My Wi-Fi Settings?

Resetting the Mooka Air Purifier will not erase your Wi-Fi settings. If the reset button is not working, try troubleshooting the purifier by checking the power source and ensuring proper connection.

Advertisement

Does Resetting the Mooka Air Purifier Affect the Child Lock Feature?

Resetting the Mooka Air Purifier does not affect the child lock feature. To disable child lock, press and hold the "Child Lock" button for 3 seconds. Troubleshoot child lock issues by checking the user manual or contacting customer support.

Are the Steps to Reset a Mooka Air Purifier Similar to Resetting a Honeywell Air Purifier?

Yes, the steps to reset a Mooka air purifier are similar to resetting a Honeywell air purifier. To reset a Honeywell air purifier, simply press and hold the appropriate button for 3 seconds. Similarly, for a Mooka air purifier, press and hold the reset button for a few seconds.

Can the same instructions be used to reset the Mooka Air Purifier as well?

Yes, the same instructions can be used to reset the Mooka Air Purifier using the Bell HowellIonicMAXX Air Purifier. Just follow the steps provided in the manual to ensure that the Mooka Air Purifier is reset correctly.

Conclusion

In conclusion, resetting the Mooka air purifier is a simple and straightforward process. By following the steps mentioned above, you can easily reset the device and restore it to its original settings.

Remember, ‘a clean air purifier is a happy air purifier.’ So, make sure to reset your Mooka air purifier regularly to keep it functioning efficiently and to enjoy the benefits of clean and fresh air in your home.

Advertisement

At the heart of Aero Guardians' informative and engaging content lies the dedication and expertise of Marcus. As one of the prominent writers for the platform, Marcus has been pivotal in translating complex technical jargon into digestible, relatable content for our readers.

Continue Reading
Advertisement

Air Purifier Guides

How to Use Winix Plasmawave Air Purifier

Published

on

By

An image showcasing a person effortlessly operating the Winix Plasmawave Air Purifier in a well-lit living room, with visible dust particles being effectively filtered, and the device's sleek design enhancing the ambiance

When I opened my new Winix Plasmawave Air Purifier, I was filled with excitement. The simple setup and easy-to-use control panel helped me grasp the device’s capabilities quickly.

Adjusting the air purification settings was a breeze, and with regular cleaning and maintenance, I knew I could rely on this purifier for optimal performance.

Join me as I share my troubleshooting tips and reveal the secrets to unlocking the full potential of the Winix Plasmawave Air Purifier.

Key Takeaways

  • The unboxing process is straightforward and hassle-free, with clear instructions provided in the user manual.
  • The control panel and remote control offer easy access to all the necessary features and settings for effective operation.
  • Regular maintenance, including filter replacement and cleaning, is crucial for optimal performance and longevity of the air purifier.
  • Troubleshooting techniques can help resolve common issues and ensure the air purifier’s maximum effectiveness in improving indoor air quality.

Unboxing and Setup

Let’s start by unboxing and setting up the Winix PlasmaWave air purifier.

The unboxing process was straightforward and hassle-free. Inside the box, I found the air purifier unit, filters, and a user manual.

I began by removing all the protective packaging from the unit. Then, I carefully installed the filters into their designated slots. The unit has a pre-filter, a carbon filter, and a True HEPA filter, which work together to capture and eliminate various pollutants.

Advertisement

Once the filters were securely in place, I plugged in the air purifier and turned it on. The setup instructions provided clear step-by-step guidance on how to adjust the settings and customize the air purifier’s performance to my liking.

Overall, the unboxing and setup process was simple, making it easy for me to start using the Winix PlasmaWave air purifier right away.

Understanding the Control Panel

The control panel on this device provides all the necessary information to operate it effectively. It is designed to be user-friendly, with intuitive buttons and clear labels. Here are some key features of the control panel:

  • Power Button: This is the main button to turn the air purifier on and off.
  • Fan Speed: You can adjust the fan speed to your preference, choosing from low, medium, or high.
  • PlasmaWave Button: This feature helps to neutralize viruses, bacteria, and other pollutants in the air.
  • Timer: You can set a timer to automatically turn off the air purifier after a certain period of time.
  • Filter Reset Indicator: This light will illuminate when it’s time to replace the filters.

Using the remote control, you can conveniently access all these features from a distance. It allows you to adjust settings, turn on/off the air purifier, and even set a timer without having to walk up to the control panel.

For more detailed instructions on how to replace the filters, refer to the filter replacement guide provided with the air purifier. It gives step-by-step instructions and helpful tips to ensure proper maintenance of your device.

Adjusting Air Purification Settings

To adjust the settings on this device, simply press the buttons on the control panel or use the remote control.

Advertisement

The Winix PlasmaWave air purifier offers numerous air purification benefits, which in turn provide significant health benefits. By adjusting the settings, you can customize the air purification process to suit your specific needs.

For instance, you can select the fan speed to control the airflow and adjust the intensity of the purification process. Additionally, you can choose between different modes, such as Auto, Sleep, or Turbo, depending on the level of air purification required.

These settings allow you to optimize the efficiency of the air purifier, ensuring that it effectively removes pollutants, allergens, and other harmful particles from the air, resulting in cleaner and healthier indoor air for you and your family.

Cleaning and Maintenance Tips

When cleaning and maintaining this device, remember to regularly change the filters and wipe down the exterior with a damp cloth. It is important to follow a maintenance schedule to ensure optimal performance of your Winix PlasmaWave air purifier.

Here are some cleaning and maintenance tips to keep in mind:

Advertisement
  • Filter Replacement:

  • Replace the pre-filter every 3 months or as needed to remove larger particles like dust and pet hair.

  • The True HEPA filter should be replaced every 12 months to effectively capture allergens and pollutants.

  • Exterior Cleaning:

  • Use a soft, damp cloth to wipe down the exterior of the air purifier regularly to remove dust and dirt.

  • Avoid using harsh chemicals or abrasive materials that could damage the device.

Troubleshooting and Tips for Optimal Performance

For optimal performance, make sure you clean the filters regularly and avoid using harsh chemicals on the exterior.

When it comes to troubleshooting techniques for your Winix PlasmaWave air purifier, there are a few things you can try.

If the unit is not turning on, check if it is properly plugged into a power source. If it still doesn’t work, try resetting it by unplugging it for a few minutes and then plugging it back in.

If you notice a decrease in airflow, it could be due to a clogged filter. In this case, remove the filter and clean it according to the manufacturer’s instructions.

Lastly, to improve indoor air quality, consider placing the air purifier in a central location and running it on a higher fan speed for maximum effectiveness.

Advertisement

Frequently Asked Questions

Can the Winix Plasmawave Air Purifier Remove Pet Dander and Allergens From the Air?

Yes, the Winix Plasmawave Air Purifier effectively removes pet dander and allergens from the air. It’s been a great help in relieving my allergies and keeping the air clean and fresh.

How Often Should I Replace the Filters in the Winix Plasmawave Air Purifier?

I replace the filters in my Winix Plasmawave air purifier every 6-12 months. Replacement filters can be purchased online or at stores that sell air purifiers and filters.

Can I Use the Air Purifier in a Large Room or Open Floor Plan?

In a large room or open floor plan, the Winix Plasmawave Air Purifier can effectively clean the air. Its powerful filtration system and wide coverage area make it suitable for these spaces.

Does the Winix Plasmawave Air Purifier Emit Any Harmful Gases or Chemicals Into the Air?

No, the Winix Plasmawave Air Purifier does not emit any harmful gases or chemicals into the air. It has been thoroughly tested and proven to be safe for use.

Can I Leave the Air Purifier on All Day and Night, or Should I Turn It off When Not in Use?

I leave my air purifier on all day and night for continuous purification. It’s designed for 24/7 usage, so there’s no need to turn it off when not in use. This ensures clean air throughout my home.

Advertisement

Can the Winix Plasmawave Air Purifier Help with Common Air Quality Issues?

Looking for a solution to common air quality issues? The Winix Plasmawave air purifier, as recommended in the “air purifier necessity guide,” effectively removes allergens, dust, and odors from the air. With its advanced technology, this air purifier can greatly improve the air quality in your home or office.

Conclusion

In conclusion, the Winix PlasmaWave air purifier has proven to be a breath of fresh air in my home.

Its unboxing and setup process was like unwrapping a gift from the heavens, and understanding the control panel was as simple as deciphering a secret code.

Adjusting the air purification settings felt like harnessing the power of the wind itself, while cleaning and maintenance tips kept my purifier running smoothly like a well-oiled machine.

Troubleshooting and maximizing performance felt like unlocking the secrets of the universe.

Advertisement

With this purifier, my home has become an oasis of clean, fresh air.

Continue Reading

Air Purifier Guides

How to Use Ozone Air Purifier

Published

on

By

An image showcasing a well-lit room with an ozone air purifier in the corner, emitting a soft, blue glow

Want to eliminate those irritating allergens and odors in your home? Then check out the ozone air purifier!

In this article, I’ll guide you through the ins and outs of using this powerful device.

From understanding the basics to choosing the right purifier for your needs, we’ll cover it all.

Get ready to breathe in cleaner, fresher air as we delve into the world of ozone air purifiers.

Key Takeaways

  • Ozone air purifiers remove pollutants and odors by producing ozone.
  • High levels of ozone can be harmful to humans, pets, and plants.
  • Choose an ozone air purifier appropriate for the room size to avoid health risks.
  • Regularly clean and maintain the ozone air purifier for optimal performance.

Understanding the Basics of Ozone Air Purifiers

To understand the basics of ozone air purifiers, you need to know how they work and their potential benefits.

Ozone air purifiers are designed to remove pollutants and odors from the air by producing ozone, a molecule made up of three oxygen atoms. When ozone is released into the air, it reacts with airborne contaminants, such as bacteria, viruses, and mold, breaking them down and neutralizing their harmful effects. This process effectively purifies the air and eliminates unpleasant smells.

Advertisement

The benefits of using ozone air purifiers include improved indoor air quality, reduced allergy symptoms, and elimination of airborne pathogens. However, it is important to take precautions when using ozone air purifiers, as high levels of ozone can be harmful to humans, pets, and plants.

It is recommended to follow the manufacturer’s instructions and use ozone air purifiers in well-ventilated areas. Understanding the benefits and precautions of ozone air purifiers is essential in choosing the right one for your needs.

Choosing the Right Ozone Air Purifier for Your Needs

When selecting the right ozone air purifier for your needs, consider the size of the room you want to purify. Ozone air purifiers work by releasing ozone molecules into the air, which can help eliminate odors and kill bacteria and viruses.

However, it’s important to note that ozone can be harmful to humans and pets if inhaled in high concentrations. Therefore, it’s crucial to choose an ozone air purifier that is appropriate for the size of your room to avoid potential health risks.

A good buying guide is to look for the recommended room size on the product’s packaging or specifications. This will ensure that the ozone concentration remains within safe levels and effectively purifies the air without compromising your health.

Advertisement

Setting Up Your Ozone Air Purifier Correctly

Make sure you position the ozone air purifier in a central location within the room for optimal air circulation. This is an important step in the installation process to ensure that the purifier can effectively clean the air in the entire room.

Additionally, it is recommended to place the purifier at least three feet away from walls or furniture to allow for proper airflow.

When troubleshooting common issues with your ozone air purifier, there are a few things to keep in mind. First, make sure that the purifier is plugged in and turned on. Check the power supply and ensure that it is functioning properly. If the purifier is not producing ozone or there is a strange odor, check the plates or filters for any dirt or debris that may be affecting the performance.

By setting up your ozone air purifier correctly and addressing any troubleshooting issues, you can ensure that it operates safely and effectively in your home or office.

Now, let’s move on to the next section on how to operate your ozone air purifier.

Advertisement

Operating Your Ozone Air Purifier Safely and Effectively

Ensure that you follow the safety guidelines and operate your ozone air purifier correctly for optimal results. It is important to address common misconceptions and potential health risks associated with ozone air purifiers. While ozone can effectively remove odors and kill bacteria, it can also be harmful if not used properly. To operate your ozone air purifier safely, make sure to keep the room well-ventilated and follow the manufacturer’s instructions for ozone output levels and exposure times. Avoid using ozone air purifiers in occupied spaces, as high levels of ozone can irritate the respiratory system and worsen existing respiratory conditions. It is also crucial to periodically check the ozone levels in the room using an ozone monitor. By taking these precautions, you can enjoy the benefits of an ozone air purifier while minimizing potential health risks.

Common Misconceptions Potential Health Risks
Ozone air purifiers are High ozone levels can irritate the
completely safe to use. respiratory system and worsen
existing respiratory conditions.
Ozone air purifiers only Prolonged exposure to high levels of
remove odors. ozone can cause lung damage.
Ozone air purifiers can People with asthma, allergies, and
improve indoor air other respiratory conditions are
quality. more sensitive to ozone and should
avoid using ozone air purifiers.

Maintaining and Cleaning Your Ozone Air Purifier

To keep your ozone air purifier working effectively, it’s important to regularly clean and maintain it. By following a recommended maintenance schedule, you can ensure that your purifier continues to provide clean and fresh air for your space.

One common issue that may arise is a decrease in ozone production. This can be caused by a dirty ozone plate or a clogged filter. To troubleshoot this issue, simply remove the ozone plate and clean it with warm soapy water. Additionally, check the filter and clean or replace it if necessary.

It is also important to clean the exterior of the purifier regularly to prevent dust and dirt buildup. By properly maintaining your ozone air purifier, you can extend its lifespan and enjoy the benefits of clean air in your home or office.

Frequently Asked Questions

Can an Ozone Air Purifier Remove Pet Dander and Allergens From the Air?

Yes, an ozone air purifier can remove pet dander and allergens from the air. However, it’s important to note that ozone air purifiers can also pose potential health risks, so proper usage and precautions should be followed.

Advertisement

How Long Does It Take for an Ozone Air Purifier to Eliminate Odors in a Room?

Using an ozone air purifier is effective in eliminating odors in a room. It usually takes a few hours for the ozone to break down and neutralize the odor molecules. Regular maintenance ensures its optimal performance.

Are Ozone Air Purifiers Safe to Use Around Children and Pets?

Ozone air purifiers can be harmful to asthmatic individuals and people with respiratory issues. They can also be detrimental to plants and indoor gardens. It’s important to consider these factors before using them.

Can an Ozone Air Purifier Eliminate Mold and Mildew in a Damp Environment?

An ozone air purifier can effectively eliminate mold and mildew in a damp environment. By producing ozone, it eliminates moisture and prevents mold growth. Regular use in such environments can help maintain a clean and healthy space.

Do Ozone Air Purifiers Require Regular Filter Replacements Like Traditional Air Purifiers?

Ozone air purifiers have the advantage of not requiring regular filter replacements like traditional air purifiers. However, it is important to maintain them properly by cleaning the ozone plates regularly to ensure efficient operation.

Can I Use an Ionic Air Purifier in the Same Way as an Ozone Air Purifier?

Yes, you can use an ionic air purifier in the same way as an ozone air purifier. Both work by creating an ionic air purifier that emits negatively charged ions to remove particles from the air. However, it’s important to note that ozone air purifiers also emit ozone, which can be harmful in high concentrations.

Advertisement

Conclusion

So there you have it, a comprehensive guide on how to use an ozone air purifier.

While some may argue that ozone air purifiers can be harmful and should be avoided, it is important to note that when used correctly and in moderation, they can provide effective air purification.

By understanding the basics, choosing the right purifier, setting it up correctly, operating it safely, and maintaining it regularly, you can enjoy clean and fresh air in your home.

Remember, it’s all about finding the right balance and taking the necessary precautions.

Advertisement

Continue Reading

Air Purifier Guides

How to Use the Air Purifier

Published

on

By

An image showcasing a serene living room, illuminated by soft natural light

Using an air purifier is comparable to having a personal protector for your indoor air quality. It is a straightforward but efficient method to eliminate pollutants and allergens from your home, guaranteeing you inhale clean and fresh air.

In this article, I will guide you through the process of using an air purifier, from understanding its features to cleaning and maintaining it. With this knowledge, you’ll be able to optimize the performance of your air purifier and enjoy a healthier living environment.

Key Takeaways

  • Air purifiers remove harmful particles and pollutants from the air.
  • Regular maintenance, including cleaning or replacing filters, is essential for optimal performance.
  • Placement and location of the air purifier can affect its effectiveness.
  • Customizing and optimizing usage, such as adjusting fan speed and setting specific hours of operation, can maximize efficiency and air purification results.

Understanding the Air Purifier’s Features

Now let’s take a look at the air purifier’s features and how they can improve the air quality in your home.

Air purifiers are designed to remove harmful particles and pollutants from the air, ensuring a clean and healthy living environment. One of the key features of an air purifier is its filtration system. This system consists of different filters that capture dust, pet dander, pollen, and other allergens.

Regular air purifier maintenance is essential to ensure optimal performance. Cleaning or replacing the filters as recommended by the manufacturer will help maintain the air purifier’s effectiveness.

The benefits of air purification are numerous. By removing pollutants from the air, air purifiers can alleviate allergies, reduce asthma symptoms, and improve overall respiratory health. Additionally, they can eliminate unpleasant odors and create a fresh and inviting atmosphere in your home.

Advertisement

Setting Up Your Air Purifier

To begin setting up your air purifier, you’ll need to plug it into an electrical outlet. Once you’ve done that, there are a few more steps to take to ensure optimal performance.

One important factor to consider is choosing the right size air purifier for your space. A small purifier may not be effective in a large room, while a large purifier may be unnecessary for a small space. Refer to the manufacturer’s guidelines or consult with a professional to determine the appropriate size for your needs.

Additionally, regular maintenance is crucial to keep your air purifier running efficiently. Here are some maintenance tips to keep in mind:

  1. Clean or replace the filters regularly: Depending on the model, filters may need to be cleaned or replaced every few months. This ensures that the purifier can effectively remove pollutants from the air.

  2. Vacuum the exterior: Dust and debris can accumulate on the outside of the purifier, hindering its performance. Regularly vacuuming the exterior helps to maintain its effectiveness.

  3. Check the fan and motor: Ensure that the fan and motor are clean and free from obstructions. This helps to prevent overheating and prolongs the lifespan of the purifier.

  4. Follow the manufacturer’s instructions: Different air purifiers may have specific maintenance requirements. Always refer to the manufacturer’s instructions for proper care and maintenance.

Choosing the Right Location

When it comes to choosing the right location for your air purifier, there are a few key factors to consider.

First, you want to ensure optimal placement for maximum effectiveness. This means placing the purifier in a central location in the room, away from walls and furniture that could obstruct air circulation.

Advertisement

Additionally, factors such as room size, airflow patterns, and the presence of obstacles can all affect the overall air circulation in the space.

Optimal Placement for Effectiveness

For best results, it’s important to place the air purifier in a central location within the room. By doing so, you can maximize its effectiveness in optimizing air quality. The central placement allows the purifier to circulate the air more efficiently, ensuring that all corners of the room are covered.

Avoid placing the purifier near walls or furniture that could obstruct the airflow. It’s also crucial to position the purifier at a suitable height, ideally at the same level as your breathing zone. This ensures that the purifier captures the airborne pollutants effectively.

Additionally, keep in mind that the purifier should be placed away from any potential sources of contamination, such as smoking areas or chemical storage. Taking these steps will help you achieve the best possible air purification results.

Factors Affecting Air Circulation

Positioning the air purifier in a central location within the room allows it to circulate the air more efficiently and optimize air quality. To further enhance the effectiveness of the air purifier, there are two key factors to consider: airflow control and humidity levels.

Advertisement

Airflow Control: Ensuring proper airflow is crucial for the air purifier to work optimally. Avoid placing the purifier near walls, furniture, or curtains that can obstruct the airflow. Position it in an open area, away from any potential obstructions, to allow the purified air to circulate freely throughout the room.

Humidity Levels: Maintaining the right humidity levels is essential for a healthy indoor environment. High humidity can promote the growth of mold and mildew, while low humidity can cause dryness and discomfort. Some air purifiers come with built-in humidifiers, allowing you to control both air quality and humidity levels simultaneously.

Installing the Filters

To install the filters, you’ll need to locate the filter compartment on the side of the air purifier. It’s a crucial step in maintaining the effectiveness of your air purifier.

When installing replacement filters, make sure to read the manufacturer’s instructions carefully. Start by switching off the power and unplugging the device for safety.

Open the filter compartment by releasing the latch or removing the cover. Take out the old filters and dispose of them properly. It’s important to remove any dust or debris that may have accumulated in the compartment before inserting the new filters.

Advertisement

Slide the new filters into place, making sure they fit securely. Finally, close the compartment and plug in your air purifier.

Enjoy cleaner, fresher air once again!

Powering On and Off

When it comes to powering on and off your air purifier, it’s important to understand proper power usage and how to troubleshoot any power issues that may arise.

Proper power usage involves following the manufacturer’s instructions for plugging in and turning on the device, as well as using the correct voltage and outlet.

If you encounter any power issues, such as the air purifier not turning on or suddenly shutting off, troubleshooting steps may include checking the power cord for any damage, ensuring the outlet is functioning properly, and consulting the user manual for specific troubleshooting tips.

Advertisement

Proper Power Usage

Make sure you’re using the correct voltage for the air purifier to prevent any potential damage. Using the wrong voltage can lead to overheating or even a complete malfunction of the device.

To ensure power saving and energy efficiency, here are three important points to consider:

  1. Opt for an air purifier with adjustable power settings. This allows you to customize the energy consumption based on your needs. Lower power settings are ideal for maintaining air quality while minimizing energy usage.

  2. Look for air purifiers with energy-saving features such as automatic shut-off timers or sleep mode. These features allow the device to operate only when necessary, reducing power consumption and extending the lifespan of the purifier.

  3. Consider investing in an air purifier with a high CADR (Clean Air Delivery Rate) and Energy Star certification. These ratings indicate that the purifier meets strict energy efficiency standards while still effectively cleaning the air in your space.

Troubleshooting Power Issues

If your device is not turning on, it may be due to a power issue.

When it comes to fixing malfunctions, the first thing you should do is check the power source. Ensure that the air purifier is properly plugged into a working electrical outlet. Sometimes, the power cord may be loose or damaged, so make sure it is securely connected to both the device and the outlet.

If the power source seems fine, you can try resetting the air purifier by unplugging it for a few minutes and then plugging it back in. Additionally, check if there is a power switch or button that needs to be turned on for the device to function.

Advertisement

Adjusting the Fan Speed

To adjust the fan speed on your air purifier, simply locate the control panel and press the corresponding button. Here’s how you can increase airflow and adjust the fan settings:

  1. Press the ‘Fan Speed’ button on the control panel. This button may be labeled with icons representing different fan speeds, such as low, medium, and high.

  2. Use the up or down arrows on the control panel to cycle through the available fan speed options. Each press of the arrow will adjust the speed incrementally.

  3. Once you’ve selected the desired fan speed, press the ‘OK’ or ‘Enter’ button to confirm your choice.

By adjusting the fan speed, you can customize the airflow of your air purifier to suit your preferences.

Now, let’s move on to exploring the timer function and how it can enhance your experience with the air purifier.

Using the Timer Function

Using the timer function on your air purifier can offer several benefits and allow for efficient usage.

By setting the timer, you can customize the purifying schedule to fit your needs and ensure the air in your space is constantly fresh and clean.

Advertisement

Additionally, understanding the different settings available on the timer can help maximize the effectiveness of your air purifier and make it even more convenient to use.

Timer Benefits and Settings

The timer on the air purifier allows me to easily control when it turns on and off. Here are the benefits of using a timer on my air purifier:

  1. Energy Efficiency: By setting the timer, I can ensure that the air purifier only operates when I need it the most. This not only saves energy but also reduces the electricity bill.

  2. Noise Reduction: Having the air purifier running all the time can be noisy, especially when I’m trying to sleep or relax. With the timer, I can set it to turn off during those times, providing me with a quiet environment.

  3. Customizable Duration: The timer allows me to set the duration for which I want the air purifier to run. Whether it’s for a few hours or the entire night, I can adjust the timer according to my specific needs.

Setting the timer duration is a simple process. I just need to press the timer button and use the controls to set the desired time. Once set, the air purifier will automatically turn on and off at the specified times, providing me with clean and fresh air whenever I need it.

Efficient Usage Tips

Maximize the efficiency of your air purifier by adjusting the settings according to your specific needs and preferences. To help you achieve the best air quality possible, here are some efficient usage tips:

  1. Choose the right fan speed: Adjust the fan speed based on the air pollution level. Higher speeds are suitable for heavy pollution, while lower speeds work well for maintaining clean air.

  2. Position it strategically: Place your air purifier in a central location to allow for optimal air circulation throughout the room.

  3. Regularly clean or replace filters: Clean or replace filters as recommended by the manufacturer. This ensures that the air purifier functions at its highest efficiency.

  4. Keep doors and windows closed: To prevent outdoor pollutants from entering the room, close doors and windows while the air purifier is in operation.

Customizing Purifying Schedule

Now that you understand how to efficiently use your air purifier, let’s dive into the topic of customizing your purifying schedule.

Advertisement

This feature allows you to automate the purification process according to your specific needs. Here are some ways you can optimize your air purifier’s performance:

  1. Customizing timer settings: Most air purifiers come with a built-in timer that allows you to set specific hours of operation. By adjusting the timer settings, you can ensure that your purifier runs when you need it the most, such as during the night when you’re sleeping or during peak pollution hours.

  2. Optimizing purification levels: Depending on the air quality in your surroundings, you can adjust the purification levels of your device. If the air quality is poor, you can set the purifier on a higher speed or activate the turbo mode. On the other hand, if the air quality is relatively good, you can lower the purification levels to conserve energy.

  3. Creating personalized schedules: Some advanced air purifiers offer the option to create personalized schedules. This means you can set different purification levels and timer settings for different times of the day. For example, you can set the purifier to run at a higher speed during cooking or cleaning activities and lower it during quieter hours.

Understanding the Indicator Lights

To use the air purifier properly, it’s important to understand the indicator lights. These lights provide valuable information about the status and performance of the device.

The meanings of the indicator lights may vary depending on the specific model, but they generally indicate important functions such as power, filter replacement, and air quality. For example, a green light often indicates that the purifier is operating normally, while a red light may indicate a problem that needs attention, such as a clogged filter.

If you encounter any issues with the indicator lights, it’s crucial to consult the user manual for troubleshooting steps. Common problems may include flickering lights, lights that don’t turn on, or lights that stay on even when the device is not in use.

Understanding and troubleshooting indicator light issues will help ensure optimal performance and longevity of your air purifier.

Advertisement

Cleaning and Maintaining the Air Purifier

Make sure you regularly clean and maintain your air purifier to keep it running efficiently. Here are some cleaning techniques and tips to help you maintain your air purifier:

  1. Wipe down the exterior: Use a soft, damp cloth to clean the exterior of the air purifier. Avoid using harsh chemicals or abrasive materials that could damage the surface.

  2. Clean the filters: Depending on the type of air purifier you have, you may need to clean or replace the filters regularly. Follow the manufacturer’s instructions for cleaning or replacing the filters to maintain optimal performance.

  3. Vacuum the vents: Dust and debris can accumulate on the vents of your air purifier, reducing its effectiveness. Use a brush attachment on your vacuum cleaner to gently remove any build-up.

By following these cleaning techniques and regularly replacing the filters, you can ensure that your air purifier continues to provide clean and fresh air for you and your family.

Now, let’s move on to troubleshooting common issues with air purifiers.

Troubleshooting Common Issues

First, check if the power cord is securely plugged in and try resetting the device if you encounter any issues.

When it comes to fixing noise problems with your air purifier, there are a few things you can try.

Advertisement

First, make sure that the air purifier is placed on a stable surface and not touching any walls or furniture. Sometimes, vibrations from nearby objects can cause unnecessary noise.

Additionally, check if the air filter is clean, as a clogged filter can strain the motor and create noise.

If the noise persists, it may be a sign of a mechanical issue, in which case contacting customer support would be recommended.

Addressing air quality concerns involves regularly cleaning and replacing the air filters as instructed by the manufacturer.

It’s also important to keep the air purifier in a well-ventilated area and away from any potential sources of pollutants.

Advertisement

Frequently Asked Questions

How Long Should I Run the Air Purifier Each Day?

I run the air purifier for the recommended duration each day to ensure optimal usage. It helps to maintain clean air and improve indoor air quality, which is important for my health and well-being.

Can I Use the Air Purifier in Multiple Rooms?

Yes, you can use the air purifier in multiple rooms. It’s a great way to improve air quality in your office and enjoy the benefits of cleaner air in your bedrooms.

Can I Use Essential Oils With the Air Purifier?

Using essential oils in an air purifier can have health benefits, but it’s important to use them correctly and safely. I can provide guidance on how to properly incorporate essential oils into your air purifier.

How Often Do I Need to Replace the Filters?

I typically replace the filters in my air purifier every 3-6 months, depending on how dirty they get. It’s important to pay attention to signs of a dirty filter, such as reduced airflow or a musty smell.

Does the Air Purifier Remove Pet Dander and Allergens From the Air?

Yes, the air purifier effectively removes pet dander and allergens from the air. It’s an essential part of air purifier maintenance and offers numerous benefits for pet owners, ensuring cleaner and healthier indoor air quality.

Advertisement

Is the Use of Ozone Air Purifier Similar to Regular Air Purifiers?

Yes, ozone air purifier benefits are similar to regular air purifiers in some ways. Both types remove harmful pollutants from the air, such as dust, pollen, and pet dander. However, ozone air purifiers also have the added benefit of neutralizing odors and killing bacteria and mold spores.

Conclusion

In conclusion, using an air purifier is an essential step in ensuring clean and fresh air in your home. By understanding its features and following the proper setup and maintenance procedures, you can effectively eliminate pollutants and allergens from your indoor environment.

Did you know that according to a study conducted by the Environmental Protection Agency (EPA), indoor air can be two to five times more polluted than outdoor air? Investing in an air purifier can significantly improve the air quality in your home and promote better health for you and your family.

Continue Reading

Trending