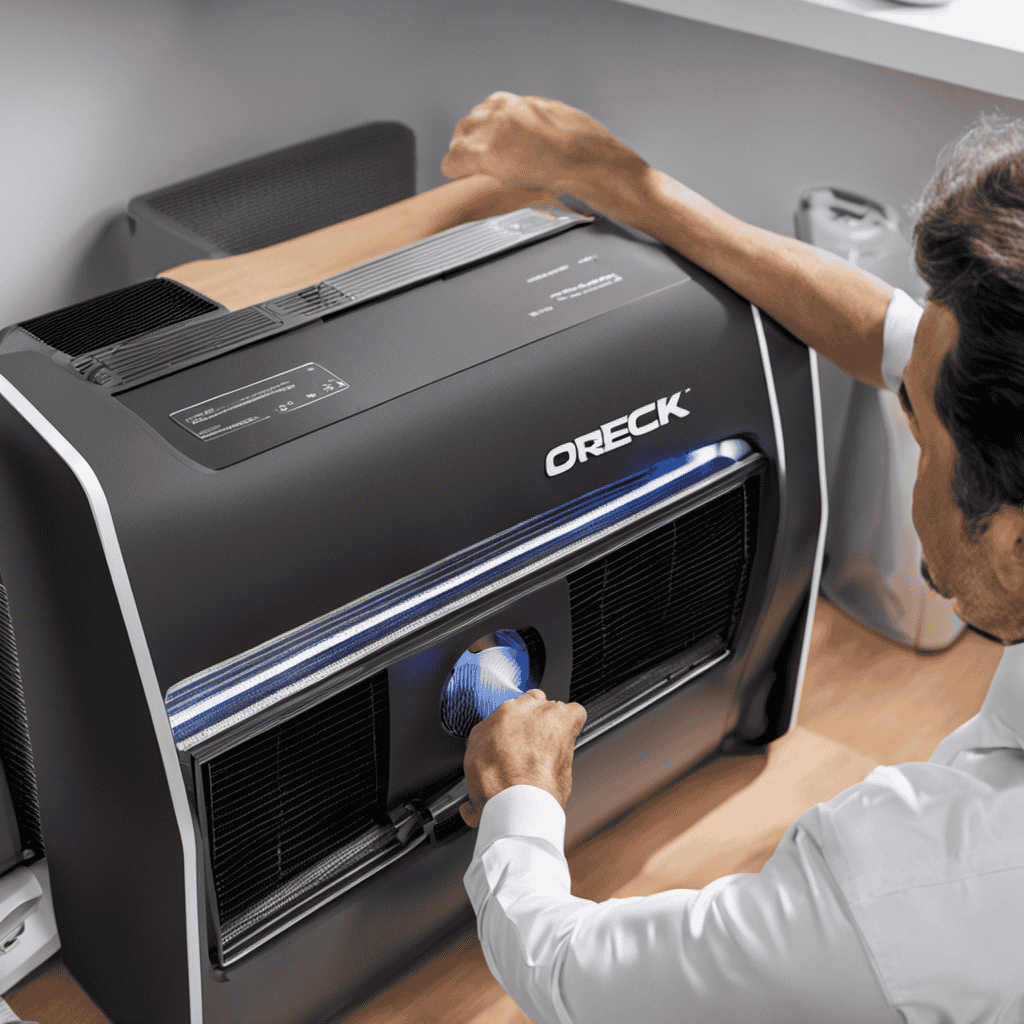
I know what you’re thinking – why would anyone want to take apart an Oreck Air Air Purifier? Well, sometimes we encounter stubborn dirt and grime that just won’t budge, or maybe we want to replace a worn-out filter. Whatever the reason, I’m here to guide you through the step-by-step process of disassembling your Oreck Air Air Purifier.
With the right tools and a little know-how, you’ll be able to access every nook and cranny to keep your purifier running smoothly.
So, let’s get started!
Key Takeaways
- The disassembly process of an Oreck Air Air Purifier requires tools such as a Phillips head screwdriver, small flathead screwdriver, and needle-nose pliers.
- The disassembly process includes unplugging the purifier, removing the front grille by pressing down on the tabs and lifting it upwards, accessing the filter compartment, and detaching the fan assembly.
- To replace buttons on the purifier, debris should be removed, the new button should be aligned with the corresponding hole and pressed firmly until a click is heard.
- When accessing the circuit board, it is important to turn off the power, unscrew the screws holding the control panel, disconnect wires carefully, and replace or repair the circuit board as needed.

LEVOIT Air Purifiers for Bedroom Home Dorm, AHAM VERIFIED, 3-in-1 Filter Cleaner With Aroma Pad, Filters Smoke, Allergens, Pet Dander, Odor, Dust, Office, Desktop, Core Mini-P, White
𝗥𝗘𝗠𝗢𝗩𝗘 𝗣𝗢𝗟𝗟𝗨𝗧𝗔𝗡𝗧𝗦 𝗘𝗩𝗘𝗥𝗬𝗪𝗛𝗘𝗥𝗘: Our Pre-Filter and Main Filter capture allergens as lint, hair, pet dander, pet hair, fine...
As an affiliate, we earn on qualifying purchases.
Tools Needed for Disassembly
To take apart an Oreck air purifier, you’ll need a few tools. The disassembly process requires the following tools: a screwdriver with a Phillips head, a small flathead screwdriver, and a pair of needle-nose pliers. These tools are essential for removing the screws and connectors that hold the purifier together.
Start by unplugging the purifier from the power source and removing the front grill. Use the screwdriver to remove the screws securing the back panel. Once the back panel is off, locate the filters and carefully remove them. Use the needle-nose pliers to disconnect any electrical connectors.

Air Purifiers for Home Large Room up to 2200sq.ft, MOOKA Air purifier for Home Pets with Washable Filter, PM 2.5 Display Air Quality Sensor Air Cleaner for Bedroom, Dorm room, Pets, Office PR1 (White)
MORE AIR INTAKE & HIGH-EFFICIENCY: This is the 2024 latest MOOKA PR1 HEPA air purifiers for home. To...
As an affiliate, we earn on qualifying purchases.
Removing the Front Grille
First, you’ll need to locate the tabs on the edges of the front grille. These tabs are essential for removing the front grille of your Oreck air purifier. Once you have identified the tabs, follow these step-by-step instructions to remove the front grille:
- Gently press down on the tabs located on the top edge of the front grille.
- Simultaneously pull the top edge of the grille towards you and lift it upwards.
- Repeat the same process for the tabs on the bottom edge of the grille.
- Once all tabs are disengaged, carefully lift the front grille away from the main unit.
Now that you have successfully removed the front grille, you can proceed to clean it thoroughly. Remember, cleaning the front grille is an important maintenance task that helps to ensure the efficiency of your air purifier.
To transition into the subsequent section about accessing the filter compartment, we will now focus on removing the back cover of the Oreck air purifier.

KNKA Air Purifier for Home Bedroom Large Room Up to 1,695 Ft² in 1 Hr, HEPA Air Cleaner with Washable Pre-Filter, AQI Display, ECO Mode, Sleep Mode, Pet Mode for Pets, Dust, Pollen, APH4000
𝐇𝐢𝐠𝐡 𝐂𝐀𝐃𝐑 𝐕𝐚𝐥𝐮𝐞: This air purifier provides reliable performance with a Smoke/Dust/PM2.5 CADR of 226 CFM (384 m³/h)...
As an affiliate, we earn on qualifying purchases.
Accessing the Filter Compartment
Once you’ve removed the front grille, accessing the filter compartment is a simple process. To begin, locate the filter compartment, which is typically located behind the front grille. Open the compartment by releasing the latches or removing any screws that may be securing it.
Once the compartment is open, you will have clear access to the filters inside. If you are replacing the filter, carefully remove the old filter and dispose of it properly. If you are cleaning the filter, gently remove it from the compartment and rinse it under running water. Allow the filter to dry completely before reinserting it back into the compartment.
With the filter replaced or cleaned, you are now ready to move on to the next step: detaching the fan assembly.

LEVOIT Air Purifiers for Home Large Room Up to 1875 Ft² with Washable Pre-Filter, AHAM VERIFIDE, Air Quality Monitor, HEPA Sleep Mode for Allergies, Pet Hair in Bedroom, Vital 200S-P, White
𝐖𝐇𝐘 𝐂𝐇𝐎𝐎𝐒𝐄 𝐀𝐇𝐀𝐌 𝐕𝐄𝐑𝐈𝐅𝐈𝐃𝐄 𝐏𝐑𝐎𝐃𝐔𝐂𝐓𝐒: AHAM (Association of Home Appliance Manufacturers) is an ANSI-accredited organization that sets strict...
As an affiliate, we earn on qualifying purchases.
Detaching the Fan Assembly
Now that you’ve accessed the filter compartment, it’s time to detach the fan assembly. Follow these steps to safely remove the fan assembly for cleaning or reassembling:
-
Disconnect the power supply: Before starting any work on the fan assembly, make sure to unplug the air purifier from the power source to avoid any electrical accidents.
-
Remove the screws: Using a screwdriver, locate and remove the screws that secure the fan assembly to the air purifier. Keep these screws in a safe place as you’ll need them later for reassembly.
-
Detach the fan assembly: Once the screws are removed, carefully lift and separate the fan assembly from the air purifier. Be cautious not to damage any wires or connectors during this process.
Remember, cleaning the fan assembly regularly will help maintain the efficiency of your air purifier.
When you’re ready to reassemble, simply reverse these steps, ensuring all connections are secure and the screws are tightly fastened.
Separating the Motor Housing
Now that we’ve successfully detached the fan assembly, let’s move on to the next step: separating the motor housing.
This crucial step requires precision and careful attention to detail to avoid any damage to the internal components.
In this discussion, I’ll guide you through the motor housing removal techniques and provide troubleshooting tips for common issues that may arise during the process.
Motor Housing Removal Techniques
To remove the motor housing, you’ll need to unscrew the screws holding it in place. Here is a step-by-step guide on how to remove the motor housing of your Oreck air purifier:
-
Turn off and unplug the air purifier to ensure safety.
-
Locate the screws that secure the motor housing. They are usually found on the back or bottom of the unit.
-
Use a screwdriver to carefully unscrew the screws and set them aside.
-
Gently lift the motor housing off the unit, taking care not to damage any internal components.
-
Clean the motor housing using a soft cloth or brush to remove any dust or debris.
-
Once cleaned, reassemble the motor housing by aligning it with the unit and screwing the screws back in place.
Troubleshooting Common Issues
If you’re experiencing any issues with your Oreck air purifier, here are some troubleshooting tips that may help.
| Issue | Possible Cause | Solution |
|---|---|---|
| No power | Power cord not properly plugged in | Ensure power cord is securely plugged into a working outlet |
| Low air flow | Dirty filters | Remove and clean filters according to manufacturer’s instructions |
| Unpleasant odor | Dirty pre-filter | Clean pre-filter with mild soap and water |
| Loud noise | Loose components | Check all screws and connections to ensure they are tight |
To clean and maintain your Oreck air purifier, follow these steps:
- Turn off and unplug the unit.
- Remove and clean the pre-filter.
- Remove and clean the main filter.
- Wipe down the exterior of the unit with a damp cloth.
Remember to consult your user manual for specific instructions on cleaning and maintenance.
Disassembling the Control Panel
When disassembling the control panel of an Oreck air purifier, there are a few key points to consider.
First, understanding button removal techniques is crucial to avoid damaging the control panel.
Second, ensuring circuit board accessibility is essential for troubleshooting and repairing any issues.
Lastly, being familiar with common issues and their troubleshooting methods will help in efficiently resolving any problems that may arise.
Button Removal Techniques
One option for removing the buttons on an Oreck air purifier is by gently prying them off with a flathead screwdriver. Here are the steps to remove the buttons:
- Locate the button you want to remove.
- Take a flathead screwdriver and position it under the edge of the button.
- Apply pressure to the screwdriver and gently pry the button off.
Once the buttons are removed, you may need to reassemble or replace them. For button reassembly techniques, follow these steps:
- Ensure the button and the control panel are clean and free from any debris.
- Align the button with the corresponding hole on the control panel.
- Press the button firmly into place until you hear a click.
If you need to replace a button, you can purchase replacement buttons from authorized Oreck dealers or online retailers. Simply follow the same steps for button reassembly using the new button.
Circuit Board Accessibility
The circuit board on the Oreck air purifier can be accessed by removing the control panel. To replace or repair the circuit board, follow these step-by-step instructions:
-
Turn off the power: Before starting any repair work, make sure to disconnect the power supply to avoid any electrical hazards.
-
Remove the control panel: Using a screwdriver, carefully unscrew the screws holding the control panel in place. Once the screws are removed, gently lift the control panel to expose the circuit board.
-
Disconnect the wires: Take note of the connections and carefully disconnect the wires attached to the circuit board. It is important to remember the positions and connections for later reassembly.
-
Replace or repair the circuit board: If you are replacing the circuit board, simply remove the old one and insert the new one in its place. If you are repairing the circuit board, identify the faulty component and replace it with a new one.
Troubleshooting Common Issues
Now that we understand how to access the circuit board in an Oreck air purifier, let’s move on to troubleshooting common issues that may arise with the device. Here are some techniques and maintenance tips to help you identify and resolve these problems:
-
Check the power supply: Ensure that the device is properly plugged in and that the power outlet is functioning correctly. If the purifier is not turning on, try using a different outlet or checking the power cord for any damage.
-
Clean the filters: Over time, the filters in the air purifier can become clogged with dirt and debris, reducing its effectiveness. Regularly clean or replace the filters to maintain optimal performance.
-
Reset the unit: Sometimes, a simple reset can solve minor issues. Locate the reset button on the control panel or refer to the user manual for instructions on how to perform a reset.
Frequently Asked Questions
How Often Should I Clean or Replace the Filters in My Oreck Air Purifier?
I clean or replace the pre-filter in my Oreck air purifier every 3 months. Signs that indicate the filters need cleaning or replacing are reduced airflow, increased noise, and a noticeable decrease in air quality.
Can I Use Any Type of Cleaning Solution to Clean the Filters?
I can use a mild cleaning solution to clean the filters of my Oreck Air Purifier. However, it is important to follow the manufacturer’s instructions and avoid using harsh chemicals that may damage the filters. Proper maintenance is key.
Is It Safe to Disassemble the Oreck Air Purifier While It Is Still Plugged In?
It is not safe to disassemble an electrical appliance while it is still plugged in. There are potential risks of electric shock or damage. Follow these steps to safely disassemble an Oreck Air Purifier.
Can I Wash the Front Grille of the Air Purifier in the Dishwasher?
No, it is not safe to wash the front grille of the air purifier in the dishwasher. It is recommended to use alternative cleaning methods specified in the user manual to ensure dishwasher safety.
How Long Does It Take to Completely Disassemble and Reassemble the Oreck Air Purifier?
To completely disassemble and reassemble the Oreck Air Purifier, it typically takes around 30 minutes. It’s important to follow the step-by-step instructions carefully to ensure a smooth process and avoid any damage.
Conclusion
In conclusion, disassembling an Oreck Air Air Purifier can be a straightforward process by following step-by-step instructions and using the necessary tools.
Removing the front grille, accessing the filter compartment, detaching the fan assembly, separating the motor housing, and disassembling the control panel are all steps that can be easily accomplished.
By carefully following these steps, you can successfully take apart your Oreck Air Air Purifier and perform any necessary maintenance or repairs with precision and ease.