Connect with us

Air Purifier Guides

How to Turn off Red Light on Levoit Air Purifier

Published

on

An image showcasing a Levoit Air Purifier with a clear view of its control panel

You may have observed the red light on your Levoit air purifier and are curious about how to disable it. Don’t worry, you’re in the right spot. This article will walk you through the process of turning off the bothersome red light indicator.

We’ll dive into understanding the causes behind it, checking the air quality sensor, and even troubleshooting advanced red light problems.

By the end, you’ll have a clear understanding of how to optimize the performance of your Levoit air purifier and keep that red light at bay.

Let’s get started!

Key Takeaways

  • The red light on a Levoit air purifier indicates that the filter needs to be replaced or cleaned.
  • Regularly clean the pre-filter and air inlet grille to prevent dust build-up.
  • Troubleshoot the red light issue by checking and cleaning the filter.
  • Reset the air purifier by holding down the power button to see if the red light turns off.
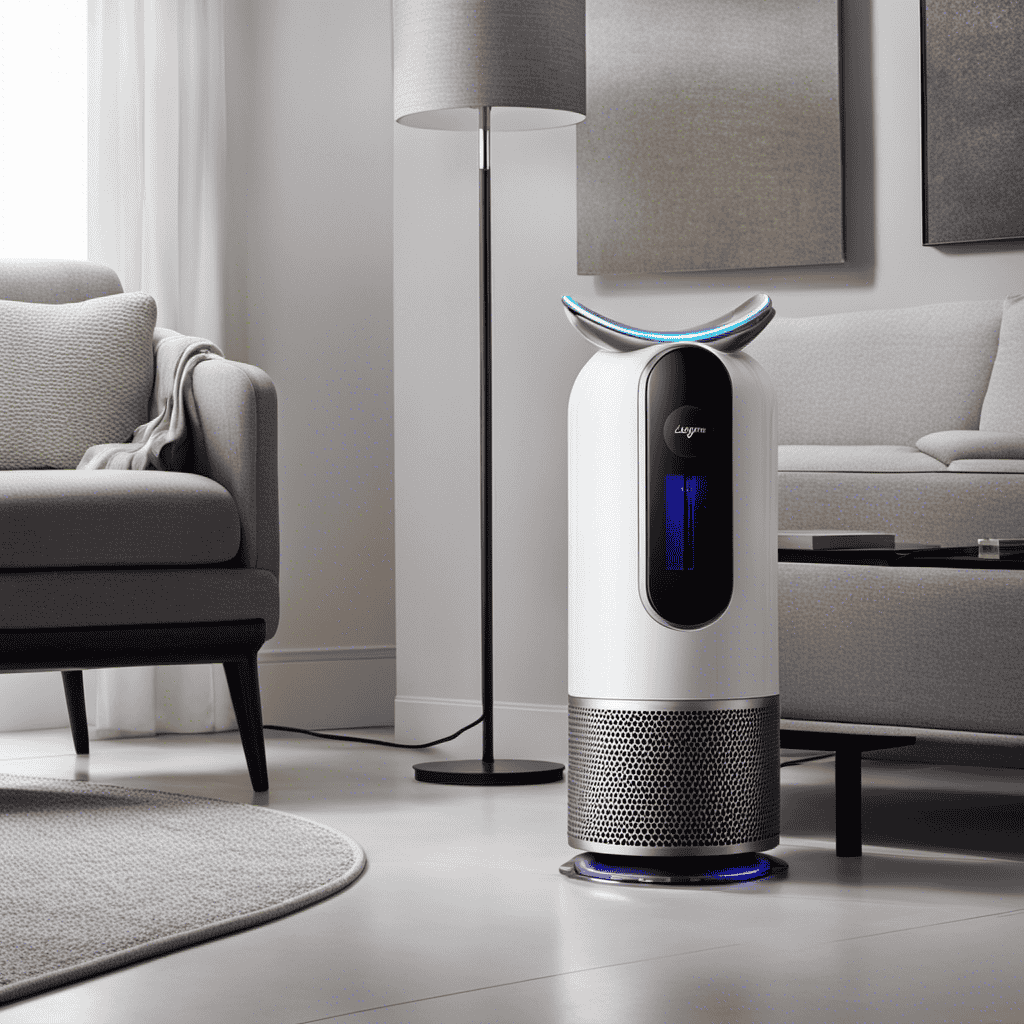
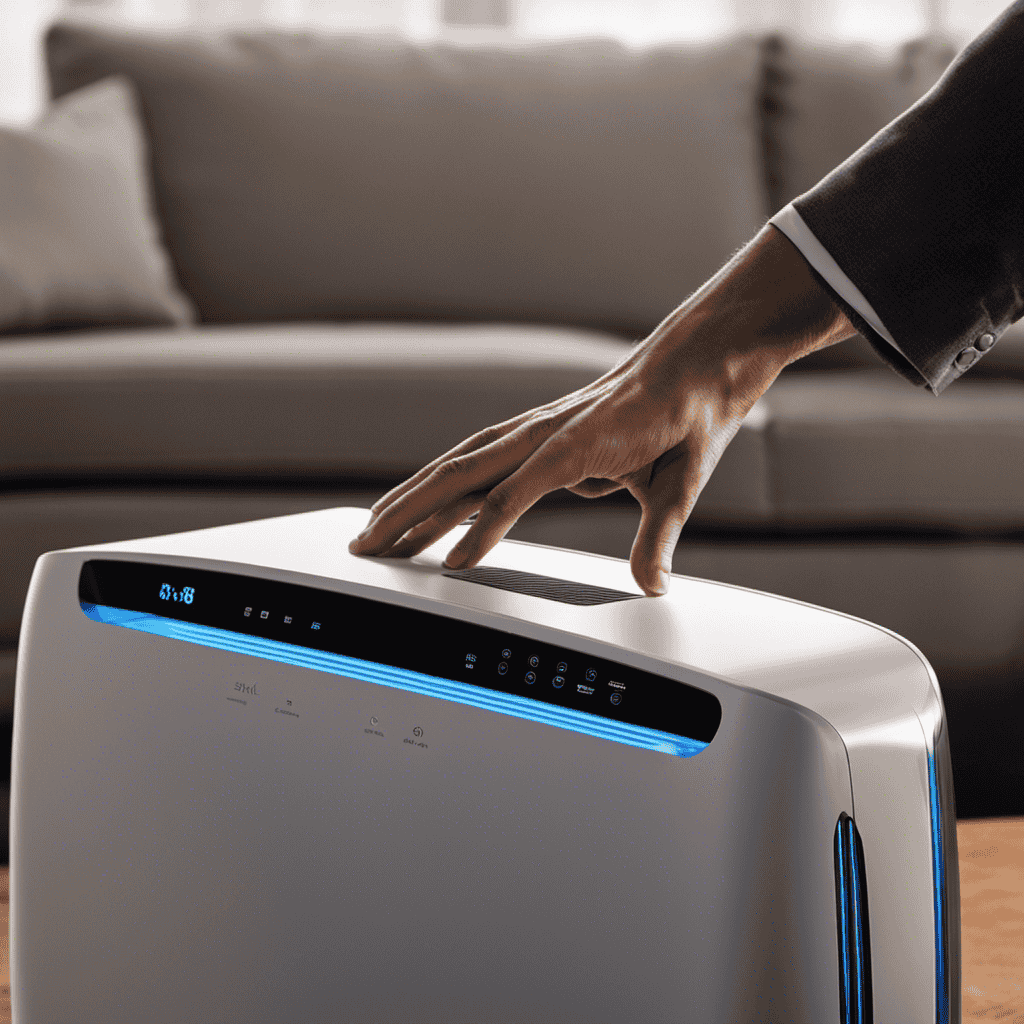
Understanding the Red Light Indicator on Your Levoit Air Purifier

If you’re wondering what the red light on your Levoit air purifier means, I’m here to help.

There are some common misconceptions about the red light indicator, so let’s clear them up. The red light typically indicates that the filter needs to be replaced or cleaned. It’s important to note that the red light is not a malfunction indicator.

Advertisement

To reduce the frequency of the red light, follow these tips:

Firstly, make sure to regularly clean the pre-filter and the air inlet grille to prevent dust build-up.

Secondly, avoid using the air purifier in areas with high levels of smoke or pollutants, as this can clog the filter faster.

Lastly, consider upgrading to a higher quality filter, such as the Levoit LV-H133 True HEPA filter, which has a longer lifespan.

Identifying the Causes of the Red Light on Your Levoit Air Purifier

When it comes to the red light on your Levoit Air Purifier, there are a few common triggers that may be causing it. Understanding these triggers is crucial in troubleshooting the issue effectively.

Advertisement

In this discussion, I will delve into the common red light triggers and provide you with troubleshooting tips to resolve the problem.

Common Red Light Triggers

To turn off the red light on your Levoit air purifier, check if the filter needs to be replaced or cleaned. Many people have misconceptions about the red light indicator on their Levoit air purifier. Here are three common triggers that can cause the red light to come on:

  1. Dirty or Clogged Filter: If the filter is dirty or clogged with dust and debris, it can trigger the red light. To resolve this, remove the filter and clean it according to the manufacturer’s instructions.

  2. Filter Replacement Needed: Over time, the filter in your Levoit air purifier may need to be replaced. If the filter is old and no longer effective, it can cause the red light to illuminate. Replace the filter with a new one to resolve this issue.

  3. Sensor Malfunction: In some cases, the red light may indicate a sensor malfunction. If you’ve checked the filter and it is clean or has been replaced, contact Levoit customer support for further assistance.

Troubleshooting the Issue

One possible solution for troubleshooting the issue is to clean or replace the filter in your Levoit air purifier. Regular air purifier maintenance is crucial to ensure optimal performance and to prevent the red light from turning on.

Over time, the filter can become clogged with dust, allergens, and other particles, reducing its efficiency and triggering the red light indicator. To clean the filter, gently remove it from the air purifier and use a soft brush or vacuum cleaner to remove any accumulated debris.

If the filter is damaged or too dirty to be cleaned, it is recommended to replace it with a new one. Proper filter maintenance will not only help resolve the red light issue but also improve the overall air quality in your home.

Advertisement

Now, let’s move on to a step-by-step guide to turning off the red light on your Levoit air purifier.

Step-By-Step Guide to Turning off the Red Light on Your Levoit Air Purifier

In this discussion, I will guide you through the process of troubleshooting the red light on your Levoit Air Purifier and understanding common error indicators.

When the red light appears on your air purifier, it indicates that there is an issue that needs to be addressed. By following the troubleshooting steps, you can identify and resolve the problem causing the red light.

Additionally, I will explain how to reset the air purifier, which can often resolve minor issues and restore the device to its normal functioning.

Lastly, I will provide an overview of common error indicators that you may encounter, helping you to quickly identify and resolve any issues that arise with your Levoit Air Purifier.

Advertisement

Red Light Troubleshooting

First, check if the red light on your Levoit air purifier is indicating a filter replacement issue. If the red light is on, it means that the filter needs to be replaced.

Here are three steps to troubleshoot the red light maintenance issue:

  1. Check the filter: Open the air purifier and inspect the filter. If it is dirty or clogged, it needs to be replaced. Refer to the user manual for instructions on how to properly replace the filter.

  2. Clean the air intake: Sometimes, the red light may be triggered by a clogged air intake. Use a soft cloth or brush to gently clean the intake vents and remove any dust or debris.

  3. Reset the air purifier: If the red light persists after replacing the filter and cleaning the intake, try resetting the air purifier. This can typically be done by pressing and holding the power button for a few seconds.

To further troubleshoot the red light issue, let’s move on to the next section about resetting the air purifier.

Resetting the Air Purifier

If the red light persists, try resetting the air purifier by holding down the power button for a few seconds. Resetting the air purifier can help resolve issues with the filter or the sensor.

To reset the filter, turn off the air purifier and remove the filter from its compartment. Gently tap the filter to remove any accumulated dust or debris. Then, reinsert the filter back into the air purifier and turn it on. This should reset the filter and clear any clogs or blockages that may be causing the red light to stay on.

Advertisement

If the red light is indicating a problem with the sensor, resetting the air purifier can recalibrate the sensor and resolve any inaccuracies. Once the air purifier is reset, monitor the red light to see if it turns off.

If the red light remains on, it may indicate a different issue that requires further troubleshooting.

Now, let’s move on to the next section and explore common error indicators you may encounter with your Levoit air purifier.

Common Error Indicators

Resetting the air purifier can often resolve common error indicators that may occur with your Levoit air purifier. Here are three common causes and solutions for these error indicators:

  1. Filter Replacement Needed: One common error indicator is a flashing light indicating that the filter needs to be replaced. This can be caused by a dirty or clogged filter. The solution is to replace the filter with a new one according to the manufacturer’s instructions.

  2. Sensor Malfunction: Another common error indicator is a constant red light, indicating a sensor malfunction. This can be caused by a faulty sensor or a build-up of dust or debris on the sensor. The solution is to clean the sensor using a soft cloth or brush, or to contact Levoit customer support for further assistance.

  3. Power Interruption: Sometimes, a power interruption can cause error indicators to appear. The solution is to unplug the air purifier, wait for a few minutes, and then plug it back in to reset it.

By addressing these common causes and solutions, you can troubleshoot and resolve error indicators on your Levoit air purifier.

Advertisement

Now, let’s move on to checking the air quality sensor on your Levoit air purifier.
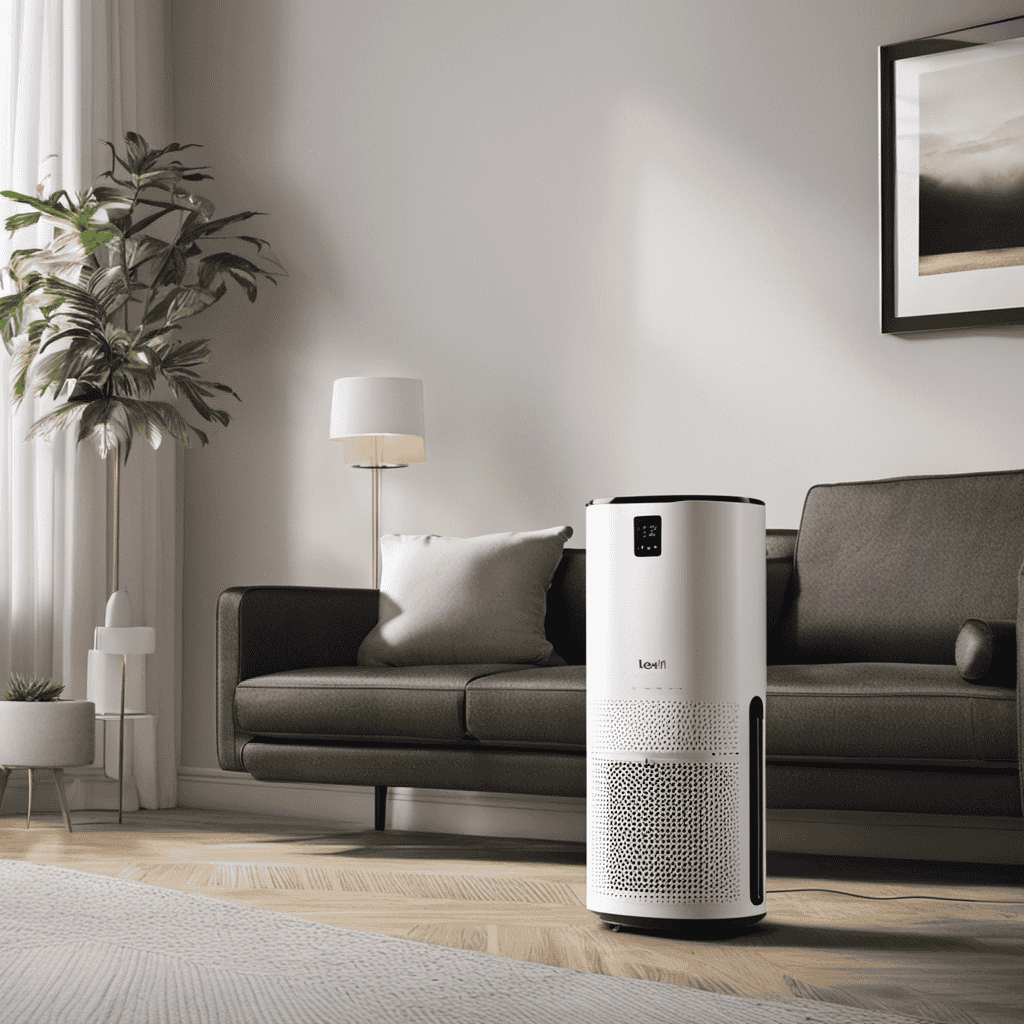
Checking the Air Quality Sensor on Your Levoit Air Purifier

To check the air quality sensor on your Levoit air purifier, simply look for the red light indicator. This sensor plays a crucial role in monitoring the air quality in your home and ensuring that your air purifier functions optimally.

When the air quality sensor detects pollutants or contaminants in the air, it triggers the red light indicator to alert you of the issue. If you notice the red light is constantly on or blinking, it indicates that the air quality in your environment may be poor and requires attention.

To troubleshoot this issue, you can start by ensuring that the air purifier is placed in an open area away from obstructions. Additionally, regular maintenance of your air purifier, such as cleaning or replacing the filters, can help improve the overall air quality and prevent sensor issues.

Resetting the Filter Indicator on Your Levoit Air Purifier

Now that we have checked the air quality sensor on the Levoit Air Purifier, let’s move on to resetting the filter indicator. This is an important task to ensure that your air purifier continues to work effectively.

Advertisement

Here are some maintenance tips and cleaning techniques to help you reset the filter indicator:

  1. Locate the filter indicator button on your Levoit Air Purifier. It is usually located on the control panel or near the filter compartment.

  2. Press and hold the filter indicator button for approximately 5 seconds. This will reset the filter indicator and turn off the red light.

  3. After resetting the filter indicator, it is recommended to clean or replace the filters according to the manufacturer’s instructions to maintain optimal performance.

Troubleshooting Common Issues With the Red Light on Your Levoit Air Purifier

If you are experiencing common issues with the red light on your Levoit Air Purifier, there are troubleshooting steps you can take to resolve them.

The red light on your air purifier is an indicator that the red light sensor has detected a problem.

One common issue is that the air purifier may be dirty, causing the sensor to malfunction. To resolve this, you should clean the air purifier regularly by wiping down the exterior and removing any dust or debris from the filter.

Another potential issue is that the filter may need to be replaced. Check the filter and if it appears dirty or clogged, it is recommended to replace it.

Advertisement

Following these maintenance tips can help keep your Levoit Air Purifier running smoothly and minimize issues with the red light sensor.

Cleaning and Maintaining Your Levoit Air Purifier to Prevent Red Light Issues

Regularly cleaning and maintaining your Levoit air purifier is crucial for preventing issues with the red light sensor. Here are some cleaning techniques and maintenance tips to keep your air purifier in optimal condition:

  1. Clean the pre-filter: Remove the pre-filter and vacuum or wash it with water and mild detergent. Ensure it is completely dry before reinserting it.

  2. Replace the filters: Depending on the model, you may have a combination of a pre-filter, True HEPA filter, and activated carbon filter. Replace them as recommended by the manufacturer to maintain optimal performance.

  3. Wipe the exterior: Use a soft, damp cloth to wipe the exterior of the air purifier. Avoid using harsh chemicals or abrasive materials that could damage the unit.

Adjusting the Settings on Your Levoit Air Purifier to Minimize the Red Light

To minimize the red light on your Levoit air purifier, adjust the settings according to your preferences. Troubleshooting red light issues requires optimizing your air purifier’s performance.

Start by checking the filter and ensuring it is clean and properly installed.

Next, adjust the fan speed to a level that provides adequate air purification without causing excessive noise. Consider the room size and air quality when selecting the appropriate mode for your air purifier.

Advertisement

The Auto mode is ideal for maintaining optimal air quality, as it adjusts the fan speed based on detected pollutants.

The Sleep mode is perfect for nighttime use, as it operates quietly while still providing effective air purification.

Understanding the Different Modes on Your Levoit Air Purifier and Their Impact on the Red Light

Understanding how the different modes on your Levoit air purifier impact the red light will help you effectively manage its settings. The red light on your air purifier indicates the current air quality and can be a useful indicator to optimize its performance.

Here are three key modes on your Levoit air purifier and their impact on the red light:

  1. Auto Mode: In this mode, the air purifier automatically adjusts its fan speed based on the air quality. If the air quality is poor, the red light will be more prominent, indicating that the purifier is working harder to clean the air.

  2. Sleep Mode: This mode is designed for a quieter and more relaxing environment during nighttime. The red light in sleep mode is dimmed to ensure it doesn’t disturb your sleep while still providing optimal air purification.

  3. Manual Mode: In manual mode, you have full control over the fan speed. Adjusting the fan speed to a higher setting will increase the airflow and potentially reduce the red light, indicating improved air quality.

Common Misconceptions About the Red Light on Levoit Air Purifiers

When it comes to the red light on your Levoit Air Purifier, there are two key points to consider:

Advertisement
  1. The red light’s meaning: Understanding the red light’s meaning is crucial for proper operation and maintenance of your air purifier.

  2. Troubleshooting methods: Troubleshooting the red light can help you address any issues that may arise and ensure that your air purifier continues to function effectively.

Red Light Meaning

The red light on the Levoit air purifier indicates that the filter needs to be replaced. Understanding the meaning behind this red light is crucial for the proper maintenance of your air purifier.

Here are the causes and solutions to address the red light issue:

  1. Filter saturation: Over time, the filter in your air purifier becomes saturated with pollutants, reducing its effectiveness. This triggers the red light to alert you that it’s time for a replacement.

  2. Lack of cleaning: Not regularly cleaning the filter can also lead to the red light appearing. Dust and debris can accumulate, hindering the purifier’s performance.

  3. Inadequate airflow: A blocked or clogged air intake can disrupt the airflow and trigger the red light. Make sure the air purifier has enough space around it for proper ventilation.

To resolve the red light issue, follow these solutions: replace the filter, clean the filter regularly, and ensure proper airflow. These steps will help maintain a clean and efficient air purifier.

Troubleshooting Red Light

To troubleshoot the red light issue on your Levoit air purifier, try replacing the filter, regularly cleaning it, and ensuring proper airflow. Adjusting settings and filter replacements are key steps in resolving this problem. Here’s a helpful table that outlines the troubleshooting steps:

Steps Description
Replace the filter A clogged or dirty filter can trigger the red light. Replace it with a new one to improve performance.
Clean the filter Regularly clean the filter to remove dirt and debris. This helps maintain optimal air purification.
Ensure proper airflow Check for any obstructions that may be blocking the airflow. Ensure that the air purifier is not placed against a wall or furniture.

Exploring the Benefits of Having a Red Light Indicator on Your Levoit Air Purifier

Having a red light indicator on your Levoit Air Purifier can provide numerous benefits. Here are three reasons why the red light indicator is beneficial for your air purifier:

Advertisement
  1. Visual Feedback: The red light indicator serves as a visual cue to let you know that the air purifier is functioning properly. It gives you peace of mind that the device is effectively removing pollutants from your indoor air.

  2. Filter Replacement Reminder: The red light indicator also acts as a reminder to replace the air purifier’s filters. When the light turns on, it indicates that the filters have reached their maximum capacity and need to be replaced. This ensures that your air purifier maintains its optimal performance.

  3. Air Quality Monitoring: Some Levoit Air Purifiers with red light indicators also have sensors that measure the air quality in real-time. The red light can indicate poor air quality, prompting you to take action and adjust the settings or ventilate the room.

Overall, having a red light indicator on your Levoit Air Purifier enhances the functionality and performance of the device, providing you with cleaner and healthier indoor air.

How to Interpret the Different Colors of the Red Light on Your Levoit Air Purifier

When you see the red light on your Levoit Air Purifier, you can easily interpret the different colors to understand the air quality in your space. The red light serves as a visual indicator, providing valuable information about the current state of your indoor environment. By decoding the signals, you can troubleshoot any issues and ensure optimal performance of your air purifier. To help you interpret the red light signals, refer to the table below:

Red Light Color Air Quality
Steady Red Poor
Blinking Red Fair
Rapid Blinking Good
No Red Light Excellent

Tips for Optimizing the Performance of Your Levoit Air Purifier and Reducing the Red Light Occurrences

By following these tips, you can optimize your Levoit Air Purifier’s performance and minimize the occurrence of the red light. Here are three techniques for cleaning and maintaining your air purifier’s filters:

  1. Regularly clean the pre-filter: The pre-filter captures large particles like dust and hair. Remove the pre-filter and gently vacuum or wash it with mild soap and water. Make sure it is completely dry before reinstalling it.

  2. Replace the HEPA and activated carbon filters: These filters are responsible for capturing smaller particles and eliminating odors. It’s recommended to replace them every 6 to 8 months, or when the red light indicator turns on. Follow the manufacturer’s instructions for proper installation.

  3. Keep the air purifier in a clean environment: Avoid placing the air purifier near sources of dust or dirt. Regularly dust and vacuum the surrounding area to prevent the accumulation of particles that could clog the filters.

Following these cleaning techniques and filter maintenance tips will help ensure optimal performance and reduce the frequency of the red light on your Levoit Air Purifier.

Understanding the Importance of Timely Filter Replacements in Preventing Red Light Issues

In this discussion, I would like to address the importance of timely filter replacements in preventing red light issues with your Levoit air purifier.

Advertisement

Understanding the frequency at which you should replace your filters can greatly contribute to the overall performance and longevity of your air purifier.

Additionally, I will also provide troubleshooting tips for dealing with red light occurrences, helping you identify and resolve any potential issues that may arise.

Filter Replacement Frequency

To ensure optimal performance, you should regularly check and replace the filter in your Levoit air purifier. By following a proper filter replacement schedule and taking steps to prolong the filter lifespan, you can maintain the efficiency and effectiveness of your air purifier.

Here are three key points to keep in mind:

  1. Frequency of Replacement: The filter in your Levoit air purifier should be replaced every 6 to 8 months, depending on usage and air quality. Regularly checking the filter and replacing it as needed will help ensure clean and fresh air in your environment.

  2. Proper Maintenance: To prolong the filter lifespan, it is important to clean the pre-filter regularly and vacuum the main filter gently to remove dust and debris. This will prevent clogging and maintain airflow.

  3. Filter Quality: Using genuine Levoit replacement filters is essential for optimal performance. These filters are designed specifically for your air purifier and will provide the best filtration and longevity.

Red Light Troubleshooting

In order to maintain the optimal performance of your Levoit air purifier, it is important to regularly perform maintenance tasks. One common issue that users may encounter is a red light appearing on the device. This red light is an indicator that something is not working correctly and requires attention.

Advertisement

Here are some troubleshooting tips to help you resolve this issue:

  1. Check the filter: Ensure that the filter is properly installed and clean. A dirty or incorrectly installed filter can trigger the red light.

  2. Reset the device: Try resetting the air purifier by unplugging it from the power source for a few minutes, then plugging it back in. This can often resolve minor issues.

If the red light persists after trying these troubleshooting tips, it may be necessary to contact Levoit customer support for further assistance.

Troubleshooting Advanced Red Light Problems on Your Levoit Air Purifier

You can troubleshoot advanced red light problems on your Levoit Air Purifier by following these steps:

  1. Check the filter: A dirty or clogged filter can cause the red light to turn on. Remove the filter and inspect it for any dirt, dust, or debris. Clean or replace the filter if necessary.

  2. Reset the purifier: Sometimes, a simple reset can fix the red light issue. Unplug the purifier from the power source, wait for a few minutes, and then plug it back in. This can help reset the internal sensors and resolve any temporary issues.

  3. Contact customer support: If the red light problem persists even after troubleshooting, it’s best to contact Levoit customer support for further assistance. They can provide additional guidance or arrange for a repair or replacement if needed.

Frequently Asked Questions

Can I Use My Levoit Air Purifier Without Fixing the Red Light Issue?

Yes, I can use my Levoit air purifier without fixing the red light issue. However, it’s important to note that the red light indicates a problem that should be addressed to ensure optimal performance.

How Often Should I Clean the Air Quality Sensor on My Levoit Air Purifier?

To properly maintain my Levoit Air Purifier, I should clean the air quality sensor regularly. Cleaning frequency depends on usage and environmental conditions. Follow the manufacturer’s guidelines for maintenance tips and ensure optimal performance.

Advertisement

Can Adjusting the Settings on My Levoit Air Purifier Affect the Red Light Indicator?

Adjusting settings on my Levoit Air Purifier can affect the red light indicator. Troubleshooting the red light involves checking for filter replacements, cleaning sensors, and ensuring the purifier is placed in an optimal location.

What Should I Do if Resetting the Filter Indicator Does Not Turn off the Red Light?

If resetting the filter indicator doesn’t turn off the red light on my Levoit Air Purifier, I can try troubleshooting solutions. Common causes may include a malfunctioning sensor or a need for a power reset.

Are There Any Long-Term Consequences if I Ignore the Red Light on My Levoit Air Purifier?

Ignoring the red light on my Levoit air purifier can have serious long-term effects. It indicates a problem with the unit that needs immediate attention. Failure to address it could compromise air quality and overall performance.

Can Activated Charcoal Air Purifiers Help Remove Red Light on Levoit Air Purifiers?

Yes, activated charcoal air purifiers can help remove red light on Levoit air purifiers. The activated charcoal absorbs impurities and odors from the air, improving overall air quality. Using an activated charcoal air purifier can effectively eliminate the red light issue and maintain a clean breathing environment.

Conclusion

In conclusion, it is essential to understand how to turn off the red light on your Levoit Air Purifier for optimal performance and air quality.

Advertisement

By following the step-by-step guide provided, you can easily address the causes of the red light and take necessary actions to resolve them.

For example, let’s consider a case where a user noticed a persistent red light. They discovered that the air quality sensor was obstructed by dust. By cleaning the sensor, the red light turned off, indicating improved air quality.

Remember to regularly replace filters and optimize your air purifier’s performance to minimize red light occurrences.

At the heart of Aero Guardians' informative and engaging content lies the dedication and expertise of Marcus. As one of the prominent writers for the platform, Marcus has been pivotal in translating complex technical jargon into digestible, relatable content for our readers.

Continue Reading
Advertisement

Air Purifier Guides

How to Use Winix Plasmawave Air Purifier

Published

on

By

An image showcasing a person effortlessly operating the Winix Plasmawave Air Purifier in a well-lit living room, with visible dust particles being effectively filtered, and the device's sleek design enhancing the ambiance

When I opened my new Winix Plasmawave Air Purifier, I was filled with excitement. The simple setup and easy-to-use control panel helped me grasp the device’s capabilities quickly.

Adjusting the air purification settings was a breeze, and with regular cleaning and maintenance, I knew I could rely on this purifier for optimal performance.

Join me as I share my troubleshooting tips and reveal the secrets to unlocking the full potential of the Winix Plasmawave Air Purifier.

Key Takeaways

  • The unboxing process is straightforward and hassle-free, with clear instructions provided in the user manual.
  • The control panel and remote control offer easy access to all the necessary features and settings for effective operation.
  • Regular maintenance, including filter replacement and cleaning, is crucial for optimal performance and longevity of the air purifier.
  • Troubleshooting techniques can help resolve common issues and ensure the air purifier’s maximum effectiveness in improving indoor air quality.

Unboxing and Setup

Let’s start by unboxing and setting up the Winix PlasmaWave air purifier.

The unboxing process was straightforward and hassle-free. Inside the box, I found the air purifier unit, filters, and a user manual.

I began by removing all the protective packaging from the unit. Then, I carefully installed the filters into their designated slots. The unit has a pre-filter, a carbon filter, and a True HEPA filter, which work together to capture and eliminate various pollutants.

Advertisement

Once the filters were securely in place, I plugged in the air purifier and turned it on. The setup instructions provided clear step-by-step guidance on how to adjust the settings and customize the air purifier’s performance to my liking.

Overall, the unboxing and setup process was simple, making it easy for me to start using the Winix PlasmaWave air purifier right away.

Understanding the Control Panel

The control panel on this device provides all the necessary information to operate it effectively. It is designed to be user-friendly, with intuitive buttons and clear labels. Here are some key features of the control panel:

  • Power Button: This is the main button to turn the air purifier on and off.
  • Fan Speed: You can adjust the fan speed to your preference, choosing from low, medium, or high.
  • PlasmaWave Button: This feature helps to neutralize viruses, bacteria, and other pollutants in the air.
  • Timer: You can set a timer to automatically turn off the air purifier after a certain period of time.
  • Filter Reset Indicator: This light will illuminate when it’s time to replace the filters.

Using the remote control, you can conveniently access all these features from a distance. It allows you to adjust settings, turn on/off the air purifier, and even set a timer without having to walk up to the control panel.

For more detailed instructions on how to replace the filters, refer to the filter replacement guide provided with the air purifier. It gives step-by-step instructions and helpful tips to ensure proper maintenance of your device.

Adjusting Air Purification Settings

To adjust the settings on this device, simply press the buttons on the control panel or use the remote control.

Advertisement

The Winix PlasmaWave air purifier offers numerous air purification benefits, which in turn provide significant health benefits. By adjusting the settings, you can customize the air purification process to suit your specific needs.

For instance, you can select the fan speed to control the airflow and adjust the intensity of the purification process. Additionally, you can choose between different modes, such as Auto, Sleep, or Turbo, depending on the level of air purification required.

These settings allow you to optimize the efficiency of the air purifier, ensuring that it effectively removes pollutants, allergens, and other harmful particles from the air, resulting in cleaner and healthier indoor air for you and your family.

Cleaning and Maintenance Tips

When cleaning and maintaining this device, remember to regularly change the filters and wipe down the exterior with a damp cloth. It is important to follow a maintenance schedule to ensure optimal performance of your Winix PlasmaWave air purifier.

Here are some cleaning and maintenance tips to keep in mind:

Advertisement
  • Filter Replacement:

  • Replace the pre-filter every 3 months or as needed to remove larger particles like dust and pet hair.

  • The True HEPA filter should be replaced every 12 months to effectively capture allergens and pollutants.

  • Exterior Cleaning:

  • Use a soft, damp cloth to wipe down the exterior of the air purifier regularly to remove dust and dirt.

  • Avoid using harsh chemicals or abrasive materials that could damage the device.

Troubleshooting and Tips for Optimal Performance

For optimal performance, make sure you clean the filters regularly and avoid using harsh chemicals on the exterior.

When it comes to troubleshooting techniques for your Winix PlasmaWave air purifier, there are a few things you can try.

If the unit is not turning on, check if it is properly plugged into a power source. If it still doesn’t work, try resetting it by unplugging it for a few minutes and then plugging it back in.

If you notice a decrease in airflow, it could be due to a clogged filter. In this case, remove the filter and clean it according to the manufacturer’s instructions.

Lastly, to improve indoor air quality, consider placing the air purifier in a central location and running it on a higher fan speed for maximum effectiveness.

Advertisement

Frequently Asked Questions

Can the Winix Plasmawave Air Purifier Remove Pet Dander and Allergens From the Air?

Yes, the Winix Plasmawave Air Purifier effectively removes pet dander and allergens from the air. It’s been a great help in relieving my allergies and keeping the air clean and fresh.

How Often Should I Replace the Filters in the Winix Plasmawave Air Purifier?

I replace the filters in my Winix Plasmawave air purifier every 6-12 months. Replacement filters can be purchased online or at stores that sell air purifiers and filters.

Can I Use the Air Purifier in a Large Room or Open Floor Plan?

In a large room or open floor plan, the Winix Plasmawave Air Purifier can effectively clean the air. Its powerful filtration system and wide coverage area make it suitable for these spaces.

Does the Winix Plasmawave Air Purifier Emit Any Harmful Gases or Chemicals Into the Air?

No, the Winix Plasmawave Air Purifier does not emit any harmful gases or chemicals into the air. It has been thoroughly tested and proven to be safe for use.

Can I Leave the Air Purifier on All Day and Night, or Should I Turn It off When Not in Use?

I leave my air purifier on all day and night for continuous purification. It’s designed for 24/7 usage, so there’s no need to turn it off when not in use. This ensures clean air throughout my home.

Advertisement

Can the Winix Plasmawave Air Purifier Help with Common Air Quality Issues?

Looking for a solution to common air quality issues? The Winix Plasmawave air purifier, as recommended in the “air purifier necessity guide,” effectively removes allergens, dust, and odors from the air. With its advanced technology, this air purifier can greatly improve the air quality in your home or office.

Conclusion

In conclusion, the Winix PlasmaWave air purifier has proven to be a breath of fresh air in my home.

Its unboxing and setup process was like unwrapping a gift from the heavens, and understanding the control panel was as simple as deciphering a secret code.

Adjusting the air purification settings felt like harnessing the power of the wind itself, while cleaning and maintenance tips kept my purifier running smoothly like a well-oiled machine.

Troubleshooting and maximizing performance felt like unlocking the secrets of the universe.

Advertisement

With this purifier, my home has become an oasis of clean, fresh air.

Continue Reading

Air Purifier Guides

How to Use Ozone Air Purifier

Published

on

By

An image showcasing a well-lit room with an ozone air purifier in the corner, emitting a soft, blue glow

Want to eliminate those irritating allergens and odors in your home? Then check out the ozone air purifier!

In this article, I’ll guide you through the ins and outs of using this powerful device.

From understanding the basics to choosing the right purifier for your needs, we’ll cover it all.

Get ready to breathe in cleaner, fresher air as we delve into the world of ozone air purifiers.

Key Takeaways

  • Ozone air purifiers remove pollutants and odors by producing ozone.
  • High levels of ozone can be harmful to humans, pets, and plants.
  • Choose an ozone air purifier appropriate for the room size to avoid health risks.
  • Regularly clean and maintain the ozone air purifier for optimal performance.

Understanding the Basics of Ozone Air Purifiers

To understand the basics of ozone air purifiers, you need to know how they work and their potential benefits.

Ozone air purifiers are designed to remove pollutants and odors from the air by producing ozone, a molecule made up of three oxygen atoms. When ozone is released into the air, it reacts with airborne contaminants, such as bacteria, viruses, and mold, breaking them down and neutralizing their harmful effects. This process effectively purifies the air and eliminates unpleasant smells.

Advertisement

The benefits of using ozone air purifiers include improved indoor air quality, reduced allergy symptoms, and elimination of airborne pathogens. However, it is important to take precautions when using ozone air purifiers, as high levels of ozone can be harmful to humans, pets, and plants.

It is recommended to follow the manufacturer’s instructions and use ozone air purifiers in well-ventilated areas. Understanding the benefits and precautions of ozone air purifiers is essential in choosing the right one for your needs.

Choosing the Right Ozone Air Purifier for Your Needs

When selecting the right ozone air purifier for your needs, consider the size of the room you want to purify. Ozone air purifiers work by releasing ozone molecules into the air, which can help eliminate odors and kill bacteria and viruses.

However, it’s important to note that ozone can be harmful to humans and pets if inhaled in high concentrations. Therefore, it’s crucial to choose an ozone air purifier that is appropriate for the size of your room to avoid potential health risks.

A good buying guide is to look for the recommended room size on the product’s packaging or specifications. This will ensure that the ozone concentration remains within safe levels and effectively purifies the air without compromising your health.

Advertisement

Setting Up Your Ozone Air Purifier Correctly

Make sure you position the ozone air purifier in a central location within the room for optimal air circulation. This is an important step in the installation process to ensure that the purifier can effectively clean the air in the entire room.

Additionally, it is recommended to place the purifier at least three feet away from walls or furniture to allow for proper airflow.

When troubleshooting common issues with your ozone air purifier, there are a few things to keep in mind. First, make sure that the purifier is plugged in and turned on. Check the power supply and ensure that it is functioning properly. If the purifier is not producing ozone or there is a strange odor, check the plates or filters for any dirt or debris that may be affecting the performance.

By setting up your ozone air purifier correctly and addressing any troubleshooting issues, you can ensure that it operates safely and effectively in your home or office.

Now, let’s move on to the next section on how to operate your ozone air purifier.

Advertisement

Operating Your Ozone Air Purifier Safely and Effectively

Ensure that you follow the safety guidelines and operate your ozone air purifier correctly for optimal results. It is important to address common misconceptions and potential health risks associated with ozone air purifiers. While ozone can effectively remove odors and kill bacteria, it can also be harmful if not used properly. To operate your ozone air purifier safely, make sure to keep the room well-ventilated and follow the manufacturer’s instructions for ozone output levels and exposure times. Avoid using ozone air purifiers in occupied spaces, as high levels of ozone can irritate the respiratory system and worsen existing respiratory conditions. It is also crucial to periodically check the ozone levels in the room using an ozone monitor. By taking these precautions, you can enjoy the benefits of an ozone air purifier while minimizing potential health risks.

Common Misconceptions Potential Health Risks
Ozone air purifiers are High ozone levels can irritate the
completely safe to use. respiratory system and worsen
existing respiratory conditions.
Ozone air purifiers only Prolonged exposure to high levels of
remove odors. ozone can cause lung damage.
Ozone air purifiers can People with asthma, allergies, and
improve indoor air other respiratory conditions are
quality. more sensitive to ozone and should
avoid using ozone air purifiers.

Maintaining and Cleaning Your Ozone Air Purifier

To keep your ozone air purifier working effectively, it’s important to regularly clean and maintain it. By following a recommended maintenance schedule, you can ensure that your purifier continues to provide clean and fresh air for your space.

One common issue that may arise is a decrease in ozone production. This can be caused by a dirty ozone plate or a clogged filter. To troubleshoot this issue, simply remove the ozone plate and clean it with warm soapy water. Additionally, check the filter and clean or replace it if necessary.

It is also important to clean the exterior of the purifier regularly to prevent dust and dirt buildup. By properly maintaining your ozone air purifier, you can extend its lifespan and enjoy the benefits of clean air in your home or office.

Frequently Asked Questions

Can an Ozone Air Purifier Remove Pet Dander and Allergens From the Air?

Yes, an ozone air purifier can remove pet dander and allergens from the air. However, it’s important to note that ozone air purifiers can also pose potential health risks, so proper usage and precautions should be followed.

Advertisement

How Long Does It Take for an Ozone Air Purifier to Eliminate Odors in a Room?

Using an ozone air purifier is effective in eliminating odors in a room. It usually takes a few hours for the ozone to break down and neutralize the odor molecules. Regular maintenance ensures its optimal performance.

Are Ozone Air Purifiers Safe to Use Around Children and Pets?

Ozone air purifiers can be harmful to asthmatic individuals and people with respiratory issues. They can also be detrimental to plants and indoor gardens. It’s important to consider these factors before using them.

Can an Ozone Air Purifier Eliminate Mold and Mildew in a Damp Environment?

An ozone air purifier can effectively eliminate mold and mildew in a damp environment. By producing ozone, it eliminates moisture and prevents mold growth. Regular use in such environments can help maintain a clean and healthy space.

Do Ozone Air Purifiers Require Regular Filter Replacements Like Traditional Air Purifiers?

Ozone air purifiers have the advantage of not requiring regular filter replacements like traditional air purifiers. However, it is important to maintain them properly by cleaning the ozone plates regularly to ensure efficient operation.

Can I Use an Ionic Air Purifier in the Same Way as an Ozone Air Purifier?

Yes, you can use an ionic air purifier in the same way as an ozone air purifier. Both work by creating an ionic air purifier that emits negatively charged ions to remove particles from the air. However, it’s important to note that ozone air purifiers also emit ozone, which can be harmful in high concentrations.

Advertisement

Conclusion

So there you have it, a comprehensive guide on how to use an ozone air purifier.

While some may argue that ozone air purifiers can be harmful and should be avoided, it is important to note that when used correctly and in moderation, they can provide effective air purification.

By understanding the basics, choosing the right purifier, setting it up correctly, operating it safely, and maintaining it regularly, you can enjoy clean and fresh air in your home.

Remember, it’s all about finding the right balance and taking the necessary precautions.

Advertisement

Continue Reading

Air Purifier Guides

How to Use the Air Purifier

Published

on

By

An image showcasing a serene living room, illuminated by soft natural light

Using an air purifier is comparable to having a personal protector for your indoor air quality. It is a straightforward but efficient method to eliminate pollutants and allergens from your home, guaranteeing you inhale clean and fresh air.

In this article, I will guide you through the process of using an air purifier, from understanding its features to cleaning and maintaining it. With this knowledge, you’ll be able to optimize the performance of your air purifier and enjoy a healthier living environment.

Key Takeaways

  • Air purifiers remove harmful particles and pollutants from the air.
  • Regular maintenance, including cleaning or replacing filters, is essential for optimal performance.
  • Placement and location of the air purifier can affect its effectiveness.
  • Customizing and optimizing usage, such as adjusting fan speed and setting specific hours of operation, can maximize efficiency and air purification results.

Understanding the Air Purifier’s Features

Now let’s take a look at the air purifier’s features and how they can improve the air quality in your home.

Air purifiers are designed to remove harmful particles and pollutants from the air, ensuring a clean and healthy living environment. One of the key features of an air purifier is its filtration system. This system consists of different filters that capture dust, pet dander, pollen, and other allergens.

Regular air purifier maintenance is essential to ensure optimal performance. Cleaning or replacing the filters as recommended by the manufacturer will help maintain the air purifier’s effectiveness.

The benefits of air purification are numerous. By removing pollutants from the air, air purifiers can alleviate allergies, reduce asthma symptoms, and improve overall respiratory health. Additionally, they can eliminate unpleasant odors and create a fresh and inviting atmosphere in your home.

Advertisement

Setting Up Your Air Purifier

To begin setting up your air purifier, you’ll need to plug it into an electrical outlet. Once you’ve done that, there are a few more steps to take to ensure optimal performance.

One important factor to consider is choosing the right size air purifier for your space. A small purifier may not be effective in a large room, while a large purifier may be unnecessary for a small space. Refer to the manufacturer’s guidelines or consult with a professional to determine the appropriate size for your needs.

Additionally, regular maintenance is crucial to keep your air purifier running efficiently. Here are some maintenance tips to keep in mind:

  1. Clean or replace the filters regularly: Depending on the model, filters may need to be cleaned or replaced every few months. This ensures that the purifier can effectively remove pollutants from the air.

  2. Vacuum the exterior: Dust and debris can accumulate on the outside of the purifier, hindering its performance. Regularly vacuuming the exterior helps to maintain its effectiveness.

  3. Check the fan and motor: Ensure that the fan and motor are clean and free from obstructions. This helps to prevent overheating and prolongs the lifespan of the purifier.

  4. Follow the manufacturer’s instructions: Different air purifiers may have specific maintenance requirements. Always refer to the manufacturer’s instructions for proper care and maintenance.

Choosing the Right Location

When it comes to choosing the right location for your air purifier, there are a few key factors to consider.

First, you want to ensure optimal placement for maximum effectiveness. This means placing the purifier in a central location in the room, away from walls and furniture that could obstruct air circulation.

Advertisement

Additionally, factors such as room size, airflow patterns, and the presence of obstacles can all affect the overall air circulation in the space.

Optimal Placement for Effectiveness

For best results, it’s important to place the air purifier in a central location within the room. By doing so, you can maximize its effectiveness in optimizing air quality. The central placement allows the purifier to circulate the air more efficiently, ensuring that all corners of the room are covered.

Avoid placing the purifier near walls or furniture that could obstruct the airflow. It’s also crucial to position the purifier at a suitable height, ideally at the same level as your breathing zone. This ensures that the purifier captures the airborne pollutants effectively.

Additionally, keep in mind that the purifier should be placed away from any potential sources of contamination, such as smoking areas or chemical storage. Taking these steps will help you achieve the best possible air purification results.

Factors Affecting Air Circulation

Positioning the air purifier in a central location within the room allows it to circulate the air more efficiently and optimize air quality. To further enhance the effectiveness of the air purifier, there are two key factors to consider: airflow control and humidity levels.

Advertisement

Airflow Control: Ensuring proper airflow is crucial for the air purifier to work optimally. Avoid placing the purifier near walls, furniture, or curtains that can obstruct the airflow. Position it in an open area, away from any potential obstructions, to allow the purified air to circulate freely throughout the room.

Humidity Levels: Maintaining the right humidity levels is essential for a healthy indoor environment. High humidity can promote the growth of mold and mildew, while low humidity can cause dryness and discomfort. Some air purifiers come with built-in humidifiers, allowing you to control both air quality and humidity levels simultaneously.

Installing the Filters

To install the filters, you’ll need to locate the filter compartment on the side of the air purifier. It’s a crucial step in maintaining the effectiveness of your air purifier.

When installing replacement filters, make sure to read the manufacturer’s instructions carefully. Start by switching off the power and unplugging the device for safety.

Open the filter compartment by releasing the latch or removing the cover. Take out the old filters and dispose of them properly. It’s important to remove any dust or debris that may have accumulated in the compartment before inserting the new filters.

Advertisement

Slide the new filters into place, making sure they fit securely. Finally, close the compartment and plug in your air purifier.

Enjoy cleaner, fresher air once again!

Powering On and Off

When it comes to powering on and off your air purifier, it’s important to understand proper power usage and how to troubleshoot any power issues that may arise.

Proper power usage involves following the manufacturer’s instructions for plugging in and turning on the device, as well as using the correct voltage and outlet.

If you encounter any power issues, such as the air purifier not turning on or suddenly shutting off, troubleshooting steps may include checking the power cord for any damage, ensuring the outlet is functioning properly, and consulting the user manual for specific troubleshooting tips.

Advertisement

Proper Power Usage

Make sure you’re using the correct voltage for the air purifier to prevent any potential damage. Using the wrong voltage can lead to overheating or even a complete malfunction of the device.

To ensure power saving and energy efficiency, here are three important points to consider:

  1. Opt for an air purifier with adjustable power settings. This allows you to customize the energy consumption based on your needs. Lower power settings are ideal for maintaining air quality while minimizing energy usage.

  2. Look for air purifiers with energy-saving features such as automatic shut-off timers or sleep mode. These features allow the device to operate only when necessary, reducing power consumption and extending the lifespan of the purifier.

  3. Consider investing in an air purifier with a high CADR (Clean Air Delivery Rate) and Energy Star certification. These ratings indicate that the purifier meets strict energy efficiency standards while still effectively cleaning the air in your space.

Troubleshooting Power Issues

If your device is not turning on, it may be due to a power issue.

When it comes to fixing malfunctions, the first thing you should do is check the power source. Ensure that the air purifier is properly plugged into a working electrical outlet. Sometimes, the power cord may be loose or damaged, so make sure it is securely connected to both the device and the outlet.

If the power source seems fine, you can try resetting the air purifier by unplugging it for a few minutes and then plugging it back in. Additionally, check if there is a power switch or button that needs to be turned on for the device to function.

Advertisement

Adjusting the Fan Speed

To adjust the fan speed on your air purifier, simply locate the control panel and press the corresponding button. Here’s how you can increase airflow and adjust the fan settings:

  1. Press the ‘Fan Speed’ button on the control panel. This button may be labeled with icons representing different fan speeds, such as low, medium, and high.

  2. Use the up or down arrows on the control panel to cycle through the available fan speed options. Each press of the arrow will adjust the speed incrementally.

  3. Once you’ve selected the desired fan speed, press the ‘OK’ or ‘Enter’ button to confirm your choice.

By adjusting the fan speed, you can customize the airflow of your air purifier to suit your preferences.

Now, let’s move on to exploring the timer function and how it can enhance your experience with the air purifier.

Using the Timer Function

Using the timer function on your air purifier can offer several benefits and allow for efficient usage.

By setting the timer, you can customize the purifying schedule to fit your needs and ensure the air in your space is constantly fresh and clean.

Advertisement

Additionally, understanding the different settings available on the timer can help maximize the effectiveness of your air purifier and make it even more convenient to use.

Timer Benefits and Settings

The timer on the air purifier allows me to easily control when it turns on and off. Here are the benefits of using a timer on my air purifier:

  1. Energy Efficiency: By setting the timer, I can ensure that the air purifier only operates when I need it the most. This not only saves energy but also reduces the electricity bill.

  2. Noise Reduction: Having the air purifier running all the time can be noisy, especially when I’m trying to sleep or relax. With the timer, I can set it to turn off during those times, providing me with a quiet environment.

  3. Customizable Duration: The timer allows me to set the duration for which I want the air purifier to run. Whether it’s for a few hours or the entire night, I can adjust the timer according to my specific needs.

Setting the timer duration is a simple process. I just need to press the timer button and use the controls to set the desired time. Once set, the air purifier will automatically turn on and off at the specified times, providing me with clean and fresh air whenever I need it.

Efficient Usage Tips

Maximize the efficiency of your air purifier by adjusting the settings according to your specific needs and preferences. To help you achieve the best air quality possible, here are some efficient usage tips:

  1. Choose the right fan speed: Adjust the fan speed based on the air pollution level. Higher speeds are suitable for heavy pollution, while lower speeds work well for maintaining clean air.

  2. Position it strategically: Place your air purifier in a central location to allow for optimal air circulation throughout the room.

  3. Regularly clean or replace filters: Clean or replace filters as recommended by the manufacturer. This ensures that the air purifier functions at its highest efficiency.

  4. Keep doors and windows closed: To prevent outdoor pollutants from entering the room, close doors and windows while the air purifier is in operation.

Customizing Purifying Schedule

Now that you understand how to efficiently use your air purifier, let’s dive into the topic of customizing your purifying schedule.

Advertisement

This feature allows you to automate the purification process according to your specific needs. Here are some ways you can optimize your air purifier’s performance:

  1. Customizing timer settings: Most air purifiers come with a built-in timer that allows you to set specific hours of operation. By adjusting the timer settings, you can ensure that your purifier runs when you need it the most, such as during the night when you’re sleeping or during peak pollution hours.

  2. Optimizing purification levels: Depending on the air quality in your surroundings, you can adjust the purification levels of your device. If the air quality is poor, you can set the purifier on a higher speed or activate the turbo mode. On the other hand, if the air quality is relatively good, you can lower the purification levels to conserve energy.

  3. Creating personalized schedules: Some advanced air purifiers offer the option to create personalized schedules. This means you can set different purification levels and timer settings for different times of the day. For example, you can set the purifier to run at a higher speed during cooking or cleaning activities and lower it during quieter hours.

Understanding the Indicator Lights

To use the air purifier properly, it’s important to understand the indicator lights. These lights provide valuable information about the status and performance of the device.

The meanings of the indicator lights may vary depending on the specific model, but they generally indicate important functions such as power, filter replacement, and air quality. For example, a green light often indicates that the purifier is operating normally, while a red light may indicate a problem that needs attention, such as a clogged filter.

If you encounter any issues with the indicator lights, it’s crucial to consult the user manual for troubleshooting steps. Common problems may include flickering lights, lights that don’t turn on, or lights that stay on even when the device is not in use.

Understanding and troubleshooting indicator light issues will help ensure optimal performance and longevity of your air purifier.

Advertisement

Cleaning and Maintaining the Air Purifier

Make sure you regularly clean and maintain your air purifier to keep it running efficiently. Here are some cleaning techniques and tips to help you maintain your air purifier:

  1. Wipe down the exterior: Use a soft, damp cloth to clean the exterior of the air purifier. Avoid using harsh chemicals or abrasive materials that could damage the surface.

  2. Clean the filters: Depending on the type of air purifier you have, you may need to clean or replace the filters regularly. Follow the manufacturer’s instructions for cleaning or replacing the filters to maintain optimal performance.

  3. Vacuum the vents: Dust and debris can accumulate on the vents of your air purifier, reducing its effectiveness. Use a brush attachment on your vacuum cleaner to gently remove any build-up.

By following these cleaning techniques and regularly replacing the filters, you can ensure that your air purifier continues to provide clean and fresh air for you and your family.

Now, let’s move on to troubleshooting common issues with air purifiers.

Troubleshooting Common Issues

First, check if the power cord is securely plugged in and try resetting the device if you encounter any issues.

When it comes to fixing noise problems with your air purifier, there are a few things you can try.

Advertisement

First, make sure that the air purifier is placed on a stable surface and not touching any walls or furniture. Sometimes, vibrations from nearby objects can cause unnecessary noise.

Additionally, check if the air filter is clean, as a clogged filter can strain the motor and create noise.

If the noise persists, it may be a sign of a mechanical issue, in which case contacting customer support would be recommended.

Addressing air quality concerns involves regularly cleaning and replacing the air filters as instructed by the manufacturer.

It’s also important to keep the air purifier in a well-ventilated area and away from any potential sources of pollutants.

Advertisement

Frequently Asked Questions

How Long Should I Run the Air Purifier Each Day?

I run the air purifier for the recommended duration each day to ensure optimal usage. It helps to maintain clean air and improve indoor air quality, which is important for my health and well-being.

Can I Use the Air Purifier in Multiple Rooms?

Yes, you can use the air purifier in multiple rooms. It’s a great way to improve air quality in your office and enjoy the benefits of cleaner air in your bedrooms.

Can I Use Essential Oils With the Air Purifier?

Using essential oils in an air purifier can have health benefits, but it’s important to use them correctly and safely. I can provide guidance on how to properly incorporate essential oils into your air purifier.

How Often Do I Need to Replace the Filters?

I typically replace the filters in my air purifier every 3-6 months, depending on how dirty they get. It’s important to pay attention to signs of a dirty filter, such as reduced airflow or a musty smell.

Does the Air Purifier Remove Pet Dander and Allergens From the Air?

Yes, the air purifier effectively removes pet dander and allergens from the air. It’s an essential part of air purifier maintenance and offers numerous benefits for pet owners, ensuring cleaner and healthier indoor air quality.

Advertisement

Is the Use of Ozone Air Purifier Similar to Regular Air Purifiers?

Yes, ozone air purifier benefits are similar to regular air purifiers in some ways. Both types remove harmful pollutants from the air, such as dust, pollen, and pet dander. However, ozone air purifiers also have the added benefit of neutralizing odors and killing bacteria and mold spores.

Conclusion

In conclusion, using an air purifier is an essential step in ensuring clean and fresh air in your home. By understanding its features and following the proper setup and maintenance procedures, you can effectively eliminate pollutants and allergens from your indoor environment.

Did you know that according to a study conducted by the Environmental Protection Agency (EPA), indoor air can be two to five times more polluted than outdoor air? Investing in an air purifier can significantly improve the air quality in your home and promote better health for you and your family.

Continue Reading

Trending