Air Purifier Guides
Ultimate Guide: How to Clean Your Xiaomi Air Purifier (Step-by-Step)
Find out the essential steps to clean your Xiaomi air purifier effectively and discover why regular maintenance is crucial for optimal performance.
To clean your Xiaomi air purifier, start by powering it off and unplugging it for safety. Remove the filter cover, take out the filters, and use a vacuum cleaner with a soft brush to gently clean them. Check the air quality sensor with a hairdryer on low, then wipe the exterior with a damp cloth. Make sure everything is dry before reassembling the unit. Remember to monitor the filter indicators and replace them as needed. This step-by-step guide guarantees your purifier runs efficiently, creating a healthier home environment. Keeping up with maintenance will certainly enhance your experience.
Key Takeaways
- Power off and unplug the air purifier before starting the cleaning process for safety.
- Replace HEPA filters every 6-12 months and clean pre-filters monthly to maintain efficiency.
- Use a vacuum cleaner with a soft brush to gently clean filters and a hairdryer for the air quality sensor.
- Wipe exterior surfaces weekly with a damp cloth, avoiding harsh chemicals to prevent damage.
- Regularly monitor filter indicators and air quality readings to ensure optimal performance and timely maintenance.
Importance of Regular Maintenance
When it comes to your Xiaomi air purifier, staying on top of regular maintenance is vital to keeping it running smoothly. By performing routine upkeep, you enhance its air purification efficiency, guaranteeing clean indoor air quality. This creates a healthier living environment for you and your loved ones.
Regular maintenance tasks, including filter replacement and proper cleaning techniques, help minimize the accumulation of dust and pollutants, which can harm your respiratory health. Additionally, using air purifiers is important for improving overall well-being, as air purifiers reduce allergens and harmful particles in indoor environments.
Maintaining your air purifier is essential for prolonging its lifespan. When you keep the device in ideal working condition, you prevent the need for costly repairs or replacements down the line.
Consistent upkeep also guarantees compliance with warranty requirements, protecting your investment.
Filter Replacement Guidelines
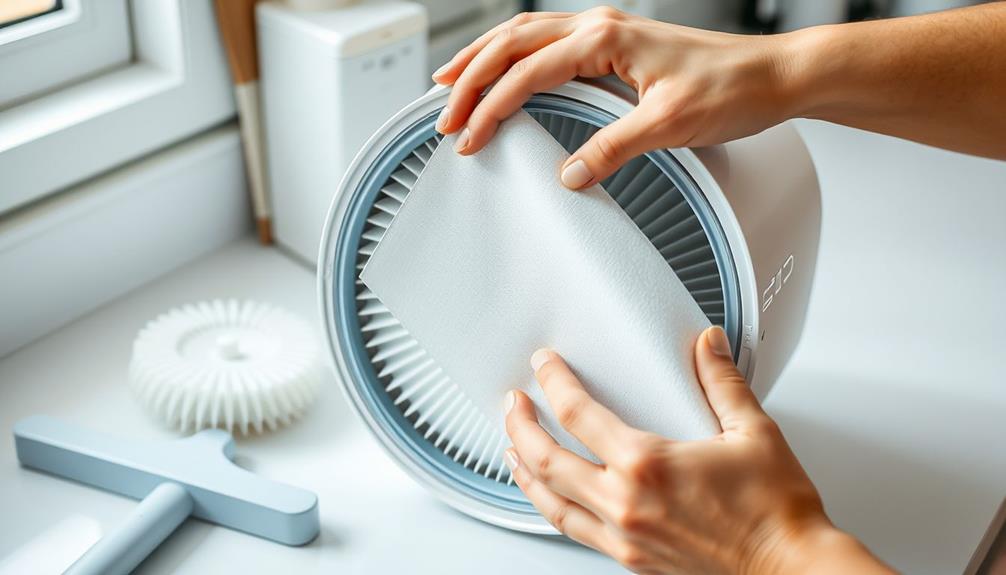
To keep your Xiaomi Air Purifier running efficiently, you need to replace its filters regularly.
Regular filter changes are essential for maintaining efficiency and guaranteeing your air remains clean and fresh. Pay attention to the filter indicator lights, as they'll let you know when it's time for a change.
Always use genuine Xiaomi filters to guarantee compatibility and peak performance.
Additionally, following proper maintenance guidelines can enhance the longevity of your purifier and improve its effectiveness in reducing allergens and harmful particles in your indoor environment, as noted in the importance of air purifiers.
Replacement Frequency Recommendations
Regular maintenance of your Xiaomi air purifier is essential for its performance, and knowing when to replace the filters is key. Following these replacement frequency recommendations will help you maintain ideal air purification:
Additionally, keeping your home free from toxic substances, like chocolate which poses risks to dogs, can enhance overall air quality, benefiting both pets and humans. For more information on household dangers, refer to ten household dangers identified for dogs.
- HEPA filters: Replace every 6-12 months to guarantee effective filtration of airborne particles.
- Activated carbon filters: Change every 3-6 months, depending on your usage and local air quality.
- Pre-filters: Clean monthly to prevent dust accumulation and improve overall efficiency.
- Filter indicator lights: Keep an eye on these reminders to know when it's time for a replacement.
- Genuine Xiaomi filters: Always use these to comply with warranty requirements and achieve the best results.
Genuine Filter Usage
Using genuine filters in your Xiaomi air purifier is vital for maintaining its efficiency and guaranteeing clean air in your home. To achieve peak performance, always adhere to the manufacturer's guidelines regarding filter replacement.
For instance, HEPA filters should be replaced every 6-12 months, while activated carbon filters need changing every 3-6 months, depending on your air quality and usage. Additionally, just as a vacuum like the Bissell Pet Hair Eraser benefits from a self-cleaning brush roll to enhance performance, maintaining your air purifier with genuine filters guarantees it operates effectively.
To keep your Xiaomi running smoothly, don't forget to clean the pre-filters monthly to prevent dust buildup and maintain proper airflow. Regular maintenance of your Xiaomi air purifier not only enhances its efficiency but also improves the overall air quality in your living space.
Using third-party filters might seem cost-effective, but they often don't fit properly and can hinder your purifier's performance. Stick with genuine filters to guarantee your device operates as intended and complies with warranty requirements.
Monitoring Filter Indicators
Monitoring filter indicators on your Xiaomi air purifier is vital for maintaining ideal air quality and performance. By keeping an eye on these indicators, you can guarantee timely filter replacement and peak functionality.
Implementing a holistic lifestyle approach can further enhance your indoor air quality, contributing to overall well-being. Here are some key points to evaluate:
- Replace HEPA filters every 6-12 months.
- Change activated carbon filters every 3-6 months, depending on usage.
- Clean pre-filters monthly to extend their lifespan.
- Refer to your user manual for specific filter replacement guidelines.
- Always use genuine Xiaomi filters for the best results.
Regularly checking the filter indicators helps you stay on top of maintenance procedures. If the indicator light turns on, it's time to assess the filters.
For HEPA filters, remember that their efficiency diminishes over time, so timely replacement is essential for effective air purification. Pre-filters capture larger particles, and cleaning them monthly will enhance their performance while prolonging the life of your HEPA filter.
Always consult your user manual for tailored advice regarding your specific Xiaomi air purifier model and adhere to these guidelines to keep your indoor air quality at its best.
Cleaning and Care Tips
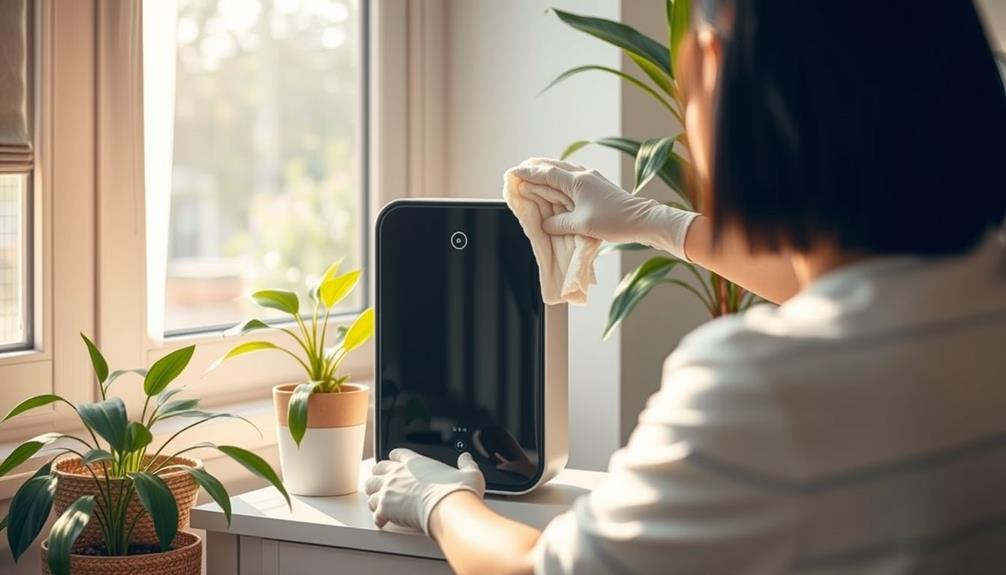
Keeping your Xiaomi air purifier in top shape requires some simple care routines. Start with regular cleaning to prevent dust buildup. Wipe the exterior surfaces weekly with a damp cloth to keep it looking good and functioning well.
Don't forget to clean the air inlet and outlet grilles regularly; this helps guarantee optimal airflow and enhances the device's efficiency. Additionally, it's beneficial to be mindful of the environment around your air purifier, as certain smells and pollutants can affect its performance, much like how cats can be sensitive to air quality.
When you clean the Xiaomi air purifier, always power off the unit first. This step is essential for your safety and prevents any accidental damage to internal components.
During cleaning, avoid using harsh chemicals or abrasive materials, as these can damage the unit and affect its performance. Instead, stick to gentle cleaning solutions.
To further improve your air purifier's longevity, try to keep it in a dust-free environment. This simple habit minimizes the need for frequent cleaning and helps maintain clean and fresh air in your home.
Troubleshooting Common Issues
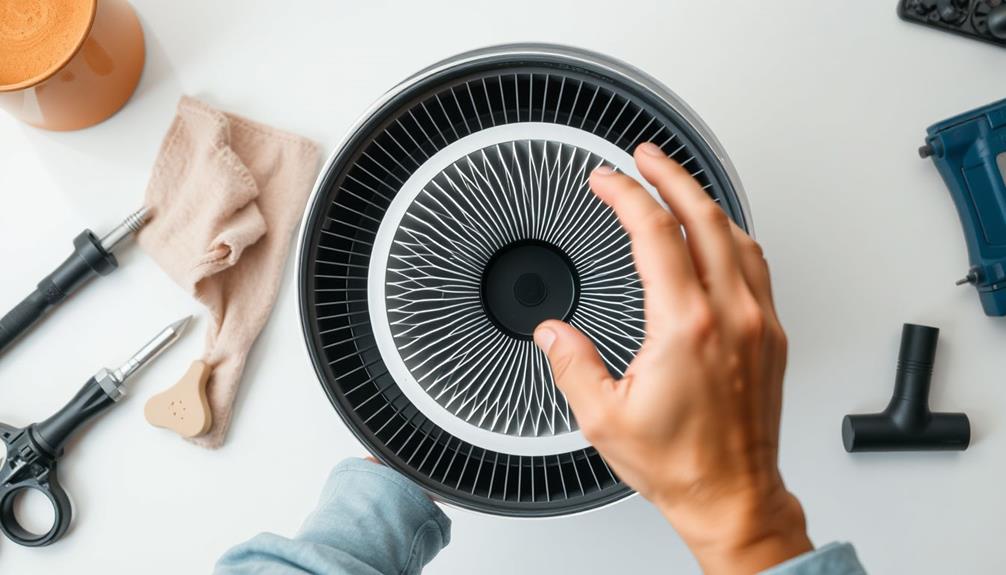
Even with regular cleaning and care, you might encounter some common issues with your Xiaomi air purifier. Here are a few things to keep in mind:
- Check for error codes on the display, as these can indicate specific issues that need addressing. For example, understanding the key factors in choosing a home cleaning service can help in selecting a professional service to maintain your home's air quality effectively.
- Confirm the device is plugged in and powered on.
- Inspect the filters for proper installation.
- Reset the device if it becomes unresponsive.
- Regularly clean the air quality sensor.
If your purifier displays error codes, consult the user manual for specific troubleshooting steps. Sometimes, the issue could be as simple as it being unplugged or turned off.
To confirm proper operation, regularly clean and inspect the filters, as clogged or incorrectly placed filters can lead to performance issues. If you notice that your device isn't functioning, try resetting it by unplugging it for a few minutes before plugging it back in.
Dust accumulation can also affect the sensor's readings, so it's essential to regularly clean the air quality sensor.
Preparing for Cleaning
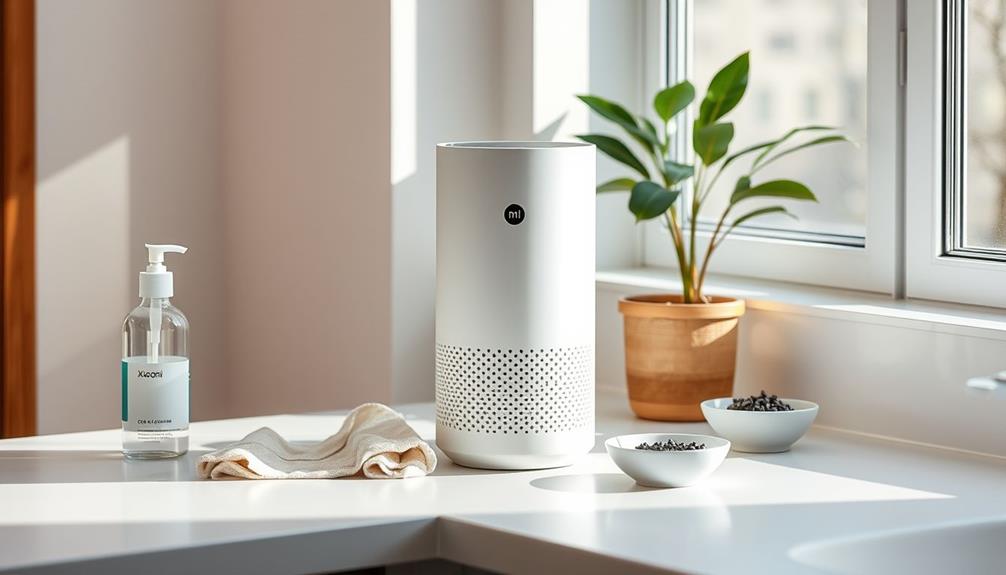
Before you start cleaning your Xiaomi air purifier, make sure it's powered off and unplugged to avoid any electrical hazards.
It's also wise to check for energy-efficient appliances that can help reduce costs while providing better air quality.
Next, gather your essential cleaning tools like a soft cloth, small brush, and mild detergent to make the process smoother.
Safety Precautions First
Cleaning your Xiaomi air purifier requires some important safety precautions to guarantee a smooth process. Following these steps will help protect you from potential hazards while ensuring an effective cleaning experience.
It's also beneficial to incorporate relaxation techniques, such as deep breathing, to maintain a calm mindset while cleaning the device and to enhance your overall well-being yoga for relaxation.
- Always unplug the device before starting.
- Allow the purifier to cool down for a few minutes after use.
- Set up your cleaning area in a well-ventilated space.
- Wear gloves and a mask if you're sensitive to dust or allergens.
- Organize all necessary cleaning tools beforehand.
First and foremost, unplugging your air purifier is essential for safety. This prevents any electrical accidents during the cleaning process.
Give the unit a few minutes to cool down after use to avoid burns or injuries.
Next, find a well-ventilated area to minimize the inhalation of dust and allergens while you clean.
If you have allergies or sensitivities, don't skip wearing gloves and a mask to protect yourself from irritants.
Finally, gather your cleaning tools in advance to streamline the process, making sure you're fully prepared to tackle the task ahead.
Following these precautions will set you up for a successful cleaning experience.
Essential Cleaning Tools
What tools do you need to effectively clean your Xiaomi air purifier? Having the right essential cleaning tools at your fingertips makes the process smoother and more efficient. Here's a handy list to help you get started:
Tool | Purpose |
---|---|
Soft Cloth | Gently wipe the exterior surfaces |
Vacuum Cleaner Attachment | Remove dust and debris from filters |
Mild Detergent | Clean washable filters without harsh chemicals |
Hairdryer (Low Setting) | Gently clean air quality sensors |
Using a soft cloth for gentle cleaning helps avoid scratches while maintaining the purifier's appearance. For internal components, a small brush or vacuum cleaner attachment can effectively eliminate dust without causing damage. When it comes to cleaning washable filters, mix mild detergent with warm water to guarantee you don't harm any parts. Finally, a hairdryer set on low is perfect for keeping air quality sensors dust-free, enhancing the purifier's performance. By organizing all these tools beforehand, you'll create a seamless cleaning experience that keeps your air purifier functioning at its best.
Gathering Necessary Tools
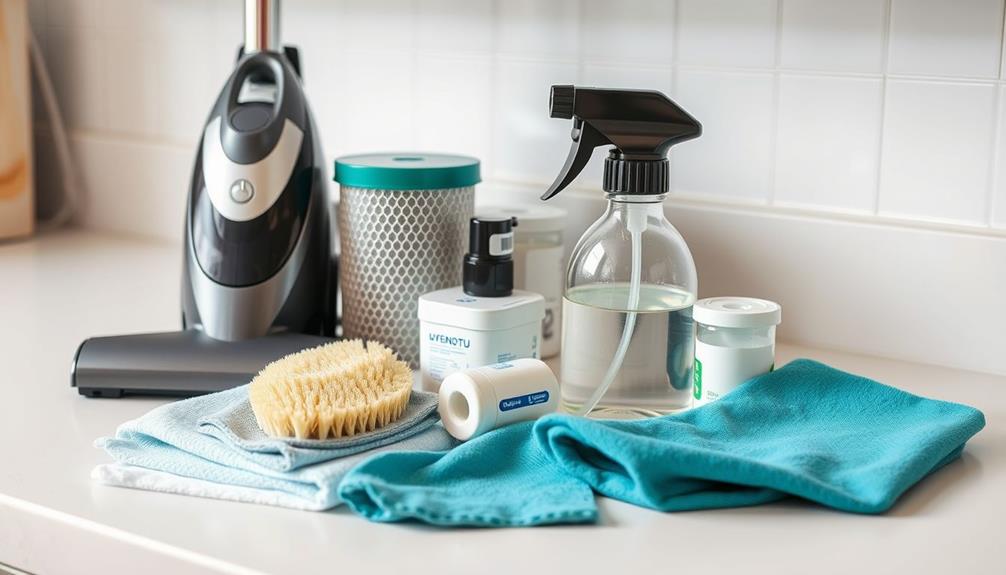
To guarantee a smooth cleaning process, you'll need to gather a few essential tools beforehand. First and foremost, make sure that your Xiaomi air purifier is unplugged for safety. This step is vital before you start gathering your necessary tools.
Organizing these tools in a well-ventilated area will make everything more accessible during the cleaning process. Additionally, it's important to regularly maintain your air purifier to guarantee peak performance, similar to how you'd care for well-draining soil for plants.
Here's a quick list of what you'll need:
- Soft cloth: For wiping surfaces without scratching.
- Small brush: Ideal for dusting hard-to-reach areas.
- Vacuum cleaner: To remove loose particles effectively.
- Mild detergent: For cleaning washable filters without damage.
- Warm water: To mix with your mild detergent for a gentle cleaning solution.
Having these cleaning tools ready will help you tackle the task efficiently.
Step-by-Step Cleaning Process
A thorough cleaning process for your Xiaomi air purifier can greatly enhance its performance and longevity, much like the key components for a healthy lifestyle that contribute to overall well-being.
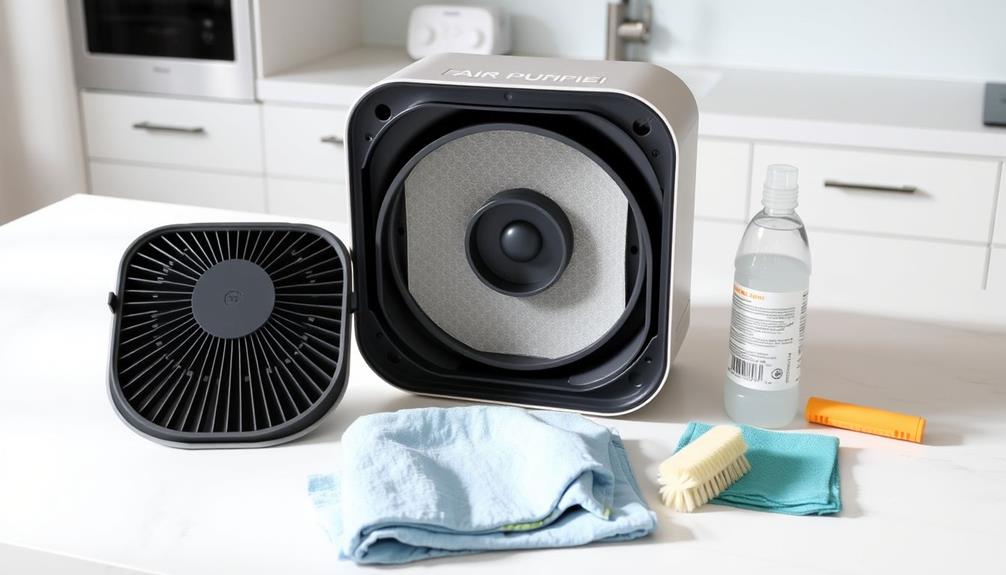
Start by powering off and unplugging the device for safety. Next, remove the filter cover and gently extract the air purifier's filter, being cautious not to damage it.
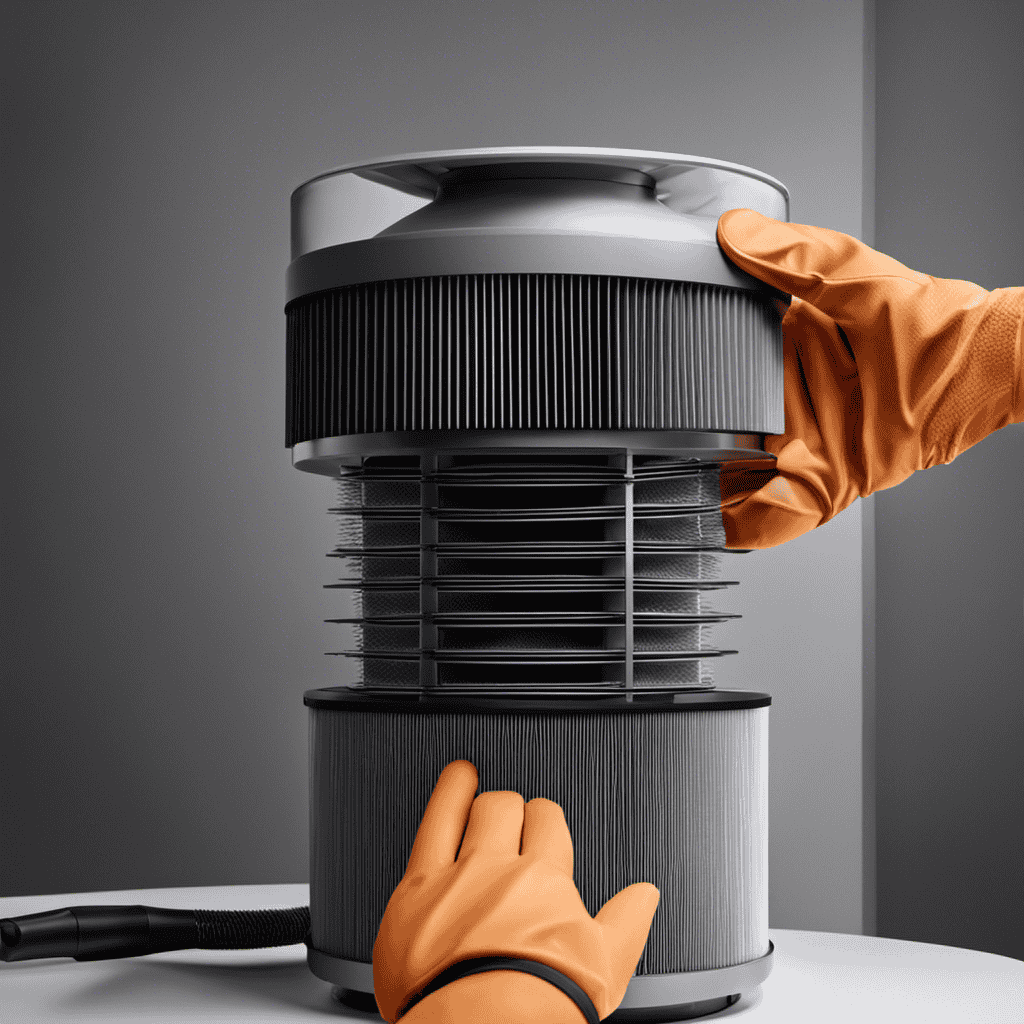
Use a vacuum cleaner with a soft brush attachment to remove dust from the filters and inner components. This step is essential for peak performance. For the air quality sensor, use a hair dryer on a low setting to clean it carefully.
Then, wipe down the exterior surfaces with a damp cloth, avoiding harsh chemicals and abrasive materials that could cause damage. This helps maintain the unit's appearance while ensuring it effectively cleans the air.
After cleaning, allow the filters to dry properly before reinserting them. Secure the filter cover back in place, then plug the device back in to resume normal operation.
Following these steps regularly will keep your air purifier functioning at its best, ensuring a healthier environment.
Reassembly and Restart
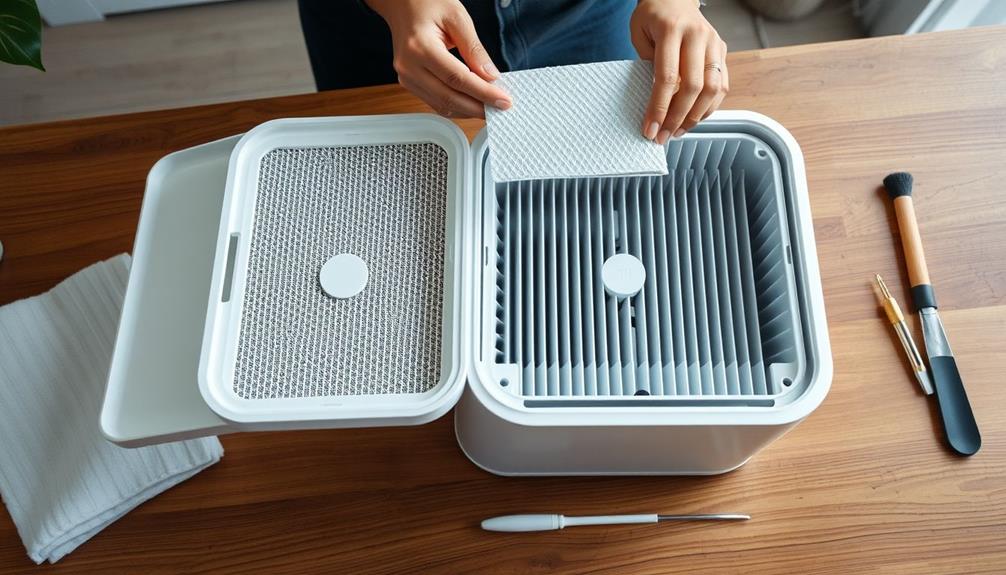
Reassembling your Xiaomi air purifier is vital for restoring its functionality after cleaning. Follow these steps to guarantee everything is put back together correctly:
- Reinstate the filter to maintain ideal airflow.
- Confirm the filter cover is properly aligned.
- Wait a few minutes before plugging it back in.
- Monitor the air quality indicators after restarting.
- Verify the purifier is in normal functioning mode.
Start by reinserting the filter into its designated slot, making sure it fits securely. This step is fundamental for maintaining ideal airflow and efficiency.
Next, properly align the filter cover with the unit. Press down firmly until you hear a click, confirming it's secured in place.
Allow your air purifier to sit for a few minutes after reassembly to confirm any remaining moisture evaporates.
Once that's done, plug it back in and press the power button to turn it on. Pay attention to the operational lights—they should indicate normal functioning.
Testing the Purifier
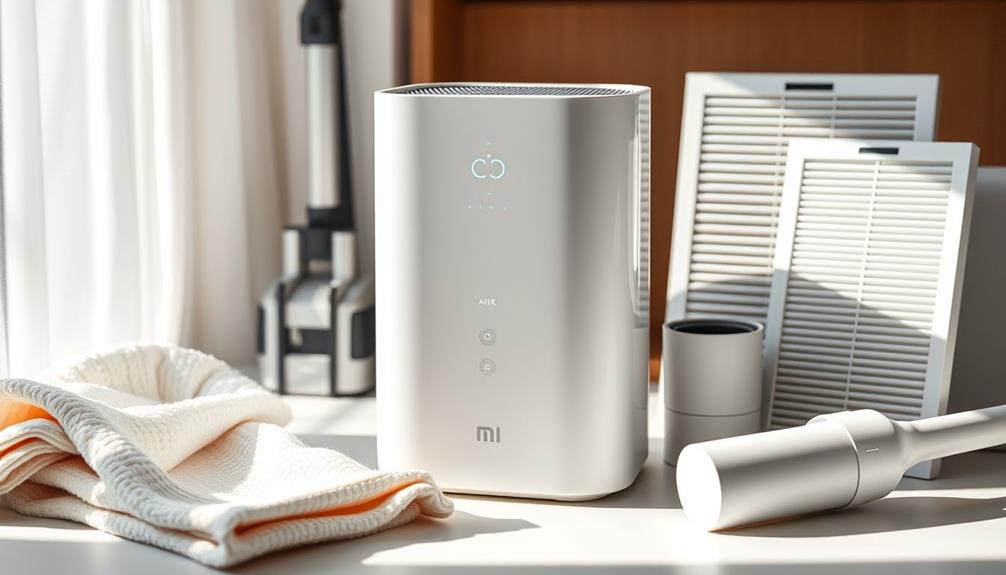
After you've cleaned your Xiaomi air purifier, make sure it's plugged into a working outlet to confirm it's getting power.
Next, adjust the fan settings to see if it responds properly at different speeds.
Check Power Connection
To guarantee your Xiaomi air purifier is operational, start by checking the power connection. Ensuring your device is plugged into a functioning electrical outlet is essential for a steady power supply.
Here are some steps to help you confirm it's ready to go:
- Inspect the power cord for any visible damages or frays.
- Make sure the plug is securely inserted into the electrical outlet.
- Check that the power button is in the "on" position.
- Listen for any operational sounds, like the fan noise, indicating your purifier is receiving power and functioning correctly.
If it doesn't power on, try resetting it by unplugging it for a few minutes, then plug it back in and turn it on again.
Adjust Fan Settings
Once you've confirmed your Xiaomi air purifier is powered on and ready, it's time to adjust the fan settings. You can use the control panel or the mobile app to select different fan speeds, typically ranging from low to high. This will help you test the functionality and guarantee peak performance.
As you adjust the fan settings, keep an eye on the air quality indicators displayed on the panel. This will allow you to monitor how effectively the purifier responds to the changes in fan speed:
Fan Speed | Effect on Air Quality |
---|---|
Low | Minimal airflow |
Medium | Balanced performance |
High | Maximum purification |
Regularly testing the fan speeds not only guarantees you're getting the best air quality but also helps identify any operational issues that might require maintenance. By adjusting the fan settings based on real-time air quality readings, you can enhance your clean Xiaomi Air Purifier's functionality, keeping your environment fresh and healthy.
Monitor Air Quality
As you monitor the air quality indicators on your Xiaomi air purifier, you'll gain valuable insights into its performance and effectiveness in eliminating indoor pollutants.
Regularly checking these indicators helps you maintain a healthy indoor environment. Here are some key points to take into account:
- Utilize built-in sensors for real-time feedback on air quality levels.
- Check the app or display for error codes indicating filter replacement needs.
- Conduct performance tests after cleaning or replacing filters to guarantee efficiency.
- Track air quality fluctuations throughout the day, noting how external factors impact it.
- Adjust purifier settings based on air quality readings for ideal air purification.
Tips for Optimal Performance
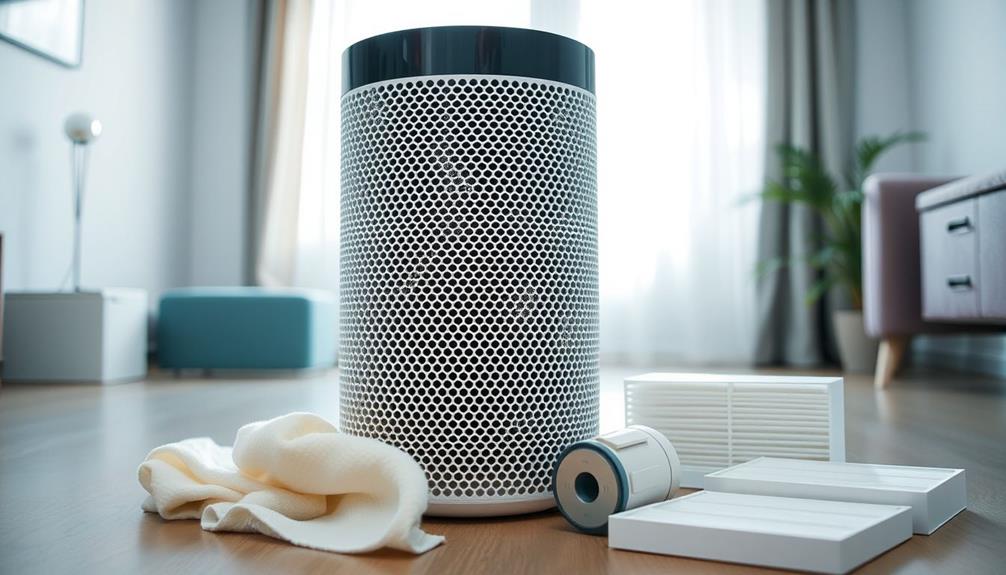
Maximizing the performance of your Xiaomi air purifier requires a proactive approach to maintenance and usage.
Start by regularly monitoring the Air Purifier Filter; replace the HEPA filters every 6-12 months. This guarantees peak performance and reduces allergens in your home.
Don't forget to clean pre-filters monthly by washing them with water. This helps maintain airflow and prevents accumulated dust, which can hinder efficiency.
Make sure you're using genuine Xiaomi filters and components to align with the manufacturer's instructions. This not only assures compatibility but also boosts effectiveness.
For the best results, position your air purifier in the most utilized room, and keep windows and doors closed during operation. This creates an excellent environment for eliminating dust particles and improving air quality.
Additionally, keep the exterior of the purifier clean by wiping it down weekly with a damp cloth.
Steer clear of harsh chemicals that could damage the unit.
Conclusion
Maintaining your Xiaomi air purifier is essential for its performance and longevity. By following the steps outlined, you'll guarantee cleaner air and a healthier environment. For instance, imagine a family in a city plagued by pollution; after regularly cleaning their purifier and replacing the filters, they noticed a significant drop in allergy symptoms. With just a little effort, you can achieve similar results, breathing easier and enjoying fresher air in your home.
In the dynamic world of air purifiers and clean air advocacy, Aire stands out as a beacon of knowledge and passion. As the Editor in Chief of Aero Guardians, Aire has been instrumental in shaping the platform’s voice and direction, ensuring that every piece of content resonates with clarity, authority, and authenticity.
Air Purifier Guides
Troubleshooting Air Purifier Wi-Fi Connection Issues
Troubleshooting air purifier Wi-Fi connection issues can be tricky, but simple steps can lead to a seamless experience. Discover how to fix your connectivity problems.
If your air purifier isn't connecting to Wi-Fi, start by checking that it's near the router and both devices are on the same 2.4GHz network. Make certain you've installed the latest Dyson Link app and allowed any necessary permissions. Recheck your Wi-Fi password for accuracy and guarantee there are no obstructions blocking the signal. If it's still not working, restart your router or consider updating your air purifier's firmware. A factory reset may also help if connection issues persist. There's a lot more you can explore to guarantee smooth connectivity.
Key Takeaways
- Ensure the air purifier is connected to a 2.4GHz Wi-Fi network, as many do not support 5GHz connections.
- Position the air purifier within 10 meters of the router to maintain a strong Wi-Fi signal.
- Verify that the correct Wi-Fi password is entered during the setup process to avoid connection failures.
- Restart the router if the air purifier shows a flashing Wi-Fi indicator to refresh the connection.
- Regularly update the Dyson Link app and air purifier firmware to prevent compatibility issues.
App Installation and Updates
When setting up your air purifier, the first step is to install the latest Dyson Link app, so make certain you uninstall any previous versions before downloading it from the App Store or Google Play. This guarantees you get the most recent updates, which can include essential bug fixes and enhancements for better connectivity and functionality with your air purifier.
Additionally, making sure your indoor air quality is optimal is important, especially if you're using an air purifier for the importance of air purifiers.
Once you've completed the app installation, check that your mobile device has the necessary permissions enabled to allow the app to access your Wi-Fi settings. This is critical for establishing a seamless Wi-Fi connection between your air purifier and your smartphone.
If you're unsure about compatibility, verify your device's specifications against the app's requirements to avoid any installation issues.
After you've installed the app, either create a new account or log into your existing one. This step is essential for starting the setup process for your air purifier.
Keep the app updated regularly to confirm you're benefiting from ongoing improvements and features that enhance your overall experience.
Required Information for Setup
To successfully set up your air purifier, you'll need some essential information at your fingertips. This will make the connection process smooth and hassle-free. Here's what you should gather before you start:
1. Home Wi-Fi Password: You'll need this to connect your air purifier to your network. Make sure it's correct to avoid any interruptions during setup.
Additionally, it's wise to reflect on the range of services offered by different air purifier models, as some might include additional features that enhance their connectivity.
2. Product-Specific Wi-Fi Information: Check the instruction manual or look for a removable sticker on the purifier itself. This info is critical for connecting your device properly.
3. Remote Control Packaging Details: Often, the packaging includes important Wi-Fi information that may assist in the setup process. Don't overlook this!
Having the correct Wi-Fi information handy is essential, as it establishes the connection between your air purifier and the app.
Additionally, make certain that both your air purifier and mobile device are on the same network during setup for ideal connectivity.
Wi-Fi Connection Checks
To troubleshoot your air purifier's Wi-Fi connection, start by checking your router's status indicators to confirm it's functioning properly.
It's also wise to verify that your air purifier is compatible with your home network settings, as some devices may require specific configurations.
Make sure the Wi-Fi signal is strong and stable, as a weak connection could be the culprit.
If you're still having issues, resetting the router might help refresh the network and get things back on track.
Additionally, consider looking into general return policies in case your device is defective and needs to be exchanged.
Verify Router Status Indicators
Checking your router's status indicators is essential for diagnosing Wi-Fi connection issues with your air purifier. By closely examining these indicators, you can determine if your Wi-Fi router is functioning properly.
Regular checks on your network's performance can also be beneficial, especially in light of recent cybersecurity incidents that may affect connected devices.
- Indicator Light: First, check if the Wi-Fi router's status indicator light is activated and stable. A steady light means the network is operational, while a blinking or red light might indicate a problem.
- Error Lights: Look for any other error lights on the router. These can signal connectivity issues or malfunctions. If you see a blinking red light, it could mean there's a significant issue that needs addressing.
- Airplane Mode: Finally, verify that the router isn't in airplane mode or disabled. If it is, no devices, including your air purifier, will connect to the Wi-Fi network.
If you notice any irregularities in the status indicators, it's a good idea to restart the router. This simple action often refreshes the network connection and can resolve many common issues.
Check Wi-Fi Signal Strength
After confirming your router's status indicators are normal, the next step is to check the Wi-Fi signal strength.
First, make sure your air purifier is positioned within 10 meters of the router to maintain a strong connection. If it's too far away, you might notice a flashing Wi-Fi symbol on the purifier, indicating a weak signal. Additionally, confirm that there are no large obstacles or electronic devices, like cordless vacuum cleaners, that may interfere with the signal.
You can also consider the benefits of budget-friendly vacuum cleaners that provide effective cleaning without straining your finances.
Next, verify that your mobile device is connected to the same 2.4GHz Wi-Fi network since many air purifiers don't support 5GHz connections. You can test the Wi-Fi signal strength using other devices in the same area. If you notice that your smartphone or tablet struggles to connect, the issue likely lies with the Wi-Fi hotspot itself.
If the signal appears weak, consider relocating either the router or the air purifier to reduce interference, which can improve connectivity. Sometimes, even small adjustments can make a significant difference.
Reset Router if Necessary
Your router's performance can greatly impact your air purifier's connectivity, so if you're still facing persistent Wi-Fi issues, it might be time to reset it. Unplugging your router for a few minutes can refresh the connection and potentially resolve any lingering problems.
Additionally, verify your home security systems aren't interfering with your Wi-Fi signal, as some devices can cause unexpected disruptions in connectivity home security systems.
Here are three steps to follow when resetting your router:
- Unplug your router: Disconnect it from the power source and wait for about 5 minutes. This allows it to clear any temporary glitches.
- Check the Wi-Fi light: After plugging it back in, verify that the Wi-Fi light is activated and stable. This indicates that your network is operational before you attempt to reconnect your air purifier.
- Verify router settings: Make certain your router is configured to support 2.4GHz networks, as many air purifiers only connect to this frequency. Avoid using a VPN during this process; it can interfere with your air purifier's connection.
If problems persist even after these steps, test the Wi-Fi signal strength with other devices. This will help you determine if the issue lies with your air purifier or if you need to contemplate upgrading to original spare parts for your router.
Connection Process Steps
To start the connection process, make certain you've got the latest version of the app installed on your device.
It's also a good idea to make certain that your air purifier is free from any obstructions that may interfere with the Wi-Fi signal, as this could hinder the connection.
Position your air purifier close to your Wi-Fi router to make certain a strong signal during setup.
Additionally, be aware that energy-efficient appliances can help reduce your overall power consumption.
Then, confirm that your mobile device is connected to the same 2.4GHz Wi-Fi network as your purifier for a smooth connection.
Connection Preparation Steps
Preparing for a successful Wi-Fi connection with your air purifier involves a few essential steps. By taking the time to get everything in order, you can guarantee a smoother setup process. Here's what you need to do:
- Position the Air Purifier: Make sure your air purifier is placed near the Wi-Fi router. This helps enhance connectivity during the setup, similar to how ideal projector placement affects image quality in a home theater setup.
- Check Your Network: Confirm that your mobile device is connected to the same 2.4GHz Wi-Fi network as your air purifier. Many air purifiers don't support 5GHz networks, so this step is vital.
- Gather Wi-Fi Information: Look at the instruction manual for your air purifier's Wi-Fi details, including the SSID and password. You might also find this information on a sticker located on the device.
Once you've completed these parts, you'll be ready for the next steps.
After entering the Wi-Fi password, keep an eye out for confirmation prompts within the app that indicate a successful setup.
App and Device Setup
Setting up the app for your air purifier is an essential step in establishing a seamless connection. First, make certain you've got the latest version of the app installed on your mobile device, available on the App Store or Google Play. Additionally, it's important to take into account the ethical considerations surrounding data protection while using connected devices.
Next, position your air purifier close to your Wi-Fi router to enhance connectivity during this process. Also, verify your mobile device is connected to the same 2.4GHz network.
Open the app and follow the specific prompts for either iOS or Android devices. You'll need to enter your home Wi-Fi password during this step. If you encounter issues and can't connect, double-check that all settings are correct and that you've followed each step carefully.
Once you've completed the setup, look for confirmation messages in the app. This will indicate that your air purifier is now linked to your Wi-Fi network and you're able to connect.
If problems persist, don't hesitate to refer to the app's help section for troubleshooting tips or consult the instruction manual for additional guidance.
Common Troubleshooting Issues
Many users encounter common troubleshooting issues when trying to connect their air purifiers to Wi-Fi. These problems can stem from various factors, often leading to frustration. Here are three key issues you might face:
Additionally, just as maintaining a consistent sleep schedule can improve overall wellness, verifying your air purifier is properly connected can enhance your indoor air quality for better health.
Yoga for back pain management can also help create a more serene environment, making it easier to focus on troubleshooting.
- Weak Wi-Fi Signal: If your air purifier is too far from the router, the connection can be weak. Make sure it's within a strong signal range.
- Incorrect Wi-Fi Password: Double-check the password you input. Even a small typo can prevent your appliance from connecting.
- Router Compatibility: Many air purifiers, especially those needing 2.4GHz networks, may struggle with certain router settings. If you have a Technicolor router, you might need to verify your air purifier's software is updated to at least version 2.20 for peak performance.
If your air purifier shows as offline in the app after a successful connection, it could be due to network changes or a firmware update.
A flashing Wi-Fi indicator usually signals a connection failure. For further assistance, you might want to visit the App Store for any app updates or explore parts for your appliance to verify everything's functioning properly.
Resolution Steps for Errors
When your air purifier shows a flashing Wi-Fi symbol, it signals a connection failure that requires immediate attention. Start by checking your Wi-Fi settings to verify you're connected to a 2.4GHz network with the correct password. Make sure the air purifier is within 10 meters of the Wi-Fi router and that the router's 2.4GHz band is enabled.
If you're still facing connectivity issues, try restarting the router by unplugging it for a few minutes. This simple step can often reset the connection and resolve the problem. Additionally, check that your air purifier's firmware is updated and verify that the app is on its latest version to avoid compatibility issues.
If the connection failures persist, consider performing a factory reset on the air purifier. After the reset, re-add the device in the app to re-establish the connection.
Here's a handy troubleshooting table to guide you through the resolution steps:
Step | Action | Notes |
---|---|---|
1. Check Wi-Fi settings | Verify 2.4GHz network and password | Confirm with your router's settings |
2. Proximity to router | Keep within 10 meters | Walls can affect signal strength |
3. Restart router | Unplug for a few minutes | This can help reset connectivity |
4. Factory reset air purifier | Follow manufacturer instructions | Re-add the device in the app |
Support Options and Resources
If you encounter persistent issues with your air purifier, there are several support options and resources available to help you. Here are some effective ways to get the assistance you need:
- Book a Repair: If your appliance is malfunctioning, you can book a repair with authorized technicians. Warranty repairs are typically offered free of charge, guaranteeing you get the help you need without additional costs.
- Access Online Resources: A range of related articles and FAQs can provide guidance on connectivity issues and troubleshooting steps. This information can be found on the manufacturer's website, making it easy to navigate common problems.
- Contact Customer Support: If you still have unresolved issues, direct contact with customer support representatives is available. They can assist you with inquiries about warranty options or any other concerns you may have.
Additionally, if you're considering a DIY approach, you can purchase original spare parts for your air purifier through the official webshop. This way, you can guarantee that your appliance is maintained with genuine parts for peak performance.
Conclusion
In the journey of connecting your air purifier to Wi-Fi, think of it as a bridge—one that links you to cleaner air and peace of mind. If you encounter bumps along the way, don't fret; each obstacle is just a stepping stone. With the right tools and a little patience, you'll cross that bridge. Embrace the clarity that comes with a successful connection, and let fresh air flow into your home like a gentle breeze on a warm day.
In the dynamic world of air purifiers and clean air advocacy, Aire stands out as a beacon of knowledge and passion. As the Editor in Chief of Aero Guardians, Aire has been instrumental in shaping the platform’s voice and direction, ensuring that every piece of content resonates with clarity, authority, and authenticity.
Air Purifier Guides
Common Dyson Air Purifier Problems and Their Quick Fixes
Uncover essential tips for resolving common Dyson air purifier issues—your solution might be just a read away to ensure optimal performance!
If you're facing issues with your Dyson air purifier, there are quick fixes you can try. First, make certain the unit's plugged in and the power switch is on. Check for airflow obstructions and inspect the filters; clean or replace them if necessary. If you notice odd noises or vibrations, ascertain it's on a stable surface and look for loose parts. For connectivity problems, confirm your Wi-Fi connection and restart both the router and the purifier. Keeping the unit clean and monitoring notifications can prevent most issues. There's more helpful info just ahead to troubleshoot effectively.
Key Takeaways
- Ensure the air purifier is plugged in, the power switch is on, and check for any obstructions affecting airflow.
- Replace clogged filters every 12 months and check filter indicator lights for timely replacements.
- Clean the sensor regularly and restart the purifier if air quality readings seem inaccurate.
- Verify Wi-Fi connection, ensure the purifier is in range, and check for router obstructions for remote control issues.
- Perform a reset by holding the standby button for 20 seconds if continuous monitoring malfunctions occur.
Power and Operational Issues
When your Dyson air purifier won't turn on, it can be frustrating, but often the solution is straightforward. First, check if the unit's plugged into a functioning outlet and that the power switch is in the "On" position. These are common reasons why your air purifier may not be operating.
If the purifier still won't turn on, inspect for any obstructions around it that could hinder airflow. Even small items can impact the device's functionality.
Next, consider the filter. A clogged filter can prevent the fan from rotating, so it's crucial to regularly check and replace the filter every 12 months for peak performance. Also, confirm that the power rating of the outlet matches your device's requirements; improper ratings can compromise operation.
If you've checked the power, obstructions, and filter, yet the air purifier still doesn't work, you might be facing internal wiring issues. In such cases, it's best to consult a professional to address these problems safely.
Maintenance and Filter Concerns
Maintaining your Dyson air purifier is essential for ensuring it operates at its best. To keep your air purifier running efficiently, you should replace the filters every 12 months.
Regularly check the filter condition for any signs of dirt or damage, as a clogged or worn filter can greatly impair the unit's efficiency. Regular filter changes are essential for maintaining efficiency. The filter indicator lights on your purifier will remind you when it's time for a replacement, so pay attention to those signals.
Always consult your user manual for specific maintenance instructions tailored to your Dyson model. This manual will provide details on how to safely remove and install new filters, ensuring you don't miss a step.
When it's time to dispose of the used filters, make sure to follow proper disposal methods to avoid contamination and maintain your air quality.
Air Quality and Sensor Functionality
Air quality sensors play an important role in your Dyson air purifier's effectiveness. To guarantee ideal sensor functionality, regularly inspect the filter for dirt and clogs. A dirty filter can greatly impair its ability to provide accurate readings, ultimately affecting the air quality in your home.
It's also important to place the purifier in an unobstructed location, allowing for better air quality detection. Avoid areas with furniture or other obstructions blocking the sensor's view. Additionally, just as you'd for your pets, maintaining a clean environment is vital for overall health, as highlighted in the section on dog health and nutrition.
Cleaning the sensor itself is vital, too. Dust or debris can hinder its performance, so make this a routine task. If you notice discrepancies in air quality readings, don't hesitate to restart the purifier; this often refreshes sensor functionality and helps recalibrate the device.
Lastly, keep an eye on external factors like cooking or outdoor pollution, which can cause spikes in air quality levels that the sensors will detect. By staying proactive and addressing these concerns, you'll guarantee your Dyson air purifier continues to operate at its best, providing you with cleaner air and peace of mind.
Connectivity and Remote Control Issues
If you're facing issues with your Dyson air purifier's connectivity or remote control, you're not alone.
Start by checking your Wi-Fi connection and ensuring the remote has fresh batteries. Additionally, make sure the air purifier is within range of your router for ideal connectivity.
A few simple troubleshooting steps can often get everything back on track quickly, including reviewing key factors in choosing a home cleaning service that might help enhance your overall home environment.
Wi-Fi Connection Troubleshooting
Experiencing Wi-Fi connection issues with your Dyson air purifier can be frustrating, but several straightforward troubleshooting steps can help you regain control.
First, verify your air purifier is within the range of your Wi-Fi router and connected to a 2.4GHz network, as many devices don't support 5GHz connections. Confirm the Wi-Fi settings on the purifier are enabled and check for any physical obstructions between the unit and the router that might interfere with the signal.
Understanding the significance of maintaining a seamless connection is crucial for peak device performance and user experience, especially as technology continues to evolve in areas like AI and technological innovation.
If you're still having trouble, try restarting both the router and the purifier. This simple step can refresh their connections and often resolves intermittent Wi-Fi issues.
Additionally, look for any available firmware updates for the device. Keeping your air purifier's software up-to-date can enhance connectivity and overall performance.
If problems persist after these troubleshooting steps, consult the user manual for specific instructions related to Wi-Fi connectivity. You can also reach out to Dyson customer support for further assistance.
Remote Control Functionality Issues
Maintaining effective control over your Dyson air purifier can be just as important as ensuring a stable Wi-Fi connection. If you're experiencing remote control functionality issues, start by checking the batteries. Make sure they're fresh and installed correctly; depleted or improperly placed batteries can cause connectivity issues.
Additionally, a well-maintained home security system can enhance your overall peace of mind, allowing you to focus on other aspects of your home environment, such as air quality and comfort home security benefits.
Next, inspect the area between the remote and the purifier for any obstructions. Physical barriers can impede the signal, making it difficult for your remote to send commands. Also, verify that your remote control settings are adjusted to match your specific Dyson model.
If your remote is still unresponsive, try resetting it. This may involve removing the batteries, waiting a moment, and reinserting them. Follow any additional reset instructions from the manufacturer if needed.
Warning and Notification Signals
When your Dyson air purifier shows warning signals, it often means the filter isn't attached correctly or needs maintenance.
Regularly inspecting your purifier can help identify issues early, similar to how proper maintenance practices can prevent plumbing problems in toilets.
To resolve these alerts, check the user manual for troubleshooting steps and keep an eye on notifications from the Dyson app.
Staying on top of filter maintenance can prevent frustrating warnings and keep your air purifier running smoothly.
Correct Filter Attachment
Properly attaching the filter in your Dyson air purifier is essential for ideal performance. If the filter isn't securely fitted, you might see warning signals indicating issues with the filter attachment. To prevent this, always consult the user manual for specific guidance on correct filter installation.
Additionally, ensuring you have a well-diversified portfolio, much like the importance of using a compatible filter for your model, can help mitigate risks in other areas of your life; diversification of retirement portfolio reduces risk exposure. Using the wrong filter can easily trigger alert notifications.
If you've attached the filter correctly but continue to receive warnings, check the Dyson app for any updates or notifications regarding other maintenance needs. Sometimes, the app can provide insights into issues beyond the filter itself.
Should you still encounter persistent issues, don't hesitate to reach out to Dyson customer support. They're equipped to help you troubleshoot and resolve any ongoing problems.
Maintenance Notification Checks
Warning signals on your Dyson air purifier can be a source of frustration, but understanding their meanings is vital for keeping your device running smoothly.
It's important to regularly check the filter attachment to make sure it's fitted correctly, as improper fitting can trigger warning notifications. Additionally, making sure that the air purifier is placed in a location with good airflow can enhance its effectiveness.
When a warning signal appears, consult the user manual for specific troubleshooting guidance; it may indicate a need for maintenance or filter replacement. If you're unsure about the filter type needed for your model, consider checking out best soil for String of Hearts plants for a comparison of compatible materials.
To maintain peak performance, monitor notifications from the Dyson app. This app keeps you informed about your air purifier's status and any necessary actions to take.
Also, make sure the sensor hatch and surrounding areas are clean to prevent false warning signals related to filter maintenance.
If you've verified the filter and cleaned the unit but the warning signals persist, don't hesitate to contact Dyson customer support. They can assist you further and help guarantee your air purifier operates at its best.
Noise and Vibration Problems
Experiencing noise and vibration issues with your Dyson air purifier can be frustrating, but pinpointing the cause is often straightforward.
First, check for loose parts; tightening any components can greatly reduce unwanted noise. If your purifier's on an unstable surface, that could be causing vibrations, so make sure it's placed on a flat, stable area.
A holistic lifestyle approach can improve your overall well-being, which might make you more sensitive to any disturbances in your environment. Foreign objects lodged in the fan or filter area can also create irritating sounds. Regular inspections and cleaning will help prevent these obstructions.
If you notice changes in noise levels when adjusting settings, it might be time for some maintenance. Keeping an ear out for these changes can give you insights into potential issues.
If you've tried these fixes and the noise persists, don't hesitate to contact customer support. They can guide you through further troubleshooting steps or recommend necessary repairs.
Continuous Monitoring Malfunctions
If your Dyson air purifier's continuous monitoring function isn't working as it should, don't panic; there are several steps you can take to troubleshoot the issue.
Start by considering these key points:
- Reset the device: Hold the standby button for 20 seconds to refresh its settings. Doing this can often resolve minor glitches similar to how best practices in software quality assurance can fix issues in software systems.
- Check device settings: Verify the continuous monitoring feature is enabled; it might've been accidentally turned off.
- Look for software updates: Inspect if there are any updates that could enhance the performance of the continuous monitoring function.
- Consult your user manual: Refer to the troubleshooting instructions specific to your purifier model for additional guidance.
- Reach out to Dyson customer support: If the continuous monitoring feature continues to malfunction after trying the above steps, don't hesitate to ask for help.
Sensor Cleaning and Obstruction
To guarantee your Dyson air purifier operates efficiently, regular sensor cleaning is key. The air quality sensor, located near the LCD display and identified by two tiny holes, needs your attention to guarantee accurate readings and maximum performance.
Here's a quick reference table to help you with sensor cleaning:
Task | Tools Needed | Frequency |
---|---|---|
Turn off the purifier | N/A | Every cleaning session |
Clean sensor holes | Dry dusting brush | Monthly |
Vacuum surrounding area | HEPA vacuum attachment | Monthly |
Inspect placement | N/A | Weekly |
Check for obstructions | N/A | Weekly |
Always turn off the Dyson air purifier before starting the sensor cleaning process to prevent malfunctions. Use a dry dusting brush to gently clear any dust from the sensor holes and a HEPA vacuum attachment for thorough cleaning of surrounding debris. Additionally, inspect the placement of your purifier to guarantee it's not in a confined space. Any obstruction can hinder air quality detection, impacting the unit's effectiveness.
Conclusion
So there you have it—your Dyson air purifier isn't a magical solution to all your air quality woes, but it sure can be a drama queen at times! With a bit of patience and these quick fixes, you can avoid letting it air out its grievances. Remember, it's just a machine, not your ex! Keep it happy, and it'll keep your air clean—just don't expect it to do your laundry while it's at it!
In the dynamic world of air purifiers and clean air advocacy, Aire stands out as a beacon of knowledge and passion. As the Editor in Chief of Aero Guardians, Aire has been instrumental in shaping the platform’s voice and direction, ensuring that every piece of content resonates with clarity, authority, and authenticity.
Air Purifier Guides
How to Fix a Non-Responsive Air Purifier Control Panel
Just follow these steps to troubleshoot your non-responsive air purifier control panel and discover the solution that could bring it back to life!
To fix a non-responsive air purifier control panel, start by confirming it's plugged into a working outlet and inspect the power cord for any visible damage. Next, check the control panel for signs of wear and verify all filter covers are securely in place. If it's still unresponsive, unplug the unit for a few minutes to reset it. If the panel remains unresponsive, you might need to inspect the internal components for issues or consider professional help. There are various solutions and tips to explore that could make your air purifier work efficiently again.
Key Takeaways
- Ensure the air purifier is securely plugged into a functional outlet and test with another device if necessary.
- Inspect the power cord for visible damage, such as fraying or exposed wires, that may interrupt power supply.
- Check the control panel for signs of wear or damage; consider resetting the unit by unplugging it for a few minutes.
- Verify that the filter is properly installed and not obstructing the control panel, which might impact functionality.
- If issues persist, consult a professional technician for internal diagnostics and potential control board or touchscreen replacement.
Identify the Main Issue
When your air purifier's control panel isn't responding, it's vital to identify the main issue quickly. Begin by checking the power cord; verify it's securely plugged in and free from any visible damage. A damaged power cord can prevent electricity from reaching your unit, leading to unresponsiveness.
Next, inspect the outlet to confirm it's functional. If the indicator lights are still on but the control panel remains inactive, the problem might lie within the control board or power board.
Additionally, take a closer look at the touchscreen on the control panel. Signs of wear or damage can also result in unresponsiveness and may require a replacement.
Regular maintenance is important; for instance, regular filter changes are vital for maintaining efficiency and can help prevent issues. Don't forget to regularly maintain your air purifier; accumulated dust and debris can interfere with sensor functionality, further complicating the issue.
Basic Troubleshooting Steps
If your air purifier's control panel isn't responding, start with some basic troubleshooting steps that can often resolve the issue.
First, verify your air purifier is plugged in and that the power source is working by testing it with another device. If that checks out, inspect the control panel for any visible signs of wear or damage. A faulty touchscreen can lead to unresponsiveness.
Additionally, it's a good idea to check if any filters need replacing, as this can impact the performance of your device and might be connected to control issues service options.
Next, check that the filter cover is securely in place. Improper installation can prevent the controls from functioning properly.
If everything appears fine, try unplugging the air purifier for a few minutes. This simple reset can sometimes restore functionality, so plug it back in and test the control panel again.
If the control panel remains unresponsive after these troubleshooting steps, consult the owner's manual for specific guidance related to your model.
If you still can't resolve the issue, don't hesitate to contact customer support for further assistance. They can provide additional troubleshooting steps or recommend next steps for repair or replacement.
Inspect Power Connections
After checking the basic troubleshooting steps, it's time to focus on the power connections that may be causing your air purifier's control panel to remain unresponsive.
First, make sure the air purifier is securely plugged into a functional outlet. A lack of power supply can easily keep the control panel from responding. If it's plugged in but still unresponsive, inspect the power cord for any signs of damage, such as fraying or exposed wires. Such issues can prevent electricity from reaching the unit.
Remember that energy consumption of appliances can often lead to overlooked power issues that affect performance.
If the power cord looks intact, try plugging the air purifier into a different outlet to rule out any problems with the original socket. Sometimes, the issue might be as simple as a faulty outlet.
Also, don't forget to check that the power button is pressed fully; a light touch mightn't engage the switch properly, resulting in unresponsiveness.
Lastly, check for any loose connections at the back of the control panel. Improper installation or wear can lead to power issues that affect the control functionality.
Check for Hardware Problems
A thorough examination of hardware components is vital when your air purifier's control panel remains unresponsive. Start by inspecting the power cord for any signs of damage, like exposed wires or fraying. A damaged power cord can prevent the air purifier from receiving power, leading to unresponsive controls.
Additionally, it's important to take into account that regular maintenance checks can help identify potential issues before they escalate, just as with home security systems which require routine evaluations for peak performance.
Next, verify the unit is plugged into a functional outlet; if necessary, test it with another outlet to rule out power supply issues.
Don't forget to check the touchscreen face for wear or damage. A degraded surface can result in unresponsive controls that may require replacement.
If everything looks fine on the exterior, take a look at the control board. A malfunctioning control board can inhibit the control panel's functionality, even if the indicator lights are operational.
If you've gone through these checks and the air purifier is still unresponsive, it might be time to think about replacing the power board. This component is essential for proper functioning, and a faulty power board can prevent the entire unit from operating as it should.
Taking these steps can often resolve the issues with your air purifier's control panel.
Seek Professional Assistance
When the air purifier's control panel stays unresponsive despite your troubleshooting efforts, consulting a professional technician is often the best course of action. They've the expertise to diagnose any potential internal component failures that you mightn't be equipped to handle.
A technician can accurately assess the control panel issues, whether they stem from a faulty control board or touchscreen problems. Additionally, it's important to take into account that environmental factors, such as smoke and pollution, could be affecting the air quality and, by extension, the performance of your air purifier, making professional assessment even more essential environmental irritants.
Seeking professional assistance guarantees that any technical problems are addressed correctly, preventing further damage to your unit. Technicians come with specialized tools that allow them to troubleshoot complex electrical issues, which could be beyond a typical user's capacity.
They can identify underlying problems like damaged power boards, which may be causing the control panel to malfunction. Engaging with certified repair services not only provides peace of mind but can also offer warranty options for the repairs performed.
This added layer of protection guarantees that any work done complies with safety standards, giving you confidence in the longevity and efficiency of your air purifier. Don't hesitate to reach out to a professional; it could save you time and money in the long run.
Conclusion
If your air purifier's control panel feels like it's gone on a permanent vacation, don't panic! With just a few simple steps, you can breathe life back into it. Whether it's checking power connections or inspecting for hardware issues, you've got the power to revive your purifier. And if all else fails, calling in a pro is just a phone call away. Don't let a stubborn control panel ruin your fresh air oasis—take action and reclaim your clean air today!
In the dynamic world of air purifiers and clean air advocacy, Aire stands out as a beacon of knowledge and passion. As the Editor in Chief of Aero Guardians, Aire has been instrumental in shaping the platform’s voice and direction, ensuring that every piece of content resonates with clarity, authority, and authenticity.
-
Types of Air Purifiers5 months ago
What Is an Air Purifier
-
FAQs - Advanced Queries2 months ago
What Do the Numbers on My Air Purifier Mean
-
Air Purifier Guides5 months ago
How to Reset Filter on Miko Air Purifier
-
Vetted3 months ago
Aera Mini Review: Smart Home Fragrance Diffuser With Hypoallergenic Scent Technology (2023)
-
Air Purifier Guides2 months ago
How to Make a Homemade Ozone Generator (Air Purifier
-
Maintenance and Tips6 months ago
How to Reset Filter Light on Winix Plasmawave Air Purifier
-
Air Purifier Guides6 months ago
How to Dispose of Air Purifier Filter Levoit
-
FAQs - Advanced Queries6 months ago
When to Use Ionizer on Coway Air Purifier