Hey! Got a Blue Air Purifier that’s in need of a little pick-me-up? Don’t fret, I’ve got just the thing for you. Find out how to give your purifier a fresh start! Dive in!
In this article, I’ll walk you through the step-by-step process of giving your air purifier a thorough cleaning. Trust me, it’s not as complicated as it sounds. With just a few materials and a little bit of time, you’ll have your Blue Air Purifier looking and working like new again.
Let’s get started, shall we?
Key Takeaways
- Gather the necessary materials for cleaning, including a soft cloth or sponge, mild dish soap, warm water, a vacuum cleaner with brush attachment, gloves, and a mask for safety.
- Follow the manufacturer’s instructions and recommendations for cleaning the Blue Air Purifier, including turning off the power switch or unplugging it from the electrical outlet and allowing it to cool down before handling.
- Clean the pre-filter every 2-3 months or more frequently in dusty environments, using a soft cloth or sponge, mild dish soap, and warm water. Avoid water or harsh chemicals that could damage the filter.
- Deep clean the interior of the air purifier every three to six months by removing the filters and using a vacuum or brush attachment to remove dust. Clean the filters with mild soap and water, ensuring thorough drying. Use a soft brush or toothbrush for stubborn stains on the fan blades. Regularly clean the air intake vent for optimal airflow.

Air Purifiers for Home Large Room, Cover Up to 2600 Ft² with Washable Filters, Powerful Turbo Mode, PM2.5 Air Quality Display, Air Cleaner for Pets, HAP607, Bright White
𝐓𝐑𝐈𝐏𝐋𝐄 𝐈𝐍𝐓𝐀𝐊𝐄, 𝐖𝐇𝐎𝐋𝐄-𝐑𝐎𝐎𝐌 𝐏𝐔𝐑𝐈𝐅𝐈𝐂𝐀𝐓𝐈𝐎𝐍: Featuring a front air inlet combined with wider dual-side air inlets, this air purifier...
As an affiliate, we earn on qualifying purchases.
Gathering the Necessary Materials
First, make sure you have all the necessary materials to clean your blue air purifier. You’ll need a few cleaning supplies to ensure a thorough cleaning process. Gather a soft cloth or sponge, mild dish soap, warm water, and a vacuum cleaner with a brush attachment. These supplies will help remove dirt, dust, and other particles effectively.
Now, let’s move on to the step-by-step instructions. Start by turning off and unplugging the air purifier. Carefully remove the filters and gently vacuum them to remove any loose debris.
Next, mix a small amount of mild dish soap with warm water. Dip the cloth or sponge into the soapy water and gently wipe the exterior surfaces of the air purifier.

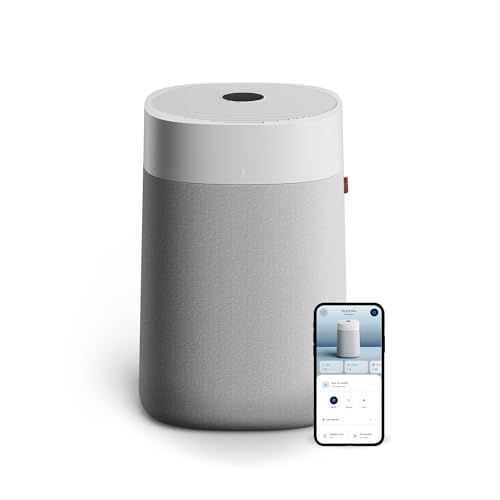
KNKA Air Purifier for Home Bedroom Large Room Up to 1,695 Ft² in 1 Hr, HEPA Sleep Mode Air Cleaner with Washable Pre-Filter, AHAM VERIFIDE, AQI Display, Pet Mode for Pets, Dust, Pollen, APH4000
𝐀𝐇𝐀𝐌 𝐕𝐞𝐫𝐢𝐟𝐢𝐞𝐝 & 𝐇𝐢𝐠𝐡 𝐂𝐀𝐃𝐑 𝐕𝐚𝐥𝐮𝐞: Certified by the Association of Home Appliance Manufacturers, this air purifier provides...
As an affiliate, we earn on qualifying purchases.
Turning off and Unplugging the Air Purifier
Before you turn off and unplug the air purifier, make sure you have followed all safety precautions. Cleaning your air purifier is an essential part of maintaining its effectiveness and prolonging its lifespan. Here are three important steps to take when turning off and unplugging your air purifier:
-
Turn off the power: Before unplugging the air purifier, make sure to turn off the power switch or unplug it from the electrical outlet. This ensures your safety and prevents any electrical accidents during the cleaning process.
-
Allow it to cool down: Give the air purifier some time to cool down before handling it. This prevents any burns or injuries that may occur due to hot surfaces.
-
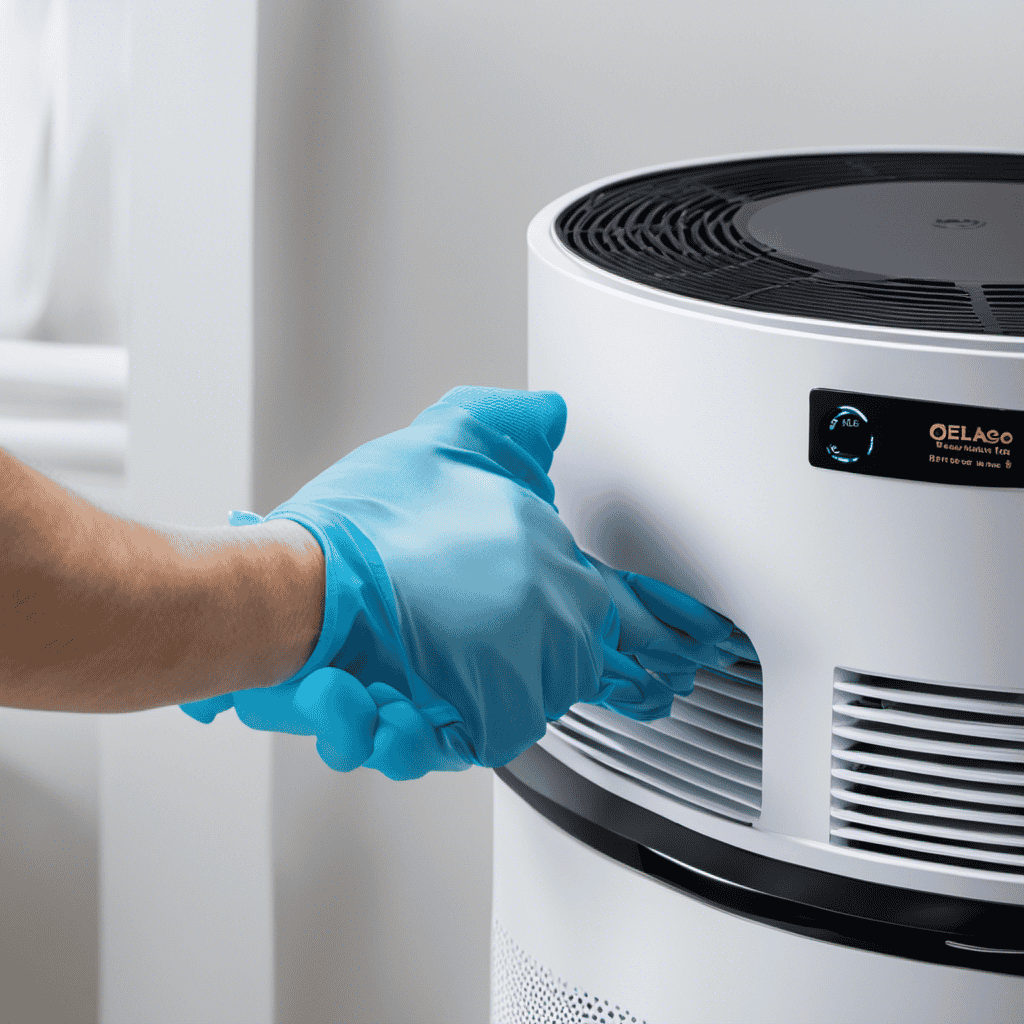
Wear protective gear: To ensure your safety during the cleaning process, wear gloves and a mask to protect yourself from any dust, allergens, or chemicals that may be present.
BLUEAIR Air Purifiers for Large Rooms, Cleans 3,048 Sqft In One Hour, HEPASilent Smart Air Cleaner For Home, Pets, Allergies, Virus, Dust, Mold, Smoke - Blue Pure 211i Max
BLUEAIR’S TOP-PERFORMING AIR PURIFIER LINE: Blue family’s new Pure Max series with our proprietary HEPASilent performance now even...
As an affiliate, we earn on qualifying purchases.
Removing and Cleaning the Pre-Filter
When it comes to maintaining the pre-filter of your air purifier, there are a few key tips to keep in mind.
First, it’s important to regularly check and clean the pre-filter to ensure optimal performance.
Secondly, the frequency of cleaning will depend on factors such as the air quality in your area and the amount of dust and debris present.
Lastly, if you encounter any issues with the pre-filter, such as a decrease in air flow or strange noises, troubleshooting common problems can help identify and resolve the issue.
Pre-Filter Maintenance Tips
To ensure optimal performance, it’s important to regularly clean the pre-filter of your blue air purifier. The pre-filter is the first line of defense against larger particles like dust and pet hair. Over time, it can become clogged and less effective, so proper maintenance is crucial.
Here are some tips for maintaining your pre-filter:
-
Regular cleaning: It’s recommended to clean the pre-filter every two to three months, or more frequently if you have pets or live in a dusty environment. Follow the manufacturer’s instructions for cleaning, as different models may have specific requirements.
-
Gentle cleaning techniques: Use a vacuum cleaner with a soft brush attachment to remove any loose debris from the pre-filter. Avoid using water or harsh chemicals, as they may damage the filter material.
-
Pre-filter replacement: Eventually, the pre-filter will reach the end of its lifespan and need to be replaced. Check the manufacturer’s recommendations for the recommended replacement interval, and make sure to purchase the correct replacement filter for your specific model.
Cleaning Frequency Recommendations
You should regularly maintain your pre-filter by following the manufacturer’s recommendations for cleaning frequency. Cleaning your pre-filter is an essential part of keeping your Blue Air purifier in optimal condition.
The recommended cleaning techniques will vary depending on the specific model you own, so it’s important to consult the user manual or contact the manufacturer for guidance.
Regular cleaning of the pre-filter offers several benefits. Firstly, it helps to ensure that the air purifier can effectively capture large particles such as dust, pet dander, and pollen. Secondly, it helps to prolong the lifespan of the pre-filter, reducing the need for frequent replacements. Lastly, regular cleaning promotes better air circulation and enhances the overall performance of your Blue Air purifier.
Troubleshooting Common Issues
If experiencing issues, check the user manual for troubleshooting tips and guidance to resolve common problems.
Here are three common troubleshooting issues with air purifiers and some helpful tips and tricks to resolve them:
-
Loud Noise: If your air purifier is making a loud noise, it could indicate a problem with the fan or motor. Start by checking if there is any debris or dust blocking the fan. Clean or replace the filter if necessary. If the noise persists, it might be a sign of a more serious problem, and you may need to contact customer support for further assistance.
-
Poor Air Quality: If you feel that your air purifier is not effectively cleaning the air, check if the filters are clean and properly installed. Make sure the air intake is not blocked by any objects. It’s also important to ensure that the purifier is appropriate for the size of the room. If the issue persists, consider replacing the filters or contacting customer support for further guidance.
-
Odors: If your air purifier is emitting unpleasant odors, it could be a sign that the filters need to be replaced. Check the user manual for instructions on how to properly change the filters. Additionally, ensure that the purifier is not placed near any sources of strong odors, such as garbage cans or pets. If the problem continues, contact customer support for assistance in resolving the issue.
Remember to always refer to the user manual for specific troubleshooting tips and tricks tailored to your air purifier model.

LEVOIT Air Purifiers for Home Large Room Up to 1875 Ft² with Washable Pre-Filter, AHAM VERIFIDE, Air Quality Monitor, HEPA Sleep Mode for Allergies, Pet Hair in Bedroom, Vital 200S-P, White
𝐖𝐇𝐘 𝐂𝐇𝐎𝐎𝐒𝐄 𝐀𝐇𝐀𝐌 𝐕𝐄𝐑𝐈𝐅𝐈𝐃𝐄 𝐏𝐑𝐎𝐃𝐔𝐂𝐓𝐒: AHAM (Association of Home Appliance Manufacturers) is an ANSI-accredited organization that sets strict...
As an affiliate, we earn on qualifying purchases.
Cleaning the Carbon Filter
Start by removing the carbon filter from the blue air purifier. Carbon filter maintenance is crucial to keep your air purifier functioning properly. To clean the carbon filter, you need to choose the right cleaning products. I recommend using a gentle household cleaner or mild detergent mixed with water. Avoid using harsh chemicals or abrasive materials as they can damage the filter.
Gently scrub the filter with the cleaning solution using a soft brush or sponge. Rinse thoroughly with water to remove any residue. Once cleaned, allow the filter to air dry completely before reinserting it into the purifier. With proper care and regular cleaning, your carbon filter will continue to effectively remove odors and harmful gases from your indoor air.
Now, let’s move on to cleaning the HEPA filter.
Cleaning the HEPA Filter
When it comes to maintaining your air purifier, it’s important to pay attention to the filters. Proper filter maintenance ensures optimal performance and clean air in your home.
In this discussion, I will provide you with key tips on filter maintenance and the recommended cleaning frequency for your HEPA filter.
Filter Maintenance Tips
To keep your blue air purifier running efficiently, make sure you regularly clean and replace the filters. Filter maintenance is crucial for optimal performance and clean air in your home. Here are three important tips to keep in mind:
-
Filter Replacement: It is essential to replace your air purifier’s filters as recommended by the manufacturer. Over time, filters get clogged with dust, pollen, and other pollutants, reducing their effectiveness. By replacing them regularly, you ensure that your air purifier continues to capture airborne particles effectively.
-
Troubleshooting Issues: If you notice a decrease in the air purifier’s performance or unusual noises, it could be a sign of a clogged or damaged filter. In such cases, check the filters and clean or replace them accordingly. This simple step can resolve many common issues and restore your purifier’s efficiency.
-
Regular Maintenance: In addition to filter replacement, regular maintenance is essential for optimal performance. Clean the exterior of your air purifier regularly using a soft cloth and mild detergent. This helps remove any dust or debris that may have accumulated and ensures unrestricted airflow.
By following these filter maintenance tips, you can prolong the life of your blue air purifier and maintain clean and fresh air in your home.
Now let’s move on to the recommended cleaning frequency for your air purifier.
Recommended Cleaning Frequency
Now that we’ve covered filter maintenance tips, let’s talk about the recommended cleaning frequency for your blue air purifier.
It’s important to keep your air purifier clean to ensure it functions at its best. The frequency of cleaning will depend on the level of usage and the environment in which the purifier is placed.
Generally, it is recommended to clean the exterior of the purifier once a week. This can be done by simply wiping it with a soft, damp cloth.
As for the interior, it is advised to deep clean it every three to six months. This involves removing the filters and using a vacuum cleaner or a brush attachment to remove any dust or debris. Additionally, you can use mild soap and water to clean the filters. Just make sure to thoroughly dry them before reinserting them into the purifier.
When it comes to cleaning products, it is recommended to use non-abrasive cleaners and avoid using harsh chemicals that could damage the purifier.
Cleaning the Fan Blades
You’ll need a soft cloth and mild detergent to clean the fan blades of your blue air purifier. Cleaning the fan blades is an important step in maintaining the efficiency of your air purifier.
Here are three simple steps to clean the fan blades effectively:
-
Turn off the air purifier and unplug it from the power source to ensure safety.
-
Dampen the soft cloth with water and mild detergent. Gently wipe the fan blades, being careful not to apply too much pressure, as it may damage the blades or the motor.
-
For stubborn stains, use a soft brush or toothbrush to gently scrub the affected area. Be cautious not to let any water or detergent drip into the motor.
Wiping Down the Exterior of the Air Purifier
Using a soft cloth and mild detergent, gently wipe down the exterior of your air purifier to keep it clean and dust-free. This simple cleaning technique is essential for maintaining the efficiency and longevity of your device.
When wiping down the exterior, be sure to pay attention to all surfaces, including the top, sides, and control panel. Avoid using harsh chemicals or abrasive materials that could damage the finish. Instead, opt for mild detergent or a vinegar and water solution for a safe and effective clean.
It’s also important to regularly clean the air intake vent, which is responsible for drawing in air to be purified. This will ensure optimal airflow and prevent any buildup of dust or debris that could hinder the performance of your air purifier.
Cleaning the Air Intake Vent
When it comes to maintaining the performance and efficiency of your air purifier, there are two key aspects to consider: removing trapped dust and proper filter maintenance.
Dust particles can get trapped in various parts of the air purifier, affecting its effectiveness in cleaning the air. Regularly cleaning the air intake vent helps to remove any accumulated dust and ensures optimal airflow.
Additionally, proper filter maintenance, such as replacing or cleaning the filters according to the manufacturer’s instructions, is essential for maintaining the air purifier’s efficiency in capturing airborne particles.
Removing Trapped Dust
To easily remove trapped dust from your blue air purifier, simply follow these steps:
-
Turn off and unplug the air purifier to ensure safety during the cleaning process.
-
Carefully remove the front grill or cover of the purifier. This will give you access to the filters and the interior of the device.
-
Gently vacuum the filters using a soft brush attachment to remove any loose dust and debris. Pay close attention to the crevices and corners where dust tends to accumulate.
-
If the dust is stubborn and not easily removed, you can use a damp cloth or sponge to wipe the filters gently. Avoid using excessive water to prevent damage to the filters.
-
Once the filters are clean and dust-free, replace them back into the air purifier following the manufacturer’s instructions.
Proper Filter Maintenance
Regularly replacing and cleaning the filters is crucial for maintaining the efficiency and longevity of your air purifier. Not only does it ensure that your purifier is working effectively, but it also helps in preventing mold growth and troubleshooting filter issues.
When it comes to cleaning the filters, it’s important to follow the manufacturer’s instructions. Typically, you can rinse the filters under running water or gently vacuum them to remove any trapped dust and debris. However, it’s important to avoid using harsh chemicals or submerging the filters in water, as this can damage them.
As for replacing the filters, most air purifiers have indicators that will let you know when it’s time to change them. It’s important to adhere to these guidelines to maintain the air quality in your home and ensure the optimal performance of your air purifier.
Cleaning the Air Outlet Vent
Cleaning the air outlet vent is a crucial step in maintaining a blue air purifier’s performance. Neglecting this essential task can lead to reduced airflow and potential mold growth. To ensure your air purifier continues to operate at its best, follow these three simple steps to clean the air outlet vent effectively:
- Turn off and unplug the air purifier to avoid any accidents or damage.
- Use a soft brush or a vacuum cleaner with a brush attachment to gently remove any dust or debris from the vent.
- For a more thorough clean, dampen a cloth with mild soap and water, and carefully wipe down the vent to prevent the growth of mold.
By regularly cleaning the air outlet vent, you can maintain optimal airflow and prevent the accumulation of harmful particles.
Once the vent is clean, you can proceed to reassemble the air purifier for continued use.
Reassembling the Air Purifier
Once you have finished cleaning the air outlet vent, it’s time to reassemble the purifier for continued use. To ensure proper reassembly, follow these step-by-step instructions.
First, locate the clean air outlet vent cover and align it with the corresponding slots on the purifier. Gently press down until it snaps into place.
Next, attach the pre-filter by sliding it into the designated groove and securing it with the tabs.
Then, insert the HEPA filter, making sure it fits snugly.
Finally, replace the main filter cover by aligning the tabs and sliding it back into position.
If you encounter any issues during reassembly, here are a few troubleshooting tips: double-check that all parts are properly aligned, ensure the filters are clean and undamaged, and consult the user manual for further guidance.
Happy purifying!
Are the Cleaning Steps the Same for Blue and Blu Air Purifiers?
When it comes to maintenance, it’s important to clean your Blu air purifier regularly. The cleaning steps for Blue and Blu air purifiers are generally the same, involving removing the filter, gently vacuuming or washing it, and wiping down the unit with a damp cloth. Proper maintenance ensures optimal performance.
Testing and Maintaining the Cleaned Air Purifier
After reassembling the purifier, it’s important to regularly test and maintain its performance. To ensure that your air purifier is effectively cleaning the indoor air, here are three testing methods you can use:
-
Air Quality Measurements: Use an air quality monitor to measure the levels of pollutants in your home before and after using the purifier. This will help you determine the effectiveness of the device in reducing contaminants.
-
Smoke Test: Light a match or a candle near the purifier and observe how quickly the smoke is removed from the air. A well-functioning purifier should be able to clear the air of smoke within a few minutes.
-
Filter Inspection: Regularly inspect and clean or replace the filters in your purifier. Dirty or clogged filters can reduce the efficiency of the device and may not effectively clean the air.
Frequently Asked Questions
How Often Should I Clean My Blue Air Purifier?
I clean my blue air purifier every 3 months to ensure optimal performance. It’s important to follow the manufacturer’s instructions on how to clean air purifier filters and practice regular maintenance for the best results.
Can I Use Cleaning Solutions or Should I Only Use Water?
I always use water to clean my Blue Air Purifier because cleaning solutions can damage the filters. It’s best to follow the manufacturer’s instructions for cleaning and maintenance to ensure optimal performance and longevity.
What Should I Do if the Fan Blades Are Difficult to Clean?
If the fan blades are difficult to clean, I recommend using a soft brush or a vacuum cleaner with a brush attachment to remove any dust or debris. Be gentle yet thorough to ensure proper cleaning.
Are There Any Specific Precautions I Should Take When Cleaning the Air Intake Vent?
When cleaning the air intake vent, it’s important to follow proper cleaning techniques to ensure optimal performance. Avoid common mistakes like using harsh chemicals or excessive force, as this can damage the vent.
Is There a Way to Determine if the Filters Need to Be Replaced Instead of Just Cleaned?
To determine if the filters of a Blue Air Purifier need to be replaced, look for signs of dirty filters such as reduced airflow or a noticeable decrease in air quality.
Conclusion
In conclusion, maintaining a clean and fresh air purifier is crucial for optimal performance and air quality. By following the simple steps outlined in this guide, you can easily clean your blue air purifier and keep it functioning at its best.
Remember to gather the necessary materials, turn off and unplug the unit, clean each filter thoroughly, and pay attention to the intake and outlet vents.
Regular cleaning and maintenance will ensure that your air purifier continues to provide you with clean and breathable air, banishing bothersome bacteria and banishing bad odors.
So, seize the opportunity to sanitize your blue air purifier and savor the sensation of a spotless and serene space!