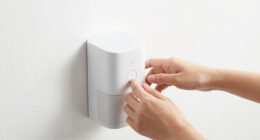
Do you ever think about the right way to clean your Hepa filter air purifier? Well, search no more! This article will walk you through the step-by-step process of cleaning your Hepa filter air purifier, guaranteeing it works efficiently and effectively.
By understanding the importance of cleaning, gathering the necessary supplies, and following a maintenance schedule, you can keep your air purifier in pristine condition and enjoy clean, fresh air in your home.
So, let’s get started!
Key Takeaways
- Regular cleaning of a HEPA filter air purifier is important for efficient functioning and to trap and remove harmful particles.
- Signs of filter degradation include reduced airflow, decreased effectiveness, and increased dust or allergen presence, indicating the need for cleaning or replacement.
- The recommended frequency for replacing the HEPA filter is every 6 to 12 months, but it may vary based on manufacturer’s recommendations, air quality, and usage.
- The cleaning process involves gathering supplies, removing the filter, using compressed air and cleaning solutions (if allowed), and ensuring thorough drying before reassembling the air purifier.

DEWALT Drill Bit Set, 3-Flats Shank,14-Piece, 135 Degree Split Point, for Plastic, Wood and Metal (DWA1184)
135 Degree Split point tip design to help reduce walking
As an affiliate, we earn on qualifying purchases.
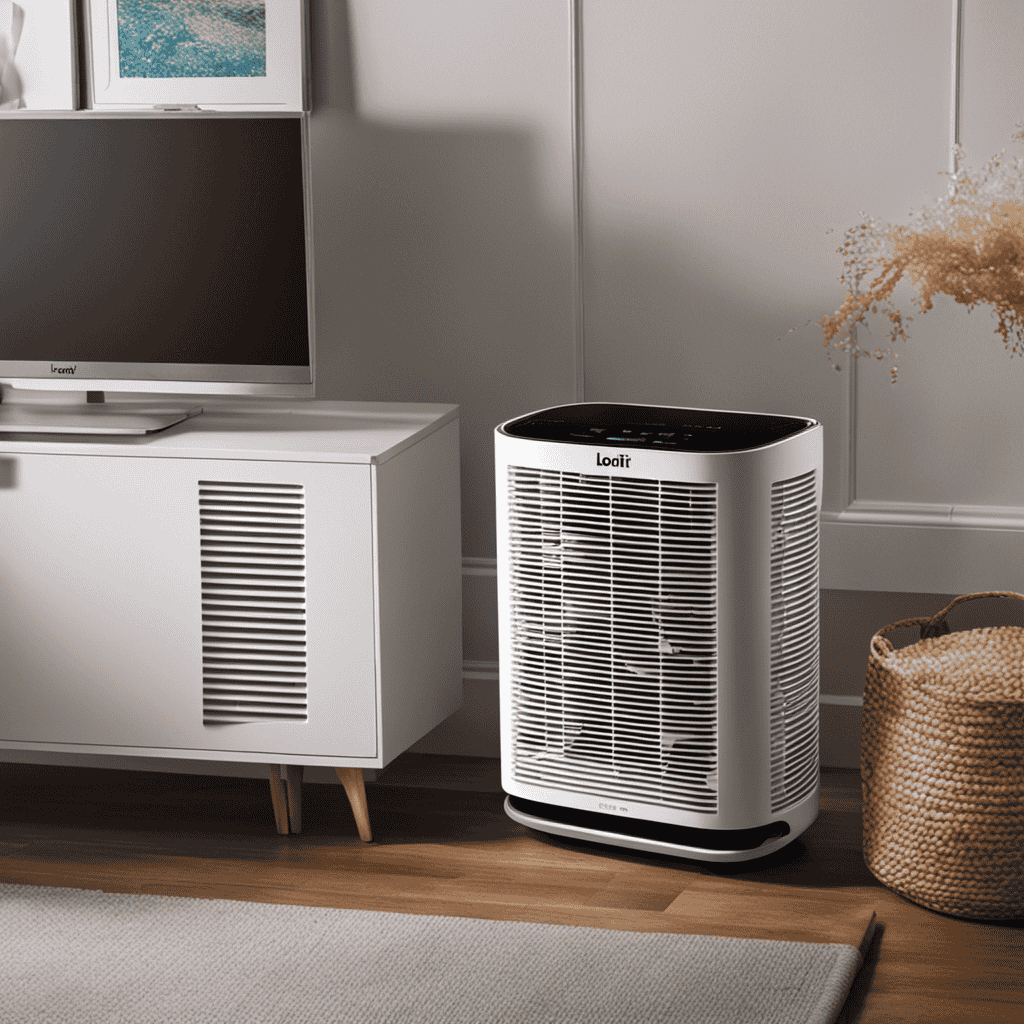
Understanding the Importance of Cleaning a Hepa Filter Air Purifier
Understanding the importance of cleaning a HEPA filter air purifier is crucial for maintaining indoor air quality. Regular maintenance of the HEPA filter is essential to ensure that it functions efficiently and effectively.
A clean HEPA filter has numerous benefits. Firstly, it helps in trapping and removing harmful particles like dust, pollen, and pet dander from the air, reducing the risk of allergies and respiratory issues.
Secondly, a clean filter ensures that the air purifier continues to work optimally, providing clean and fresh air throughout the space.
Additionally, regular cleaning of the HEPA filter extends its lifespan, saving you money on frequent replacements.

DEWALT 20V MAX Cordless Drill Driver Set, Electric Drill, Brushless 1/2 In 2 Speed, 2.0 Ah Battery and Charger Included, LED Light (DCD777D1)
DEWALT Power drill brushless motor delivers more run time over brushed
As an affiliate, we earn on qualifying purchases.
Assessing the Condition of Your Hepa Filter Air Purifier
When it comes to assessing the condition of my Hepa filter air purifier, there are a few key signs of filter degradation that I always look out for. These include reduced airflow, a decrease in the purifier’s effectiveness, and a noticeable increase in dust or allergen presence in the air.
Based on my experience, I highly recommend following the manufacturer’s replacement frequency recommendations to ensure optimal performance and maintain the air quality in your space.
Signs of Filter Degradation
If your HEPA filter air purifier starts emitting a strange odor, it may be a sign of filter degradation. This is just one of the signs that your filter may be clogged and in need of cleaning. Clogged filters can have a significant impact on the air quality in your home. Not only can they reduce the efficiency of your air purifier, but they can also release trapped pollutants back into the air. To help you assess the condition of your filter, here is a table showcasing some common signs of clogged filters and their impact on air quality:
| Signs of Clogged Filters | Impact on Air Quality |
|---|---|
| Strange odor | Release of pollutants |
| Reduced airflow | Reduced purification |
| Increase in dust | Poor air circulation |
Replacement Frequency Recommendations
Regularly replacing the filter is essential to ensure that the air in your home remains clean and healthy. The frequency of filter replacement depends on various factors, such as the manufacturer’s recommendations, the air quality in your area, and the usage of the air purifier. As a general guideline, it is recommended to replace the HEPA filter every 6 to 12 months. However, if you live in an area with high levels of pollutants or if you use the air purifier frequently, you may need to replace the filter more often.
Cleaning techniques can also help extend the lifespan of the filter. Some techniques include vacuuming the filter regularly, rinsing it with water, or using a soft brush to remove dust and debris. By following the recommended replacement frequency and employing proper cleaning techniques, you can ensure that your air purifier functions optimally, providing you with clean and fresh air.
Now that you understand the importance of regular filter replacement, let’s move on to gathering the necessary cleaning supplies.

VENTS-US Frigate ERV 80 R - Whole House Energy Recovery Ventilation System, Up to 100 CFM - Continuous Supply of Fresh Air While Exhausting Equal Amounts of Stale Air
Whole-Home Ventilation: Brings in fresh air and exhausts stale air at up to 100 CFM, maintaining healthy indoor...
As an affiliate, we earn on qualifying purchases.
Gathering the Necessary Cleaning Supplies
You’ll need to gather the necessary cleaning supplies for your HEPA filter air purifier. To effectively clean your filter, you will need a few items:
- A soft brush or a vacuum cleaner with a brush attachment
- A microfiber cloth
- A mild detergent or cleaning solution
The soft brush or vacuum attachment will help remove larger particles and dust from the surface of the filter. The microfiber cloth can be used to wipe down the filter gently. Avoid using harsh chemicals or abrasive materials as they can damage the filter.
Once you have gathered these suitable cleaning supplies, you can move on to the next step of removing the HEPA filter from the air purifier.

AC Infinity CLOUDWAY Whole House EC Fan T10, 1200 CFM with Temperature Humidity Controller, WiFi Integrated App Control – Ceiling Mount House Attic Vent Fan, Exhaust Home Ventilation System
A whole house attic fan designed to cool and ventilate entire homes by exhausting hot air from indoor...
As an affiliate, we earn on qualifying purchases.
Removing the Hepa Filter From the Air Purifier
Once you’ve gathered the necessary cleaning supplies, it’s time to take out the HEPA filter from the air purifier. To ensure a thorough cleaning process, it’s essential to understand the correct method for removing the filter. Here are the steps to follow:
- Turn off the air purifier and unplug it from the power source.
- Locate the filter compartment, usually found at the back or side of the unit.
- Open the compartment carefully, following the manufacturer’s instructions.
- Identify the HEPA filter among any other filters present.
- Gently remove the HEPA filter from its housing, being cautious not to damage it.
- If the filter is reusable, use alternative cleaning methods like vacuuming or washing it with mild soap and water.
- If the filter is not reusable, dispose of it properly and replace it with a new one.
Troubleshooting common issues with filter removal:
- If the filter is stuck, double-check if there are any latches or clips holding it in place.
- Refer to the user manual or contact the manufacturer for guidance if you encounter any difficulties during the process.
Preparing the Hepa Filter for Cleaning
Before starting the cleaning process, it’s important to gather the necessary supplies and ensure the air purifier is turned off and unplugged.
Assessing filter efficiency is crucial to determine if it needs cleaning. A clogged or dirty filter can decrease the air purifier’s performance and affect the air quality in your home.
To assess the filter’s efficiency, inspect it for visible dirt and debris. If the filter appears dirty or discolored, it’s time to clean it.
Proper storage techniques are essential to maintain the filter’s effectiveness. After cleaning, make sure the filter is completely dry before storing it. Store the filter in a clean, dry place away from direct sunlight and moisture. Avoid folding or bending the filter, as this can damage its structure.
Using Compressed Air to Remove Loose Debris
Now that the HEPA filter is ready for cleaning, let’s move on to the next step: using compressed air to remove loose debris. This method is an effective way to get rid of any dust or dirt that may have accumulated on the filter.
Here are the steps to follow:
- Start by unplugging the air purifier and removing the HEPA filter from the unit.
- Take the filter outside or to a well-ventilated area to prevent the debris from spreading indoors.
- Using a vacuum cleaner with a brush attachment, gently vacuum the surface of the filter to remove any loose particles.
- Next, grab a can of compressed air and carefully spray it onto the filter. Make sure to hold the can upright and use short bursts to avoid damaging the filter.
- Move the can in a sweeping motion across the entire surface of the filter to dislodge any remaining debris.
Alternative cleaning methods:
- Some people prefer using a soft brush to gently brush away the dirt from the filter.
- Another option is to rinse the filter with water, but make sure to check the manufacturer’s instructions beforehand, as not all filters are washable.
Rinsing the Hepa Filter With Water
To rinse the HEPA filter with water, you’ll need to carefully follow the manufacturer’s instructions and ensure that the filter is washable.
It’s important not to use harsh chemicals when cleaning the filter, as they can damage the delicate fibers. Instead, consider using vinegar as a natural cleaning solution. Vinegar is an effective and safe option that can help remove dirt, dust, and odors from the filter.
Start by removing the filter from the air purifier and gently tapping it to remove any loose debris. Then, fill a basin or sink with a mixture of equal parts vinegar and water. Submerge the filter in the solution and let it soak for about 15 minutes.
Afterward, rinse the filter thoroughly with clean water and allow it to air dry completely before reinserting it into the air purifier.
Following these steps will ensure that your HEPA filter is properly cleaned and maintained.
Applying a Gentle Cleaning Solution
When it comes to cleaning my air purifier, I want to make sure I’m using the most suitable cleaning solutions.
I also want to know the most effective cleaning techniques to ensure the best results.
Additionally, I want to avoid any potential damage or residue that could affect the performance of my air purifier.
Suitable Cleaning Solutions
You can use a mixture of water and mild detergent to clean your HEPA filter air purifier. This cleaning method is effective in removing dust, allergens, and other particles that may have accumulated on the filter.
However, there are alternative solutions that can also be used to clean your HEPA filter air purifier:
-
Vinegar solution: A mixture of equal parts water and vinegar can be used as an alternative to mild detergent. Vinegar has natural cleaning properties and can help eliminate odors.
-
Baking soda paste: Mixing baking soda with water to form a paste can be applied to the filter and left to sit for a few hours before rinsing. This method can help remove stubborn stains or odors.
Effective Cleaning Techniques
Using gentle wiping motions, ensure that all surfaces of the device are thoroughly cleaned.
When it comes to cleaning a HEPA filter air purifier, there are a few effective techniques that can help maintain its efficiency.
Firstly, make sure to unplug the device before cleaning to avoid any accidents. Start by removing the filter and gently vacuuming it to remove any loose particles. Be careful not to damage the delicate filter material.
Next, use a damp cloth or sponge to wipe down the exterior of the device, making sure to reach all the nooks and crannies. Avoid using harsh chemicals or abrasive materials that could damage the unit.
Lastly, don’t forget to clean the air intake vents to prevent any clogs.
Avoiding Damage or Residue?
To avoid any potential damage or residue, it’s important to be cautious and use gentle cleaning techniques on your device. Here are some tips to ensure damage prevention and effective residue removal when cleaning your HEPA filter air purifier:
-
Use a soft brush or vacuum attachment: Gently brush the surface of the filter or use a vacuum with a soft brush attachment to remove any loose debris or dust.
-
Wash with mild detergent: If your filter is washable, carefully remove it and wash it with a mild detergent and lukewarm water. Rinse thoroughly and let it dry completely before reinserting it into the device.
By following these cleaning techniques, you can maintain the effectiveness of your HEPA filter and ensure a clean and healthy indoor environment.
Now let’s move on to the next section and discuss how to scrub the HEPA filter gently.
Scrubbing the Hepa Filter Gently
When scrubbing the Hepa filter, it’s important to be gentle to avoid damaging it. To clean the filter effectively, you should use suitable cleaning solutions and employ effective cleaning techniques.
First, choose a suitable cleaning solution, such as a mild detergent or a vinegar and water mixture. Avoid using harsh chemicals or abrasive cleaners as they can damage the filter.
Next, gently remove the filter from the air purifier and place it in a sink or basin. Use a soft brush or cloth to scrub the filter in a gentle circular motion, being careful not to apply too much pressure.
Rinse the filter thoroughly with water to remove any residue.
Finally, allow the filter to air dry completely before placing it back into the air purifier.
Following these steps will ensure that your Hepa filter is cleaned properly without causing any damage.
Rinsing off the Cleaning Solution
After scrubbing the Hepa filter, you should rinse off the cleaning solution thoroughly. This step is crucial to avoid residue buildup and ensure the filter operates at its optimal capacity.
Here are the benefits of regular cleaning and rinsing:
-
Ensures efficient filtration: Rinsing off the cleaning solution removes any remaining dirt, dust, and debris that may have accumulated on the filter. This helps the filter to effectively trap airborne particles and maintain its filtration efficiency.
-
Extends the filter’s lifespan: Regular rinsing prevents the buildup of residue, which can clog the filter and reduce its lifespan. By keeping the filter clean, you can maximize its longevity and save on replacement costs.
Drying the Hepa Filter Thoroughly
When it comes to cleaning a HEPA filter air purifier, one crucial step that cannot be overlooked is the thorough drying of the filter.
This step is of utmost importance as it ensures that all moisture is removed from the filter, preventing the growth of mold and bacteria.
Importance of Complete Drying
To ensure your HEPA filter air purifier is functioning properly, make sure you fully dry it after cleaning. Complete drying techniques are crucial in preventing moisture buildup, which can lead to mold and bacteria growth. Here are some effective ways to ensure complete drying:
- Use a clean, dry cloth to wipe down the surface of the air purifier.
- Place the HEPA filter in a well-ventilated area to air dry naturally.
- Use a hairdryer on a low heat setting to speed up the drying process, if needed.
By following these complete drying techniques, you can prevent any residual moisture from causing problems in your air purifier.
This is important because moisture buildup can create an environment conducive to the growth of mold and bacteria, which can compromise the effectiveness of your air purifier and potentially harm your health.
Now, let’s move on to the next section about preventing mold and bacteria.
Preventing Mold and Bacteria
Preventing mold and bacteria is crucial for maintaining the effectiveness and safety of your air purifier. Mold and bacteria can grow and thrive in moist environments, which can lead to the release of harmful allergens and pollutants into the air.
To prevent these issues, it is important to regularly clean and maintain your air purifier. Start by checking the manufacturer’s instructions for specific cleaning recommendations. Generally, you can use a damp cloth or sponge to wipe down the exterior of the purifier.
For the filters, gently vacuum or brush off any visible dust or debris. Additionally, consider using an antimicrobial spray or solution to disinfect the filters and kill any remaining mold or bacteria.
Reassembling the Hepa Filter Into the Air Purifier
Once you’ve finished cleaning the Hepa filter, it’s time to reassemble it back into the air purifier. This is an important step to ensure that the air purifier functions properly and effectively.
The reassembling process can be simple if you follow the correct steps. Here are some key points to keep in mind:
-
First, make sure that the filter is completely dry before reassembling it. Moisture can damage the filter and reduce its lifespan.
-
Next, carefully align the filter with the designated slot in the air purifier. It should fit snugly without any gaps.
-
Finally, secure the filter in place using the designated clips or locks. Double-check that it is properly secured to prevent any air leakage.
Common mistakes to avoid during the reassembling process include forcing the filter into place, not aligning it correctly, or forgetting to secure it properly.
Following these steps will ensure that your air purifier continues to provide clean and fresh air.
Cleaning the Exterior of the Air Purifier
Make sure you regularly wipe down the outside of your air purifier to remove any dust or dirt buildup. Not only does this keep your air purifier looking clean and well-maintained, but it also helps prevent corrosion and ensures the optimal functionality of the device.
To clean the exterior of your air purifier, follow these simple steps:
- Gather the necessary materials: a soft, lint-free cloth and a mild cleaning solution.
- Turn off and unplug the air purifier.
- Dampen the cloth with the cleaning solution and gently wipe down the surfaces of the air purifier.
- Pay extra attention to any stubborn stains, using a gentle scrubbing motion to remove them.
- Dry the air purifier thoroughly before plugging it back in and turning it on.
Maintaining a Cleaning Schedule for Your Hepa Filter Air Purifier
After cleaning the exterior of your air purifier, it is essential to establish a regular cleaning schedule to maintain the efficiency and lifespan of your HEPA filter. By following a maintenance routine, you can ensure that your air purifier continues to provide clean and fresh air in your home.
Here are some key steps to help you maintain your HEPA filter:
-
Assess filter efficiency regularly:
-
Check the manufacturer’s instructions for recommended filter lifespan.
-
Monitor the air purifier’s performance and airflow to determine if the filter needs replacement or cleaning.
-
Extend filter lifespan:
-
Vacuum the pre-filter or use compressed air to remove large particles.
-
Clean the HEPA filter gently with a brush or by rinsing it in water, if the manufacturer allows it.
By following these steps, you can maximize the efficiency of your HEPA filter and extend its lifespan, ensuring that your air purifier functions optimally.
Now, let’s move on to troubleshooting common issues that arise with a dirty HEPA filter.
Troubleshooting Common Issues With a Dirty Hepa Filter
If you’re experiencing reduced airflow or a decrease in performance from your air purifier, there may be some common issues to troubleshoot with a dirty HEPA filter.
One common problem is a clogged filter. Over time, the filter can become filled with dust, pet hair, and other particles, which can restrict the airflow and reduce its effectiveness. To troubleshoot this issue, simply remove the filter and give it a thorough cleaning.
Another common problem is a worn-out filter. HEPA filters have a lifespan and need to be replaced regularly. If you’ve cleaned the filter and are still experiencing issues, it may be time for a new one.
Frequently Asked Questions
How Often Should I Clean My Hepa Filter Air Purifier?
I clean my HEPA filter air purifier every 3-6 months. Regular cleaning helps maintain its efficiency and ensures clean air. Replacing the filter is necessary every 6-12 months. Using a HEPA filter purifier improves indoor air quality by trapping allergens and pollutants.
Can I Use Any Cleaning Solution to Clean the Hepa Filter?
I wouldn’t recommend using any cleaning solution to clean a HEPA filter. It’s best to follow the manufacturer’s instructions and use a soft brush or vacuum to remove dust and debris.
Can I Wash the Exterior of the Air Purifier With Water?
Yes, I can wash the exterior of the air purifier with water. It is one of the cleaning tips for maintaining the air purifier. However, it is important to make sure the unit is unplugged and dried thoroughly before using it again.
How Do I Know if My Hepa Filter Needs to Be Replaced?
I can easily tell if my HEPA filter needs replacing by looking for signs of a clogged filter, like reduced airflow or a dusty smell. To extend its lifespan, I regularly vacuum and gently tap the filter.
What Should I Do if My Air Purifier Is Not Working Properly Even After Cleaning the Hepa Filter?
If my air purifier isn’t working well after cleaning the HEPA filter, I’ll troubleshoot by checking the power supply, fan, and settings. If the issue persists, I’ll seek professional help for further diagnosis and repair.
Are There Different Methods for Cleaning Hepa Filter Air Purifiers?
Yes, there are different methods for cleaning hepa filter air purifiers. Some can be vacuumed, some can be washed with water, and some may need to be replaced. It’s important to follow the manufacturer’s instructions for the specific cleaning hepa filter air purifier to ensure it continues to work effectively.
Conclusion
In conclusion, it is essential to take the time to clean your Hepa filter air purifier. This is necessary for maintaining its efficiency and prolonging its lifespan. By assessing the condition of the purifier, gathering the necessary supplies, and following the proper steps to clean both the filter and the exterior, you can ensure that your air purifier continues to provide you with clean and fresh air.
Remember to establish a regular cleaning schedule to prevent any potential issues and enjoy the benefits of a pristine air purifier. So go ahead, breathe in the fresh air, and let your home become a haven of purity.