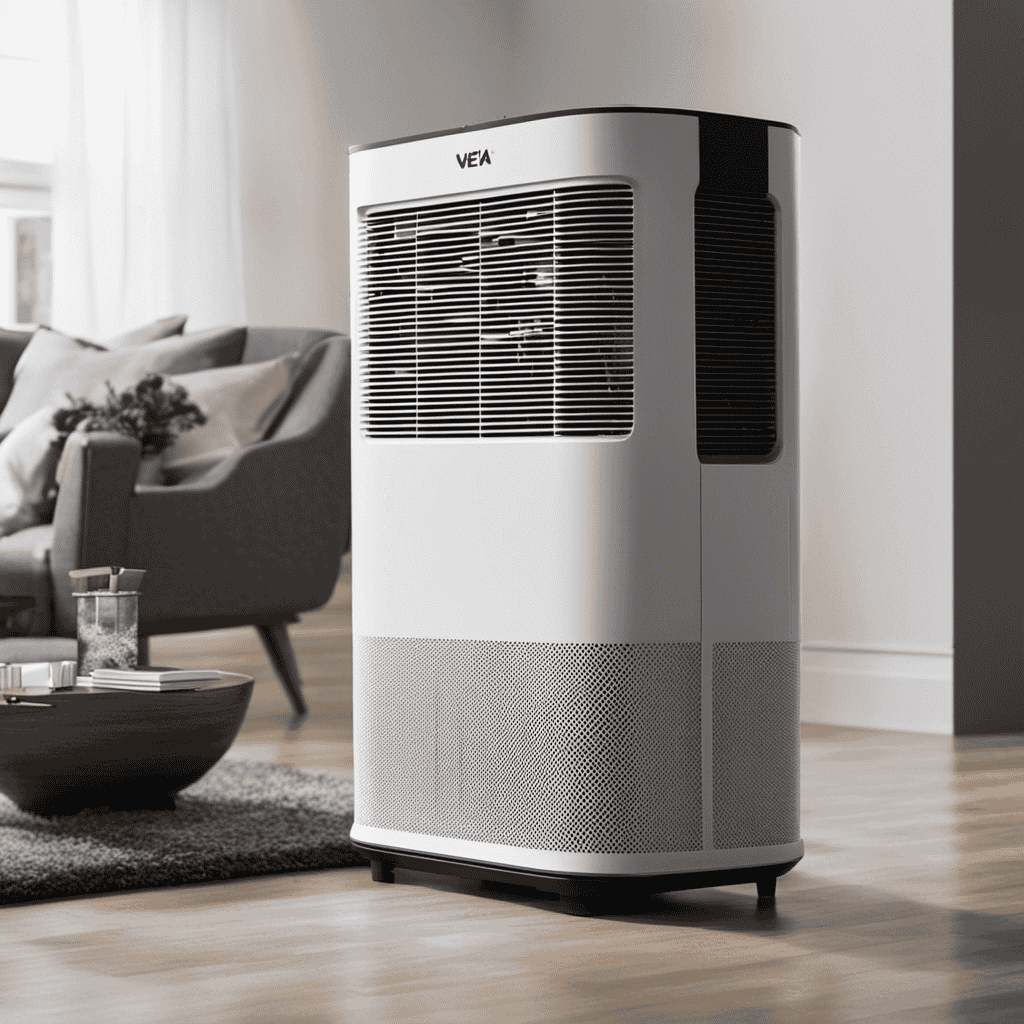
As an avid user of the Veva Air Purifier, I have discovered the importance of regular cleaning in order to maintain its optimal performance.
In this guide, I will walk you through the step-by-step process of cleaning your Veva Air Purifier to ensure that it continues to purify the air in your home effectively.
From gathering the necessary supplies to reassembling the purifier, I will provide you with detailed instructions to make this task a breeze.
Let’s dive in and get your Veva Air Purifier sparkling clean!
Key Takeaways
- Regular cleaning is essential for optimal performance and longevity of the Veva air purifier.
- Use a soft, lint-free cloth or microfiber cloth to remove dust and debris from the air purifier.
- Clean the pre-filter regularly by tapping to remove loose debris and replacing if heavily soiled.
- Avoid using abrasive cleaning agents and do not submerge any part of the purifier in water. Refer to the manufacturer’s instructions for specific cleaning recommendations.

DEWALT Drill Bit Set, 3-Flats Shank,14-Piece, 135 Degree Split Point, for Plastic, Wood and Metal (DWA1184)
135 Degree Split point tip design to help reduce walking
As an affiliate, we earn on qualifying purchases.
Gather Necessary Cleaning Supplies
First, gather all the supplies you’ll need to clean your Veva air purifier.
To begin the cleaning process, you will require a few essential items. Firstly, grab a soft, lint-free cloth or microfiber cloth that will not scratch the surface of your air purifier.
Next, make sure to have a small brush or a toothbrush handy to reach into the crevices and remove any debris or dust.
Additionally, you will need a mild dish soap or a specialized air purifier cleaner that is compatible with your Veva model.
Finally, have a bucket or sink filled with warm water ready for rinsing the parts.

DEWALT 20V MAX Cordless Drill Driver Set, Electric Drill, Brushless 1/2 In 2 Speed, 2.0 Ah Battery and Charger Included, LED Light (DCD777D1)
DEWALT Power drill brushless motor delivers more run time over brushed
As an affiliate, we earn on qualifying purchases.
Turn off and Unplug the Air Purifier
Before doing anything else, make sure you’ve turned off and unplugged your Veva air purifier. This is a crucial step in the cleaning process to ensure your safety and prevent any electrical accidents. Once the purifier is powered off and disconnected from the power source, you can proceed with the cleaning process. It is essential to take certain safety precautions while cleaning your air purifier. For instance, avoid using abrasive cleaning agents or submerging any part of the purifier in water. Instead, use a soft, damp cloth to wipe down the exterior and remove any dust or debris. Additionally, refer to the manufacturer’s instructions for specific cleaning recommendations for different parts of the purifier, such as the filters or fan blades. Following these safety precautions will help maintain the efficiency and longevity of your Veva air purifier.
| Safety Precautions |
|---|
| 1. Turn off and unplug the air purifier before cleaning. |
| 2. Avoid using abrasive cleaning agents. |
| 3. Do not submerge any part of the purifier in water. |
| 4. Refer to the manufacturer’s instructions for specific cleaning recommendations. |

VENTS-US Frigate ERV 80 R - Whole House Energy Recovery Ventilation System, Up to 100 CFM - Continuous Supply of Fresh Air While Exhausting Equal Amounts of Stale Air
Whole-Home Ventilation: Brings in fresh air and exhausts stale air at up to 100 CFM, maintaining healthy indoor...
As an affiliate, we earn on qualifying purchases.
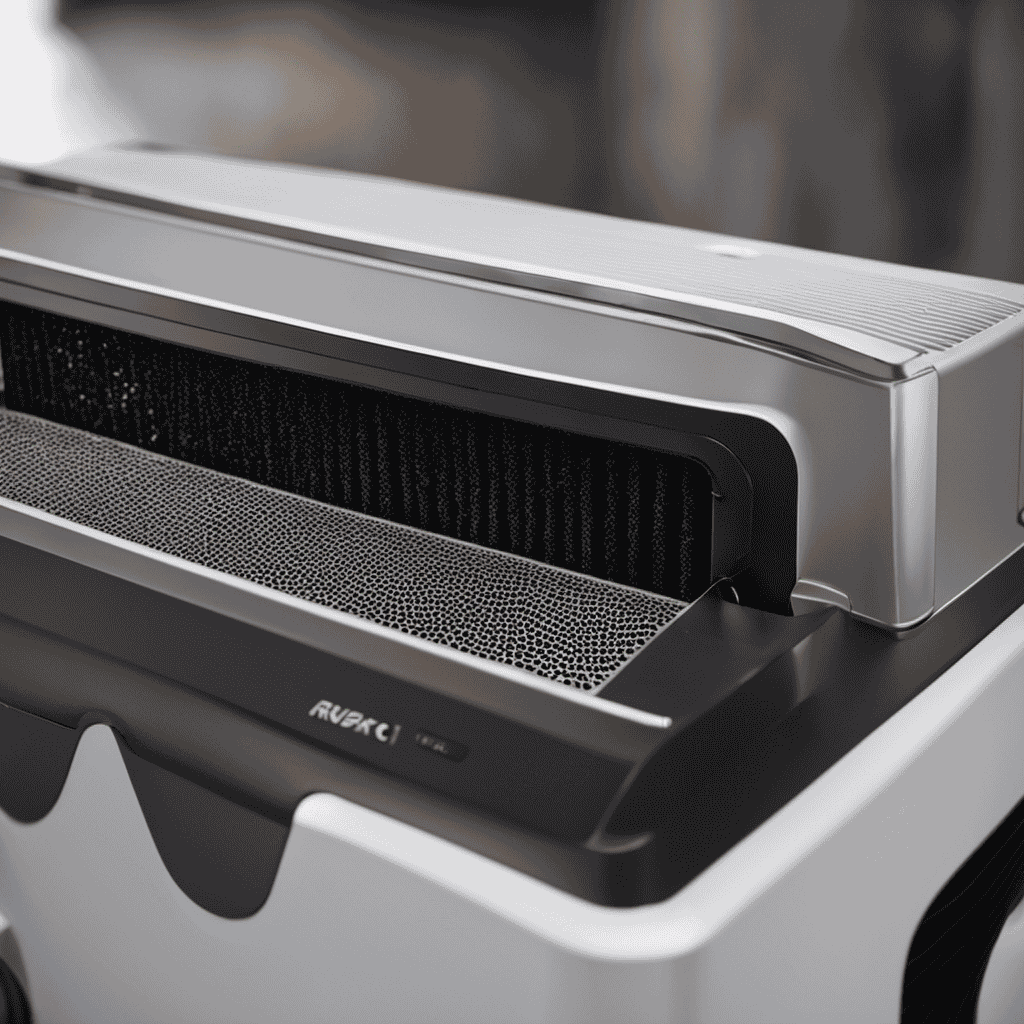
Remove and Clean the Pre-Filter
When it comes to maintaining an air purifier, one of the key areas to focus on is the pre-filter. Regular cleaning of the pre-filter is essential in order to ensure optimum performance and longevity of the air purifier.
In this discussion, I will provide you with important pre-filter maintenance tips, highlight the importance of regular cleaning, and share effective techniques to clean the pre-filter thoroughly.
Pre-Filter Maintenance Tips
To keep your Veva air purifier running efficiently, make sure to regularly clean the pre-filter. The pre-filter is an essential component of the air purifier as it traps larger particles such as dust, pet hair, and lint.
Over time, the pre-filter can become clogged with debris, which can hinder the air purifier’s performance. Cleaning the pre-filter is a simple process that can be done in a few easy steps.
First, turn off and unplug the air purifier. Locate the pre-filter, which is usually located at the front or top of the unit. Remove the pre-filter and gently tap it to remove any loose debris. If the pre-filter is heavily soiled, it may need to be replaced.
Troubleshooting pre-filter issues can also involve checking for any tears or damage to the filter, as this can affect its effectiveness. Regular maintenance of the pre-filter is crucial for ensuring optimal performance and prolonging the lifespan of your Veva air purifier.
Importance of Regular Cleaning
It’s essential that you regularly maintain your pre-filter to ensure the optimal performance and longevity of your Veva air purifier. Regular maintenance not only keeps your air purifier functioning at its best, but it also provides several benefits for clean air in your home or office.
Here are some key reasons why regular cleaning is important:
-
Improved air quality: Cleaning the pre-filter removes dirt, dust, and other particles that can clog the filter and reduce its efficiency. This leads to cleaner air being circulated in your space.
-
Extended lifespan: By regularly cleaning the pre-filter, you prevent it from becoming overloaded with debris, which can cause it to wear out faster. This helps extend the overall lifespan of your Veva air purifier.
-
Cost savings: When your air purifier is properly maintained, it operates more efficiently, reducing energy consumption and potentially saving you money on electricity bills.
Effective Cleaning Techniques
By using a microfiber cloth, you can effectively remove dust and debris from the pre-filter, ensuring optimal performance of your air purifier. Regular cleaning is essential to prevent dust buildup and maintain the efficiency of your Veva air purifier. In addition to cleaning the pre-filter, it is important to address stubborn stains that may accumulate over time. For these stains, a gentle cleaning solution can be used. Simply mix mild detergent with water and apply it to the stained area using a soft cloth. Gently scrub the stain in a circular motion until it is removed. Rinse the cloth and wipe away any excess detergent. This thorough cleaning process will keep your Veva air purifier in top condition, providing you with clean and fresh air.
| Cleaning Step | Instructions |
|---|---|
| Step 1 | Use a microfiber cloth to remove dust and debris from the pre-filter. |
| Step 2 | Mix mild detergent with water to create a cleaning solution. |
| Step 3 | Apply the cleaning solution to stubborn stains and gently scrub in a circular motion. |
| Step 4 | Rinse the cloth and wipe away any excess detergent. |
| Step 5 | Allow the pre-filter to dry completely before re-installing it in the air purifier. |
| Step 6 | Repeat this cleaning process regularly to maintain optimal performance. |

AC Infinity CLOUDWAY Whole House EC Fan T10, 1200 CFM with Temperature Humidity Controller, WiFi Integrated App Control – Ceiling Mount House Attic Vent Fan, Exhaust Home Ventilation System
A whole house attic fan designed to cool and ventilate entire homes by exhausting hot air from indoor...
As an affiliate, we earn on qualifying purchases.
Clean the HEPA Filter
When it comes to maintaining your air purifier, proper filter maintenance is crucial for optimal performance.
In order to keep your air purifier running efficiently, it is important to follow some key filter maintenance tips.
Additionally, knowing the recommended cleaning frequency for your filters will help ensure that your air purifier continues to effectively remove pollutants from your indoor air.
Filter Maintenance Tips
To maintain your Veva air purifier’s filters, you should regularly vacuum them and replace them every 6 to 12 months. Cleaning the pre-filter is an essential step in maintaining filter efficiency. Here are some techniques to effectively clean your pre-filter:
- Gently remove the pre-filter from the air purifier.
- Use a soft-bristle brush or a vacuum with a brush attachment to remove the dust and debris.
- If the pre-filter is heavily soiled, you can rinse it under running water. Make sure it is completely dry before reinstalling it.
To further maintain the efficiency of your air purifier’s filters, consider the following tips:
- Keep the surrounding area clean to minimize the buildup of dust and particles.
- Regularly check the filter indicator light and replace the filters as recommended by the manufacturer.
Cleaning Frequency Recommendations
Regularly vacuuming and replacing the filters every 6 to 12 months helps maintain the efficiency of your Veva air purifier.
Cleaning frequency recommendations for your Veva air purifier depend on various factors such as the level of pollution in your environment and the amount of usage.
For optimal performance, it is recommended to clean the pre-filter every 2 to 3 months. This can be done by gently vacuuming or washing the pre-filter with lukewarm water and mild detergent.
Additionally, the carbon filter should be replaced every 6 to 12 months, as it absorbs odors and harmful gases.
Cleaning the outer casing of the air purifier can be done every 2 to 3 months using a soft cloth dampened with water and mild soap.
Regular cleaning not only helps maintain the efficiency of your Veva air purifier but also ensures that it continues to provide clean and fresh air for you and your family.
Clean the Activated Carbon Filter
You can easily clean the activated carbon filter in your Veva air purifier. Regular maintenance of the activated carbon filter is essential for maintaining the optimal performance and extending its lifespan.
Here are some steps to help you clean your activated carbon filter effectively:
- Start by turning off and unplugging the air purifier.
- Remove the front panel or access door to access the filter compartment.
- Carefully slide out the activated carbon filter from its housing.
- Gently vacuum the filter to remove any loose dust and debris.
- If necessary, rinse the filter with lukewarm water to remove stubborn dirt.
- Allow the filter to air dry completely before reinstalling it.
- Once dry, reinsert the activated carbon filter into the filter compartment.
- Secure the front panel or access door and plug in the air purifier.
Wipe Down the Exterior of the Air Purifier
Start by gently wiping down the exterior of your purifier with a damp cloth. This will help remove any dust or dirt that may have accumulated on the surface. It’s important to use a soft cloth to avoid scratching the finish of the purifier.
When choosing a cleaning product, it’s best to use mild, non-abrasive cleaners that are safe for use on electronics. Avoid using harsh chemicals or abrasive cleaners, as they can damage the surface of the purifier.
In order to ensure the longevity of your air purifier, it’s essential to properly maintain and clean it on a regular basis. By following these simple steps and using the right cleaning products, you can keep your purifier in top condition and enjoy clean, fresh air in your home. Remember to always refer to the manufacturer’s instructions for specific cleaning recommendations.
Clean the Fan and Vents
After wiping down the exterior, it’s important to also clean the fan and vents of your air purifier to ensure optimal performance. Neglecting fan maintenance and vent cleaning can lead to reduced airflow and poor air quality.
Here are some techniques to effectively clean the fan and vents:
- Remove the front cover of the air purifier to access the fan and vents.
- Use a soft brush or compressed air to gently remove dust and debris from the fan blades.
- Carefully vacuum the vents to remove any trapped particles.
- For stubborn dirt or grime, dampen a cloth with mild soap and water and wipe down the fan blades and vents.
- Allow the fan and vents to completely dry before reassembling the air purifier.
By regularly cleaning the fan and vents, you can ensure that your air purifier operates at its best and provides clean and fresh air for your space.
Now, let’s move on to cleaning the sensor (if applicable).
Clean the Sensor (If Applicable
If the sensor is applicable to your model, it’s essential to regularly clean it for accurate air quality readings and optimal performance. Cleaning the sensor is a crucial step in maintaining the functionality of your Veva air purifier.
To begin, make sure the unit is powered off and unplugged. Gently remove the sensor cover, being careful not to damage any delicate components. Use a soft, lint-free cloth or a small brush to gently wipe away any dust or debris that may have accumulated on the sensor surface. Take care not to apply too much pressure, as this could damage the sensor.
Once you have cleaned the sensor, replace the cover and plug the unit back in. If you continue to experience sensor issues, consult the user manual or contact Veva customer support for further troubleshooting assistance.
Reassemble the Air Purifier
When reassembling an air purifier, it’s essential to follow proper techniques to ensure its efficient operation.
This discussion will cover the step-by-step process of reassembly, including how to correctly align and secure the components.
Additionally, we’ll address common issues that may arise during reassembly and provide troubleshooting tips to overcome them.
Proper Reassembly Techniques
To properly reassemble the Veva air purifier, make sure to follow these techniques.
First, ensure that you have all the necessary parts and tools ready. Take note of the disassembly process and reverse it step by step. Here are some tips to help you with the reassembly:
- Start by connecting the filter housing to the main unit, ensuring a snug fit.
- Secure the filter in place, making sure it is properly aligned with the housing.
- Attach the front cover, ensuring that all the tabs and hooks are securely fastened.
- Check for any loose or misplaced screws and tighten them if necessary.
- Finally, power on the air purifier and test its functionality.
Troubleshooting disassembly issues:
- If you encounter any difficulties during the reassembly process, refer back to the disassembly instructions for guidance.
- Check for any damaged or broken parts that may hinder the reassembly.
- If you are unsure about a specific step, consult the user manual or contact Veva customer support for assistance.
Troubleshooting Reassembly Issues
After learning the proper reassembly techniques for the Veva air purifier, it’s important to address any troubleshooting reassembly problems that may arise. If you encounter difficulties during reassembly, here are some tips to help you overcome them.
First, double-check that you have followed the disassembly steps in reverse order and that all components are correctly aligned. Sometimes, a simple misalignment can prevent proper reassembly.
If you are struggling with a specific part, consult the user manual for detailed instructions or look for online resources that provide visual guides. These resources can help you identify any mistakes you may have made during reassembly.
Additionally, don’t hesitate to reach out to Veva’s customer support for assistance. They have knowledgeable staff who can guide you through the reassembly process or address any specific issues you may encounter.
Test and Maintain Regular Cleaning Schedule
Maintain a regular cleaning schedule for your Veva air purifier to ensure optimal performance. Regular cleaning not only extends the lifespan of your air purifier but also helps maintain its efficiency in removing air pollutants.
Here are some crucial steps to follow when cleaning your Veva air purifier:
-
Testing the Air Quality: Before cleaning, it’s essential to test the air quality using a separate air quality monitor. This will help you determine the effectiveness of your air purifier and identify any potential issues.
-
Avoiding Common Cleaning Mistakes: To ensure proper cleaning, avoid common mistakes such as using harsh chemicals or submerging the unit in water. Instead, gently wipe the exterior with a soft cloth and use a vacuum cleaner with a brush attachment to remove dust and debris from the filters.
Frequently Asked Questions
How Often Should I Clean My Veva Air Purifier?
I clean my Veva air purifier once every 3 months. To clean it, I remove the filters and wash them with mild soap and water. Then, I wipe down the exterior with a damp cloth.
Can I Use Any Cleaning Solution to Wipe Down the Exterior of the Air Purifier?
I wouldn’t recommend using any cleaning solution to wipe down the exterior of the air purifier. It’s best to follow the manufacturer’s guidelines and use a soft cloth or brush to remove dust and debris.
Is It Necessary to Clean the Fan and Vents of the Air Purifier?
Yes, it is essential to clean the fan and vents of the air purifier regularly. Neglecting this can lead to decreased efficiency and poor air quality. Use a mild cleaning solution and follow the recommended cleaning frequency for optimal performance.
How Do I Clean the Sensor on My Veva Air Purifier?
To clean the sensor on my Veva Air Purifier, I follow these cleaning tips: 1) Turn off the purifier. 2) Gently wipe the sensor with a soft cloth. 3) Avoid using water or cleaning agents. If the sensor still doesn’t work, consult the troubleshooting guide.
What Should I Do if My Veva Air Purifier Is Not Functioning Properly After Cleaning?
If my Veva Air Purifier isn’t working properly after cleaning, I would try some troubleshooting tips. Common issues could include a clogged filter or a malfunctioning sensor. I’ll provide more detailed information on how to resolve these problems.
Conclusion
Well, congratulations! You’ve successfully cleaned your Veva air purifier. Now, you can bask in the joy of knowing that your air is cleaner and fresher than ever before.
Who needs to go outside and enjoy the great outdoors when you can have the same experience right in your own home? With a regular cleaning schedule in place, you can continue to enjoy the benefits of your air purifier for years to come.
So, sit back, relax, and breathe in that purified air – you deserve it!