
I will walk you through the detailed process of taking apart a Honeywell air purifier.
In this article, I’ll share the tools you’ll need and provide detailed instructions on:
- Removing the outer casing
- Accessing the filter compartment
- Detaching the control panel
- Disassembling the fan assembly
- Removing the motor and electrical components
- Separating the purification chamber and base.
Let’s dive into the inner workings of this air purifier and uncover its secrets together.
Key Takeaways
- The tools needed for disassembling a Honeyw Air Purifier include a screwdriver (Phillips head), a plastic or metal spudger tool, needle-nose pliers, a pair of gloves, and a soft cloth dampened with mild soap and water.
- The casing removal techniques involve unscrewing the screws holding the casing together, using a pry tool to carefully separate the casing, cleaning the casing with a soft cloth dampened with mild soap and water, and then aligning the casing with the unit and securing the screws back in place for reassembly.
- Accessing the filter compartment requires locating the latch on the side panel, pushing the latch inwards to release the side panel, sliding the panel off to reveal the filter compartment, and then cleaning the filter by vacuuming or rinsing it under running water before letting it dry and reinstalling it.
- Detaching the control panel involves removing the control panel screws using a screwdriver, carefully detaching the control panel connectors, lifting and removing the control panel from the air purifier, and keeping track of screws and small parts for easier reassembly.
Tools Needed for Disassembly
To disassemble the Honeywell air purifier, you’ll need a few tools. Here’s a step-by-step disassembly process to follow.
First, you’ll need a screwdriver with a Phillips head to remove the screws holding the outer casing together. Once the screws are removed, gently pry open the casing using a plastic or metal spudger tool. Be careful not to damage any internal components.
Next, you’ll need needle-nose pliers to disconnect any electrical connectors. Take note of the position of each connector for reassembly.
To remove the filters, use a pair of gloves and carefully pull them out from their slots.
Removing the Outer Casing
When it comes to removing the outer casing of a device, there are several techniques that can be employed.
One common method is using a screwdriver to unscrew the screws holding the casing together.
Another technique involves using a pry tool to carefully separate the casing from the device.
In terms of tools for disassembly, it is essential to have a variety of screwdrivers with different sizes and types of heads, as well as a pry tool to assist in removing the casing without causing damage.
Casing Removal Techniques
First, you’ll need to remove the screws in order to take off the casing of the HoneyW air purifier. To do this, locate the screws on the back of the unit and use a screwdriver to carefully unscrew them.
Once the screws are removed, gently lift off the casing, being mindful of any wires or connectors that may be attached. Set the casing aside for cleaning.
To clean the casing, use a soft cloth dampened with mild soap and water. Avoid using abrasive cleaners or harsh chemicals as they may damage the casing.
After cleaning, make sure the casing is completely dry before reassembling the air purifier. To reassemble, simply align the casing with the unit and carefully secure the screws back in place.
Tools for Disassembly
Next, you’ll want to gather the necessary tools for taking apart the casing of your HoneyW air purifier. Having the right tools will ensure a smooth disassembly process and prevent any damage to the unit. Here are the essential tools you’ll need:
| Tools | Quantity | Description |
|---|---|---|
| Screwdriver | 1 | Phillips or flathead |
| Pliers | 1 | Needle-nose or regular |
| Tweezers | 1 | Fine-tipped or angled |
| Plastic pry tool | 1 | Non-metallic, for prying |
The screwdriver will be used to remove any screws securing the casing. Pliers will come in handy for gripping and maneuvering small parts. Tweezers will help you handle delicate components. The plastic pry tool is crucial for safely prying open the casing without causing any damage. With these tools at hand, you’re ready to proceed to the next step: accessing the filter compartment.
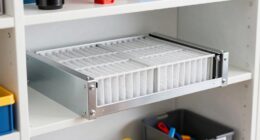
Accessing the Filter Compartment
To access the filter compartment of your Honeyw air purifier, you’ll need to locate the latch on the side panel. The latch is usually located towards the bottom of the purifier, near the power cord.
Once you find the latch, gently push it inwards to release the side panel. Carefully slide the panel off to reveal the filter compartment.
To troubleshoot common issues with the purifier, it is important to first turn off the power and unplug the unit. Then, remove the filter from the compartment and inspect it for any signs of damage or dirt buildup.
If the filter is dirty, you can clean it by gently vacuuming or rinsing it under running water. Make sure to let the filter dry completely before reinstalling it.
Detaching the Control Panel
Now that we have accessed the filter compartment, the next step is to detach the control panel. This is an important step in disassembling the Honeywell air purifier as it allows us to access the internal components for cleaning or maintenance. Follow these steps to detach the control panel:
-
Start by removing the control panel screws using a screwdriver. These screws are usually located at the back or sides of the control panel.
-
Once the screws are removed, carefully detach the control panel connectors. These connectors are small plastic plugs that connect the control panel to the main unit. Gently pull them apart, making sure not to damage the connectors or wires.
-
Once the connectors are detached, you can lift and remove the control panel from the air purifier.
With the control panel detached, we can now move on to disassembling the fan assembly, which will be covered in the next section.
Disassembling the Fan Assembly
Once the control panel is detached, we can proceed with taking apart the fan assembly. Before we get started, it’s important to take some disassembling precautions to ensure a smooth process.
First, make sure the air purifier is unplugged from the power source to prevent any electrical accidents. Additionally, prepare a clean and organized workspace with all the necessary tools at hand.
To disassemble the fan assembly, follow these steps:
- Remove the front grille by gently pulling it towards you.
- Unscrew the screws holding the fan blade in place and carefully lift it off the motor shaft.
- Disconnect the wires connecting the fan motor to the control panel.
- Finally, remove the fan assembly by unscrewing the mounting screws.
Remember to take note of each step and keep track of the screws and small parts. This will make reassembling the fan assembly much easier.
With the fan assembly disassembled, we can now move on to removing the motor and electrical components.
Removing the Motor and Electrical Components
After the fan assembly is disassembled, we can proceed with removing the motor and electrical components. This step is crucial in the process of disassembling the Honeywell air purifier.
Here’s a step-by-step guide on how to do it:
-
Start by disconnecting the power supply. This ensures your safety and prevents any electrical accidents.
-
Next, locate the air intake and carefully disassemble it. This may involve removing screws or releasing clips that hold it in place.
-
Once the air intake is removed, you can access the motor and electrical components. Carefully disconnect any wires or connectors attached to them.
By following these steps, you will be able to remove the motor and electrical components from your Honeywell air purifier.
Now, let’s move on to the next section, which is separating the purification chamber and base.
Separating the Purification Chamber and Base
To separate the purification chamber and base, carefully detach any connecting screws or clips holding them together. Once these fasteners are loosened, gently lift the purification chamber away from the base, ensuring not to damage any delicate components or wiring.
This step is necessary for troubleshooting common issues, such as cleaning or replacing the filter, inspecting the fan or motor, or addressing any blockages that may impede airflow.
When performing this task, it is important to have the appropriate tools for separation, such as a screwdriver or a pair of pliers. These tools will allow you to safely detach the chamber and base without causing any damage.
Remember to consult the user manual for specific instructions and safety precautions before attempting any disassembly.
Frequently Asked Questions
How Often Should I Clean or Replace the Filters in My Honeywell Air Purifier?
I clean or replace my Honeywell air purifier filters every 3-6 months. Regular maintenance ensures optimal performance and removes pollutants effectively. It’s important to follow the manufacturer’s instructions for proper cleaning and replacement procedures.
Can I Disassemble My Honeywell Air Purifier Without Voiding the Warranty?
Yes, you can disassemble your Honeywell air purifier without voiding the warranty. To ensure warranty coverage, follow the recommended disassembly process provided in the user manual.
Are There Any Safety Precautions I Should Take Before Disassembling My Honeywell Air Purifier?
Before disassembling my Honeywell air purifier, I always prioritize safety precautions. This includes unplugging the device, wearing protective gloves, and working in a well-ventilated area. Following proper disassembly steps ensures a smooth process.
Can I Use Any Cleaning Solutions or Detergents to Clean the Outer Casing of My Honeywell Air Purifier?
I can use vinegar or other mild cleaning solutions to clean the outer casing of my Honeywell air purifier. It is important to avoid abrasive cleaners or harsh chemicals that could damage the surface.
Is It Possible to Reassemble My Honeywell Air Purifier if I Encounter Any Difficulties During the Disassembly Process?
If you encounter reassembling difficulties during the disassembly process of the Honeywell air purifier, troubleshooting steps can be taken. Ensure proper alignment, securely fasten all components, and refer to the user manual for specific instructions.
Conclusion
In conclusion, disassembling a Honeywell air purifier may seem daunting, but with the right tools and determination, it’s straightforward. By following the step-by-step guide provided, you can easily access and clean each component of the purifier. This ensures optimal performance and prolongs its lifespan.
So don’t be afraid to dive in and give your air purifier the TLC it deserves. You’ll be amazed at the difference it can make in the air quality of your home.