Connect with us

Air Purifier Guides

How to Reset Dyson Air Purifier Wifi

Published

on

An image showcasing the step-by-step process of resetting a Dyson Air Purifier's WiFi

I understand the irritation that arises when the wifi connection of your Dyson Air Purifier isn’t functioning as it should. However, worry not!

In this article, I’ll guide you through the simple and straightforward process of resetting the wifi on your Dyson Air Purifier. By following these step-by-step instructions, you’ll be able to troubleshoot common issues and get your purifier connected again in no time.

Let’s dive in and get your Dyson Air Purifier back online!

Key Takeaways

  • Press and hold the reset button for 5-10 seconds to reset the wifi connection on the Dyson air purifier.
  • Use a paperclip or small pointed object to press the reset button.
  • Resetting the network connection can help resolve connectivity issues.
  • Improving wifi signal strength by moving the device closer to the wifi router can enhance connectivity.

Understanding the Dyson Air Purifier Wifi Reset Process

To understand the Dyson Air Purifier Wifi reset process, you’ll need to follow a few simple steps.

Advertisement

If you’re experiencing issues with your wifi connectivity, troubleshooting the network settings is usually the first step. Begin by checking if your wifi is working properly with other devices. If not, try resetting your router or contacting your internet service provider for assistance.

Once your wifi is stable, locate the reset button on your Dyson Air Purifier. This button is usually located on the bottom or back of the device. Press and hold the reset button for about 5-10 seconds until the wifi light starts flashing. This indicates that the wifi connection has been reset successfully.

Now, you’re ready to proceed to the next step of the reset process.

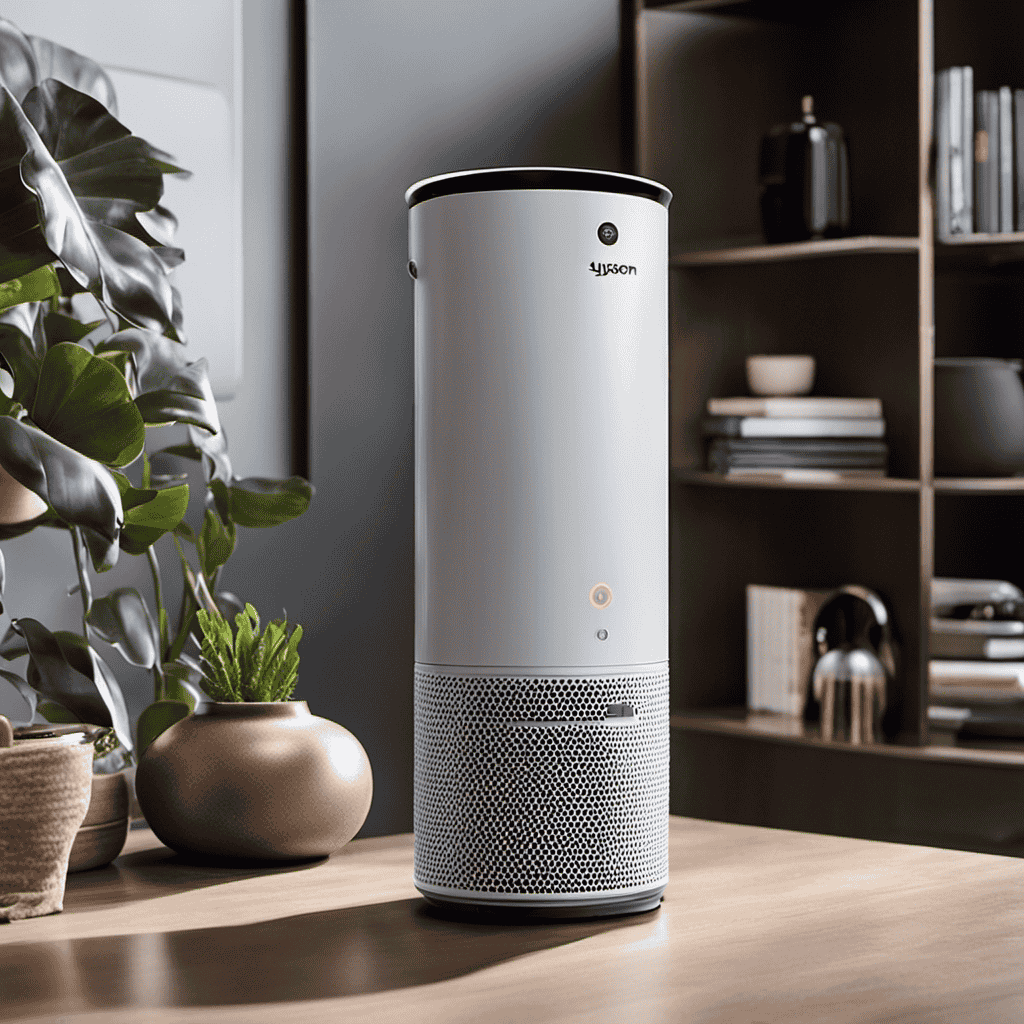
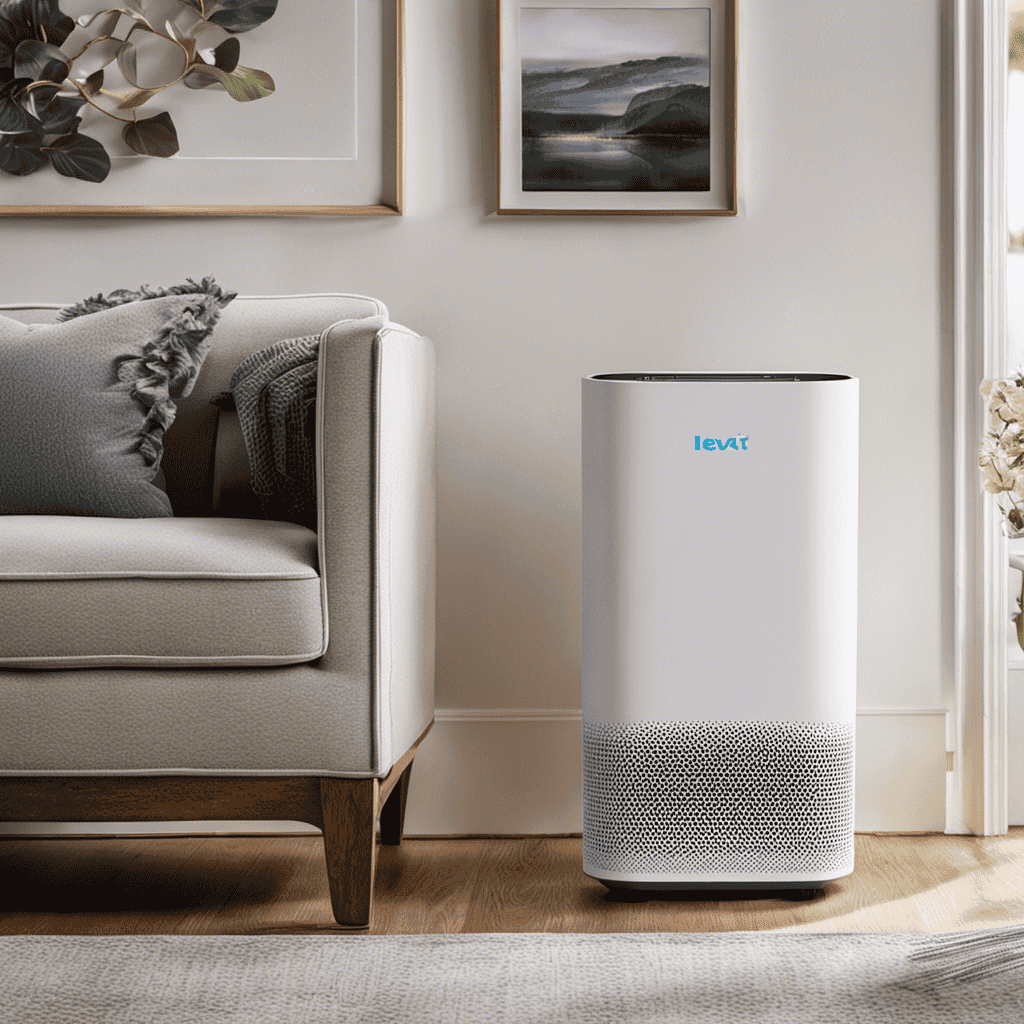
Locating the Reset Button on Your Dyson Air Purifier

When it comes to troubleshooting issues with my Dyson Air Purifier, one of the first things I always check is the location of the reset button. Knowing where it is can save time and frustration during the reset process.

In this discussion, I will explore the reset button location on the Dyson Air Purifier and provide some helpful tips for troubleshooting the reset process.

Advertisement

Reset Button Location

You can easily locate the reset button on your Dyson air purifier by checking the back or bottom of the device. The reset button is a small, recessed button that can be pressed using a paperclip or a small pointed object. This button is used to reset the device to its factory settings, which can be helpful in troubleshooting Wi-Fi connectivity issues or resolving other technical problems.

Here are four things to keep in mind about the reset button functionality:

  1. Factory reset: Pressing the reset button will erase all the settings and configurations you have made on the device, returning it to its original state.

  2. Wi-Fi connectivity: If you are experiencing issues with the Wi-Fi connection on your Dyson air purifier, performing a factory reset can often resolve the problem.

  3. Troubleshooting: If you have exhausted other troubleshooting steps and are still facing issues with your Dyson air purifier, trying a factory reset can be a good next step.

  4. Consult the manual: Before performing a factory reset, it is always a good idea to consult the user manual or contact Dyson support for specific instructions on your model.

Troubleshooting Reset Process

If you are having trouble with the reset process, make sure to follow the instructions in the user manual carefully.

Resetting your Dyson air purifier’s WiFi connection can help troubleshoot connectivity issues with the device and the accompanying app.

To troubleshoot the WiFi connection, first, check if your WiFi network is working properly and if other devices can connect to it.

Advertisement

If there are no issues with your WiFi, try restarting both your air purifier and the device you are using to control it.

If the problem persists, try resetting the WiFi connection on your air purifier by pressing and holding the reset button for 10 seconds.

You can also try uninstalling and reinstalling the Dyson Link app to troubleshoot app connectivity issues.

If the problem still persists, contacting Dyson customer support may be necessary for further assistance.

Step-by-Step Guide to Resetting the Wifi on Your Dyson Air Purifier

Advertisement

To reset the WiFi on your Dyson Air Purifier, simply follow these step-by-step instructions:

  1. First, make sure you have a clear understanding of WiFi signals and how they work. This will help you troubleshoot any network issues that may arise during the reset process.

  2. Locate the WiFi button on your Dyson Air Purifier. It is usually located on the control panel or the side of the device.

  3. Press and hold the WiFi button for about 10 seconds until the WiFi light starts flashing. This indicates that the WiFi on your purifier has been reset.

  4. Finally, reconnect your Dyson Air Purifier to your home WiFi network by following the instructions provided in the user manual or the Dyson Link app.

Troubleshooting Common Issues With Dyson Air Purifier Wifi Reset

I recently encountered some common issues while trying to reset the wifi on my Dyson Air Purifier.

One problem I faced was a lost wifi connection during the reset process, which was quite frustrating.

Additionally, I also encountered error messages popping up on the screen during the reset, making it difficult to complete the process successfully.

Advertisement

Lost Wifi Connection

The Dyson air purifier’s wifi connection was lost. It was frustrating, but I knew there were a few troubleshooting steps I could try to reconnect it to my wifi network:

  1. Check the wifi signal: Ensure that the air purifier is within range of the wifi router and that the signal is strong enough for a stable connection.

  2. Restart the purifier: Turn off the purifier, unplug it from the power source, and wait for a few seconds before plugging it back in and turning it on again.

  3. Reset the wifi settings: Press and hold the wifi button on the purifier for 10 seconds until the wifi light starts flashing. Then, follow the instructions in the Dyson app to reconnect it to your wifi network.

  4. Update the firmware: Make sure that your purifier’s firmware is up to date by checking for any available updates in the Dyson app.

Error Messages During Reset

After attempting the troubleshooting steps, I encountered error messages during the reset process. It was frustrating to see these messages as I was eager to reconnect my Dyson air purifier to the Wi-Fi. However, I didn’t give up and sought out solutions to overcome these errors. I found that the most common error messages during the reset process are "Connection Failed" and "Authentication Error." To troubleshoot these issues, I followed the steps listed in the table below:

Error Message Solution
Connection Failed Check Wi-Fi signal and move closer to router
Authentication Error Re-enter Wi-Fi password and ensure it’s correct

Resetting the Wifi Settings on Your Dyson Air Purifier App

To reset the wifi settings on your Dyson Air Purifier app, follow these steps:

  1. Open the Dyson Air Purifier app on your smartphone or tablet.
  2. Go to the settings menu within the app.
  3. Look for the wifi or network settings option.
  4. Select the option to reset the network settings.

Resetting the wifi settings can be helpful when troubleshooting wifi connection issues or if you want to connect your Dyson Air Purifier to a new network.

By following these simple steps, you can easily reset the wifi settings on your Dyson Air Purifier app and ensure a smooth and uninterrupted connection.

Remember to reconnect your air purifier to your wifi network after resetting the wifi settings.

Advertisement

Resetting the Network Connection on Your Dyson Air Purifier

If you’re experiencing connectivity issues, try resetting the network connection on your Dyson device. Understanding network connectivity is essential when troubleshooting wifi issues.

To reset the network connection on your Dyson air purifier, follow these steps. First, ensure that your device is turned on and connected to power. Then, locate the network settings on your Dyson device. It might be under the settings or network section.

Once you’ve found it, select the option to reset the network connection. This will clear any existing network settings and allow you to set up a new connection. After resetting, you can try connecting to your wifi network again. If the issue persists, you may need to contact Dyson customer support for further assistance.

Tips for a Successful Wifi Reset on Your Dyson Air Purifier

When resetting the network connection on your Dyson device, make sure it is turned on and connected to power.

Here are some tips for troubleshooting wifi connectivity and optimizing wifi signal strength:

Advertisement
  1. Move the Dyson device closer to your wifi router: By reducing the distance between the device and the router, you can improve the signal strength and minimize interference.

  2. Check for any physical obstructions: Walls, furniture, and other objects can weaken the wifi signal. Ensure there are no obstacles blocking the path between the device and the router.

  3. Restart your router: Sometimes, simply rebooting the router can resolve connectivity issues. Turn it off, wait for a few seconds, and then turn it back on.

  4. Update the firmware: Check for any available firmware updates for your Dyson device. Updating the firmware can enhance its performance and stability.

Frequently Asked Questions About Resetting Dyson Air Purifier Wifi

Some common questions about resetting the wifi on your Dyson air purifier include how long the process takes and whether it will erase any saved settings.

When troubleshooting a wifi connection issue, resetting the network settings can often resolve the problem. The process of resetting the wifi on your Dyson air purifier typically takes about 1-2 minutes. During this time, the purifier will disconnect from the current network and reset its network settings.

However, it is important to note that resetting the wifi will not erase any saved settings on the purifier itself. Your device will retain its previous settings, such as fan speed and timer settings. Resetting the wifi simply allows you to connect to a new network or troubleshoot connectivity issues.

Frequently Asked Questions

Can I Reset the Wifi on My Dyson Air Purifier Using the Mobile App?

Yes, you can reset the wifi on your Dyson air purifier without using the mobile app. If you are experiencing issues with wifi connectivity, troubleshooting steps can be followed to reset the wifi connection.

Will Resetting the Wifi on My Dyson Air Purifier Erase Any Personalized Settings or Preferences?

Resetting the wifi on my Dyson Air Purifier will not erase any personalized settings or preferences. To troubleshoot wifi connectivity issues, follow these steps to reconfigure wifi settings on your Dyson Air Purifier.

Advertisement

What Should I Do if I Cannot Locate the Reset Button on My Dyson Air Purifier?

If I can’t find the reset button on my Dyson air purifier, troubleshooting the Wi-Fi connection might help. Resetting Dyson Air Purifier Wifi can be done by following the manufacturer’s instructions or contacting customer support for assistance.

Can I Reset the Wifi on My Dyson Air Purifier Without a Smartphone or Tablet?

I can reset the wifi on my Dyson Air Purifier without a smartphone or tablet. Troubleshooting wifi issues on the purifier is possible through alternative methods provided in the user manual.

How Long Does It Take for the Wifi on My Dyson Air Purifier to Reset After Following the Steps?

Resetting the wifi on my Dyson air purifier doesn’t take long. After following the troubleshooting steps and changing the wifi network, it usually reconnects within a few minutes.

Conclusion

In conclusion, resetting the wifi on your Dyson Air Purifier is a breeze. Just locate the reset button and follow the step-by-step guide. Troubleshoot any issues that may arise.

Remember, patience is a virtue when it comes to technology, so don’t give up easily. With a little perseverance, you’ll have your Dyson Air Purifier connected to the wifi in no time.

Advertisement

So, don’t throw in the towel. Keep calm and reset on!

At Aero Guardians, where every piece of information aims to make the world a breath fresher, Samuela's role as an author has been nothing short of transformative. With a penchant for weaving stories around the science of air purification, Samuela has enriched the platform with content that is both enlightening and captivating.

Continue Reading
Advertisement

Air Purifier Guides

How to Use the O2 Air Purifier

Published

on

By

a serene living room with natural sunlight streaming through the windows

Are you curious about the most efficient way to enhance your indoor air quality using an air purifier? You’re in luck! This article will walk you through the detailed process of effectively using the O2 Air Purifier.

From unboxing and initial setup to understanding the control panel and operating modes, I will provide you with all the information you need to ensure optimal air purification.

Plus, I’ll share some handy tips and tricks for maintaining and replacing filters.

Let’s get started!

Key Takeaways

  • Read the user manual carefully and refer to the troubleshooting section for common issues.
  • Familiarize yourself with the control panel, including the power button, fan speed adjustment, timer, and filter indicator light.
  • Choose the appropriate operating mode (auto, sleep, or manual) based on your preferences and needs.
  • Regularly clean and replace filters to maintain optimal air purification and performance.

Unboxing and Initial Setup

Advertisement

To begin unboxing and setting up your new O2 air purifier, start by removing the device from its packaging and locating the user manual.

The unboxing experience of the O2 air purifier is straightforward and hassle-free. Once you have taken the device out of the box, you will find it securely packaged with protective foam and plastic covers. Gently remove these covers and place them aside.

Inside the packaging, you will also find the user manual, which provides detailed instructions on how to set up and operate the air purifier. It is essential to read the manual carefully to ensure proper installation and usage.

In case you encounter any common issues during the setup process, such as difficulty turning on the device or unusual noises, refer to the troubleshooting section of the manual for guidance.

Understanding the Control Panel

Take a look at the control panel to easily adjust the settings on your O2 air purifier. The control panel features several buttons and indicators that allow you to customize your air purifier’s operation.

Advertisement

At the top of the panel, you will find the power button, which turns the device on and off. Below that, there are buttons for adjusting the fan speed and setting the timer.

The filter indicator light alerts you when it’s time to replace the filter, ensuring peak performance. In addition, the control panel also includes a troubleshooting guide, which provides helpful information and solutions for common issues that may arise.

With these control panel features and the troubleshooting guide, you can easily optimize the performance of your O2 air purifier.

Operating Modes and Settings

When adjusting the operating modes and settings, you’ll find a variety of options available on the control panel of your O2 air purifier.

The O2 air purifier has several customizable features that allow you to tailor its performance to your specific needs. One of the key features is the ability to choose between different operating modes, such as auto mode, sleep mode, and manual mode.

Advertisement

Auto mode automatically adjusts the fan speed based on the air quality, while sleep mode operates at a quieter setting for undisturbed sleep. In manual mode, you can manually adjust the fan speed to your desired level.

Additionally, the O2 air purifier offers energy saving options, such as a timer function that allows you to set specific time intervals for the purifier to operate.

These customizable features and energy saving options make the O2 air purifier a versatile and efficient choice for improving indoor air quality.

Maintenance and Filter Replacement

Ensure that you regularly clean and replace the filters in your O2 air purifier to maintain its optimal performance.

Proper maintenance is crucial for the effectiveness of your air purifier and the quality of the air you breathe.

Advertisement

Cleaning the filters on a regular basis helps remove dust, allergens, and other particles from the air, ensuring that your purifier continues to operate efficiently.

Additionally, replacing the filters when necessary improves the overall air purification process by eliminating any buildup or blockages.

By keeping your filters clean and replacing them as needed, you can enjoy the many benefits of your O2 air purifier, such as improved indoor air quality and decreased symptoms of allergies and respiratory issues.

Now let’s move on to some tips and tricks for optimal air purification.

Tips and Tricks for Optimal Air Purification

Advertisement

To get the most out of your O2 air purifier, try adjusting the fan speed based on the level of air pollution in your home.

The O2 air purifier is designed to remove common air pollutants such as dust, pollen, pet dander, smoke, and mold spores from the air. By adjusting the fan speed, you can ensure that the air in your home is being properly filtered and purified.

When the air pollution levels are high, such as during allergy season or when there is construction nearby, you can increase the fan speed to provide maximum purification. On the other hand, during times of low air pollution, you can lower the fan speed to conserve energy while still maintaining clean air.

Frequently Asked Questions

Can the O2 Air Purifier Eliminate Pet Dander and Allergens From the Air?

Yes, the O2 air purifier effectively eliminates pet dander and allergens from the air. Regular air purifier maintenance ensures optimal performance. Using an air purifier has numerous benefits, including improved air quality and reduced allergy symptoms.

Advertisement

How Often Should I Clean the Exterior of the O2 Air Purifier?

I clean the exterior of the O2 Air Purifier regularly to maintain its appearance and prevent dust build-up. In addition, I make sure to replace the filters as recommended to ensure optimal performance and air quality.

Is the O2 Air Purifier Suitable for Large Rooms or Open Floor Plans?

The O2 Air Purifier is suitable for large rooms and open floor plans. It efficiently cleans the air, removing up to 99% of airborne contaminants. Its powerful filtration system ensures fresh, clean air throughout your space.

Can the O2 Air Purifier Be Operated Remotely Through a Smartphone App?

Yes, the O2 Air Purifier can be operated remotely through a smartphone app. It has remote control capabilities and smartphone connectivity, allowing you to control and monitor the purifier from anywhere.

What Is the Warranty Period for the O2 Air Purifier?

The warranty period for the O2 Air Purifier is two years. It provides peace of mind in keeping my home free from pet dander and allergens, ensuring a cleaner and healthier environment.

Conclusion

In conclusion, using the O2 air purifier has been an absolute game-changer for me.

Advertisement

Its unboxing and initial setup were a breeze, and the control panel is user-friendly, making it easy to navigate the various operating modes and settings.

The maintenance and filter replacement process is simple and hassle-free, ensuring optimal air purification at all times.

Trust me when I say, this purifier has truly transformed my living space into a haven of fresh and clean air.

Don’t miss out on the O2 air purifier experience!

Advertisement

Continue Reading

Air Purifier Guides

How to Use Ozone Air Purifier Safely

Published

on

By

An image of a serene living room, bathed in natural light

Were you aware that indoor air can be up to five times more contaminated than outdoor air? This surprising fact underscores the significance of utilizing ozone air purifiers to establish a healthier home environment.

In this article, I will guide you through the safe and effective use of ozone air purifiers. From understanding how they work to choosing the right one for your needs, I will provide practical advice to ensure you can enjoy clean and fresh air without any risks.

Key Takeaways

  • Ozone air purifiers should be used in well-ventilated areas to minimize ozone concentration.
  • Follow the manufacturer’s instructions for safe usage and to prevent health risks.
  • Regularly monitor ozone levels using an ozone meter to ensure a safe environment.
  • Excessive ozone exposure can cause respiratory issues and throat irritation, so it is important to use ozone air purifiers safely.

Understanding Ozone Air Purifiers

To understand ozone air purifiers, you need to know how they work and the potential risks they can pose.

Ozone air purifiers are devices that use ozone to clean the air in a room. Ozone, a molecule consisting of three oxygen atoms, is a powerful oxidizing agent that can break down pollutants and odors in the air.

Advertisement

One of the benefits of ozone air purifiers is their ability to remove strong odors, smoke, and volatile organic compounds from the air.

However, it is important to be aware of the potential risks associated with ozone air purifiers. High levels of ozone can be harmful to human health, causing respiratory issues and irritating the lungs.

It is crucial to use ozone air purifiers in well-ventilated areas and follow the manufacturer’s instructions to ensure safe usage.

Choosing the Right Ozone Air Purifier

When looking for the right ozone air purifier, you’ll want to consider factors such as room size and maintenance requirements. It’s crucial to find a purifier that can effectively clean the air in your specific space.

Additionally, you should prioritize an air purifier that is easy to maintain, as regular maintenance is essential for optimal performance. To help you make an informed decision, here are some key factors to consider:

Advertisement
  • Size: Choose an ozone air purifier that is suitable for the size of your room, ensuring it can effectively clean the air in that space.

  • Maintenance requirements: Look for a purifier that has simple maintenance needs, such as easy filter replacement or cleaning.

  • Noise level: Consider how quiet or loud the purifier is during operation, ensuring it won’t disrupt your sleep or daily activities.

  • Energy efficiency: Opt for an ozone air purifier that is energy-efficient, helping you save on electricity bills.

  • Price: Set a budget and find a purifier that offers good value for money, balancing cost and performance.

Proper Placement and Ventilation of Ozone Air Purifiers

Properly placing and ventilating your ozone air purifier is essential for ensuring effective air cleaning in your space.

Ozone air purifiers offer several benefits, such as eliminating odors, killing bacteria and viruses, and reducing allergens. However, it’s important to be aware of the potential health risks associated with ozone exposure.

When placing your ozone air purifier, make sure it is positioned in an open area where air can circulate freely. Avoid placing it near living areas or bedrooms to minimize direct exposure.

Advertisement

Additionally, ensure proper ventilation by opening windows or using fans to allow fresh air to enter the room.

Regularly monitor ozone levels and follow manufacturer’s guidelines for usage to maintain a safe and healthy environment.

Operating an Ozone Air Purifier Safely

Operating an ozone air purifier safely requires regular monitoring of ozone levels and following the manufacturer’s guidelines for usage. Ozone air purifiers can be effective in removing odors and harmful pollutants from the air, but they also pose certain dangers and health risks. It is important to understand these risks and take necessary precautions to ensure your safety.

Here are some key points to consider:

  • Excessive ozone exposure can cause respiratory issues, chest pain, and throat irritation.
  • Long-term exposure to high levels of ozone can lead to lung damage and worsen existing respiratory conditions.
  • Children, elderly, and individuals with respiratory issues are more susceptible to ozone-related health problems.
  • Always use an ozone air purifier in a well-ventilated area to minimize ozone concentration.
  • Regularly check the ozone levels using an ozone meter to ensure they are within safe limits.

By being aware of the dangers and risks associated with ozone air purifiers, you can take steps to protect yourself and your loved ones.

Now let’s discuss the important topic of maintenance and cleaning for ozone air purifiers.

Advertisement

Maintenance and Cleaning for Ozone Air Purifiers

Regular maintenance and cleaning are essential for ensuring the optimal performance and longevity of ozone air purifiers. Neglecting maintenance can lead to a decrease in effectiveness and potential health risks.

One important aspect of maintenance is removing ozone residue. Ozone air purifiers generate ozone, which can leave a residue on surfaces over time. To remove this residue, it is advisable to wipe down the surfaces with a damp cloth or use a mild cleaning solution.

Additionally, it is crucial to regularly clean the filters to maintain the purifier’s efficiency. By following these maintenance practices, you can ensure that your ozone air purifier continues to provide clean and healthy air while minimizing potential health risks.

Advertisement

Frequently Asked Questions

Can Ozone Air Purifiers Remove All Types of Indoor Air Pollutants?

Yes, ozone air purifiers can effectively remove many types of indoor air pollutants, including mold spores and volatile organic compounds (VOCs). However, it is important to use them safely and follow the manufacturer’s instructions for optimal results.

Are Ozone Air Purifiers Safe to Use Around Children and Pets?

Ozone air purifiers can pose dangers to children and pets. It is important to consider alternatives such as HEPA filters or activated carbon filters. Safety should always be a top priority.

How Long Does It Take for an Ozone Air Purifier to Effectively Clean the Air in a Room?

In my experience, the effectiveness of an ozone air purifier in cleaning a room’s air depends on various factors. It’s important to consider the size of the room, the level of pollution, and the strength of the purifier.

Are Ozone Air Purifiers Suitable for People With Respiratory Conditions Such as Asthma or Allergies?

Ozone air purifiers have the potential to improve air quality, but they can be harmful to people with respiratory conditions like asthma or allergies. It’s important to consider the potential health risks associated with ozone air purifiers.

Can Ozone Air Purifiers Eliminate Odors From Cooking, Smoking, or Pets?

Yes, ozone air purifiers can eliminate odors from cooking, smoking, and pets. However, it’s important to use them safely and consider their impact on the environment and potential side effects.

Advertisement

Conclusion

In conclusion, using ozone air purifiers can be an effective way to improve indoor air quality. However, it is important to use them safely and responsibly. By understanding how ozone air purifiers work and selecting the right one for your needs, you can ensure maximum benefit without any potential harm.

Proper placement and ventilation, along with regular maintenance and cleaning, are crucial for safe operation. It is interesting to note that according to a study conducted by the Environmental Protection Agency, indoor air can be up to five times more polluted than outdoor air. This highlights the importance of using air purifiers.

Continue Reading

Air Purifier Guides

How to Take Apart a Oreck Airpcb Air Purifier

Published

on

By

An image capturing the step-by-step disassembly process of an Oreck Airpcb Air Purifier

I have always been curious about how to disassemble my Oreck Airpcb Air Purifier to properly clean and maintain it. After doing some research and experimenting, I have finally perfected the process.

In this article, I will share with you the step-by-step instructions on how to disassemble your Oreck Airpcb Air Purifier. With the right tools and a little patience, you’ll be able to access and replace the filters, detach the fan motor, and even disassemble the control panel.

Let’s get started!

Key Takeaways

  • The tools needed for disassembling an Oreck Airpcb Air Purifier include a Phillips screwdriver, flathead screwdriver, and a pair of needle-nose pliers.
  • Safety precautions should be taken, such as unplugging the air purifier before disassembly, handling delicate components with care, and looking for hidden screws or fasteners.
  • The process involves accessing and cleaning the filter compartment, detaching and cleaning the fan motor and blades, and disassembling and reconnecting the control panel.
  • When putting the purifier back together, it is important to ensure proper alignment of connectors and wires, avoiding excessive force or bending wires.

Tools Needed for Disassembly

To take apart your Oreck AirPCB air purifier, you’ll need a few tools. Here are the step-by-step instructions for the disassembly process.

First, gather a Phillips screwdriver, a flathead screwdriver, and a pair of needle-nose pliers.

Begin by unplugging the air purifier from the power source.

Advertisement

Next, locate the screws on the back panel and use the Phillips screwdriver to remove them.

Carefully remove the back panel and set it aside.

Now, locate the screws on the front panel and use the Phillips screwdriver to remove them as well.

Once the screws are removed, gently pull off the front panel, revealing the internal components of the air purifier.

Congratulations, you have successfully taken apart your Oreck AirPCB air purifier!

Advertisement

Removing the Front Cover

When it comes to removing the front cover of the Oreck AirPCB air purifier, there are a few key techniques to keep in mind.

First, you’ll need to gather the necessary tools for disassembly, which include a screwdriver and a pair of pliers.

Once you have the tools ready, you may encounter some potential challenges during the removal process, such as stuck screws or difficult-to-reach areas.

But with the right approach and a bit of patience, you’ll be able to successfully remove the cover and proceed with disassembling the air purifier.

Cover Removal Techniques

First, you’ll need to locate the screws on the back of the air purifier for cover removal. To successfully remove the cover, you’ll require a Phillips screwdriver and a flathead screwdriver.

Advertisement

Start by unplugging the air purifier from the power source and placing it on a flat surface. Take the Phillips screwdriver and carefully unscrew the screws on the back of the unit. Once all the screws are removed, gently lift off the back cover. It is important to be cautious during this step to avoid damaging any internal components.

After removing the back cover, you can proceed to remove the front cover as well. Refer to the manufacturer’s instructions or user manual for specific guidance on front cover removal.

Necessary Tools for Disassembly

You’ll need a Phillips screwdriver and a flathead screwdriver to remove the cover of the air purifier. These tools are essential for the disassembly process.

Begin by locating the screws that secure the cover in place. Use the Phillips screwdriver to remove these screws one by one. Make sure to keep them in a safe place, as you will need them for reassembly later.

Once all the screws are removed, carefully lift the cover off the air purifier. Be cautious not to force it or damage any internal components.

Advertisement

Now that the cover is off, you can proceed with the disassembly process. Remember to follow the manufacturer’s instructions and take note of the order in which the parts are removed for easy reassembly later on.

Potential Challenges During Removal

Removing the cover of the air purifier can be tricky if the screws are tightly secured. However, with the right approach and tools, it is possible to safely take apart the Oreck AirPCB air purifier.

Here are some potential hazards to be aware of and disassembly tips to help you navigate through the process:

  • Sharp edges: Exercise caution while handling the cover to avoid any accidental cuts.
  • Electrical components: Always unplug the air purifier before starting the disassembly to prevent any electric shock.
  • Fragile parts: Some components may be delicate and prone to breakage, so handle them with care.
  • Hidden screws: Look for hidden screws or fasteners that may be holding the cover in place, as they can be easily overlooked.

To safely disassemble the air purifier, follow these steps:

  1. Turn off and unplug the air purifier.
  2. Remove the screws securing the cover using the appropriate screwdriver.
  3. Gently lift the cover, being mindful of any attached wires or cables.
  4. If necessary, disconnect any electrical connections before completely removing the cover.

Accessing the Filter Compartment

When it comes to maintaining and troubleshooting an air purifier, two key aspects to consider are filter removal techniques and common issues that may arise.

In this discussion, I will provide step-by-step instructions on how to properly remove the filters from your air purifier, highlighting the different techniques depending on the specific model.

Additionally, I will address common problems that users may encounter, such as filter clogging or improper installation, and provide troubleshooting tips to resolve these issues effectively.

Advertisement

Filter Removal Techniques

To access the filters, start by turning off the air purifier and unplugging it from the power source. Once you have done that, follow these steps to remove the filters from your Oreck AirPCB air purifier:

  • Locate the filter compartment on the air purifier.
  • Open the compartment by removing the latch or unlocking mechanism.
  • Carefully lift the filters out of the compartment, taking note of their position and orientation.
  • Inspect the filters for any visible dirt or debris.
  • If the filters are washable, gently rinse them under running water to remove any built-up dust or particles.
  • Allow the filters to air dry completely before reinserting them into the air purifier.

If the filters are not washable, use a vacuum cleaner with a brush attachment to gently remove any loose dirt or debris.

  • Be sure to clean the surrounding area and the filter compartment before reinserting the filters.

Regularly cleaning and maintaining your filters will ensure optimal performance and prolong the lifespan of your air purifier.

Troubleshooting Common Issues

If your air purifier is not functioning properly, try troubleshooting common issues before seeking professional help. Here are some steps you can take to identify and resolve the problem.

First, check if the power cord is securely plugged into a working outlet. If not, plug it in properly and ensure that the outlet is functional.

Next, inspect the air filters for any signs of dirt or blockage. If they are dirty, clean or replace them according to the manufacturer’s instructions.

Additionally, make sure the air purifier is placed in a well-ventilated area and not obstructed by any objects.

Advertisement

Lastly, check the control settings to ensure they are properly configured.

Removing and Replacing the Filters

First, make sure you unplug the Oreck air purifier before removing or replacing the filters.

To remove the filters, follow these steps:

  • Locate the filter compartment on the back or side of the purifier.
  • Open the compartment by pressing the latch or sliding the cover.
  • Carefully pull out the old filters from their slots.
  • Dispose of the old filters properly.

To replace the filters, do the following:

  • Take the new filters out of their packaging.
  • Insert the filters into their respective slots, making sure they fit securely.
  • Close the filter compartment by pressing the latch or sliding the cover back into place.
  • Plug the air purifier back in and turn it on to ensure the filters are working properly.

If you encounter any issues during this process, such as difficulty detaching the fan motor, refer to the troubleshooting section of the user manual or contact Oreck customer support for assistance.

Detaching the Fan Motor

When detaching the fan motor, be sure to unplug the Oreck air purifier first. To properly maintain the fan and ensure optimal performance, regular cleaning of the fan blades is necessary. Here is a step-by-step guide on how to clean the fan blades of your Oreck air purifier:

  1. Begin by turning off the air purifier and unplugging it from the power source.

  2. Locate the fan motor, which is usually situated at the back of the unit.

  3. Using a screwdriver, remove the screws that hold the fan motor in place.

  4. Gently detach the fan motor from the unit, being careful not to damage any wires or connections.

  5. Once detached, inspect the fan blades for any dust or debris buildup.

  6. Use a soft brush or cloth to carefully clean the fan blades, ensuring all dirt is removed.

  7. Once cleaned, reattach the fan motor back into the unit, securing it with the screws.

Cleaning the fan blades of your Oreck air purifier is an essential part of its maintenance.

Advertisement

Now, let’s move on to the next step: disassembling the control panel.

Disassembling the Control Panel

Now that the fan motor has been detached, let’s move on to the next step in the disassembling process: disassembling the control panel.

This is an important step in control panel troubleshooting, as it allows you to access and inspect the internal components of the panel.

Here’s a step-by-step guide on how to disassemble the control panel:

  1. Start by removing any screws or fasteners holding the control panel in place. Use a screwdriver to carefully unscrew them and set them aside.

  2. Once the screws are removed, gently pry off the control panel cover using a plastic pry tool. Be careful not to damage any of the delicate components inside.

  3. With the cover off, you will now have access to the control panel circuit board. Take note of any loose connections or signs of damage.

  4. To further inspect the control panel, you may need to disconnect any wires or connectors attached to it. Use a pair of needle-nose pliers to carefully remove them.

Now that the control panel is disassembled, we can move on to the next section, which covers putting the purifier back together.

Advertisement

Putting the Purifier Back Together

Once you have finished inspecting the control panel circuit board, it’s time to carefully reconnect any wires or connectors that were previously removed. To ensure a successful reassembly, follow these tips and avoid damaging any components.

  1. Begin by identifying the corresponding connectors on the circuit board and the wires. Take note of any markings or labels to ensure proper alignment.

  2. Gently insert the connectors into their respective slots on the circuit board. Make sure they are fully seated and secure.

  3. Avoid applying excessive force or bending any wires during the reconnection process. This can lead to wire breakage or damage to the connectors.

  4. Double-check that all connections are properly aligned and securely fastened before proceeding.

  5. Once all the wires and connectors have been reconnected, carefully reassemble the control panel onto the main unit, following the reverse order of disassembly.

Frequently Asked Questions

How Often Should I Clean the Oreck Airpcb Air Purifier?

I clean my Oreck Airpcb air purifier every 3 months to keep it running efficiently. To clean, I follow the step-by-step process outlined in the manual. Regular maintenance is essential for optimal performance and longevity of the device.

Can I Use Any Type of Cleaning Solution to Clean the Filters?

Yes, you can use cleaning solutions to clean the filters of the Oreck Airpcb Air Purifier. However, it is recommended to use mild, non-abrasive solutions and follow the manufacturer’s maintenance tips for best results and to prolong the lifespan of the filters.

Is It Safe to Disassemble the Oreck Airpcb Air Purifier Without Any Prior Experience?

Disassembling complex appliances without prior experience can pose potential risks. It is important to follow the manufacturer’s instructions and safety guidelines when taking apart any electrical device to ensure personal safety and prevent damage.

Can I Replace the Filters With Third-Party Ones?

Yes, you can replace the filters with third-party ones. However, it’s important to consider the reliability and cost-effectiveness of these filters. Follow these steps to safely replace the filters in your Oreck Airpcb Air Purifier.

Advertisement

Are There Any Special Precautions I Should Take While Detaching the Fan Motor?

When detaching the fan motor, it is important to follow certain precautions and safety measures. These include disconnecting the power source, wearing protective gloves, and carefully removing the motor without causing any damage.

Can Taking Apart an Air Purifier Help Fix a Broken Fan Issue?

Yes, taking apart an air purifier can be a helpful step in repairing a broken air purifier fan. By carefully disassembling the unit and inspecting the fan components, you may be able to identify and address the issue causing the fan to malfunction. However, it’s important to proceed with caution and consider seeking professional assistance if needed.

Conclusion

And there you have it, my friends!

With the right tools and a little bit of patience, I was able to successfully take apart my Oreck AirPCB Air Purifier.

It was like peeling back the layers of an onion, revealing the inner workings of this powerful machine.

Advertisement

I felt like a detective, unraveling the mysteries of air purification.

Now that I know how to disassemble and reassemble this purifier, I feel like I have a deeper connection with it, like we’re in this together, fighting against pollutants and allergens.

So go ahead, give it a try and discover the hidden gems within your own purifier!

Continue Reading

Trending