Air Purifier Guides
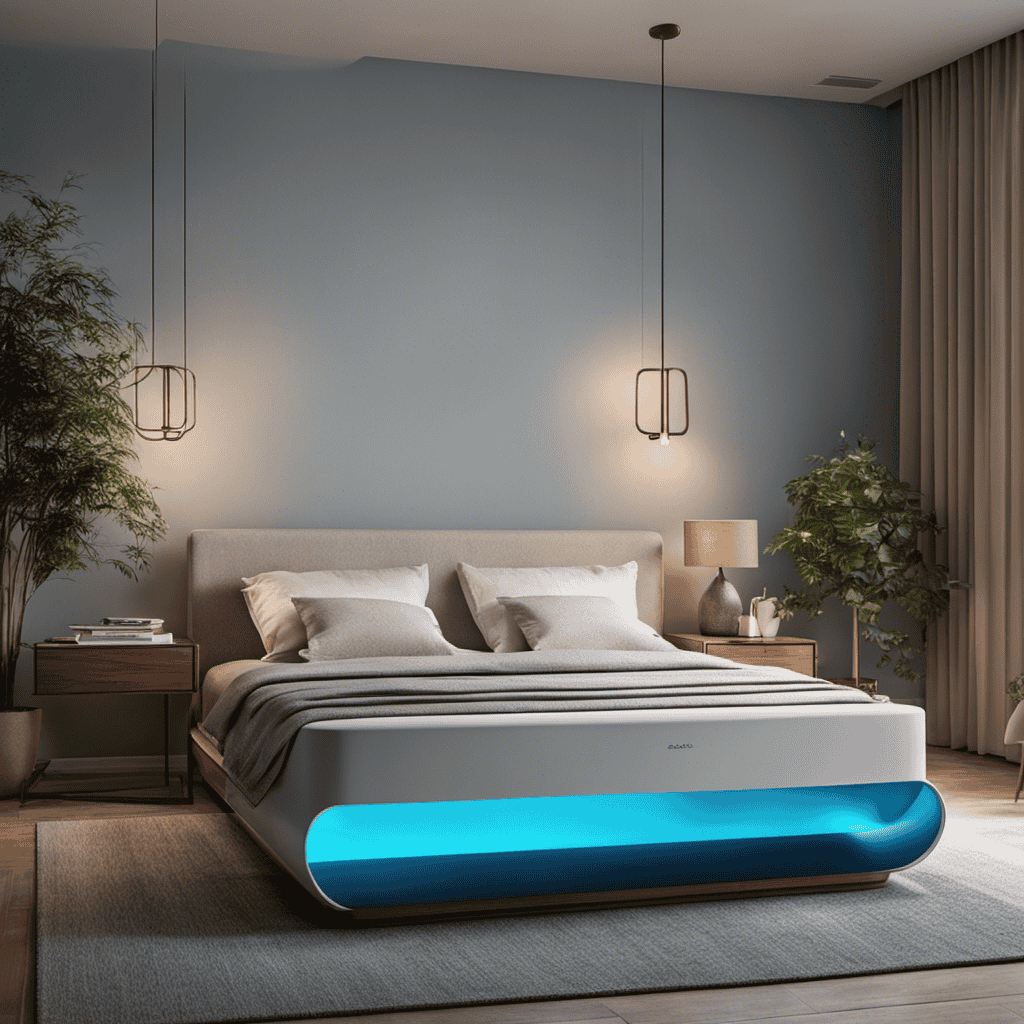
How to Make a Air Purifier Last Longer
As someone who owns an air purifier, I bet you’ve felt the annoyance of having a device that doesn’t quite meet your longevity expectations. However, don’t worry! In this article, I’m going to provide you with some proven tips on how to extend the life of your air purifier.
By implementing regular cleaning and maintenance, ensuring proper placement and ventilation, and promptly replacing filters and parts, you can avoid premature breakdowns and keep your air purifier running smoothly for years to come.
Plus, I’ll reveal additional enhancements to supercharge your purifier’s performance.
Let’s dive in!
Key Takeaways
- Clean filters regularly and follow recommended replacement frequency
- Ensure proper placement and ventilation to optimize airflow and prevent damage
- Stay on top of filter and parts replacements to maintain effectiveness and minimize costs
- Avoid overuse and overworking by setting appropriate fan speed and running only when necessary
Regular Cleaning and Maintenance
Regular cleaning and maintenance is essential to make an air purifier last longer. By regularly cleaning the filters and removing any accumulated dust and debris, you can ensure that your air purifier is functioning at its optimal level. Cleaning the filters not only improves the quality of air purification but also helps in increasing the lifespan of the device.
Additionally, it is important to check the manufacturer’s instructions regarding the recommended frequency of filter replacement. This will help in extending the durability of the air purifier as it prevents overuse of worn-out filters.
Furthermore, keeping the exterior of the air purifier clean and free from dust and dirt will also contribute to its longevity. Regular maintenance and cleaning are key factors in ensuring the effectiveness and longevity of your air purifier.
Proper Placement and Ventilation
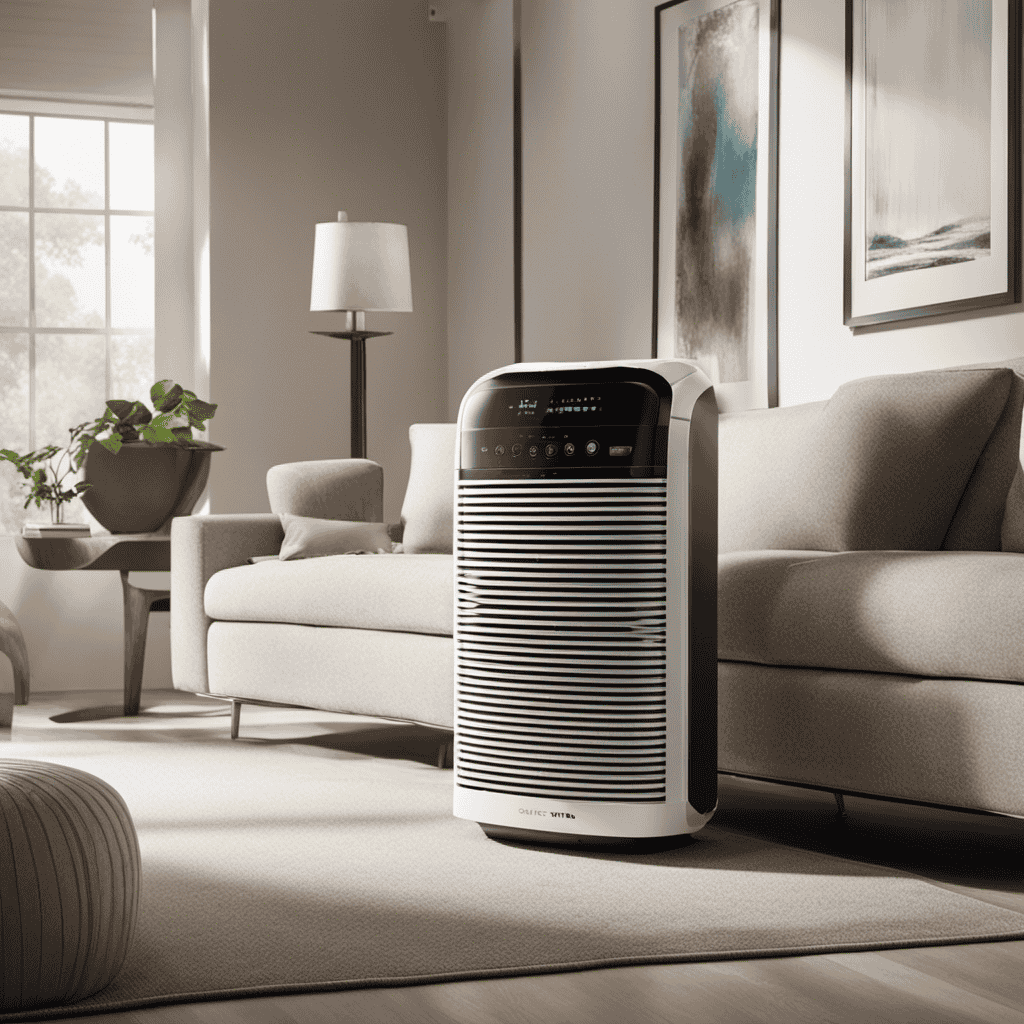
To ensure your air purifier is effective, it’s important to place it in a well-ventilated area. Proper placement and ventilation play a crucial role in maximizing the performance and longevity of your air purifier. Here are some key factors to consider:
-
Optimal airflow: Ensure that there is enough space around the air purifier for proper air circulation. Avoid placing it against walls or furniture that can obstruct airflow.
-
Noise reduction: Place the air purifier away from areas with high foot traffic or where you spend most of your time. This will help minimize the noise generated by the purifier, providing a more peaceful environment.
-
Avoid direct sunlight: Direct exposure to sunlight can cause damage to the filters and other components of the air purifier. Place it away from windows or areas with intense sunlight.
-
Keep away from moisture: Moisture can lead to mold growth and damage the internal components of the air purifier. Avoid placing it in areas prone to high humidity, such as bathrooms or near water sources.
Taking these factors into consideration will ensure that your air purifier operates optimally and lasts longer.
Replacement of Filters and Parts
When replacing filters and parts, it’s important to follow the manufacturer’s instructions to ensure proper maintenance of your air purifier. Regularly changing the filters is crucial for maintaining the effectiveness of your air purifier and prolonging its lifespan. Different types of filters have different lifespans, so it’s essential to know when each filter needs to be replaced. Neglecting to replace filters on time can lead to reduced air quality and increased maintenance costs in the long run.
Additionally, some air purifiers may require the replacement of other parts, such as pre-filters or UV bulbs. By staying on top of filter and part replacements, you can optimize the performance of your air purifier and minimize maintenance costs.
Now, let’s discuss the importance of avoiding overuse and overworking your air purifier.
Avoiding Overuse and Overworking
Using your air purifier excessively or putting too much strain on it can reduce its effectiveness and potentially lead to mechanical issues. To avoid overuse and overworking, here are some tips to maximize efficiency and optimize performance:
- Set the air purifier to the appropriate fan speed for the room size and air quality.
- Clean or replace the filters regularly according to the manufacturer’s instructions.
- Avoid running the air purifier 24/7 if it is not necessary.
- Place the air purifier in a central location to ensure proper air circulation.
Utilizing Additional Air Purifier Enhancements
By utilizing additional enhancements, such as ionizers or UV-C lights, you can further improve the air quality in your home. Air purifier accessories like these are designed to target specific pollutants and enhance the efficiency of your air purifier.
Ionizers release negative ions into the air, which attach to positively charged particles like dust or pollen, causing them to clump together and fall to the ground, effectively removing them from the air you breathe.
UV-C lights, on the other hand, use ultraviolet radiation to kill bacteria, viruses, and mold spores, making the air cleaner and safer. These accessories can be added to your existing air purifier to enhance its performance.
Additionally, there are home remedies for air purification, such as using essential oils or natural plants like aloe vera or snake plants, which can help remove toxins from the air.
Frequently Asked Questions
Can I Use Any Type of Cleaning Solution for Regular Cleaning and Maintenance of My Air Purifier?
I can use various cleaning solutions for regular maintenance of my air purifier. It’s important to choose the right cleaning solution and follow proper cleaning techniques to ensure effective and safe cleaning.
How Can I Determine the Best Placement for My Air Purifier in My Home?
I determine the best placement for my air purifier by considering factors like room size, airflow, and proximity to pollution sources. Researching the best air purifier brands and following air purifier maintenance tips helps me ensure optimal performance.
Is It Necessary to Replace All Filters and Parts at the Same Time?
It is not necessary to replace all filters and parts at the same time. Following a regular replacement schedule and proper maintenance tips can help prolong the lifespan of your air purifier.
Can Leaving the Air Purifier on for Too Long Lead to Any Negative Effects?
Leaving an air purifier on for extended periods can have negative effects, such as increased energy consumption and wear on the device. Turning it off periodically can help conserve energy and prolong its lifespan.
Are There Any Additional Accessories or Features That Can Enhance the Performance of My Air Purifier?
There are various air purifier add-ons available that can enhance performance. One such feature is a timer, which allows you to set specific operating hours, optimizing energy usage and prolonging the lifespan of the purifier.
What Maintenance Steps Can I Take to Extend the Lifespan of my Air Purifier?
To extend the air purifier filter lifespan, regular cleaning and maintenance are crucial. Vacuum or wipe the filter regularly to remove dust and debris. Follow the manufacturer’s guidelines for filter replacement and keep the unit in a clean environment to maximize its effectiveness and longevity.
Conclusion
In conclusion, maintaining the longevity of your air purifier requires regular cleaning and maintenance, proper placement and ventilation, timely replacement of filters and parts, avoiding overuse and overworking, and utilizing additional air purifier enhancements.
By following these steps, you can ensure that your air purifier continues to function effectively and efficiently, providing you with clean and fresh air for years to come.
So take the necessary steps to extend the lifespan of your air purifier and enjoy the benefits of a healthier living environment.
At Aero Guardians, where every piece of information aims to make the world a breath fresher, Samuela’s role as an author has been nothing short of transformative. With a penchant for weaving stories around the science of air purification, Samuela has enriched the platform with content that is both enlightening and captivating.
Air Purifier Guides
How to Cleam the Filter on a Kenmore Air Purifier 83395
Upon arriving at my house, I am welcomed by the fresh, purified air from my Kenmore Air Purifier 83395.
But over time, even the best purifiers need a little TLC to keep them running smoothly. That’s why I’ve put together this comprehensive guide on how to clean the filter on your Kenmore Air Purifier 83395.
By following these step-by-step instructions, you’ll ensure that your air purifier continues to effectively remove allergens and pollutants from your home, providing you with the freshest, healthiest air possible.
Let’s get started!
Key Takeaways
- Regular cleaning of filters ensures optimal performance and prolongs the unit’s lifespan.
- Clean filters improve air quality by removing pollutants, allergens, and odors.
- Recommended to replace the filter every 6 to 12 months.
- Remove the filter and rinse it under running water, use a soft brush or vacuum attachment to remove visible debris.
Understanding the Importance of Filter Maintenance
Understanding the importance of filter maintenance is crucial for keeping your Kenmore air purifier 83395 working effectively. Regular cleaning of the filters is essential to ensure optimal performance and to prolong the lifespan of the unit. Clean filters provide numerous benefits, such as improved air quality by removing pollutants, allergens, and odors from the air.
Additionally, clean filters help to maintain the airflow, allowing the purifier to efficiently capture and trap airborne particles. By regularly cleaning the filters, you can ensure that your Kenmore air purifier 83395 continues to operate at its best, providing you with clean and fresh air.
Now that we understand the importance of filter maintenance, let’s move on to identifying the filter in your Kenmore air purifier 83395.
Identifying the Filter in Your Kenmore Air Purifier 83395
When it comes to maintaining the performance and efficiency of your Kenmore Air Purifier 83395, there are two key factors to consider: the filter replacement frequency and the cleaning method for the filter.
The filter replacement frequency will depend on the air quality in your environment and the usage of the purifier. It is recommended to replace the filter every 6 to 12 months to ensure optimal filtration.
As for the cleaning method, it is advised to gently vacuum the filter regularly to remove any accumulated dust and debris. For a deeper clean, you can rinse the filter with water and mild soap. Make sure to let it dry completely before reinstalling.
These maintenance practices will help keep your Kenmore Air Purifier 83395 working effectively and efficiently.
Filter Replacement Frequency
The filter on a Kenmore air purifier 83395 should be replaced regularly to maintain optimal performance. Regular filter maintenance is essential for keeping the air in your home clean and free from pollutants. Here are the benefits of regular filter maintenance:
-
Improved Air Quality: Regularly replacing the filter ensures that it can effectively remove dust, pollen, pet dander, and other allergens from the air, improving the overall air quality in your home.
-
Extended Lifespan of the Air Purifier: A clean filter allows the air purifier to operate efficiently, reducing strain on the motor and other components. This can prolong the lifespan of the device.
-
Cost-Effective: Regularly replacing the filter can prevent the need for costly repairs or replacements in the future.
It is recommended to replace the filter on the Kenmore air purifier 83395 every 6 to 12 months, depending on the usage and air quality in your home. Remember to check the filter regularly to ensure it is clean and functioning properly.
Cleaning Method for Filter
To clean your filter, simply remove it from the air purifier and gently rinse it under running water. Cleaning the filter is an essential step to maintaining the efficiency and effectiveness of your Kenmore air purifier 83395.
By regularly cleaning the filter, you can ensure that it continues to capture and remove airborne particles, allergens, and odors from your indoor environment. To maximize the lifespan of your filter, it is important to follow some cleaning tips and filter maintenance hacks.
For example, you can use a soft brush or vacuum attachment to remove any visible debris before rinsing the filter. Additionally, avoid using harsh chemicals or cleaners that could damage the filter material.
Once the filter is clean, it is time to gather the necessary tools for cleaning the rest of the air purifier.
Gathering the Necessary Tools for Cleaning
When it comes to cleaning, having the right tools is essential. In order to achieve the best results, proper tool selection is crucial.
In this discussion, we will explore the essential cleaning tools and the importance of choosing the right tools for the job.
Essential Cleaning Tools
First, gather all the essential cleaning tools you’ll need to clean the filter on your Kenmore air purifier 83395. It’s important to properly maintain your air purifier to ensure it continues to operate effectively and efficiently.
Cleaning the filter is a crucial part of this maintenance routine. Here are the essential cleaning tools you’ll need:
- Soft brush or vacuum cleaner with a brush attachment: This will help you remove dust and debris from the filter without damaging it.
- Mild detergent or cleaning solution: Use a gentle cleaner to remove any stubborn stains or buildup on the filter.
- Clean, dry cloth: After cleaning the filter, use a cloth to dry it thoroughly before reinstalling it in the air purifier.
Proper Tool Selection
Once you’ve gathered all the essential cleaning tools, make sure to choose the right ones for the task at hand.
When it comes to cleaning the filter on a Kenmore air purifier 83395, selecting the proper tools is crucial for an effective cleaning process.
The first tool you’ll need is a soft-bristle brush or a vacuum cleaner with a brush attachment. This will help remove any loose debris or dust from the filter.
Additionally, you’ll also need a mild detergent and warm water to clean the filter thoroughly. Avoid using harsh chemicals or abrasive cleaners as they can damage the filter.
Step-by-Step Guide to Removing the Filter
To begin removing the filter on a Kenmore air purifier 83395, you’ll need to locate the filter compartment. The filter compartment is typically located on the back or side of the purifier. Once you’ve found it, follow these steps:
- Turn off the air purifier and unplug it from the power source.
- Open the filter compartment by pressing the release buttons or sliding the cover off.
- Gently pull out the old filter and dispose of it properly.
Now that you’ve successfully removed the filter, it’s important to address common filter problems and troubleshooting tips. Some common issues include a dirty or clogged filter, which can decrease the purifier’s effectiveness. To troubleshoot this, try cleaning the filter or replacing it with a new one. Additionally, check for any damage to the filter, such as tears or holes, as this can also affect its performance.
In the next section, we will explore the proper cleaning techniques for the filter, ensuring its longevity and optimal functionality.
Proper Cleaning Techniques for the Filter
Now that we’ve successfully removed the filter from the Kenmore air purifier 83395, let’s discuss the proper cleaning techniques to maintain its efficiency.
Cleaning the filter regularly is essential to ensure optimal performance and prolong its lifespan. To start, carefully vacuum the filter using a soft brush attachment to remove any loose dust and debris. Be sure to cover the entire surface of the filter, focusing on the more heavily soiled areas.
Next, gently rinse the filter under cool running water to remove any remaining dirt. Avoid using hot water or harsh cleaning agents, as they may damage the filter’s delicate structure.
Finally, allow the filter to air dry completely before reinserting it into the air purifier.
Following these proper cleaning techniques will help maintain the filter’s efficiency and keep your indoor air clean and fresh.
Drying and Reinstalling the Filter Correctly
After thoroughly rinsing the filter, make sure it is completely dry before reinserting it into the air purifier. Proper drying techniques are essential to maintain the filter’s performance and prolong its lifespan.
Here are some common mistakes to avoid when drying the filter:
-
Do not use excessive heat: Exposing the filter to high temperatures can damage the fibers and reduce its effectiveness. Instead, allow it to air dry naturally.
-
Avoid direct sunlight: While sunlight can help with drying, prolonged exposure can cause discoloration and deterioration of the filter material.
-
Patience is key: Rushing the drying process by using a fan or hairdryer may lead to incomplete drying and the growth of mold or bacteria.
Recommended Maintenance Schedule for Filter Cleaning
Regularly cleaning and maintaining your air purifier’s filter is crucial for ensuring optimal performance and prolonging its lifespan. Following a recommended maintenance schedule will help you keep your Kenmore air purifier 83395 running smoothly.
The frequency of filter cleaning depends on factors such as the air quality in your home and the usage of the purifier. As a general guideline, it is recommended to clean the filter every three months. However, if you live in an area with high pollution levels or if you have pets, you may need to clean it more frequently.
It is important to consult the user manual for specific instructions on how to clean the filter and to make sure you follow the recommended cleaning schedule to maintain the effectiveness of your air purifier.
Frequently Asked Questions
How Often Should I Clean the Pre-Filter on My Kenmore Air Purifier 83395?
I clean the pre-filter on my Kenmore air purifier 83395 every month to maintain optimal performance. It’s important to follow the manufacturer’s instructions on how to properly clean the filter to ensure it functions effectively.
Can I Use a Vacuum Cleaner to Clean the Filter?
Yes, you can use a vacuum cleaner to clean the filter on a Kenmore Air Purifier 83395. However, there are alternative filter cleaning methods such as rinsing with water or using compressed air.
What Should I Do if My Filter Is Damaged or Torn?
If my filter is damaged or torn, I should explore repair options or alternative solutions. It is important to address this issue promptly to ensure the proper functioning of my Kenmore Air Purifier 83395.
Is It Necessary to Replace the Filter After a Certain Period of Time?
Yes, it is necessary to replace the filter on a Kenmore Air Purifier after a certain period of time. However, there are alternative cleaning methods available to extend the filter’s lifespan.
Can I Use Soap or Detergent to Clean the Filter?
I can clean the filter on my Kenmore Air Purifier 83395, but I shouldn’t use soap or detergent. There are alternative cleaning methods that are recommended for maintaining the filter’s efficiency.
Conclusion
In conclusion, taking care of your Kenmore Air Purifier 83395 filter is like giving it a breath of fresh air. By regularly cleaning and maintaining the filter, you ensure that it continues to function at its best, removing harmful particles from your environment.
Just like a well-oiled machine, a clean filter keeps your air purifier running smoothly and efficiently. So don’t neglect this crucial step in filter maintenance, and enjoy the clean and crisp air that your Kenmore purifier provides.
Happy cleaning!
In the dynamic world of air purifiers and clean air advocacy, Aire stands out as a beacon of knowledge and passion. As the Editor in Chief of Aero Guardians, Aire has been instrumental in shaping the platform’s voice and direction, ensuring that every piece of content resonates with clarity, authority, and authenticity.
Air Purifier Guides
How to Check Remote for Air Purifier Homedics
Remote controls can sometimes be overwhelming, especially when trying to check them for air purifiers. Don’t worry! Sit back and relax as I take you on a journey to easily check the remote for your Homedics air purifier. If you continue reading, you’ll discover simple steps to make the process a breeze.
We’ll cover everything from understanding the functions to troubleshooting common issues. So grab your remote, sit back, and let’s get started on ensuring your air purifier works like a charm.
Key Takeaways
- Familiarize yourself with the buttons and their corresponding features
- Troubleshoot common remote control issues for uninterrupted control of your air purifier
- Sync the remote control with the air purifier for seamless operation
- Properly replace the batteries in the remote control for continued functionality
Understanding the Remote Control Functions
To understand the remote control functions, you should familiarize yourself with the buttons and their corresponding features. The remote control for the Homedics air purifier is designed to provide a convenient way to operate and control the device.
It allows you to easily program the remote control settings to suit your preferences. With the remote control, you can effortlessly adjust the fan speed, set timers, and toggle between different modes such as sleep mode or turbo mode. Additionally, the remote control enables you to access advanced air purifier features, such as activating the ionizer or adjusting the air quality sensor sensitivity.
By mastering the remote control functions, you can fully optimize the performance of your air purifier.
Now, let’s move on to troubleshooting common remote control issues.
Troubleshooting Common Remote Control Issues
If your remote control for the Homedics air purifier is not working properly, there are common troubleshooting steps you can try.
First, ensure that the remote control is compatible with your specific air purifier model. Refer to the user manual or contact customer support for compatibility information.
If the remote control is compatible, check for any signal interference that may be affecting its functionality. Signal interference can be caused by nearby electronic devices or obstacles obstructing the signal path. Try moving closer to the air purifier or removing any potential sources of interference.
Additionally, check the batteries in the remote control and replace them if necessary.
By following these troubleshooting steps, you can resolve common issues with your Homedics air purifier remote control and enjoy uninterrupted control of your air purifier.
To further enhance the functionality of your remote control, you can also sync it with the air purifier.
Syncing the Remote Control With the Air Purifier
Syncing the remote control with the air purifier is a simple process that allows for seamless control of the device. To troubleshoot any connectivity issues, ensure that the remote control is within range of the air purifier and there are no obstacles blocking the signal.
If you are pairing the remote control with multiple air purifiers, make sure that each purifier is set to a different channel or frequency to avoid interference. Begin the syncing process by turning on the air purifier and pressing the sync button on the remote control. The purifier’s indicator light should start flashing, indicating that it is ready to be paired.
Press and hold the sync button on the remote control until the indicator light on the air purifier stops flashing, confirming successful syncing. With the remote control now synced, you can conveniently control your air purifier’s settings.
Now, let’s move on to the next step of maintaining your air purifier: replacing the batteries in the remote control.
Replacing the Batteries in the Remote Control
Now that you have successfully synced the remote control, it’s time to replace the batteries. Here is a step-by-step guide to help you troubleshoot battery issues and find compatible replacement batteries for your air purifier remote control:
-
Check the battery compartment: Locate the battery compartment on the back of the remote control. Open it by sliding the cover or using a small screwdriver to remove the panel.
-
Remove old batteries: Take out the old batteries from the compartment. Make sure to dispose of them properly according to local regulations.
-
Find compatible replacement batteries: Look for the battery type and voltage specifications on the back of the remote control or in the user manual. Purchase batteries that match these specifications.
-
Install new batteries: Insert the new batteries into the battery compartment, ensuring they are correctly aligned with the positive (+) and negative (-) terminals. Close the compartment securely.
Cleaning and Maintaining the Remote Control
To keep your remote control in good working condition, regularly clean and maintain it by wiping it with a soft, dry cloth.
Cleaning your remote control is important to prevent dirt and grime buildup, which can affect its functionality. When cleaning, ensure that the remote control is turned off and the batteries are removed.
Start by gently wiping the surface of the remote control with the cloth to remove any visible dirt or dust. For hard-to-reach areas, use a cotton swab dipped in rubbing alcohol to carefully clean them.
Avoid using water or harsh cleaning agents as they can damage the remote control. Remember to clean the buttons and the battery compartment as well.
Following these cleaning techniques and best practices will help prolong the lifespan of your remote control and ensure optimal performance.
Conclusion
In conclusion, the remote control for the Homedics air purifier is an essential tool in maintaining clean and fresh air in your home.
By understanding its functions and troubleshooting common issues, you can ensure that it works effectively. Remember to sync the remote control with the air purifier and replace its batteries regularly to avoid any disruptions.
Additionally, cleaning and maintaining the remote control is crucial for its longevity.
Did you know that using an air purifier can reduce indoor air pollution by up to 99.97%? This statistic highlights the significant impact an air purifier can have on the quality of air we breathe.
At Aero Guardians, where every piece of information aims to make the world a breath fresher, Samuela’s role as an author has been nothing short of transformative. With a penchant for weaving stories around the science of air purification, Samuela has enriched the platform with content that is both enlightening and captivating.
Air Purifier Guides
How to Check Filter on Honeywell Air Purifier
Were you aware that the effectiveness of your Honeywell air purifier can be greatly diminished by a dirty or clogged filter?
In order to ensure optimal performance and clean air, it is crucial to regularly check and maintain the filter.
In this article, I will guide you step-by-step on how to access, inspect, and clean or replace the filter.
By following these simple techniques, you can enjoy the benefits of a well-maintained air purifier and breathe easier in your home.
Key Takeaways
- Regularly inspecting and cleaning the filter is important for effective removal of pollutants and allergens.
- A clean filter improves overall air quality in the home and increases energy efficiency.
- Regular maintenance helps identify damage or wear and tear on the filter, preventing potential issues and extending the lifespan of the air purifier.
- The proper technique for removing and inspecting the filter includes turning off the purifier, handling the filter with clean hands, and checking for damage, clogging, discoloration, or tears.
Types of Honeywell Air Purifiers
There are two main types of Honeywell air purifiers that you should know about.
The first type is the Honeywell True HEPA Allergen Remover. This model is designed to capture up to 99.97% of airborne particles as small as 0.3 microns. It features a True HEPA filter that is highly effective in removing allergens such as dust, pollen, pet dander, and mold spores.
The second type is the Honeywell HPA300 True HEPA Allergen Remover. This model has a larger coverage area and is suitable for larger rooms or open spaces. It also features a True HEPA filter and has additional features such as a Turbo Clean setting for faster cleaning.
When comparing the price of these models, the Honeywell HPA300 tends to be slightly more expensive. However, customer reviews and ratings for both models are generally positive, with users praising the effectiveness of the filters and the noticeable improvement in air quality.
Importance of Checking the Filter Regularly
Make sure you regularly inspect the filter on your Honeywell air purifier to maintain optimal performance. The recommended inspection frequency for the filter is every three months, or more frequently if you have pets or live in a dusty environment. Regular maintenance of the filter is crucial for several reasons. Firstly, a clean filter ensures that the air purifier can effectively remove pollutants and allergens from the air, improving the overall air quality in your home. Secondly, a dirty filter can restrict airflow and strain the air purifier’s motor, leading to reduced efficiency and increased energy consumption. Lastly, regular inspection allows you to identify any damage or wear and tear on the filter, enabling timely replacement to avoid any potential issues. By following these maintenance recommendations, you can enjoy the maximum benefits of your Honeywell air purifier.
Benefits of Regular Maintenance |
---|
Improved air quality |
Increased energy efficiency |
Prevention of potential issues |
Extended lifespan of the air purifier |
Tools Needed for Checking the Filter
When it comes to maintaining the filter in your air purifier, there are several essential steps that should be followed to ensure its optimal performance.
These steps include regular cleaning or replacement of the filter, checking for any signs of damage or clogging, and proper reinstallation.
The recommended inspection frequency for the filter depends on factors such as the air quality in your environment and the manufacturer’s guidelines.
Essential Filter Maintenance Steps
To ensure proper maintenance of your Honeywell air purifier, it’s important to regularly clean and replace the filters. Filter replacement is a crucial step in ensuring that your air purifier continues to function effectively. When it comes to troubleshooting tips, if you notice that your air purifier is not working as efficiently as before, it could be a sign that the filters need to be replaced.
Another common issue is a clogged filter, which can lead to reduced airflow and decreased performance. Regularly cleaning the filters can help prevent this problem. By following these filter maintenance steps, you can ensure that your Honeywell air purifier is working optimally and providing you with clean, fresh air.
Now let’s move on to the recommended inspection frequency for your filters.
Recommended Inspection Frequency
It’s important to regularly inspect your filters to ensure they are still functioning effectively. Regular filter checks are crucial for maintaining the performance and longevity of your Honeywell air purifier. Here are the key benefits of conducting filter inspections on a recommended schedule:
-
Improved Air Quality:
Regular filter checks help to remove pollutants, allergens, and particles from the air, ensuring cleaner and healthier indoor air quality. By identifying and replacing clogged or dirty filters promptly, you can maintain optimal filtration efficiency. -
Prolonged Filter Lifespan:
Regular inspections allow you to identify signs of wear and tear on the filters, enabling you to replace them before they become completely ineffective. By avoiding excessive filter usage, you can save money on frequent filter replacements.
By following a recommended inspection schedule, you can enjoy cleaner air and prolong the lifespan of your filters.
Now let’s move on to the next section, where I’ll guide you through the step-by-step process of accessing the filter.
Step-by-Step Guide on Accessing the Filter
First, make sure you’ve turned off the Honeywell air purifier before accessing the filter. To access the filter, you will need a few tools: a screwdriver, a clean cloth, and a vacuum cleaner with a brush attachment. Follow these steps for a smooth filter inspection process:
-
Locate the filter compartment: Refer to the user manual to find the filter compartment’s location on your specific model.
-
Remove the front cover: Use the screwdriver to carefully unscrew and remove the front cover of the air purifier.
-
Take out the filter: Once the cover is off, gently pull out the filter from its slot.
-
Inspect the filter: Check for any signs of damage or excessive dirt buildup. If the filter is damaged, it may need to be replaced.
-
Clean or replace the filter: If the filter is dirty, use the vacuum cleaner with the brush attachment to remove dust and debris. If it is beyond cleaning, replace it with a new one.
Troubleshooting common filter issues:
Issue | Solution |
---|---|
Filter not fitting properly | Ensure the filter is inserted correctly and aligned with the slot. |
Strange odor | Clean the filter thoroughly or replace it if the odor persists. |
Reduced airflow | Check for obstructions and clean the filter to improve airflow. |
Identifying Signs of a Dirty or Clogged Filter
One way to identify if your filter is dirty or clogged is by noticing a decrease in airflow. When the filter becomes clogged with dust, pet dander, and other particles, it restricts the airflow from the air purifier, causing reduced air circulation in the room. This can lead to poor air quality and ineffective purification.
To ensure optimal performance of your Honeywell air purifier, it is important to check the filter regularly. Here are some signs to look out for that indicate a clogged filter:
- Reduced airflow: If you feel that the air coming out of the air purifier is weaker than usual, it could be a sign of a clogged filter.
- Increased noise level: A clogged filter can make the air purifier work harder, resulting in louder operation.
- Dust accumulation on the filter: If you notice a visible layer of dust on the filter, it indicates that it is not effectively trapping particles anymore.
Checking the filter frequency and being aware of these signs will help maintain the efficiency of your Honeywell air purifier and ensure clean and fresh air in your living space.
Proper Technique for Removing and Inspecting the Filter
To properly inspect and remove your filter, start by turning off the purifier and locating the filter compartment. Once you have located the compartment, open it carefully and remove the filter. Make sure to handle the filter with clean hands to avoid transferring any dirt or contaminants onto it. Now, it’s time to inspect the filter for any signs of damage or clogging. Look for discoloration, buildup of dust or debris, or any noticeable tears or holes. If you notice any of these issues, it may be time to replace the filter. When it comes to recommended filter brands, some popular options include Honeywell, Blueair, and Coway. Troubleshooting common filter issues can be easily done by referring to the user manual or contacting customer support for assistance.
Filter Brand | Features | Price |
---|---|---|
Honeywell | HEPA Filter, Activated Carbon Filter | $30 |
Blueair | True HEPA Filter, Smokestop Carbon Filter | $50 |
Coway | True HEPA Filter, Vital Ion Technology | $40 |
Tips for Cleaning or Replacing the Filter
Regularly cleaning or replacing your filter is essential for maintaining the performance and air quality of your purifier. Here are some tips for cleaning or replacing your filter:
-
Cleaning Methods:
-
Vacuuming: Use a brush attachment to gently remove dust and debris from the filter.
-
Washing: Check the manufacturer’s instructions to see if your filter is washable. If it is, rinse it under lukewarm water and let it air dry completely before reinstalling.
-
Filter Replacement:
-
Check the filter: Inspect your filter regularly for signs of wear and tear, such as discoloration or holes. If it is damaged, it’s time to replace it.
-
Follow the manufacturer’s guidelines: Different purifiers have different filter replacement schedules. Make sure to follow the recommended timeframe for optimal performance.
By properly cleaning or replacing your filter, you can ensure that your purifier continues to provide clean and fresh air.
Now, let’s dive into the frequency of filter maintenance for optimal performance.
Frequency of Filter Maintenance for Optimal Performance
When it comes to maintaining optimal performance of your air purifier, it is crucial to pay attention to the frequency of filter cleaning. Regular maintenance ensures that your filters are functioning at their best, removing pollutants and allergens effectively.
Signs of a clogged filter include reduced airflow, increased noise, and a decrease in air quality. By regularly cleaning or replacing your filters, you can prolong the lifespan of your air purifier, improve indoor air quality, and ensure that it continues to operate efficiently.
Filter Cleaning Frequency
The filter on the Honeywell air purifier should be cleaned every few months to ensure optimal performance. Cleaning the filter regularly helps to remove dust, allergens, and other particles from the air, improving the overall air quality in your home. Neglecting to clean the filter can result in reduced air purification efficiency and may even lead to system malfunctions.
To ensure the longevity of your air purifier and maintain its effectiveness, follow these guidelines:
- Check the filter replacement schedule provided by Honeywell to determine the recommended lifespan of your specific filter.
- Clean the pre-filter regularly by gently vacuuming or washing it with mild soap and water.
- Replace the main filter as recommended by Honeywell to ensure maximum filtration efficiency.
Signs of Clogged Filter
If you notice reduced airflow or a musty smell in your home, it might be a sign that your filter is clogged and needs cleaning or replacing. One of the most common signs of a clogged filter is reduced airflow. When the filter becomes clogged with dust, dirt, and other debris, it restricts the airflow, causing your air purifier to work harder and less effectively.
Another common sign is a musty smell in your home. When the filter is clogged, it can’t effectively remove odors from the air, resulting in a musty smell lingering in your space.
If you experience these signs, it is recommended to clean or replace your air purifier filter to maintain optimal performance and indoor air quality.
Benefits of Regular Maintenance?
To ensure optimal performance and clean air in your home, it’s important to regularly maintain your air purifier by cleaning or replacing the filter. Neglecting this crucial step can lead to a decline in air quality and reduce the effectiveness of your purifier. Here are the benefits of regular maintenance:
-
Improved Air Quality:
Regularly cleaning or replacing the filter ensures that your air purifier can effectively capture and remove airborne pollutants such as dust, pollen, pet dander, and mold spores. Clean filters help to reduce allergens and irritants in the air, providing relief to those with allergies or respiratory conditions. -
Longer Lifespan of the Purifier:
Regular maintenance helps to extend the lifespan of your air purifier by preventing the accumulation of debris and dust on the internal components. Clean filters also prevent the motor from overworking, reducing the risk of overheating and potential damage.
Benefits of Regularly Checking and Maintaining the Filter
Regularly checking and maintaining the filter has several benefits for your Honeywell air purifier. It not only ensures that your air purifier is working at its optimal level, but it also has numerous health benefits.
Clean air is essential for our well-being, and a clean filter plays a crucial role in achieving this. When the filter is clean, it effectively removes pollutants, allergens, and odors from the air, improving the overall air quality in your home or office. This can help reduce respiratory issues, allergies, and asthma symptoms.
Additionally, clean filters promote better sleep, increased productivity, and a healthier environment. By regularly checking and maintaining the filter, you are actively contributing to a healthier and cleaner living space for yourself and your loved ones.
Frequently Asked Questions
Can I Use Any Type of Filter for My Honeywell Air Purifier?
Yes, you need to use a compatible filter for your Honeywell air purifier. Using the right filter ensures optimal performance and efficiency. It traps airborne particles and allergens, improving indoor air quality.
How Often Should I Replace the Filter in My Honeywell Air Purifier?
I should clean the filter in my Honeywell air purifier every 3 to 6 months. Signs that indicate the filter needs to be replaced include reduced airflow and a noticeable decrease in air purification efficiency.
Is It Necessary to Turn off the Air Purifier Before Checking the Filter?
No, it is not necessary to turn off the air purifier before checking the filter. However, you should clean or replace the filter in your Honeywell air purifier regularly. Signs that indicate the filter needs to be replaced include reduced airflow and a noticeable decrease in air quality.
Can I Clean the Filter Instead of Replacing It?
Yes, you can clean the filter instead of replacing it. This process involves removing the filter, gently cleaning it with a vacuum or water, and allowing it to fully dry. However, it’s important to note that replacing the filter has several benefits, such as improved air quality and better performance.
What Are the Consequences of Not Regularly Checking and Maintaining the Filter in My Honeywell Air Purifier?
Neglecting filter maintenance can be compared to driving a car without changing the oil. The consequences of not regularly checking and maintaining the filter in my Honeywell air purifier include reduced efficiency and poor air quality. Regular filter inspection is crucial for optimal performance.
Conclusion
As I conclude this comprehensive guide on checking the filter of a Honeywell air purifier, I am reminded of the importance of maintaining cleanliness and purity in our lives.
Just as the filter captures and eliminates harmful particles from the air we breathe, we must also strive to filter out negativity and impurities from our thoughts and actions.
Regularly checking and maintaining the filter ensures optimal performance, just as regularly evaluating and improving ourselves leads to a healthier, happier existence.
Let this simple act serve as a symbol of our commitment to a cleaner and more harmonious world.
At Aero Guardians, where every piece of information aims to make the world a breath fresher, Samuela’s role as an author has been nothing short of transformative. With a penchant for weaving stories around the science of air purification, Samuela has enriched the platform with content that is both enlightening and captivating.
-
Air Purifier Guides8 months ago
How to Reset Filter on Miko Air Purifier
-
FAQs - Advanced Queries5 months ago
What Do the Numbers on My Air Purifier Mean
-
Air Purifier Guides5 months ago
How to Make a Homemade Ozone Generator (Air Purifier
-
Types of Air Purifiers8 months ago
What Is an Air Purifier
-
Vetted7 months ago
Aera Mini Review: Smart Home Fragrance Diffuser With Hypoallergenic Scent Technology (2023)
-
Maintenance and Tips10 months ago
How to Reset Filter Light on Winix Plasmawave Air Purifier
-
Air Purifier Guides10 months ago
How to Dispose of Air Purifier Filter Levoit
-
FAQs - Advanced Queries2 weeks ago
When to Use Ionizer on Coway Air Purifier