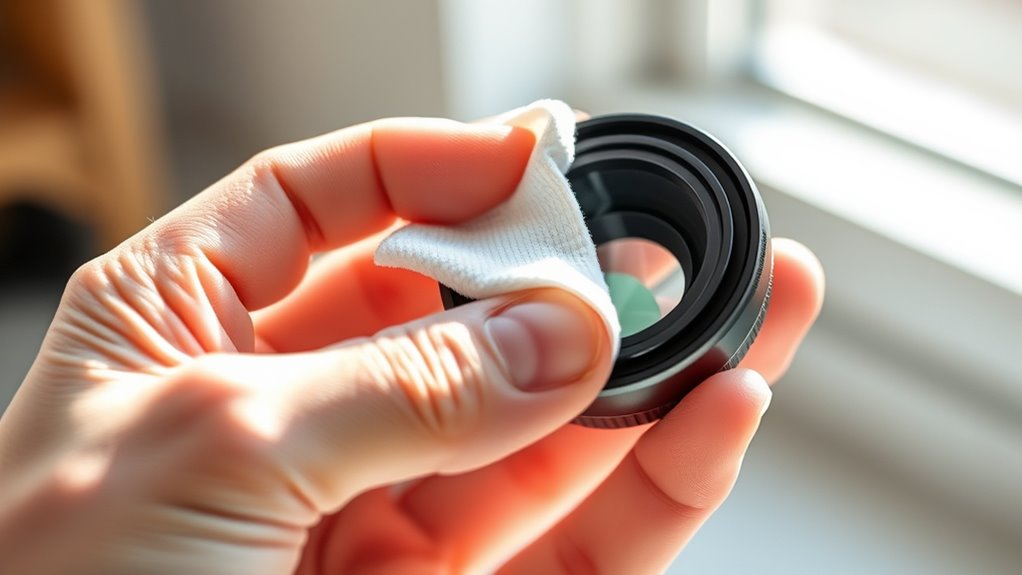

To clean your sensor lens in 60 seconds without tools, start by turning off your camera and removing the lens. Hold the camera facing downward to let dust fall away. Gently use a blower bulb to remove loose dust—avoid compressed air cans. If spots remain, use a sensor cleaning swab lightly moistened with a cleaning solution, and glide it across the sensor in one smooth motion. Keep your camera dust-free and in top shape by following these simple steps. Find out more tips to perfect your cleaning routine.
Key Takeaways
- Turn off your camera and remove the lens to access the sensor safely.
- Hold the camera with the sensor facing downward to prevent dust settling.
- Use a blower bulb to gently blow off loose dust without touching the sensor.
- If needed, lightly moisten a sensor swab with cleaning solution and gently swipe in one direction.
- Reassemble the camera, turn it on, and take a test shot to ensure the sensor is clean.

A clean sensor lens is essential for sharp, clear photos, and luckily, you can refresh it in just 60 seconds. Sensor maintenance might seem intimidating, but with the right approach, it becomes a quick and straightforward task. Developing good camera hygiene is key to preventing dust and debris from settling on your sensor, which can cause unwanted spots in your images. The best part? No tools are needed—just your camera and a steady hand.
Start by turning off your camera and removing the lens. Hold your camera with the sensor facing downward to minimize the chance of dust settling during the cleaning process. Gently tap or shake the camera to dislodge any loose particles from the sensor area. Many photographers suggest using a blower bulb—no tools required—to remove dust particles from the sensor surface. Carefully direct a blast of air at the sensor, but avoid touching the sensor surface directly or using compressed air cans, as they can spray moisture or force debris into the camera.
Once you’ve blown away loose dust, inspect the sensor carefully to see if any spots remain. If stubborn dust persists, you can employ a sensor cleaning technique called “sensor swabbing,” which involves gently wiping the sensor with a special sensor cleaning swab. These are designed to be safe and effective, and they’re inexpensive. Be sure to use a swab that matches your sensor size and to follow the instructions precisely. Lightly moisten the swab with a few drops of sensor cleaning solution, then gently glide it across the sensor in one smooth motion. Avoid pressing hard or going back and forth, which could damage the delicate surface.
Throughout the process, prioritize camera hygiene by keeping the camera body closed when not in use and avoiding touching the sensor with your fingers or any unclean objects. When you finish, reassemble your camera, turn it on, and take a test shot on a plain, well-lit surface to check for any remaining dust or spots. If you see marks, repeat the cleaning process carefully. Regular sensor cleaning helps maintain color accuracy and overall image quality, especially in challenging lighting conditions.
Maintaining a regular cleaning routine keeps your sensor free of dust and debris, ensuring pristine image quality. The key is to stay consistent with sensor maintenance and be gentle during cleaning. With just a few simple steps, you can keep your camera sensor spotless, prolong its lifespan, and enjoy sharp photos without the need for complicated tools or professional help. In just 60 seconds, you can refresh your camera’s sensor and restore its best performance—no fuss, no tools, just good camera hygiene.

K&F CONCEPT 24mm Full Frame Sensor Cleaning Swab*6 + 20ml Sensor Cleaner, DSLR SLR Digital Camera CMOS and CCD Sensor Cleaning Swab Kits for Nikon Sony Canon Camera Clean
【6 Pieces of 24mm Sensor Cleaning Swabs】 Tailored according to the size of the Full frame frame sensor;Smudge-and…
As an affiliate, we earn on qualifying purchases.
As an affiliate, we earn on qualifying purchases.
Frequently Asked Questions
Can I Use Household Cleaning Products on My Sensor Lens?
You shouldn’t use household cleaning products on your sensor lens. They’re not designed for delicate camera equipment and can cause damage or residue buildup. For proper sensor cleaning, stick to specialized tools and cleaning solutions made for cameras. Using household products risks harming your sensor, leading to costly repairs or reduced image quality. Always prioritize safe, recommended methods for sensor cleaning to keep your camera functioning perfectly.
Is It Safe to Clean My Sensor Lens Without Professional Tools?
You can safely perform sensor lens cleaning without professional tools if you’re careful and use proper techniques. For DIY camera maintenance, avoid harsh chemicals and opt for a blower or a sensor cleaning pen designed specifically for cameras. Gently remove dust and smudges, making certain you don’t scratch the sensor. While it’s possible to clean your sensor lens at home, always follow manufacturer guidelines to prevent damage and guarantee ideal camera performance.
How Often Should I Clean My Camera Sensor?
You should clean your camera sensor when you notice sensor dust or lens smudges affecting your photos. Generally, every few months is a good rule of thumb, but it depends on your shooting environment. If you switch lenses often or shoot in dusty conditions, more frequent cleanings are necessary. Don’t wait until it’s a real headache—staying ahead keeps your images crisp and clear. Better safe than sorry!
Will Cleaning Damage My Camera Sensor?
You might worry that cleaning your camera sensor risks damage, but if you follow proper techniques, the chances of sensor damage are minimal. Using gentle methods and avoiding harsh tools helps prevent cleaning risks. If you’re cautious and use the right approach, you can safely clean your sensor without causing damage. Regular maintenance keeps your camera performing well without risking sensor damage from improper cleaning.
What Signs Indicate My Sensor Lens Needs Cleaning?
If you notice sensor dust or lens smudges showing up on your photos, it’s a sign your sensor lens requires cleaning. Look for spots or streaks that don’t go away after cleaning your lens. You might also see inconsistent exposure or blurry areas in your images. Regularly inspecting your camera and paying attention to these signs helps guarantee your sensor stays clean, so your photos remain clear and sharp.

AAWipes Sensor Cleaning Swabs for Full Frame Sensor of DDR24 DSLR or SLR (20 Pack of 24mm Sensor Cleaning Swabs) (HCS-24)
SUPERFINE MICROFIBER: the microfiber swabs of Product No. HCS-24 are prepared by laser-cut in Cleanroom 100 level workshop….
As an affiliate, we earn on qualifying purchases.
As an affiliate, we earn on qualifying purchases.
Conclusion
Now that you’ve mastered this quick trick, your camera’s sensor is like a fresh canvas, ready to capture stunning images without a smudge in sight. Think of it as giving your lens a breath of crisp mountain air—clear, pure, and revitalized. With just a minute, you’ve turned a potential blurry mess into crystal-clear perfection. Keep this simple ritual in your toolkit, and watch your photos stay sharp and vibrant, like a sunrise that never fades.

Soft Tip Silicone Super Air Blower Blaster Pump Dust Cleaner Include Micro Fiber Cleaning Cloth, Bulb Blower for Digital SLR Lens Sensor LCD Screens Musical Instruments Keyboards Telescope Filters
【Multipurpose】:Our dust-free air blower is perfect for cleaning LCD,sensor,digital camera lens, binocular lens, and telescope lens, filters, musical…
As an affiliate, we earn on qualifying purchases.
As an affiliate, we earn on qualifying purchases.

Eclipse Optic Cleaner for Sensors and Lenses – Digital Sensor Cleaner Solution – Camera Cleaning Fluid for Lenses, Sensors, Cameras, Binoculars, and Other Optical Products – Dropper Tip (15ml) – 0.5oz
SAFE ON ALL CRITICAL OPTICS – Eclipse optic cleaning fluid is one of the highest purity cleaners available….
As an affiliate, we earn on qualifying purchases.
As an affiliate, we earn on qualifying purchases.