To upgrade your gasket and stop air leaks, start by carefully removing the old gasket and cleaning the surfaces thoroughly. Choose the right gasket material, such as silicone or rubber, and apply a thin layer of air sealant if recommended. Align it properly and tighten bolts evenly. Proper installation prevents leaks, improves sealing, and boosts your engine’s CADR efficiency. Keep in mind, following detailed steps can guarantee long-lasting results and maximum performance—learn more to perfect your upgrade.
Key Takeaways
- Select high-quality gasket materials like silicone or rubber tailored for your engine to ensure effective sealing.
- Carefully remove old gaskets and thoroughly clean mating surfaces to prevent leaks and ensure proper adhesion.
- Apply a thin, even layer of compatible air sealant to fill microscopic gaps and enhance airtightness.
- Install gaskets precisely aligned with bolt holes, tightening in a crisscross pattern to distribute pressure evenly.
- Allow sealants to cure fully, then check for proper sealing to prevent air leaks and improve CADR performance.
Upgrading your gasket yourself can improve engine performance and prevent costly leaks, but it requires careful preparation and the right tools. When tackling this project, understanding the importance of selecting the correct gasket materials and using appropriate air sealants is essential. The gasket acts as a barrier, sealing joints between engine components to prevent air leaks that can diminish airflow efficiency and lower your CADR (Clean Air Delivery Rate). Choosing high-quality gasket materials designed for your specific engine type ensures durability and a tight seal, especially under high temperatures and pressures. Materials such as silicone, rubber, or composite gaskets can offer different benefits; silicone, for example, provides excellent flexibility and temperature resistance, making it a popular choice for many applications.
Before beginning, you need to gather the proper tools and supplies. A clean workspace, gasket scraper, torque wrench, and possibly a gasket cutter are necessary. Additionally, selecting the right air sealants can markedly enhance your gasket’s sealing capability. Air sealants are formulated to fill microscopic gaps and irregularities, ensuring an airtight seal that prevents leaks. When applying sealants, use sparingly to avoid excess that could squeeze into engine parts or cause blockages. Follow the manufacturer’s instructions carefully to achieve ideal results. Proper preparation and the use of compatible gasket materials can also help prevent future leaks and ensure long-term sealing integrity.
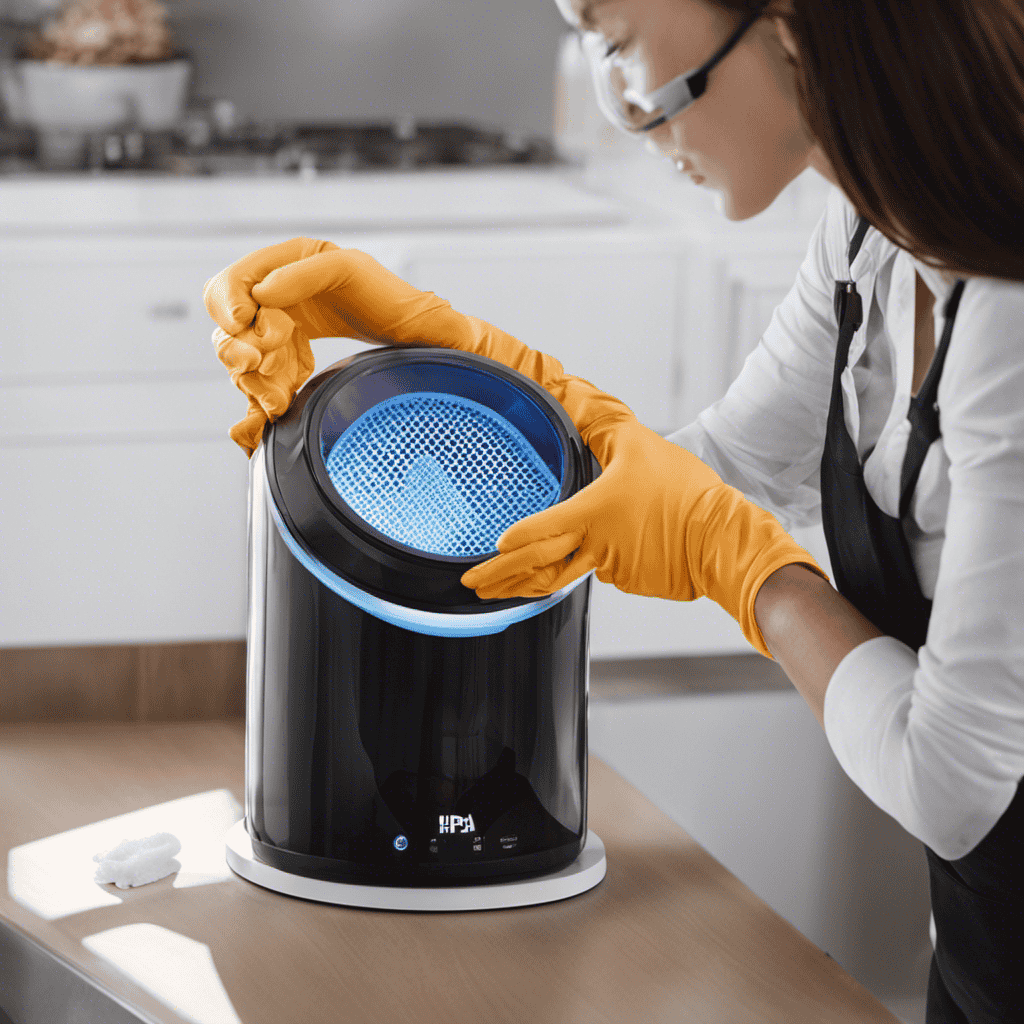
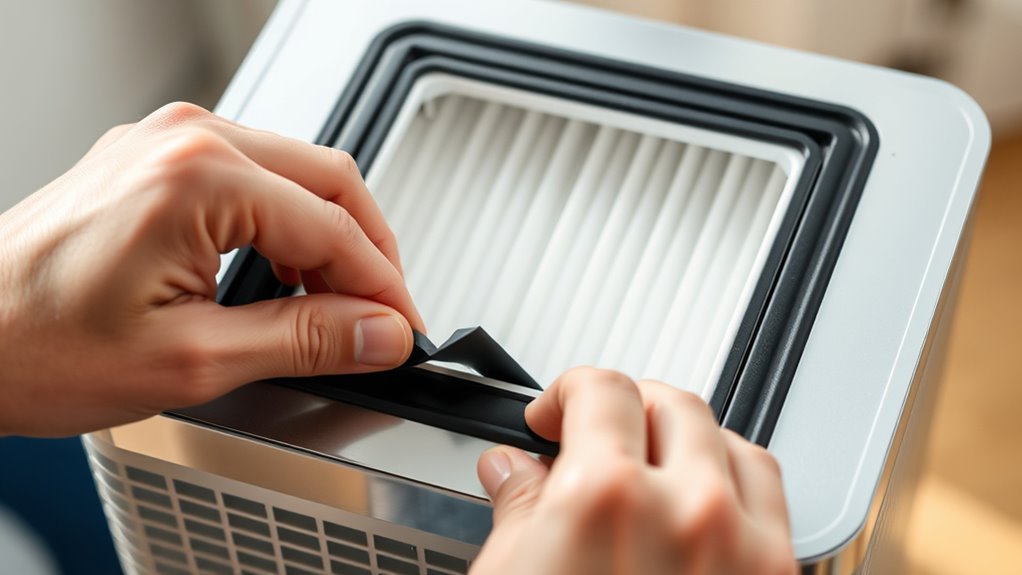
Preparation is essential. Start by removing the old gasket carefully, ensuring no debris or remnants remain on the surfaces. Clean the mating surfaces thoroughly with a non-abrasive cleaner or solvent to eliminate oil, dirt, and old sealant residues. This step ensures the new gasket will adhere properly and form a reliable seal. When installing the new gasket, align it precisely with the bolt holes and mating surfaces to prevent misalignment, which could lead to leaks. Apply a thin, even layer of air sealant on the gasket or the mating surface if recommended by the manufacturer. This extra step can help fill in small imperfections and improve sealing performance.
Once everything is in place, tighten bolts in a crisscross pattern to distribute pressure evenly, avoiding warping or uneven sealing. Allow any sealants to cure fully before starting the engine. Properly installed gaskets, combined with the right air sealants and gasket materials, result in a more airtight seal, reducing air leaks that negatively impact engine efficiency and CADR. Remember that French Press Operation techniques can teach the importance of precise timing and measurements, which are crucial during gasket installation. With patience and attention to detail, you can upgrade your gasket confidently, ensuring your engine runs smoothly while preventing future leaks or performance issues.
Frequently Asked Questions
Can Gasket Upgrades Void My Device’S Warranty?
You might wonder if gasket upgrades will void your device’s warranty. While some manufacturer policies could view modifications as voiding the warranty, it often depends on the specific device and the nature of the upgrade. It’s best to check your manufacturer’s warranty implications before making any modifications. If done carefully, gasket upgrades may not void your warranty, but always verify policies to avoid potential issues.
What Tools Are Needed for DIY Gasket Installation?
Imagine holding a small toolkit that’s ready to help you enhance your device’s performance. For DIY gasket installation, you’ll need a basic tools overview: a screwdriver, a plastic pry tool, and possibly scissors or a utility knife. When selecting gasket materials, soft foam or silicone sheets work well. These tools and materials make the process smoother, allowing you to create a tighter seal without needing advanced skills.
How Long Does a Gasket Upgrade Typically Take?
The installation timeline for a gasket upgrade usually takes about 30 minutes to an hour, depending on your experience and the repair complexity. If you’re familiar with the process, you might finish quicker, but beginners should allow extra time. Factors like the device model and how easily parts come apart can influence the overall time. Be patient, follow instructions carefully, and you’ll improve your device’s performance efficiently.
Are There Any Safety Precautions During Gasket Replacement?
When replacing a gasket, you should prioritize safety precautions like disconnecting the power source first. Avoid electrical hazards by turning off and unplugging your device, and handle batteries carefully to prevent leaks or sparks. Wear gloves if necessary to protect against any sharp edges or residues. Always follow manufacturer instructions and make sure the workspace is dry to prevent accidents. Staying cautious helps keep you safe during the gasket upgrade process.
Will Upgrading the Gasket Improve Noise Levels?
Upgrading the gasket can definitely improve noise reduction and soundproofing. When you seal gaps more effectively, less noise escapes or enters, creating a quieter environment. You’ll notice a significant difference in sound levels, especially if your device was previously noisy due to air leaks. This simple upgrade helps block sound transmission, making your space more peaceful and enhancing overall comfort without complex modifications.
Conclusion
By upgrading your gasket, you’re taking control like Icarus reaching for the sun—aiming higher and pushing past limits. This simple upgrade seals leaks and boosts your engine’s performance, fueling your confidence on every drive. Remember, just as Da Vinci’s innovations changed the world, your DIY effort transforms your vehicle’s efficiency. Keep aiming, keep improving—because greatness is built one upgrade at a time, and your journey toward better performance has only just begun.