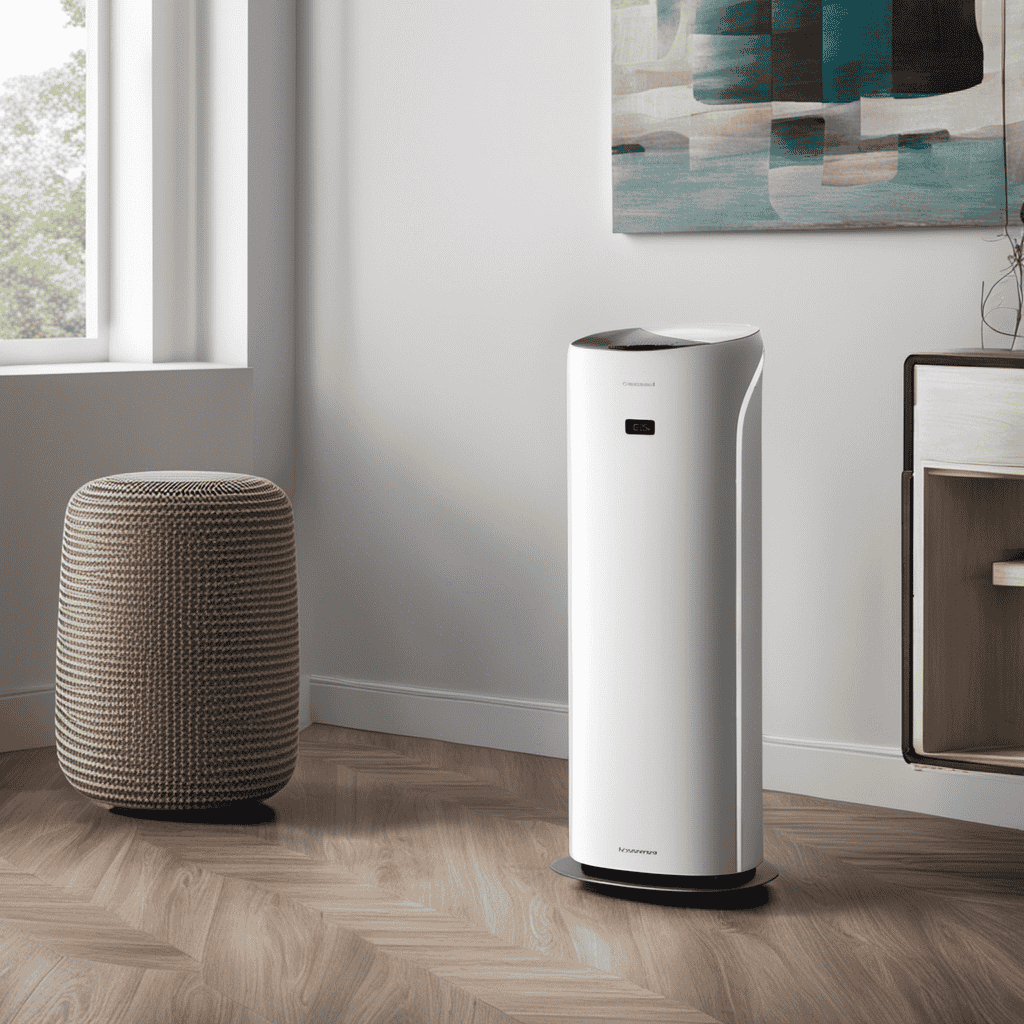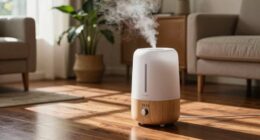
I’ve been dealing with allergies for several months until I found out the key to fresh air: regularly changing my air purifier’s filter.
In this article, I’ll show you step-by-step how to clean the filter on your air purifier, so you can breathe easier and enjoy a healthier home.
From gathering the necessary supplies to inspecting and vacuuming the filter, I’ll guide you through the process with clear instructions and helpful tips.
Say goodbye to sneezing and hello to fresh, clean air!
Key Takeaways
- Regular filter cleaning is essential for optimal air purifier efficiency and to maintain indoor air quality.
- Failure to clean the filter can decrease performance, pose health risks, and create a breeding ground for bacteria and mold.
- Proper filter removal and replacement should be done gently to prevent breakage and ensure proper airflow and contaminant prevention.
- Cleaning methods can include vacuuming, brushing, rinsing with water (if applicable), and using a mild soap solution for thorough cleaning.
Understanding the Importance of Cleaning the Filter
Understanding the importance of cleaning the filter is crucial to maintaining the efficiency of your air purifier. Regular cleaning of the filter is necessary to ensure that it functions optimally and effectively removes pollutants from the air. Failure to clean the filter can lead to a decrease in the purifier’s performance and can potentially pose health risks.
When an air purifier is in use, it constantly draws in air from the surrounding environment. This air contains various particles such as dust, pollen, pet dander, and other allergens. The filter is responsible for capturing and trapping these particles, preventing them from circulating back into the air. Over time, the filter becomes clogged with these contaminants, reducing its ability to effectively clean the air.
If the filter is not regularly cleaned, it can become overloaded with trapped particles, resulting in decreased airflow and reduced purification efficiency. This can lead to poor indoor air quality, as the purifier will no longer be able to effectively remove pollutants from the air. In addition, a dirty filter can become a breeding ground for bacteria and mold, which can further contribute to potential health risks.
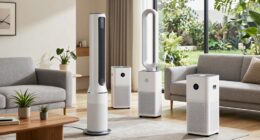
Gathering the Necessary Supplies
When it comes to maintaining an efficient and clean air purifier, there are three key points that we need to consider.
Firstly, understanding the recommended cleaning frequency is crucial to ensure that the air purifier functions optimally.
Secondly, knowing the correct method of filter removal is essential to prevent any damage to the unit and ensure effective cleaning.
Lastly, selecting the appropriate cleaner is important to ensure that the filter is thoroughly cleaned without causing any harm to its components.
Cleaning Frequency Recommendations
The recommended cleaning frequency for the air purifier filter is once every three months. Following a regular cleaning schedule for your air purifier filter has numerous benefits.
Regular cleaning ensures that the filter is free from dust, dirt, and other pollutants, allowing it to function optimally. A clean filter improves the air quality in your home by trapping and removing allergens, pet dander, and other airborne particles.
It also helps to prolong the lifespan of the air purifier by preventing dust buildup that can strain the motor and decrease its efficiency. Regular filter cleaning is important for maintaining the effectiveness of the air purifier in removing harmful contaminants from the air, creating a healthier and more comfortable living environment.
Proper Filter Removal
To properly remove the filter, gently pull on the tab located on the side.
When it’s time for a filter replacement, it’s essential to know the correct procedure to avoid any damage to the air purifier.
Start by locating the filter tab, usually positioned on one side of the unit.
Using a firm but gentle grip, pull the tab towards you until the filter is fully disengaged from its housing.
Be cautious to avoid any excessive force or twisting that could cause the filter to break.
Once the filter is removed, inspect it for any signs of wear or damage.
If you notice any tears or excessive dirt accumulation, it’s time for a replacement.
Following these steps ensures a smooth filter replacement process and mitigates common issues, such as filter integrity or reduced air purifying efficiency.
Choosing the Right Cleaner
Make sure you select the appropriate cleaner for your needs based on factors such as size, efficiency, and specific features.
When it comes to cleaning techniques and maintenance tips for air purifiers, choosing the right cleaner is crucial.
The size of your air purifier will determine the type of cleaner you should use. For smaller units, a handheld vacuum or a soft brush attachment can effectively remove dust and debris from the filter. Larger units may require a more powerful vacuum with a HEPA filter to ensure thorough cleaning.
Efficiency is another important factor to consider. Look for cleaners that are specifically designed for air purifiers, as they will have the necessary suction power to effectively remove dirt without damaging the filter.
Lastly, consider the specific features of your air purifier, such as whether it has a washable or replaceable filter. This will determine if you need a cleaner that can handle wet or dry cleaning methods.
Powering Off and Unplugging the Air Purifier
First, you should turn off and unplug your air purifier before attempting to clean the filter. This is important for your safety and to prevent any damage to the purifier. Regular maintenance of your air purifier, including cleaning the filter, is crucial to ensure that it continues to function effectively and efficiently. Cleaning the filter helps to remove dirt, dust, and other particles that may have accumulated over time, allowing the purifier to provide cleaner and healthier air.
To safely clean the filter, follow these steps:
- Start by powering off the air purifier and unplugging it from the electrical outlet.
- Carefully remove the filter from the purifier according to the manufacturer’s instructions. It may be located behind a cover or accessed from the top or bottom of the unit.
- Check the filter for any visible dirt or debris. If necessary, gently brush off the debris or use a vacuum cleaner with a brush attachment to remove it.
- If the filter is washable, rinse it under running water to remove any remaining dirt. Avoid using hot water or harsh chemicals, as these may damage the filter.
- Allow the filter to dry completely before reinstalling it back into the air purifier.
By following these steps, you can safely clean the filter of your air purifier, ensuring that it continues to provide clean and fresh air for your home or office.
In the next section, we will discuss how to properly remove the filter from the purifier.
Removing the Filter
Before removing it, make sure the air purifier is powered off and unplugged to avoid accidents or damage.
Now, let’s move on to the next step: removing the filter. Depending on your air purifier’s model, the filter may be located behind a front panel or underneath the unit. Check your air purifier’s manual for specific instructions on accessing the filter.
Once you’ve located the filter, gently remove it from its housing, being careful not to damage the filter or any surrounding components.
Now that the filter is out, you have a few options for cleaning it. Some air purifiers have washable filters, while others require replacement. If you have a washable filter, follow the manufacturer’s instructions for cleaning it. If your filter is not washable, you can purchase alternative or replacement filters designed for your specific air purifier model. These filters are usually available from the manufacturer or authorized retailers.
By using the appropriate cleaning methods and alternative filters, you can ensure that your air purifier continues to function effectively.
With the filter removed, it’s time to inspect it for any dirt or debris buildup.
Inspecting the Filter for Dirt and Debris
When it comes to maintaining your air purifier, it’s important to understand the recommended cleaning frequency. Regularly cleaning the filter ensures optimal performance and efficiency.
Signs of a clogged filter include reduced airflow and a decrease in air quality, so it’s crucial to be aware of these indicators.
Proper filter maintenance involves not only cleaning but also replacing the filter when necessary to keep your air purifier functioning effectively.
Cleaning Frequency Recommendations
It’s important to know the recommended cleaning frequency for your air purifier’s filter. Regular maintenance ensures that your air purifier continues to operate efficiently and effectively.
The cleaning frequency may vary depending on the manufacturer and model of your air purifier. However, in general, it is recommended to clean the filter every 3 to 6 months.
To clean the filter, you can use various methods such as vacuuming, washing, or using compressed air. It’s essential to follow the manufacturer’s instructions for the specific cleaning method recommended for your air purifier’s filter. Additionally, using the recommended cleaning products is crucial to avoid damaging the filter.
By regularly cleaning your air purifier’s filter, you can maintain its performance and prolong its lifespan.
Now, let’s move on to the next section to learn about the signs of a clogged filter.
Signs of Clogged Filter
One way to tell if your filter is clogged is by noticing a decrease in air flow from the device. This can happen over time as dust and particles build up in the filter, obstructing the airflow.
To prevent a clogged filter and ensure optimal performance of your air purifier, it’s important to regularly perform filter maintenance. Here are four key steps to keep in mind:
- Check the manufacturer’s recommendations for filter cleaning frequency.
- Use a soft brush or vacuum cleaner with a brush attachment to gently remove dust and debris from the filter.
- If the filter is washable, follow the instructions to rinse it thoroughly and allow it to dry completely before reinstalling.
- Consider using a pre-filter to trap larger particles and extend the lifespan of your main filter.
By following these steps, you can prevent a clogged filter and maintain the efficiency of your air purifier.
Now let’s move on to discussing proper filter maintenance.
Proper Filter Maintenance
To ensure optimal performance, regularly maintaining your air purifier’s filter is essential. Proper filter maintenance not only prolongs the lifespan of the filter but also ensures that it effectively removes pollutants from the air.
Here are some filter maintenance tips to keep in mind:
-
Check the filter regularly: Inspect the filter at least once a month to see if it needs cleaning or replacement.
-
Follow the manufacturer’s instructions: Different filters require different cleaning methods, so it’s important to follow the guidelines provided by the manufacturer.
-
Use a vacuum or brush: Gently vacuum or brush the filter to remove dust and debris. Avoid using excessive force to prevent damage.
-
Avoid washing the filter: Most air purifier filters are not washable, so avoid cleaning them with water.
Now that you know the importance of proper filter maintenance, let’s explore how to clean the filter with water.
Cleaning the Filter With Water
When cleaning the filter with water, make sure to gently rinse it under a faucet. This is an essential step in maintaining the effectiveness and longevity of your air purifier.
Here is a step-by-step guide on how to properly clean your air purifier filter using water:
-
Remove the filter from your air purifier according to the manufacturer’s instructions.
-
Fill a basin or sink with lukewarm water.
-
Add a small amount of mild soap to the water. Avoid using harsh chemicals or detergents as they can damage the filter.
-
Gently submerge the filter in the soapy water and agitate it to loosen any dirt or debris.
After following these steps, you can rinse the filter thoroughly under running water to remove any soap residue. It is important to allow the filter to dry completely before reinstalling it in your air purifier. Some air purifier brands even offer self-cleaning filters, which eliminate the need for manual cleaning.
If you encounter stubborn dirt or debris that cannot be removed with water alone, the next section will guide you on using a vacuum cleaner to tackle those tough spots.
Using a Vacuum Cleaner for Stubborn Dirt
If you’re dealing with stubborn dirt or debris, you can try using a vacuum cleaner to remove it effectively. Vacuum cleaner maintenance is essential to ensure that it functions optimally and removes dirt efficiently.
When it comes to removing stubborn dirt from your vacuum cleaner, there are a few steps you can follow. First, make sure the vacuum cleaner is unplugged and turned off. Then, detach the hose or nozzle from the main unit. Use the vacuum cleaner’s attachments to target the stubborn dirt specifically.
For example, a crevice tool can help you reach tight spaces, while a brush attachment can loosen dirt from fabrics or upholstery. Slowly move the vacuum cleaner over the affected area, making sure to cover all angles and corners. Pay extra attention to areas where dirt tends to accumulate, such as corners or edges.
Once you’ve finished vacuuming, it’s important to allow the filter to dry completely before reattaching it. This will prevent any moisture from being trapped inside the vacuum cleaner, which can lead to mold or mildew growth.
Allowing the Filter to Dry Completely
When it comes to maintaining the effectiveness of your air purifier, proper drying time and preventing moisture buildup are crucial.
After cleaning the filter, it is essential to allow it to dry completely before reinstalling it in the unit. This ensures that any trapped moisture is eliminated, preventing the growth of mold or bacteria that could compromise the air quality in your home.
Proper Drying Time
The filter should be left to dry completely before reattaching it to the air purifier. Proper drying techniques are crucial to preventing mold growth and maintaining the efficiency of your air purifier. Here are some tips to ensure your filter dries thoroughly:
- Remove the filter from the air purifier and shake off any loose debris.
- Place the filter in a well-ventilated area, away from direct sunlight or heat sources.
- Allow the filter to air dry naturally for at least 24 hours. Avoid using a hairdryer or other artificial drying methods.
- Check the filter periodically to make sure it is completely dry before reattaching it to the air purifier.
Following these drying techniques will help prevent mold growth and ensure your filter is clean and ready to provide fresh, purified air for your home.
Preventing Moisture Buildup
Properly maintaining your air purifier includes taking steps to prevent moisture buildup.
Moisture can create the perfect environment for mold growth, which can negatively impact the air quality in your home.
To prevent this, make sure to keep your air purifier in a dry area, away from sources of moisture such as humidifiers or leaky pipes.
Additionally, avoid placing your air purifier near windows or doors where condensation may occur.
Regularly check the filter for any signs of moisture and if you notice any, remove it immediately and allow it to dry completely before reinstalling it.
This will help to prevent mold growth and avoid any potential filter damage caused by moisture accumulation.
Reinstalling the Filter Properly
To reinstall the filter, follow these steps:
-
Turn off and unplug the air purifier: Before reinstalling the filter, make sure to turn off and unplug the unit to avoid electrical hazards.
-
Remove the old filter: Open the front panel or access door of your air purifier and carefully remove the old filter. Take note of its position and any arrows indicating airflow direction.
-
Clean the filter housing: Use a soft cloth or brush to gently remove dust or debris from the filter housing. This ensures proper airflow and prevents contaminants from entering the air purifier.
-
Install the new filter: Align the new filter with the arrows indicating airflow direction and carefully place it back into the filter housing. Ensure it fits securely and is positioned correctly.
Troubleshooting tips:
- If the filter doesn’t fit properly, double-check that you have the correct filter model for your air purifier.
- If there are tabs or locks on the filter housing, make sure they are properly engaged to secure the filter in place.
- If you encounter difficulties or have further questions, consult the user manual or contact the manufacturer for assistance.
Testing the Air Purifier After Cleaning the Filter
After you’ve finished cleaning the filter, don’t forget to test the air purifier to ensure it’s working properly. Testing the air purifier is an important step to verify its functionality and to ensure that it is effectively purifying the air in your space.
There are different testing methods that can be used to assess the performance of an air purifier. One common testing method is air quality analysis. This involves using specialized equipment to measure the air quality before and after the air purifier is turned on. By comparing the results, you can determine how well the air purifier is removing pollutants from the air. Air quality analysis can provide valuable insights into the effectiveness of the purifier and help you make informed decisions about its usage.
Another testing method is to check the airflow of the air purifier. A proper airflow is crucial for the efficient operation of the purifier. You can do this by placing a piece of tissue or a smoke source in front of the air intake and observing how it is being pulled into the purifier. If the airflow is strong and consistent, it indicates that the air purifier is functioning properly.
Frequently Asked Questions
How Often Should I Clean the Filter on My Air Purifier?
I clean the filter on my air purifier every three months. It’s important to keep track of how often you should replace the filter, as it can vary depending on the model and usage.
Signs that indicate the filter needs cleaning or replacement include reduced airflow, increased noise, and a decrease in the purifier’s effectiveness.
Regularly maintaining the filter ensures that your air purifier continues to provide clean and fresh air.
Can I Use Soap or Detergent to Clean the Filter?
Using soap or detergent to clean the filter on an air purifier is not recommended. It can leave behind residue and damage the filter, reducing its effectiveness.
Instead, water is the best cleaning method for air purifier filters. Gently rinse the filter under running water to remove dust and debris.
Be sure to follow the manufacturer’s instructions for proper cleaning and drying techniques to ensure optimal performance of your air purifier.
Is It Necessary to Clean the Pre-Filter as Well?
When it comes to cleaning the filter on an air purifier, it’s important to consider the cleaning frequency and methods.
One aspect that often gets overlooked is the pre-filter. While it may not require cleaning as frequently as the main filter, it is still necessary to clean it periodically. This is because the pre-filter traps larger particles, preventing them from clogging the main filter.
Therefore, it’s essential to include the cleaning of the pre-filter in your regular maintenance routine.
Can I Clean the Filter While the Air Purifier Is Still Plugged In?
Yes, you can clean the filter while the air purifier is still plugged in. However, it is important to follow proper cleaning procedures and safety precautions.
Before starting, make sure to turn off the air purifier and unplug it from the power source. Gently remove the filter and clean it according to the manufacturer’s instructions.
Regularly cleaning the filter is essential for maintaining the efficiency and effectiveness of your air purifier.
What Should I Do if the Filter Is Damaged or Torn?
If the filter on your air purifier is damaged or torn, there are a few things you can do.
First, check if the filter is still under warranty and contact the manufacturer for a replacement.
If not, you can try repairing the filter using tape or adhesive, but this may not be a long-term solution.
Ultimately, it is best to replace the filter to ensure optimal performance and clean air in your home.
Is There a Specific Method for Cleaning Air Purifier Filters?
Yes, there is a specific method for cleaning air purifier filters. To effectively clean the air purifier filter, you can use a vacuum with a brush attachment to remove dust and debris. Some filters can also be washed with water and mild detergent to remove built-up dirt. Regular cleaning air purifier filter will ensure optimal performance.
Conclusion
In conclusion, cleaning the filter on your air purifier is an essential task to ensure its optimal performance and maintain the quality of the air in your home.
By following the simple steps outlined in this article, you can easily remove dirt and debris from the filter, allowing it to function efficiently.
Remember to gather the necessary supplies and power off and unplug the purifier before starting.
Inspect the filter, use a vacuum cleaner for stubborn dirt, and allow it to dry completely before reinstalling.
Test the air purifier after cleaning to ensure its effectiveness.
Keep your air pure, pristine, and pollutant-free!