Did you know that dirty air purifiers can actually worsen the air quality in your home? It’s important to clean and maintain your air purifier regularly to ensure it functions efficiently.
In this article, I’ll guide you through the step-by-step process of cleaning your air purifier, from gathering the necessary supplies to reassembling it and testing its performance. By following these simple instructions, you’ll be able to keep the air in your home clean and fresh.
Key Takeaways
- Regular maintenance is crucial for optimal functioning of an air purifier.
- Cleaning prevents the build-up of dust, pollutants, and allergens on filters.
- Cleaning ensures the air purifier continues to provide clean and fresh air.
- Establish a regular cleaning schedule for optimal effectiveness.

WZQH Leather Work Gloves for Men or Women.Gardening,Welding,Coffee-grey L
- Material: 100% split cowhide leather with soft lining
- Protection: High abrasion, puncture, cut, and heat resistance
- Design: Reinforced palm and adjustable wrist for fit and protection
As an affiliate, we earn on qualifying purchases.
Understanding the Importance of Cleaning an Air Purifier
You need to understand the importance of cleaning your air purifier regularly to ensure it functions effectively.
Regular maintenance is crucial for keeping your air purifier in good working condition and ensuring that it continues to provide you with clean and fresh air.
By cleaning your air purifier regularly, you prevent the build-up of dust, pollutants, and allergens on the filters, which can decrease its efficiency over time.
Neglecting regular maintenance can lead to decreased air quality and potential health risks.
However, it is important to avoid common mistakes when cleaning an air purifier, such as using harsh chemicals, not following manufacturer’s instructions, or neglecting to clean all the components.
Gathering the Necessary Cleaning Supplies
To gather the necessary supplies for cleaning, start by checking if you have a soft cloth, water, and mild detergent on hand. These items are essential for effectively cleaning your air purifier and keeping it in optimal condition.
Here is a list of the cleaning supplies you will need:
-
Soft cloth: This will be used to wipe down the exterior of the air purifier and remove any dust or dirt that has accumulated.
-
Water: Use lukewarm water to dampen the cloth for cleaning. Avoid using hot water as it may damage the device.
-
Mild detergent: A gentle, non-abrasive detergent will help remove any stubborn stains or buildup on the air purifier. Dilute the detergent in water before applying it to the cloth.
-
Optional accessories: Depending on the type of air purifier you have, you may also need a brush or vacuum cleaner attachment to clean hard-to-reach areas or remove debris from filters.
Turning Off and Unplugging the Air Purifier
When it comes to cleaning my air purifier, there are several important factors to consider.
First and foremost, I always prioritize safety precautions to ensure that I am protecting myself from any potential hazards.
Additionally, establishing a regular cleaning frequency and schedule is crucial in order to maintain the optimal performance of the air purifier.
Lastly, proper storage of the cleaning supplies and the air purifier itself is of utmost importance to prevent any damage or contamination.
Safety Precautions While Cleaning
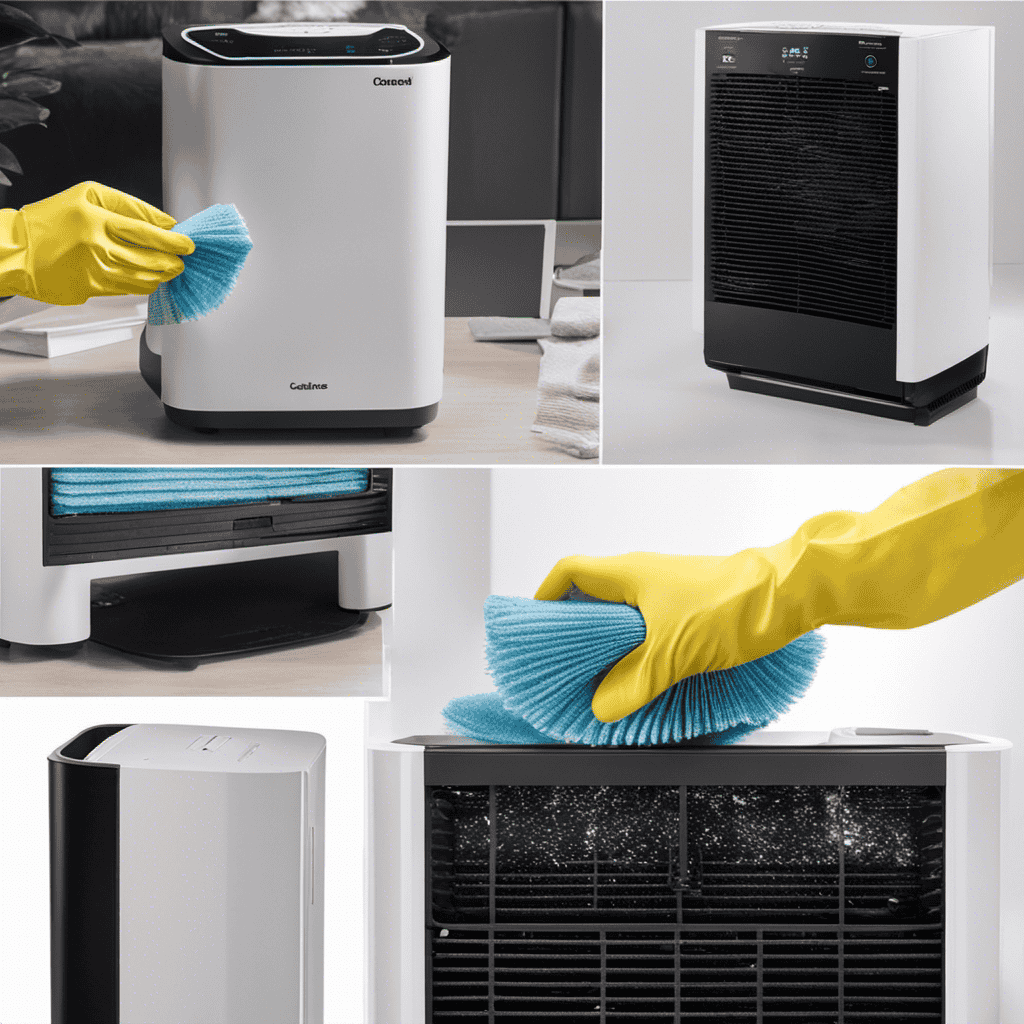
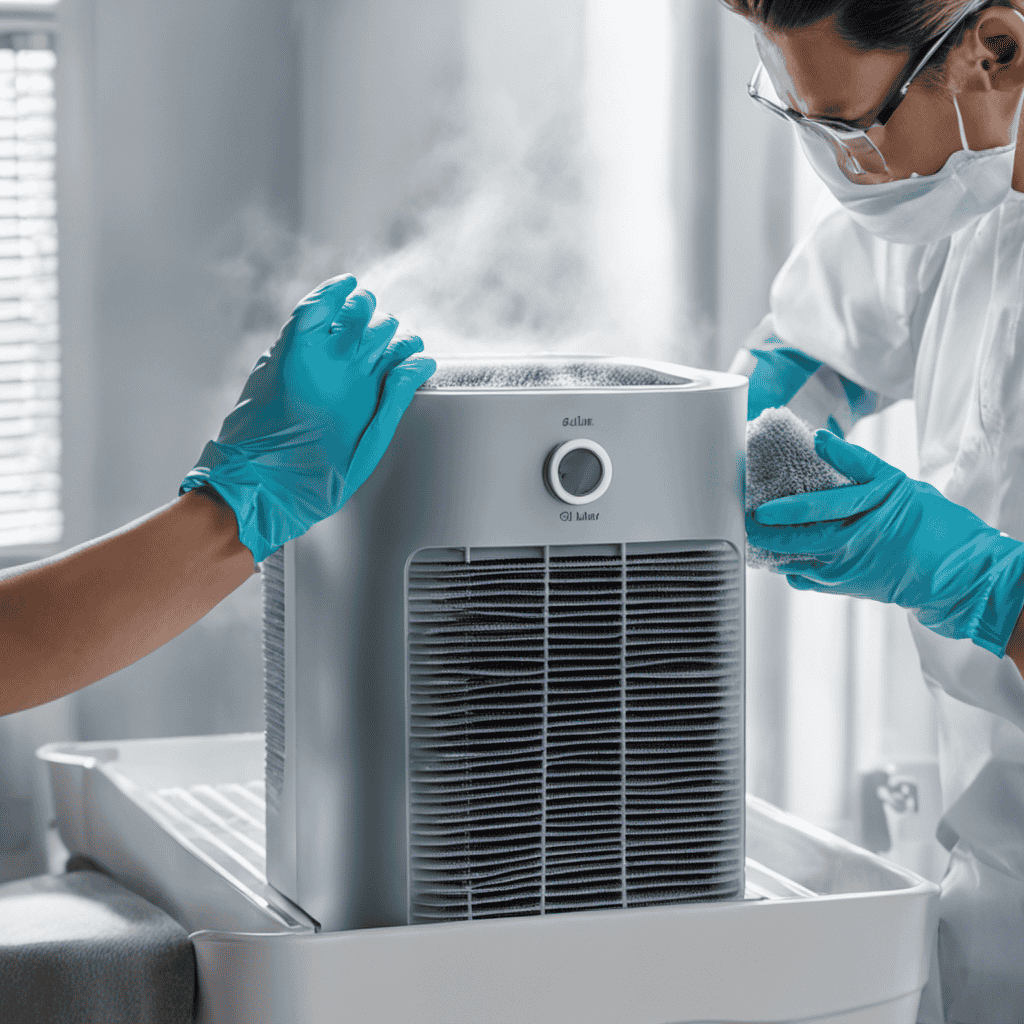
Make sure you’re wearing gloves and a mask before starting the cleaning process. Cleaning your air purifier is important to maintain its efficiency and ensure the quality of the air in your home.
Here are some cleaning techniques and safety measures to follow:
-
Disconnect the power: Before cleaning, unplug the air purifier from the electrical outlet to avoid any accidents.
-
Use a soft cloth: Gently wipe the exterior of the air purifier with a damp, soft cloth. Avoid using abrasive cleaners or harsh chemicals that can damage the unit.
-
Clean the filters: Refer to the manufacturer’s instructions for specific cleaning techniques. Some filters can be rinsed with water, while others may require replacement.
-
Dry thoroughly: After cleaning, make sure the air purifier is completely dry before plugging it back in. This will prevent any electrical hazards.
Cleaning Frequency and Schedule
It’s important to establish a regular cleaning schedule for your air purifier to maintain its effectiveness. The cleaning frequency and maintenance routine will vary depending on the specific model and usage.
Generally, it is recommended to clean the pre-filter every two to three weeks and the HEPA filter every six to twelve months. However, if you live in a highly polluted area or have pets, you may need to clean more frequently. To clean the filters, gently vacuum or wash them according to the manufacturer’s instructions.
Regularly wiping down the exterior of the purifier with a damp cloth is also important to remove dust and dirt. By following a consistent cleaning schedule, you can ensure that your air purifier continues to provide clean and fresh air.
Speaking of maintenance, let’s now discuss the importance of proper storage for your purifier.
Importance of Proper Storage
Storing your air purifier correctly is essential to ensure its longevity and optimal performance. Proper storage techniques can help prevent mold growth and maintain the effectiveness of the device. Here are some important steps to follow when storing your air purifier:
-
Clean the filters: Before storing the air purifier, make sure to clean or replace the filters as needed. This will help prevent the accumulation of dust and debris during storage.
-
Empty the water tank: If your air purifier has a built-in humidifier, empty the water tank completely to prevent mold or bacteria growth.
-
Store in a cool, dry place: Find a cool and dry location to store your air purifier. Avoid storing it in areas with high humidity, as this can promote mold growth.
-
Cover or wrap the unit: Use a dust cover or wrap the air purifier in a clean cloth to protect it from dust and other contaminants.
By following these proper storage techniques, you can ensure that your air purifier remains in good condition.
Now, let’s move on to the next step: removing the filters from the air purifier.
Removing the Filters From the Air Purifier
When it comes to maintaining the filters in your air purifier, there are a few key points to keep in mind.
First, regular maintenance is crucial to ensure optimal performance and air quality. This includes proper cleaning techniques to remove dust and debris.
Knowing when it’s time to replace the filters based on recommended frequency guidelines is also important.
Filter Maintenance Tips
You should regularly check and replace the filters in your air purifier to ensure optimal performance. Here are some filter maintenance tips to help you keep your air purifier running smoothly:
-
Check the manufacturer’s instructions: Different air purifiers have different filter replacement schedules. Consult the manual to determine how often you should replace the filters.
-
Clean or replace pre-filters: Some air purifiers have pre-filters that capture larger particles. These filters can be vacuumed or washed, depending on the type. Regularly clean or replace them to maintain their effectiveness.
-
Vacuum or wipe the main filter: Over time, the main filter can accumulate dust and debris. Use a vacuum cleaner with a brush attachment or a damp cloth to remove any dirt that has settled on the filter.
-
Consider investing in high-quality filters: While they may be more expensive, high-quality filters can last longer and provide better air purification. Look for filters with a high MERV (Minimum Efficiency Reporting Value) rating for optimal performance.
Proper Cleaning Techniques
To maintain optimal performance, it’s important to regularly clean and replace the filters in your air purifier. Filter replacement is a crucial part of air purifier maintenance to ensure that the device continues to effectively remove pollutants from your indoor air.
When it comes to cleaning the filters, there are a few tips to keep in mind. First, always refer to the manufacturer’s instructions for specific cleaning guidelines. In general, pre-filters should be cleaned every 1-3 months, depending on usage. HEPA filters typically have a longer lifespan and should be replaced every 6-12 months. However, it’s important to regularly check the filters for any signs of damage or excessive dirt accumulation.
Replacement Frequency Guidelines
By following these guidelines, you’ll know how often to replace the filters in your device for optimal performance. Maintaining clean filters is essential for an air purifier to effectively remove pollutants from the air. Here are some tips to help you determine the replacement frequency:
-
Check the manufacturer’s recommendations: Different air purifiers have varying filter lifespans. Refer to the user manual or the manufacturer’s website for the specific replacement frequency.
-
Monitor the filter indicator: Many air purifiers come with a filter indicator that alerts you when it’s time to replace the filters. This indicator is based on factors like usage time and air quality.
-
Assess the air quality: If you notice a drop in air quality or increased allergies, it may be a sign that the filters need replacement.
-
Regular maintenance: Regularly cleaning and maintaining the filters can extend their lifespan and reduce the need for frequent replacements.
Following these maintenance tips will ensure that your air purifier operates at its best and provides you with clean and fresh air in your living space.
Assessing the Condition of the Filters
Check if the filters in your air purifier need to be replaced by examining their condition. Regularly checking the condition of the filters is crucial to ensure that your air purifier is effectively purifying the air in your home.
The frequency at which you need to replace the filters depends on factors such as the filter type, usage, and air quality in your environment. Most filters have a recommended lifespan of 6 to 12 months. However, it’s essential to note that this is just a general guideline, and the actual replacement time may vary.
To assess the condition of the filters, remove them from the air purifier and inspect them closely. Look for signs of discoloration, dirt buildup, or damage. If the filters appear worn out or clogged, it’s time to replace them.
Now that we have determined the filter replacement, let’s move on to cleaning the pre-filter.
Cleaning the Pre-Filter
The pre-filter should be regularly maintained to ensure optimal performance of your air purifier. Here are some cleaning techniques for pre-filter maintenance:
-
Vacuuming: Use a soft brush attachment to gently remove dust and debris from the surface of the pre-filter. Be careful not to damage the filter material.
-
Washing: If your pre-filter is washable, remove it from the air purifier and rinse it under running water. Use a mild detergent if necessary, then allow it to air dry completely before reinstalling.
-
Tapping: For non-washable pre-filters, gently tap them against a hard surface to dislodge any trapped particles. This can be done outdoors to prevent dust from spreading inside your home.
-
Replacement: If your pre-filter is heavily soiled or damaged, it may need to be replaced. Check the manufacturer’s instructions for recommended replacement intervals.
Regularly cleaning and maintaining your pre-filter will ensure that your air purifier continues to effectively remove pollutants from your indoor air.
Cleaning the HEPA Filter
To effectively clean your HEPA filter, gently tap it against a hard surface to dislodge any trapped particles. This is a simple yet effective method to remove dirt, dust, and other impurities that may have accumulated on the filter.
However, it’s important to note that tapping alone may not be enough to completely clean the filter. For a more thorough cleaning, you can consider using a soft brush or vacuum cleaner with a brush attachment to gently remove any remaining debris.
It’s also important to follow the manufacturer’s instructions for cleaning and maintenance, as some HEPA filters may not be washable and may require replacement.
Regular cleaning and maintenance of your HEPA filter will ensure that your air purifier continues to function optimally and provide you with clean and healthy air.
Cleaning the Carbon Filter
You can easily maintain the carbon filter by replacing it every 3-6 months to ensure optimal performance. However, if you want to extend the lifespan of your carbon filter and save some money, there are a few simple steps you can follow.
Here are four tips for carbon filter maintenance and extending its lifespan:
-
Vacuum the filter: Use a soft brush attachment on your vacuum cleaner to gently remove any dust or debris from the surface of the carbon filter. This will help improve its efficiency and prolong its lifespan.
-
Rinse with water: If your carbon filter is washable, you can rinse it under running water to remove any trapped particles. Be sure to follow the manufacturer’s instructions and allow the filter to dry completely before reinstalling it.
-
Avoid exposure to moisture: Carbon filters are prone to mold and mildew growth when exposed to moisture. Make sure to keep your filter in a dry location and avoid using it in humid environments.
-
Use pre-filters: Using pre-filters can help protect your carbon filter from larger particles and prolong its lifespan. These pre-filters are usually washable or replaceable, making them an easy and cost-effective way to extend the life of your carbon filter.
Cleaning the Ionizer
If you want to enhance the performance of your ionizer, make sure to regularly clean the collection plates. Ionizer maintenance is crucial to ensure that your air purifier continues to effectively remove pollutants from your indoor air.
Over time, the collection plates can become dirty and covered with a buildup of particles, which can hinder the ionizer’s ability to generate negative ions. To clean the collection plates, first, turn off the ionizer and unplug it from the power source. Then, carefully remove the collection plates from the ionizer unit.
Use a soft brush or cloth to gently wipe away any dust or debris. If there are stubborn stains or residue, you can use a mild detergent diluted in water to clean the plates. Once clean, make sure the plates are completely dry before reinserting them into the ionizer.
Regularly cleaning the collection plates will help troubleshoot any issues with your ionizer and ensure that it continues to operate efficiently.
Now, let’s move on to cleaning the air purifier’s exterior.
Cleaning the Air Purifier’s Exterior
When it comes to keeping the exterior of your air purifier clean, there are a few surface cleaning techniques that I recommend.
Firstly, using a soft, damp cloth to wipe down the exterior of the unit is an effective way to remove dust and dirt.
Additionally, using a mild, non-abrasive cleaning solution can help to remove any stubborn stains or marks.
As for recommended cleaning products, I suggest using a gentle multi-purpose cleaner or even a mixture of water and vinegar for a more natural option.
Surface Cleaning Techniques
To effectively clean the surface of your air purifier, start by unplugging it from the power source. This ensures your safety while cleaning.
Here are some surface cleaning techniques that will help keep your air purifier working efficiently:
-
Use a soft, lint-free cloth: Gently wipe down the exterior of the air purifier to remove dust and dirt. Avoid using abrasive materials or harsh chemicals, as they can damage the surface.
-
Clean the control panel: Use a slightly damp cloth to wipe the control panel, removing any fingerprints or smudges. Be cautious not to get any moisture into the electronic components.
-
Vacuum the vents: Use a small brush attachment on your vacuum cleaner to remove dust and debris from the air purifier vents. This will ensure proper airflow and prevent clogging.
-
Clean the pre-filter: If your air purifier has a washable pre-filter, remove it and rinse it under running water. Allow it to dry completely before reinserting it.
Recommended Cleaning Products
For the best results, you should consider using mild cleaning agents and non-abrasive materials to wipe down the surface of your air purifier. When it comes to choosing the right cleaning products for your air purifier, there are a few options to consider.
One of the recommended cleaning products is a mixture of water and mild dish soap. This solution is gentle yet effective in removing dirt and grime from the surface of your air purifier. Another eco-friendly option is vinegar. Dilute vinegar with water and use it to wipe down the surface of the air purifier. Vinegar is a natural disinfectant and can help eliminate any lingering odors.
Whichever cleaning product you choose, make sure to thoroughly rinse the surface with water and dry it completely before turning the air purifier back on.
Now that you have cleaned the surface of your air purifier, it’s time to move on to cleaning the air intake vents.
Cleaning the Air Intake Vents
Cleaning the air intake vents is essential for maintaining the efficiency of your air purifier. The vents can easily become clogged with dust, pet hair, and other debris, which can restrict airflow and reduce the effectiveness of the purifier. To ensure that your air purifier is working at its best, here are some cleaning techniques and maintenance tips for cleaning the air intake vents:
- Turn off the air purifier and unplug it from the power source.
- Use a soft brush or vacuum attachment to gently remove any loose dirt and debris from the vents.
- If the vents are particularly dirty, you can use a damp cloth or sponge with mild soap to wipe away the grime.
- Allow the vents to dry completely before reassembling and plugging in the air purifier.
Regularly cleaning the air intake vents will help to keep your air purifier running efficiently and ensure that it is effectively removing pollutants from your indoor air.
Cleaning the Air Outlet Vents
The air outlet vents should be regularly checked and maintained to prevent blockage and maintain optimal airflow. Cleaning these vents is essential for the proper functioning of your air purifier.
Here are some cleaning techniques and maintenance tips to keep your air outlet vents in top condition:
- Use a soft brush or vacuum cleaner with a brush attachment to remove dust and debris from the vents.
- Wipe the vents with a damp cloth or sponge to remove any stubborn dirt or grime.
- Ensure that the vents are completely dry before reattaching them to the air purifier.
- Regularly inspect the vents for any signs of damage or blockage and clean them as needed.
Reassembling the Air Purifier
To reassemble your air purifier, start by carefully aligning the air outlet vents with the corresponding slots on the main unit. Once you have ensured that the vents are properly aligned, follow these steps to complete the reassembly process:
-
Secure the vents: Gently push the vents into the slots until they fit snugly. Make sure they are aligned properly and there are no gaps or loose parts.
-
Reattach the filters: If you removed the filters during the cleaning process, now is the time to put them back in place. Follow the manufacturer’s instructions to ensure proper installation.
-
Secure the cover: Place the cover back onto the main unit and make sure it is securely fastened. Double-check all the clips or screws to ensure a tight fit.
-
Test the air purifier: Plug in the unit and turn it on to ensure that it is functioning correctly. Check for any unusual noises or issues with the airflow.
Testing the Air Purifier After Cleaning
After thoroughly cleaning my air purifier, I was eager to test its effectiveness and see if it had improved the air quality in my home.
To assess the post-cleaning air quality, I used a handheld air quality monitor that measures particulate matter and volatile organic compounds.
I placed the monitor in various rooms throughout my house and compared the readings to those taken before cleaning to determine the effectiveness of the cleaning process.
Post-Cleaning Air Quality
Once you’ve cleaned your air purifier, you’ll notice an improvement in the air quality. Taking care of your air purifier doesn’t end with just cleaning it; there are a few post-cleaning maintenance steps you should follow to ensure its effectiveness and longevity. Here are four important post-cleaning maintenance tips to keep in mind:
-
Replace the filters regularly: Even after cleaning, the filters will eventually become clogged with pollutants. Regularly replacing them ensures optimal air purification.
-
Clean the exterior: Dust and dirt can accumulate on the outside of the purifier, affecting its performance. Wipe it down with a damp cloth regularly to keep it clean.
-
Check for any damage: After cleaning, inspect the purifier for any signs of wear or damage. Addressing issues promptly will prevent further damage and ensure its effectiveness.
-
Keep it in the right location: Place the purifier in a central area of the room, away from obstructions, for maximum air circulation and long-term air quality benefits.
By following these post-cleaning maintenance tips, you can ensure that your air purifier continues to provide you with clean and healthy air.
Now, let’s explore the effectiveness of cleaning in more detail.
Effectiveness of Cleaning
You can gauge the effectiveness of your cleaning efforts by monitoring the air quality in your home after cleaning. To measure the effectiveness of cleaning, you should compare the air quality before and after the cleaning process.
There are various methods to measure air quality, such as using air quality sensors or conducting air tests. These measurements will help you determine the level of improvement achieved through your cleaning techniques. For example, you can compare the levels of pollutants, allergens, and particles present in the air before and after cleaning. This comparison will give you a clear idea of the effectiveness of your cleaning methods and whether any adjustments or improvements are needed.
By monitoring the air quality, you can ensure that your cleaning efforts are making a positive impact on the air purification process.
Now that you have measured the effectiveness of your cleaning efforts, it is important to establish a cleaning schedule for your air purifier.
Establishing a Cleaning Schedule for the Air Purifier
To keep your air purifier running efficiently, it’s important to establish a regular cleaning schedule. Here are some maintenance tips to help you maintain a clean and healthy environment:
-
Determine the cleaning frequency: The frequency of cleaning your air purifier will depend on factors such as the manufacturer’s instructions, the level of air pollution in your area, and the usage of the device. It is generally recommended to clean the filters every 3-6 months.
-
Clean the filters: Remove the filters from the air purifier and gently vacuum them to remove any dust or debris. If the filters are washable, rinse them with water and let them dry completely before reinstalling.
-
Wipe down the exterior: Use a soft cloth dampened with a mild detergent solution to clean the exterior of the air purifier. Avoid using harsh chemicals or abrasive materials that could damage the surface.
-
Check for any malfunctions: Regularly inspect the air purifier for any signs of malfunctions or unusual noises. If you notice any issues, consult the manufacturer’s manual or contact customer support for assistance.
Frequently Asked Questions
How Often Should I Clean My Air Purifier?
I clean my air purifier regularly to maintain its efficiency. It’s important to follow the manufacturer’s recommendations, but generally, I replace the filters every 3-6 months and clean the unit every month.
Can I Use Water to Clean the Filters?
Yes, you can use water to clean the filters of your air purifier. However, it’s important to follow the manufacturer’s instructions and consider alternative cleaning methods such as vacuuming or using a brush.
Are There Any Specific Cleaning Products I Should Use?
When it comes to cleaning your air purifier, it is important to use safe cleaning methods and recommended cleaning products. These will ensure effective cleaning and maintenance of your purifier, keeping it in good condition for optimal air quality.
Can I Clean the Ionizer With a Damp Cloth?
Yes, you can clean the ionizer with a damp cloth. It’s important to ensure the cloth is only slightly damp, as excessive moisture can damage the ionizer. Gently wipe the surfaces to remove any dirt or dust buildup.
How Long Does It Take for the Filters to Dry After Cleaning?
After cleaning the filters, it’s important to allow them to dry completely before reinserting them into the air purifier. The drying time can vary depending on the type of filter and the humidity level, so it’s best to follow the manufacturer’s guidelines for proper maintenance.
Can the Methods for Removing Dust From Air Without an Air Purifier also be used to Clean an Air Purifier?
Yes, the same removing dust from air techniques can be used to clean an air purifier. Regularly vacuuming and dusting the surrounding area, as well as using a soft brush to gently clean the air purifier’s filters, can help maintain its effectiveness in removing airborne particles.
Conclusion
In conclusion, keeping your air purifier clean is essential for maintaining its effectiveness and ensuring the air in your home stays fresh and healthy. By following the steps outlined in this article, you can easily clean your air purifier and keep it running smoothly.
Remember to establish a cleaning schedule to stay on top of maintenance and enjoy the benefits of clean air. So, don’t let your air purifier gather dust and become a relic of the past. Keep it clean and enjoy the modern luxury of fresh, purified air in your home.