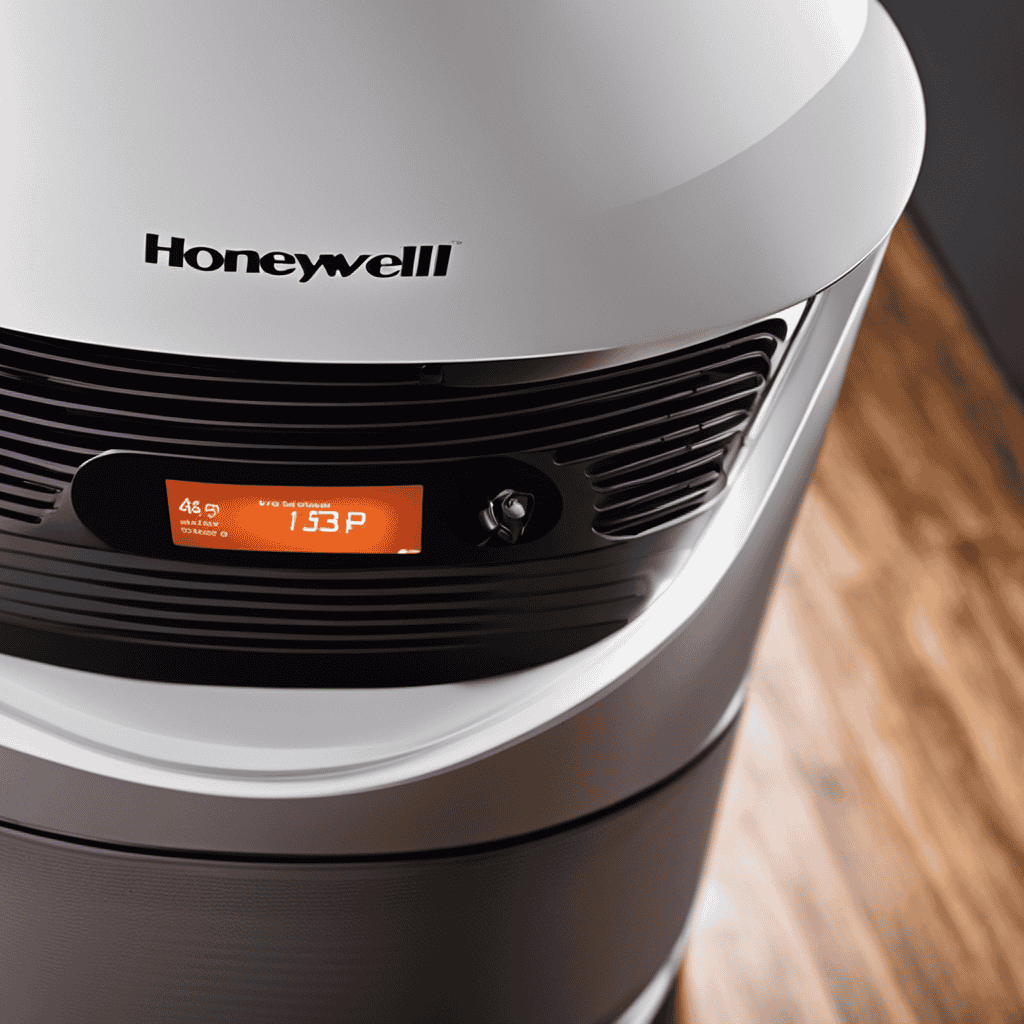
Similar to a lighthouse guiding ships in the dark, the Check Prefilter Light on a Honeywell air purifier signals when maintenance is required.
In this article, I will guide you through the steps to clear this light and restore your air purifier’s optimal performance.
Armed with a few tools and materials, you’ll be able to navigate the process effortlessly.
From understanding the light to troubleshooting persistent issues, this comprehensive guide will ensure clean and fresh air in your home.
Key Takeaways
- The Check Prefilter Light indicates the need for maintenance on the air purifier.
- Regular monitoring and timely filter replacement are essential for optimal air purification.
- The steps to clear the Check Prefilter Light include checking for dirt and debris, cleaning or replacing the prefilter, and resetting the indicator light.
- Troubleshooting tips for persistent Check Prefilter Light issues include regularly cleaning or replacing the prefilter, ensuring proper installation, and contacting Honeywell customer support if needed.

Honeywell HRF-A300 Pre-Filters for Air Purifiers, 4-Pack, Activated Carbon Reduces Household Odors and VOCs, Compatible with Select Honeywell HEPA Air Purifiers
- Compatible with Honeywell HPA Series: Fits select Honeywell air purifiers
- Trusted Brand with 25+ Years: Reliable air cleaning expertise
- Pre-Filter for Larger Particles: Captures dust, lint, pet fur
As an affiliate, we earn on qualifying purchases.
As an affiliate, we earn on qualifying purchases.
Understanding the Check Prefilter Light
The Check Prefilter Light is an important part of air purifier maintenance. It lets you know when it’s time to clean or replace the prefilter. This helps ensure that your air purifier is working effectively and efficiently.
When the Check Prefilter Light illuminates, it means that the prefilter has accumulated a significant amount of dirt and particles. Cleaning or replacing the prefilter is crucial for maintaining the air purifier’s performance and prolonging its lifespan.
To clean the prefilter, gently vacuum it or wash it with mild soap and water. If the prefilter is damaged or heavily soiled, it is recommended to replace it with a new one.
Regular monitoring of the Check Prefilter Light and timely filter replacement are essential for optimal air purification and a healthier living environment.
Identifying the Steps to Clear the Check Prefilter Light
To resolve the issue, you’ll need to follow a few steps to turn off the indicator for the prefilter on your Honeywell air purifier.
-
Check for dirt and debris: The check prefilter light is commonly caused by a dirty prefilter. Inspect the prefilter for any buildup of dirt and debris.
-
Clean or replace the prefilter: If the prefilter is dirty, it needs to be cleaned or replaced. Gently vacuum the prefilter to remove any accumulated dirt. If the prefilter is damaged or excessively dirty, replace it with a new one.
-
Reset the indicator: Once the prefilter is clean or replaced, reset the check prefilter light by pressing and holding the reset button for 5 seconds.
-
Regular maintenance: To prevent the check prefilter light from recurring, regularly clean or replace the prefilter as recommended by the manufacturer.
Gathering the Necessary Tools and Materials
Gather all the necessary tools and materials for the task at hand. To effectively clear the check prefilter light on your Honeywell air purifier, you will need the following items:
| Tools | Materials | Other |
|---|---|---|
| Screwdriver | Soft cloth | User manual |
| Vacuum cleaner | Mild detergent | Replacement filter |
The cleaning process involves the following steps:
- Turn off and unplug the air purifier.
- Remove the front cover using a screwdriver.
- Take out the prefilter and gently clean it with a vacuum cleaner or rinse it with mild detergent.
- Allow the prefilter to dry completely before reinstalling it.
- Wipe the front cover with a soft cloth.
- Replace the filter if necessary, following the instructions in the user manual.
Remember to perform regular maintenance to ensure optimal performance of your air purifier. Clean the prefilter every 3-6 months and replace the filter as recommended by the manufacturer. These maintenance tips will help extend the lifespan of your device and maintain clean indoor air quality.
Step-by-Step Guide to Clearing the Check Prefilter Light
Make sure you have all the necessary tools and materials ready for the step-by-step process of addressing the prefilter indicator on your Honeywell air purifier. Here is a guide to troubleshooting common prefilter light problems and maintaining a clean prefilter:
-
Check for obstructions: Inspect the prefilter for any visible dirt, dust, or debris that may be blocking the airflow. Remove any obstructions carefully using a soft brush or vacuum cleaner.
-
Clean the prefilter: If the prefilter is dirty, gently rinse it under cool water to remove loose particles. Allow it to dry completely before reinserting it into the air purifier.
-
Reset the indicator: Once the prefilter is clean and dry, locate the prefilter indicator on the control panel. Press and hold the reset button for 5 seconds to reset the indicator light.
-
Regular maintenance: To prevent future issues, it’s important to clean the prefilter regularly. Aim to clean it every 3 months or as needed to ensure optimal performance and prolong the lifespan of your Honeywell air purifier.
Troubleshooting Tips for Persistent Check Prefilter Light Issues
If the prefilter indicator light on your Honeywell air purifier continues to persist, try these troubleshooting tips. Common causes of check prefilter light issues can include a dirty or clogged prefilter, incorrect installation, or a malfunctioning prefilter sensor. To prevent the check prefilter light from recurring, make sure to regularly clean or replace the prefilter according to the manufacturer’s instructions. Additionally, ensure that the prefilter is properly installed and securely in place. If the issue persists, try resetting the air purifier by unplugging it from the power source, waiting for a few minutes, and then plugging it back in. If none of these solutions work, it may be necessary to contact Honeywell customer support for further assistance.
| Common Causes of Check Prefilter Light Issues | How to Prevent Check Prefilter Light from Recurring |
|---|---|
| Dirty or clogged prefilter | Regularly clean or replace the prefilter |
| Incorrect installation | Ensure proper installation of the prefilter |
| Malfunctioning prefilter sensor | Reset the air purifier if the issue persists |
Conclusion
In conclusion, clearing the Check Prefilter Light on a Honeywell air purifier is a simple and straightforward process that can easily be done at home. By following the step-by-step guide provided and using the necessary tools and materials, you can ensure that your air purifier continues to function effectively.
Remember to troubleshoot any persistent issues and seek professional help if needed.
Now, with this knowledge at your fingertips, you can enjoy cleaner and healthier air in your home. So go ahead, take control of your indoor air quality and breathe easy!