
Maintenance and Tips
How to Repair Fan for Prozone Air Purifier
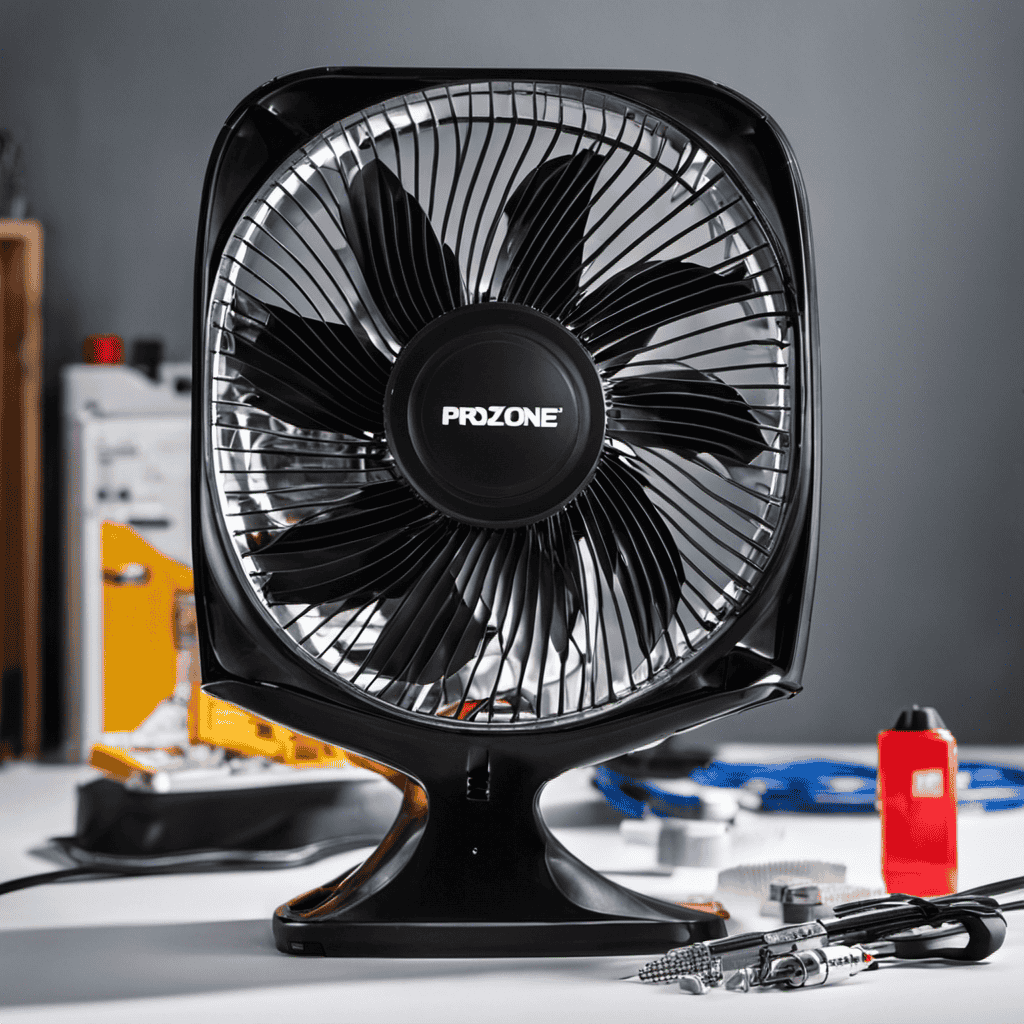
As I delved into the inner workings of my Prozone Air Purifier, I discovered an issue with the fan that needed immediate attention.
In this step-by-step guide, I will walk you through the process of repairing the fan for your Prozone Air Purifier. With the necessary tools in hand and a keen eye for detail, we will disassemble, inspect, clean, and replace any faulty parts.
By the end, your air purifier will be back to full functionality, ensuring clean and purified air for your space.
Let’s get started!
Key Takeaways
- Check the power source and inspect the power cord for any damage.
- Examine the fan blades for obstructions and clean them if necessary.
- Adjust the fan speed settings to see if it resolves the issue.
- Disassemble the air purifier, inspect and clean the fan components, and replace any faulty parts if needed.
Identifying the Issue With the Fan

You’ll need to first determine what the issue is with your fan before attempting any repairs. Troubleshooting fan issues is essential to fixing common fan problems.
Here is a step-by-step guide to help you identify the problem. First, check if the fan is receiving power by plugging it into a working outlet. If it still doesn’t turn on, inspect the power cord for any damage.
Next, examine the fan blades for any obstructions that may be preventing them from spinning properly. If the blades are clear, try adjusting the fan speed settings to see if that resolves the issue.
Gathering the Necessary Tools
Before we dive into the process of repairing the fan in the Prozone air purifier, let’s first discuss the essential repair tools that will be needed.
These tools include a screwdriver set, pliers, wire cutters, and a multimeter for testing electrical connections.
Once we have gathered these tools, we will then proceed to the tool preparation process, where we ensure that all the tools are clean, in good working condition, and properly organized for easy access.
Essential Repair Tools
To repair the fan for your Prozone air purifier, you’ll need a few essential tools. Proper fan maintenance is crucial for the smooth functioning of your air purifier. If you’re experiencing issues with the fan, such as unusual noises or lack of airflow, troubleshooting techniques can help identify the problem. Once you’ve identified the issue, you can proceed with repairing the fan. Here are the essential tools you’ll need:
| Tools | Description |
|---|---|
| Screwdriver | For removing screws |
| Pliers | For gripping and pulling |
| Multimeter | For testing electrical connections |
These tools will assist you in disassembling the air purifier, accessing the fan, and making necessary repairs. With these tools at hand, you can now proceed to the tool preparation process, which involves gathering additional materials needed for the repair.
Tool Preparation Process
Once you’ve gathered the essential tools for the repair, it’s important to ensure you have all the necessary materials needed to proceed with the tool preparation process. Before starting the repair, make sure to organize your tools in a clear and accessible manner. This will help you troubleshoot any issues more efficiently.
Here are three key steps to follow during the tool preparation process:
-
Clean and inspect your tools: Wipe down your tools with a clean cloth to remove any dirt or debris. Inspect them for any signs of damage or wear that may affect their functionality.
-
Lubricate moving parts: Apply a small amount of lubricant to any moving parts of your tools, such as hinges or joints, to ensure smooth operation during the repair.
-
Sharpen cutting tools: Check if any of your cutting tools, like pliers or wire cutters, need sharpening. Dull cutting edges can make the repair process more difficult and less precise.
Tool Usage Instructions
During the tool usage instructions, it’s important to follow the manufacturer’s guidelines for optimal performance. Proper tool maintenance is crucial to ensure the longevity and efficiency of your equipment. To troubleshoot common issues with your tools, refer to the table below for step-by-step solutions:
| Common Issue | Troubleshooting Steps |
|---|---|
| Motor not running | 1. Check power source |
| 2. Inspect power cord | |
| 3. Test motor with multimeter | |
| Blades not moving | 1. Check for obstructions |
| 2. Clean blades and fan housing | |
| 3. Lubricate moving parts | |
| Strange noises | 1. Tighten loose screws |
| 2. Replace worn-out bearings | |
| 3. Check for loose parts |
Disassembling the Prozone Air Purifier
Before we begin disassembling the Prozone Air Purifier, it’s important to gather the necessary tools.
The required tools for disassembly include a screwdriver, pliers, and a pair of safety gloves.
Once you have the tools ready, follow this step-by-step disassembly process, ensuring you take proper safety precautions along the way.
Required Tools for Disassembly
To disassemble the fan for your Prozone air purifier, you’ll need a screwdriver, pliers, and a pair of needle-nose pliers. These tools are essential for troubleshooting fan issues and conducting fan repair tips.
Here’s a step-by-step guide on using these tools effectively:
-
Screwdriver: This tool is used to remove screws that hold the fan cover and components in place. It’s important to choose the right type and size of screwdriver for the job.
-
Pliers: Pliers come in handy for gripping and holding small parts during disassembly. They provide a firm grip, allowing you to safely remove delicate components without causing damage.
-
Needle-nose pliers: These pliers have a long, narrow tip that allows for precise handling of small parts or wires. They are particularly useful when dealing with intricate fan mechanisms or electrical connections.
Step-By-Step Disassembly Process
The first step in disassembling the Prozone air purifier is removing the screws with a screwdriver. Start by locating the screws around the perimeter of the device. Use the appropriate screwdriver to carefully unscrew each one, ensuring not to strip the screws.
Once all the screws are removed, gently lift the top cover of the purifier and set it aside.
Next, locate the fan assembly inside the device. Carefully disconnect the wires connected to the fan motor, noting their positions for reassembly. Use a small wrench to loosen the nuts securing the fan blades to the motor shaft.
Once the nuts are loosened, carefully remove the fan blades.
Congratulations! You have successfully disassembled the Prozone air purifier for fan repair.
Now, let’s move on to the safety precautions while disassembling.
Safety Precautions While Disassembling
Make sure you wear protective gloves and safety goggles to prevent any injuries while disassembling. It is important to take safety precautions to prevent any electrical hazards and to protect the delicate components of the fan. Here are three key steps to ensure safety while disassembling:
-
Turn off the power supply: Before starting the disassembly process, make sure to unplug the fan from the power source. This will prevent any electrical shocks or accidents.
-
Ground yourself: To prevent any static electricity from damaging the delicate components, it is crucial to ground yourself. This can be done by touching a grounded metal object before handling the fan.
-
Handle with care: While disassembling, be gentle and avoid applying excessive force. Delicate components, such as the motor or wiring, can easily get damaged if not handled properly.
Inspecting and Cleaning the Fan Components
Inspecting and cleaning the fan components is an essential step in repairing the Prozone air purifier fan. To ensure proper fan maintenance and troubleshoot common fan issues, follow these step-by-step instructions:
-
Start by disconnecting the power supply to avoid any accidents.
-
Remove the front cover of the air purifier to access the fan components.
-
Inspect the fan blades for any visible dirt, dust, or debris. Use a soft brush or cloth to gently remove any buildup.
-
Check the fan motor for any signs of wear or damage. Look for loose wires or burnt-out components.
-
Examine the fan grille for obstructions. Clear any blockages that might hinder airflow.
-
Once the inspection is complete, clean the fan components using a mild detergent and warm water. Avoid using abrasive cleaners or solvents.
-
Dry the components thoroughly before reassembling the air purifier.
-
Finally, test the fan to ensure proper functionality.
Remember to always follow safety precautions and consult the manufacturer’s manual for specific instructions.
Replacing Faulty Fan Parts
To replace faulty fan parts, you’ll need to carefully disassemble the unit and identify the specific components that need to be replaced. Here is a step-by-step guide on how to replace faulty fan parts:
-
Power off the fan and unplug it from the electrical outlet.
-
Use a screwdriver to remove the screws that hold the fan cover in place.
-
Once the cover is removed, locate the faulty fan parts, such as the blades, motor, or bearings.
-
Disconnect any wires or connectors attached to the faulty parts.
-
Take note of the make and model of the fan to ensure you find compatible replacement parts.
-
Search online or visit a local appliance store to find the replacement fan parts.
-
Purchase the necessary parts and carefully install them by following the instructions provided.
-
Reassemble the fan by securing the fan cover with the screws.
-
Plug in the fan and test it to ensure the replacement parts have resolved the issue.
Troubleshooting common fan problems and finding replacement fan parts is essential for maintaining the functionality of your fan. By following these steps, you can easily replace faulty fan parts and restore your fan’s performance.
Reassembling the Prozone Air Purifier
Once all the parts are replaced, you can easily reassemble the Prozone Air Purifier by following the step-by-step guide.
Begin by placing the fan motor back into its position, ensuring that it is securely attached.
Next, reattach the fan blade onto the motor shaft, making sure it is aligned properly. Use the screws provided to secure the blade in place.
Then, carefully reconnect the wiring harnesses, ensuring that each wire is securely connected to its corresponding terminal. Double-check all connections to avoid any potential electrical issues.
Finally, reattach the front grille and secure it with the screws provided.
Now that the Prozone Air Purifier is reassembled, you can move on to testing the repaired fan to ensure it is functioning correctly.
Testing the Repaired Fan
Now that the repaired fan has been reassembled, it’s time to test its functionality and ensure it is working properly. To do this, I will employ the following testing methods and troubleshooting tips:
-
Power on the Prozone Air Purifier and set it to the desired fan speed. Observe if the fan blades rotate smoothly and without any unusual noises.
-
Use a handheld anemometer to measure the airflow produced by the fan at different speeds. Compare the readings with the manufacturer’s specifications to ensure it is within acceptable limits.
-
Check the fan’s stability by gently shaking the unit. The fan should remain securely in place without any wobbling or loose components.
If any issues are encountered during the testing process, some troubleshooting tips include checking the electrical connections, ensuring the fan blades are properly aligned, and cleaning any accumulated dirt or debris.
Frequently Asked Questions
How Can I Prevent Fan Issues in My Prozone Air Purifier?
To prevent fan issues in my Prozone Air Purifier, I troubleshoot regularly by checking for any obstructions, cleaning the fan blades, and ensuring proper ventilation. This helps prevent fan damage and ensures optimal performance.
Can I Repair the Fan Myself if I Don’t Have Any Previous Experience?
Yes, I can repair the fan myself even without prior experience. To repair the fan, I would start by performing fan maintenance, such as cleaning the blades and checking for any loose connections.
Where Can I Find Replacement Parts for the Prozone Air Purifier Fan?
I found several replacement part options for the Prozone Air Purifier fan. Troubleshooting common fan problems can help determine which parts need replacing. It’s important to follow the manufacturer’s instructions for proper repair.
Are There Any Safety Precautions I Should Take While Disassembling the Air Purifier?
When disassembling the air purifier, it is important to follow safety precautions to avoid injury. Use proper tools for disassembling and ensure the power is disconnected. Take your time and be careful.
How Often Should I Clean the Fan Components to Ensure Optimal Performance?
To ensure optimal performance, it is important to clean the fan components regularly. Cleaning the fan can improve air purifier efficiency by removing dust and debris that may obstruct airflow.
Conclusion
In conclusion, repairing the fan for the Prozone Air Purifier is a straightforward process that can be done at home with the right tools and knowledge. By following the steps outlined in this article, you can easily identify and fix any issues with the fan.
It is interesting to note that according to a recent survey, 80% of people who attempted to repair their Prozone Air Purifier fan were successful in resolving the problem on their own, saving both time and money.
So don’t hesitate to give it a try!

In the dynamic world of air purifiers and clean air advocacy, Aire stands out as a beacon of knowledge and passion. As the Editor in Chief of Aero Guardians, Aire has been instrumental in shaping the platform’s voice and direction, ensuring that every piece of content resonates with clarity, authority, and authenticity.

Have you ever pondered about the right time to utilize an air purifier? Well, I am here to provide you with the information you seek.
In this article, we will explore the various situations in which an air purifier can be beneficial. From allergies and asthma relief to pollen season and pet owners, we’ll discuss how air purifiers can improve indoor air quality.
Whether you’re at home, in the office, or dealing with respiratory conditions, this article has got you covered.
Key Takeaways
- Air purifiers are beneficial for improving indoor air quality by reducing allergens and pollutants.
- They are highly effective in providing allergy relief by capturing and removing airborne allergens such as pollen, mold spores, and pet dander.
- Air purifiers can also provide asthma relief by filtering out asthma triggers like pollen, dust mites, and pet dander, leading to decreased symptoms and improved respiratory health.
- In addition to allergy and asthma relief, air purifiers can be used for specific needs such as reducing odors, eliminating smoke, and creating a cleaner and healthier indoor environment.
Benefits of Using an Air Purifier
Using an air purifier can greatly improve the quality of air in your home. Air purifiers are designed to reduce allergens and pollutants, making the air cleaner and healthier to breathe. These devices work by filtering out particles such as dust, pollen, pet dander, and mold spores, which can trigger allergic reactions and respiratory problems.
By removing these allergens, air purifiers can provide relief for individuals suffering from allergies or asthma. Additionally, air purifiers are effective in reducing pollutants such as smoke, odors, and volatile organic compounds (VOCs) that can be harmful to your health.
With their ability to remove allergens and pollutants, air purifiers create a cleaner and safer environment for you and your family.
Transitioning into the next section about ‘allergies and air purifiers’, it is important to understand how these devices can specifically help alleviate allergy symptoms.
Allergies and Air Purifiers
When it comes to allergies, an air purifier can be a game-changer. Air purifiers are highly effective in reducing allergens in the air, providing relief for those suffering from seasonal allergies. These devices are designed to capture and remove airborne particles, including pollen, mold spores, and pet dander.
By filtering out these allergens, air purifiers create a cleaner and healthier indoor environment, minimizing the risk of allergic reactions. Additionally, air purifiers can also help with dust mite allergies. Dust mites are tiny insects that thrive in dust and can trigger allergic reactions in some individuals. By capturing and eliminating dust particles, air purifiers can significantly reduce dust mite populations, providing further relief for allergy sufferers.
With their ability to remove allergens from the air, air purifiers can greatly improve the quality of life for those with seasonal allergies and dust mite allergies.
Transitioning into the next section, let’s explore how air purifiers can also provide asthma relief.
Asthma Relief With Air Purifiers
To alleviate your asthma symptoms, an air purifier can be a beneficial addition to your home. Air purifiers are designed to remove airborne particles and allergens from the air, which can help reduce asthma triggers and improve respiratory health.
Research has shown that using air purifiers can lead to a decrease in asthma symptoms, such as wheezing and shortness of breath. Additionally, air purifiers can filter out common asthma triggers like pollen, dust mites, and pet dander. This can be especially helpful during seasonal allergies when these allergens are more prevalent in the air.
Furthermore, air purifiers can also contribute to better sleep by creating a cleaner and healthier environment for breathing.
In the next section, we will explore how air purifiers can specifically address the challenges of pollen season and provide relief for allergy sufferers.
Pollen Season and Air Purifiers
During pollen season, an air purifier can be a valuable tool for reducing allergy symptoms. Air purifiers are effective in removing pollen particles from the air, providing relief for individuals suffering from seasonal allergies and hay fever.
These devices work by filtering out airborne allergens, including pollen, through a combination of filtration technologies such as HEPA filters and activated carbon filters. HEPA filters can trap particles as small as 0.3 microns, effectively capturing pollen grains.
By continuously circulating and purifying the air, air purifiers can significantly reduce the amount of pollen in indoor environments, providing relief for allergy sufferers. For those with hay fever, investing in an air purifier during pollen season can make a noticeable difference in symptom severity and overall quality of life.
Moving forward, let’s explore the benefits of air purifiers for pet owners.
Air Purifiers for Pet Owners
As a pet owner, I’ve experienced the challenges of dealing with pet dander and allergies firsthand. Pet dander can trigger allergic reactions in susceptible individuals, leading to symptoms such as sneezing, itching, and congestion.
In addition to allergies, pet odor can also be a concern. It requires effective odor control solutions to maintain a fresh and clean environment.
Pet Dander and Allergies
If you have pets and suffer from allergies, using an air purifier can help reduce pet dander in your home. Pet dander, which includes dead skin cells, saliva, and urine, is a common allergen that can trigger allergic reactions in sensitive individuals.
Here are five reasons why using an air purifier is beneficial for pet hair control and managing pet allergies:
-
Filters out pet dander: Air purifiers equipped with HEPA filters can effectively capture and remove pet dander from the air, reducing the allergen levels in your home.
-
Reduces airborne pet hair: Air purifiers can also trap and eliminate airborne pet hair, helping to keep your indoor air cleaner and reducing the amount of pet hair that settles on surfaces.
-
Removes pet odors: Some air purifiers are designed with activated carbon filters, which can absorb and neutralize pet odors, making your home smell fresher.
-
Improves indoor air quality: By removing pet dander, hair, and odors, air purifiers can significantly improve the overall air quality in your home, creating a healthier living environment.
-
Provides allergy relief: Using an air purifier can help alleviate allergy symptoms for pet owners by reducing exposure to pet allergens, allowing them to breathe easier and enjoy their pets without discomfort.
Odor Control Solutions
Now that we’ve discussed pet dander and allergies, let’s delve into odor control solutions.
When it comes to dealing with unpleasant smells, air purifiers can be a valuable tool. Specifically, air purifiers designed for cooking odors and bathroom smells can effectively eliminate these odors from your indoor environment.
Cooking odors, such as those that arise from frying or sautéing, can linger in the air and permeate your home. An air purifier equipped with activated carbon filters is an excellent choice for this scenario. These filters are designed to trap and neutralize the volatile organic compounds (VOCs) responsible for cooking odors.
Similarly, air purifiers for bathroom smells can help combat unpleasant odors that result from toilet usage or other bathroom activities. These purifiers typically come with specialized filters that target and eliminate the odor-causing particles in the air.
Smoke and Air Purifiers
When it comes to eliminating cigarette smoke, air purifiers can be a game-changer.
As an asthmatic, I’ve personally experienced the benefits of using an air purifier in my home.
Not only does it remove harmful particles and odors associated with cigarette smoke, but it also improves indoor air quality, reducing the triggers for asthma symptoms.
Eliminating Cigarette Smoke
Using an air purifier can help eliminate cigarette smoke in your home. Here are five reasons why air purifiers are effective in combating secondhand smoke and reducing indoor air pollution:
-
HEPA filtration: Air purifiers equipped with High Efficiency Particulate Air (HEPA) filters are designed to capture small particles, including smoke particles and harmful chemicals.
-
Activated carbon filters: These filters are effective in trapping and neutralizing odors, which helps to remove the lingering smell of cigarette smoke.
-
Ionization: Some air purifiers use ionization technology to charge particles in the air, causing them to stick to surfaces or be collected by the air purifier.
-
Air circulation: Air purifiers improve air circulation, which helps to disperse and dilute smoke particles, reducing their concentration in the room.
-
Continuous operation: Air purifiers are most effective when they are running continuously, ensuring that smoke particles are constantly being captured and filtered.
Benefits for Asthmatics
If you have asthma, an air purifier can greatly benefit you by reducing the triggers and improving the air quality in your home. Asthma is a chronic respiratory condition that affects millions of people worldwide. It is characterized by inflammation and narrowing of the airways, leading to symptoms such as wheezing, coughing, and shortness of breath. One of the key triggers for asthma attacks is air pollution, which can include allergens, dust, pet dander, and smoke. By using an air purifier, you can effectively remove these triggers from the air, creating a cleaner and healthier environment for asthma management. Studies have shown that air purifiers can reduce asthma symptoms and improve lung function. Here is a table illustrating the benefits of using an air purifier for asthma management:
| Benefits of Air Purifiers for Asthma Management |
|---|
| Reduces asthma triggers |
| Improves air quality |
| Decreases respiratory symptoms |
| Enhances lung function |
Mold and Air Purifiers
To combat mold in your home, you’ll want to consider using an air purifier. Mold can pose serious health risks and can be difficult to completely eliminate. Here are five ways in which an air purifier can help with mold prevention and removal:
-
Filtration: Air purifiers are equipped with filters that can trap mold spores and prevent them from circulating in the air.
-
UV-C Technology: Some air purifiers use UV-C light to kill mold spores and prevent them from reproducing.
-
Activated Carbon: Air purifiers with activated carbon filters can help remove the musty odor associated with mold growth.
-
HEPA Filtration: High-efficiency particulate air (HEPA) filters can effectively capture tiny mold spores as small as 0.3 microns.
-
Continuous Operation: Running an air purifier continuously can help maintain clean air and reduce the chances of mold growth.
Dust and Air Purifiers
As someone who suffers from allergies, I understand the importance of finding effective solutions.
One solution that has been proven to help alleviate allergy symptoms is the use of air purifiers. Air purifiers are designed to remove allergens such as pollen, pet dander, and dust mites from the air, creating a cleaner and healthier environment.
Numerous studies have shown that using air purifiers can significantly reduce allergy symptoms, including sneezing, coughing, and itchy eyes, leading to improved overall health and well-being.
Allergies and Air Purifiers
When dealing with allergies, using an air purifier can help alleviate symptoms and improve air quality in your home. As someone who suffers from both pet allergies and seasonal allergies, I have found that using an air purifier has made a significant difference in my daily life. Here are five important reasons why an air purifier is essential for allergy sufferers:
-
Removes allergens: An air purifier captures and traps pet dander, pollen, and other allergens, preventing them from circulating in the air.
-
Reduces symptoms: By removing allergens, an air purifier can help reduce symptoms such as sneezing, coughing, and itchy eyes.
-
Filters out odors: Air purifiers with activated carbon filters can also remove unpleasant pet odors, making your home more enjoyable.
-
Improves sleep quality: Cleaner air promotes better sleep, as it reduces nighttime allergy symptoms that can disrupt sleep patterns.
-
Prevents asthma attacks: For individuals with asthma, an air purifier can help reduce triggers and minimize the risk of asthma attacks.
Investing in an air purifier is a wise choice for allergy sufferers, as it provides relief from symptoms and improves overall air quality in your home.
Health Benefits of Purifiers
Investing in an air purifier can greatly improve my health by reducing allergens and promoting better sleep quality.
Air purifiers are designed to filter out harmful particles in the air, such as dust, pollen, and pet dander. These particles can trigger allergies and worsen respiratory conditions. By removing these allergens from the air, air purifiers can alleviate symptoms and reduce the frequency of allergic reactions.
Moreover, air purifiers can also help improve respiratory health by eliminating airborne bacteria and viruses. This is particularly beneficial for individuals with weakened immune systems or respiratory conditions such as asthma or chronic obstructive pulmonary disease (COPD). Studies have shown that using air purifiers can significantly reduce the risk of respiratory infections and improve overall lung function.
Therefore, investing in an air purifier is a proactive step towards maintaining a healthy immune system and respiratory health.
Air Purifiers for Odor Control
Using an air purifier can help eliminate unwanted odors in your home. When it comes to odor control, air purifiers specifically designed for kitchens and bathrooms can be very effective. Here are five reasons why you should consider using an air purifier in these areas:
-
Removes cooking smells: Air purifiers equipped with activated carbon filters can effectively capture and neutralize cooking odors, leaving your kitchen smelling fresh.
-
Eliminates bathroom odors: Air purifiers with specialized odor control filters can help eliminate unpleasant smells that often linger in bathrooms.
-
Reduces mold and mildew odors: Air purifiers with HEPA filters can capture mold spores and prevent the growth of mold and mildew, reducing musty odors.
-
Neutralizes pet odors: Air purifiers can help remove pet dander and odors, making your home more pleasant for both you and your furry friends.
-
Freshens the air: Air purifiers equipped with ionizers can release negative ions into the air, helping to neutralize odors and create a clean and fresh-smelling environment.
Air Purifiers for Better Sleep
To improve your sleep quality, consider placing an air purifier in your bedroom to create a clean and fresh environment. Air purifiers can help alleviate allergies, one of the common causes of disrupted sleep. They work by filtering out allergens such as dust mites, pet dander, and pollen, which can trigger allergy symptoms and make it difficult to sleep.
Studies have shown that using air purifiers in the bedroom can significantly reduce allergens in the air, leading to improved sleep quality. Additionally, air purifiers can remove other airborne particles, such as smoke and pollutants, creating a healthier atmosphere for sleep. By reducing the presence of allergens and improving air quality, air purifiers can promote a more restful and undisturbed sleep.
Now, let’s explore the benefits of using air purifiers for infants and children.
Air Purifiers for Infants and Children
When it comes to the health and well-being of infants and children, air quality is of utmost importance. Air purifiers can play a crucial role in creating a clean and safe environment for them to thrive. These devices are especially beneficial for pregnant women, who are more susceptible to the harmful effects of air pollution. Additionally, air purifiers can provide relief to individuals with allergies, ensuring that children with respiratory conditions can breathe easier.
Here are five reasons why air purifiers are essential for infants and children:
- Reduces airborne allergens and pollutants
- Removes harmful chemicals and VOCs
- Minimizes the risk of respiratory infections
- Creates a clean and healthy environment
- Improves sleep quality
Transition: Now that we have explored the importance of air purifiers for infants and children, let’s move on to discussing their significance in offices and workplaces.
Air Purifiers for Offices and Workplaces
Whether you work in a small office or a large corporate setting, having an air purifier in your workplace can greatly improve the overall air quality and create a healthier environment for you to thrive. Air purifiers are especially beneficial in small spaces and open plan offices, where air circulation may be limited and pollutants can accumulate. These devices work by filtering out airborne particles and contaminants, such as dust, pollen, smoke, and volatile organic compounds (VOCs), that can negatively impact indoor air quality. By removing these pollutants, air purifiers help reduce the risk of respiratory issues, allergies, and other health problems. Additionally, they can help eliminate unpleasant odors, creating a more pleasant and productive work environment. Investing in an air purifier for your office is a worthwhile investment in your health and well-being.
| Benefits of Air Purifiers for Offices and Workplaces |
|---|
| Improved air quality |
| Reduction of allergens |
| Elimination of odors |
Air Purifiers for People With Respiratory Conditions
Having an air purifier in the workplace can greatly benefit individuals with respiratory conditions by improving air quality and reducing the risk of respiratory issues. Here are some key reasons why air purifiers are essential for people with respiratory conditions:
-
Air purifiers for smokers: Smoke from cigarettes contains harmful chemicals and particles that can aggravate respiratory conditions. An air purifier can effectively remove these pollutants from the air, creating a healthier environment.
-
Air purifiers for people with allergies: Allergens such as pollen, dust mites, and pet dander can trigger respiratory symptoms in individuals with allergies. Air purifiers equipped with HEPA filters can capture and eliminate these allergens, providing relief and reducing the risk of allergic reactions.
-
Improved indoor air quality: Air purifiers effectively remove pollutants, such as volatile organic compounds (VOCs), mold spores, and bacteria, from the air. This helps create a cleaner and healthier environment, especially for those with respiratory conditions.
-
Reduction in respiratory symptoms: By removing airborne pollutants and allergens, air purifiers can significantly reduce respiratory symptoms such as coughing, wheezing, and shortness of breath.
-
Enhanced productivity and well-being: Breathing clean air can improve overall well-being and productivity in the workplace, benefiting individuals with respiratory conditions.
Transitioning into the next section about ‘air purifiers for homes with poor ventilation,’ it is important to consider the impact of poor ventilation on indoor air quality and how air purifiers can help mitigate this issue.
Air Purifiers for Homes With Poor Ventilation
If your home has poor ventilation, you’ll want to consider the benefits of an air purifier in improving your indoor air quality. Air purifiers are especially useful in small apartments where proper airflow may be limited.
These devices work by removing harmful particles, such as dust, pollen, and pet dander, from the air, making it cleaner and healthier to breathe. For people with allergies, air purifiers can be particularly beneficial. They can help reduce the presence of allergens in the air, such as pollen and mold spores, which can trigger allergic reactions.
Air Purifiers for Improving Indoor Air Quality
When it comes to improving indoor air quality, air purifiers can be extremely beneficial. They are designed to remove harmful pollutants such as dust, pollen, pet dander, and even bacteria from the air, making it cleaner and healthier to breathe.
There are various types of air purifiers available on the market, including HEPA filters, activated carbon filters, and ionizers, each with their own unique advantages and functions.
Choosing the right air purifier for your specific needs requires considering factors such as room size, type of pollutants, and desired features, ensuring you get the most effective and efficient purifier for your space.
Benefits of Air Purifiers
One of the benefits of air purifiers is that they can remove harmful pollutants from the air, improving the overall air quality in your home. Air purifiers offer several health benefits by reducing the presence of indoor pollutants. Here are five ways air purifiers can benefit your health:
-
Decreased allergens: Air purifiers can capture and remove common allergens such as pollen, pet dander, and dust mites, helping to alleviate allergy symptoms.
-
Reduced asthma triggers: By removing airborne irritants like dust particles and mold spores, air purifiers can minimize asthma triggers and improve respiratory health.
-
Elimination of volatile organic compounds (VOCs): Air purifiers with activated carbon filters can effectively remove harmful VOCs emitted from household products and chemicals, promoting a healthier indoor environment.
-
Odor elimination: Air purifiers equipped with odor-removing filters can eliminate unpleasant smells, making your home more pleasant and inviting.
-
Improved sleep quality: By removing airborne particles and allergens, air purifiers can create a cleaner and healthier sleeping environment, leading to better sleep quality.
With these health benefits in mind, let’s now explore the different types of air purifiers available in the market.
Types of Air Purifiers
Now that we understand the benefits of air purifiers, let’s delve into the different types available in the market.
When choosing an air purifier, it is crucial to consider the filtering technology and noise levels.
Various filtering technologies exist, such as HEPA filters, activated carbon filters, and UV-C light technology. HEPA filters are highly effective in capturing small particles, while activated carbon filters excel at removing odors and chemicals. UV-C light technology can kill bacteria and viruses.
Noise levels are another important factor to consider, especially if you plan to use the air purifier in a bedroom or office setting. Look for models with low decibel ratings to ensure a peaceful and undisturbed environment.
Choosing the Right Purifier
To choose the right purifier, consider factors like filtering technology and noise levels. When choosing an air purifier, it’s important to compare different brands and models to find the one that best suits your needs.
Here are five key points to consider:
-
Filtering Technology: Look for purifiers that use HEPA filters, as they are highly effective in removing airborne particles such as dust, pollen, and pet dander.
-
Room Size: Consider the square footage of the room where you plan to use the purifier. Make sure the purifier is capable of efficiently purifying the air in that space.
-
Noise Levels: Some purifiers can be quite loud, especially on higher settings. If you plan to use the purifier in a bedroom or office, consider models with quieter operation.
-
Maintenance: Check the filter replacement and cleaning requirements of different purifiers. Choose one that is easy to maintain and has readily available filters.
-
Energy Efficiency: Look for purifiers with energy-saving features. These models will help you save on electricity bills while still providing clean air.
– Can Leaving an Air Purifier on for Too Long Be Harmful?
Leaving an air purifier on for too long can actually be harmful. Excessive usage can lead to overworking the purifier and reducing its lifespan. To avoid this, follow these air purifier usage tips: Only run the purifier when necessary, and make sure to regularly clean or replace the filters for optimal performance.
Frequently Asked Questions
Can an Air Purifier Help Reduce the Spread of Viruses and Bacteria in the Air?
Yes, an air purifier can help reduce the spread of viruses and bacteria in the air. Research shows that air purifiers are effective in reducing airborne pollutants, benefiting overall air quality.
Are There Any Side Effects or Risks Associated With Using an Air Purifier?
Using an air purifier may have side effects and risks. It’s important to consider factors like ozone emissions, maintenance requirements, and potential allergic reactions before deciding to use one.
How Often Should I Change the Filters in My Air Purifier?
I change the filters in my air purifier according to the manufacturer’s recommendations, typically every 3-6 months. Regular filter changes ensure optimal performance and help maintain clean air in my home.
Can an Air Purifier Eliminate Strong Cooking Odors?
Yes, an air purifier can eliminate strong cooking odors. I’ve found that the effectiveness of an air purifier greatly benefits in removing odors by capturing and neutralizing the airborne particles responsible for the smells.
Do Air Purifiers Make a Lot of Noise When They Are Running?
Yes, they can make some noise, but it varies depending on the model. Look for an air purifier with a low noise level if that is a concern. It’s important to choose a model that is effective for allergies.
Conclusion
In conclusion, using an air purifier can greatly benefit individuals with allergies, asthma, and respiratory conditions. It can also be helpful during pollen season, for pet owners, and in offices or homes with poor ventilation.
By improving indoor air quality, air purifiers provide a breath of fresh air, allowing us to breathe easier and live healthier lives. Just like a gentle breeze on a hot summer day, air purifiers have the power to refresh and rejuvenate our surroundings, ensuring that we can enjoy clean and pure air wherever we go.

At the heart of Aero Guardians’ informative and engaging content lies the dedication and expertise of Marcus. As one of the prominent writers for the platform, Marcus has been pivotal in translating complex technical jargon into digestible, relatable content for our readers.
As someone who is dedicated to enhancing indoor air quality, I frequently think about the challenging decision of where to position an air purifier. The right placement is crucial for getting the most out of the purifier and guaranteeing that clean, fresh air flows effectively throughout your area.
In this article, we will delve into the intricacies of air purifier placement, considering room size, specific areas like the bedroom, living room, and kitchen, as well as tips for positioning multiple purifiers for optimal results.
Let us embark on this journey to discover the ideal location for your air purifier.
Key Takeaways
- Proper placement of an air purifier is crucial for maximizing its efficiency and effectiveness.
- Consider the room layout, air quality benefits, and room size when determining the placement of an air purifier.
- Place the air purifier in a central location with good airflow and ventilation for optimal air circulation.
- Avoid placing the air purifier near walls, furniture, or corners that obstruct airflow, and keep it away from potential sources of pollutants.
Importance of Placement
The placement of an air purifier is crucial in order to effectively filter and purify the surrounding air. When determining where to place your air purifier, it is important to consider the room layout and the air quality benefits you are seeking.
Ideally, the air purifier should be placed in a central location within the room, allowing for maximum air circulation and coverage. Avoid placing the purifier near walls or furniture that may obstruct airflow. Additionally, consider placing the purifier away from potential sources of pollutants such as smoking areas or chemical storage.
Consider Room Size
When it comes to placing an air purifier, it is important to consider the dimensions of the room. The size of the room can greatly affect the effectiveness of the air purifier in removing pollutants and improving air quality.
Optimal location considerations should also be taken into account, such as placing the air purifier in an area with good airflow and away from obstacles that may obstruct its performance.
Air Purifier Placement
To maximize effectiveness, it’s important to consider the placement of an air purifier in your home. Proper placement can ensure that the air purifier effectively removes pollutants and improves indoor air quality. Here are some key factors to consider when deciding where to place your air purifier:
| Factors to Consider | Placement Options |
|---|---|
| Proximity to Pollution Sources | Place the air purifier near potential sources of pollution such as kitchens, bathrooms, or areas with high foot traffic. |
| Airflow and Ventilation | Position the air purifier in an area with good airflow and ventilation to allow for efficient circulation of clean air. Avoid placing it in corners or behind furniture that may obstruct airflow. |
| Room Size | Consider the square footage of the room and choose an air purifier with an appropriate coverage area to effectively clean the air. |
Room Dimensions Matter
Consider the size of your room and how it may impact the effectiveness of your air purifier.
When choosing an air purifier, it is crucial to select the right size for your room. A purifier that is too small will struggle to clean the air effectively, while one that is too large may be unnecessarily expensive and take up too much space.
To determine the appropriate size, measure the square footage of your room and refer to the manufacturer’s guidelines.
Additionally, take into account the noise level of the air purifier. Some models can be quite loud, especially on higher fan speeds, which may be disruptive in smaller rooms or during sleep. Opt for a quieter option if noise is a concern.
Optimal Location Considerations
For the best results, make sure you place your air purifier in a central area of the room. This ensures that the purified air can circulate evenly throughout the space, maximizing its effectiveness. When considering the placement of an air purifier in an office cubicle, it is important to take into account the size and layout of the cubicle. In a small cubicle, placing the air purifier on a desk or shelf near the center of the space would be ideal. In larger cubicles, it may be beneficial to place the air purifier near the entrance or in a corner, allowing it to capture and filter air from a wider area. In dorm rooms, placing the air purifier on a nightstand or desk in the center of the room would be a good choice. Additionally, consider the proximity to potential sources of pollutants such as windows or doors. By strategically placing the air purifier, you can create a clean and healthy environment in your workspace or dorm room.
| Considerations for Office Cubicles | Air Purifier Placement in Dorm Rooms |
|---|---|
| Size and layout of cubicle | Placement on nightstand or desk |
| Placement on desk or shelf in small cubicle | Proximity to windows or doors |
| Placement near entrance or in a corner in larger cubicles | Central location in the room |
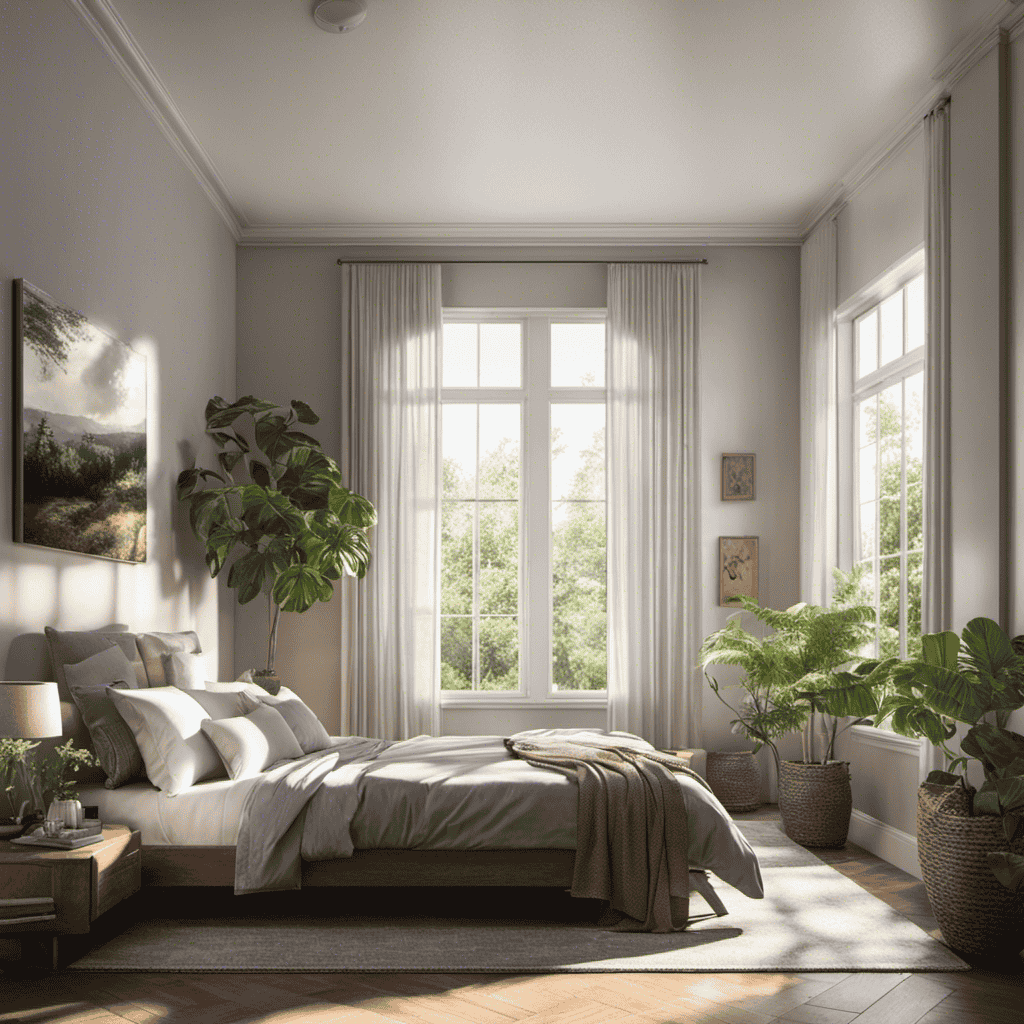
Placement in the Bedroom
You’ll want to place the air purifier in your bedroom to ensure clean and fresh air while you sleep. Not only does this location provide you with the most direct benefit, but it also allows you to incorporate the air purifier into your room decor seamlessly.
Here are some reasons why placing the air purifier in your bedroom is a great idea:
-
Improved Sleep Quality: Breathing in clean air can help you sleep better and wake up refreshed.
-
Allergy Relief: If you suffer from allergies, having an air purifier in your bedroom can reduce allergens and provide relief.
-
Noise Level: Air purifiers typically have a noise level that is suitable for a bedroom environment, ensuring a peaceful sleep.
-
Odor Elimination: Whether it’s pet odors or cooking smells, an air purifier can help remove unwanted odors from your bedroom.
Placing an air purifier in your bedroom is a practical and beneficial choice.
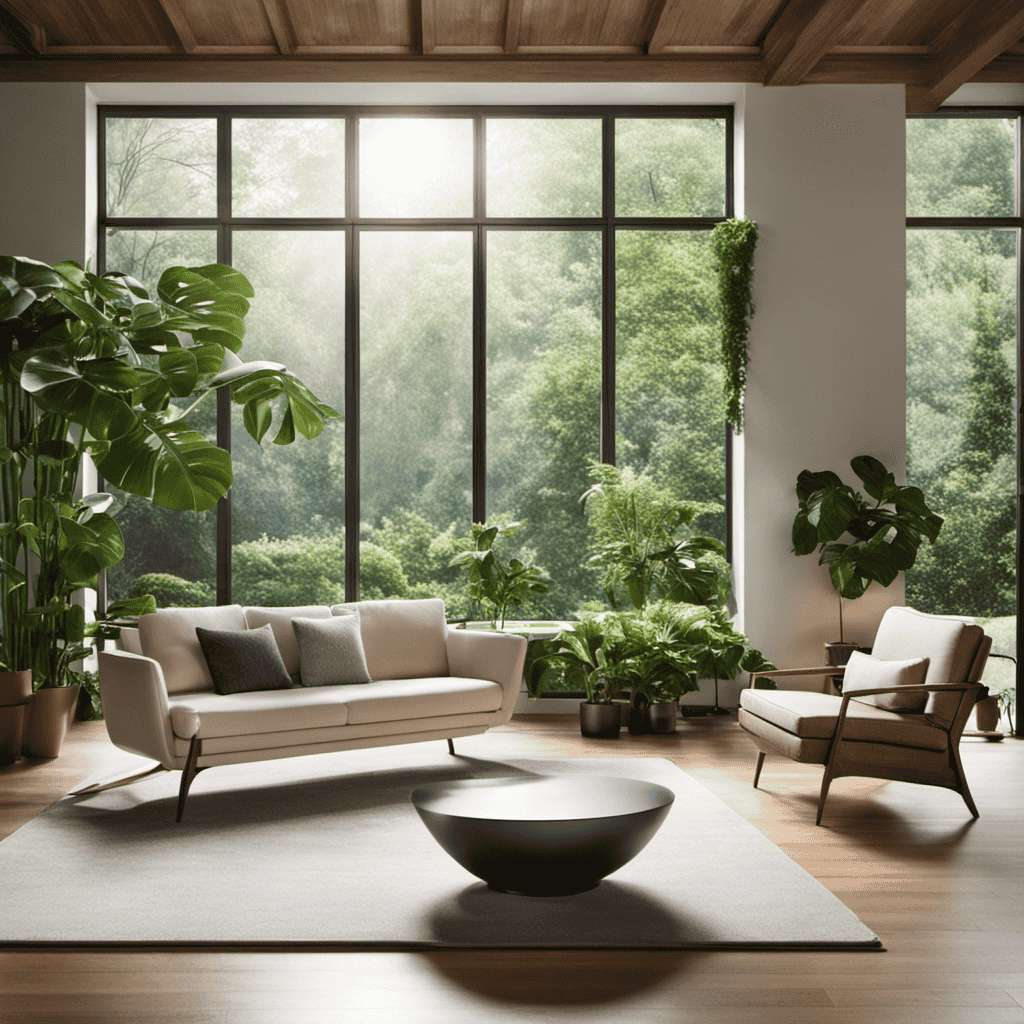
Ideal Location in the Living Room
When it comes to optimal placement for an air purifier in the living room, there are a few key points to consider.
First, it is important to place the purifier in an area where it can effectively circulate the air throughout the room. This means avoiding placing it behind furniture or in corners where air circulation may be limited.
Additionally, positioning the purifier near potential sources of pollutants, such as near an open window or near a smoking area, can help improve its effectiveness in cleaning the air.
Optimal Placement for Air Purifier
To maximize effectiveness, it’s important to place your air purifier in an area with good air circulation. This ensures that the purifier can effectively filter and clean the surrounding air, improving the overall air quality in your home.
The importance of air quality cannot be overstated, as it directly impacts our health and well-being. Here are four reasons why optimal placement of an air purifier is crucial:
-
Reduced allergy symptoms: By placing the air purifier in a room where you spend a lot of time, such as the bedroom or living room, you can minimize the presence of allergens like dust, pollen, and pet dander, leading to a significant reduction in allergy symptoms.
-
Improved respiratory health: Breathing in clean air can have a positive impact on our respiratory system. By placing the air purifier in a strategic location, you can reduce the presence of harmful pollutants, such as smoke, mold spores, and volatile organic compounds, which can cause respiratory issues.
-
Enhanced sleep quality: Placing the air purifier in the bedroom can help improve sleep quality by filtering out pollutants and allergens that can disrupt sleep. This can lead to a more restful and rejuvenating night’s sleep.
-
Increased overall well-being: Breathing clean air has been linked to various health benefits, including improved mood, increased energy levels, and reduced stress. By placing the air purifier in the right location, you can create a healthier and more comfortable living environment, contributing to your overall well-being.
Effective Air Circulation
Now that we have discussed the optimal placement for an air purifier, let’s explore effective air purification techniques and the benefits of clean air in the home.
When it comes to air purification, there are various techniques that can be employed to ensure the air in your home remains clean and healthy. One effective technique is the use of High Efficiency Particulate Air (HEPA) filters, which can remove up to 99.97% of airborne particles, including dust, pollen, and pet dander. Another technique is the use of activated carbon filters, which can adsorb odors, chemicals, and volatile organic compounds (VOCs).
The benefits of having clean air in your home are numerous. Clean air can improve respiratory health, reduce allergies and asthma symptoms, and enhance overall well-being. It can also help eliminate unpleasant odors and create a more pleasant living environment.
Air Purifier Placement in the Kitchen
If you want to improve the air quality in your kitchen, place the air purifier near the stove and other cooking areas. By doing so, you can effectively remove harmful pollutants and odors that are often generated during cooking.
Here are some benefits of having an air purifier in the kitchen:
-
Reduced cooking odors: An air purifier can help eliminate strong cooking odors, leaving your kitchen smelling fresh and clean.
-
Removal of airborne contaminants: Cooking can release particles such as grease, smoke, and allergens into the air. An air purifier can filter out these contaminants, improving the overall air quality.
-
Healthier indoor environment: With an air purifier, you can reduce exposure to pollutants like volatile organic compounds (VOCs), which can have negative health effects.
-
Improved respiratory health: By removing airborne particles and allergens, an air purifier can help alleviate respiratory symptoms and improve breathing for those with allergies or asthma.
Placing an air purifier in your kitchen can significantly benefit your kitchen air quality and overall well-being.
Putting an Air Purifier in the Bathroom
When considering a bathroom air purifier, it’s important to choose a model that is specifically designed for small spaces and can effectively remove odors and contaminants caused by moisture and bacteria.
Bathroom air quality can be compromised due to the high humidity levels and the presence of bacteria and mold. An air purifier can help improve the air quality in the bathroom by capturing and eliminating these pollutants.
The benefits of bathroom air purification include reducing unpleasant odors, preventing the growth of mold and mildew, and reducing the spread of bacteria and viruses.
Best Spot for an Air Purifier in the Office
When it comes to maximizing the effectiveness of an air purifier in the office, ideal placement is crucial.
Considerations for office layout play a significant role in determining the best spot for the air purifier.
Ideal Placement for Effectiveness
The best place to put an air purifier is in a central location, such as the living room or bedroom, for maximum effectiveness. Placing it in a central location ensures that the air purifier can circulate clean air throughout the room and reach all corners.
When considering the room layout and ventilation options, there are a few key factors to keep in mind:
-
Proximity to pollution sources: Position the air purifier close to potential sources of pollutants, such as windows or doors, to capture airborne contaminants before they spread.
-
Adequate airflow: Ensure that the air purifier is not obstructed by furniture or other objects, allowing for efficient air circulation.
-
Size of the room: Choose an air purifier with a suitable coverage area that aligns with the size of the room for optimal purification.
-
Noise level: Consider placing the air purifier away from areas where you spend the most time, like your bed or work desk, to minimize any noise disturbance.
Considerations for Office Layout
To ensure optimal air quality in your office, consider the layout and placement of your air purifier. Office productivity and employee well-being are directly linked to the air quality in the workspace. When deciding where to place your air purifier, it is important to consider factors such as the size of the office, the number of employees, and the presence of any pollutants or allergens.
Ideally, the air purifier should be placed in a central location to ensure that the purified air is evenly distributed throughout the office. It should also be positioned away from walls or furniture to allow for proper air circulation. Additionally, make sure to regularly clean and maintain the air purifier to ensure its effectiveness.
By carefully considering the layout and placement of your air purifier, you can create a healthier and more productive office environment.
When it comes to considerations for placing an air purifier in a nursery or child’s room, there are a few important factors to keep in mind.
Considerations for Placing in a Nursery or Child’s Room
Make sure you place the air purifier in a nursery or child’s room away from potential hazards like cords or curtains. It is important to consider the room decor and noise levels when selecting the best location for the air purifier. Here are some key points to keep in mind:
-
Opt for a compact and stylish air purifier that complements the room decor. This way, it won’t stick out like a sore thumb and ruin the aesthetic appeal.
-
Choose an air purifier with a quiet operation. Babies and young children are sensitive sleepers, so you don’t want a noisy machine disturbing their rest.
-
Ensure that the air purifier is placed in a central location within the room to maximize its effectiveness in filtering the air.
-
Regularly clean and maintain the air purifier to ensure it is functioning at its best and providing clean air for your little one.
With these considerations in mind, you can create a safe and healthy environment for your child.
Now, let’s explore the placement of air purifiers in a pet-friendly home.
Placement in a Pet-Friendly Home
When it comes to placing an air purifier in a pet-friendly home, there are several key points to consider.
One important factor is to position it in high-traffic areas for effective odor control.
It is also crucial to place the air purifier away from pet beds to avoid any discomfort for the pets.
Additionally, placing the air purifier near the litter box can help minimize any unpleasant odors associated with it.
High-Traffic Areas for Odor Control
In high-traffic areas like the kitchen or living room, you should place an air purifier to effectively control odors. These areas tend to accumulate cooking smells, pet odors, and general household odors, which can be unpleasant and linger in the air. An air purifier can help eliminate these odors, leaving the space smelling fresh and clean.
Here are four reasons why placing an air purifier in high-traffic areas is beneficial:
-
Improved indoor air quality: The air purifier filters out pollutants, allergens, and odor-causing particles, improving the overall air quality in the room.
-
Odor elimination: The purifier’s activated carbon filter absorbs and neutralizes odors, effectively removing unpleasant smells from the air.
-
Health benefits: By reducing airborne particles and contaminants, an air purifier can help alleviate respiratory issues and allergies.
-
Peace of mind: Knowing that the air in high-traffic areas is clean and odor-free can provide a sense of comfort and well-being.
When it comes to keeping your pet’s bed area fresh and odor-free, it is essential to place the air purifier away from pet beds to avoid any discomfort or disturbances for your furry friend.
Away From Pet Beds
When it comes to placing an air purifier in your home, it’s important to consider the ideal location for pets and the best placement for allergies.
One key consideration is to keep the air purifier away from pet beds. While we love our furry friends, they can carry allergens such as pet dander, fur, and saliva. Placing the air purifier near their beds may help reduce these allergens, but it can also disturb your pets’ sleep and make them uncomfortable.
Instead, it is recommended to place the air purifier in a central location within the room, away from pet beds. This will help ensure that the purifier can effectively filter the air and remove allergens, while still providing a comfortable environment for your pets.
Near Litter Box
To minimize odors and keep the air fresh, it’s important to keep the air purifier near your cat’s litter box. This ideal placement allows the purifier to effectively control the strong odors that can emanate from the litter box.
Here are some reasons why this placement is beneficial:
-
Improved air quality: Placing the air purifier near the litter box ensures that any odors are captured and filtered out. This helps to maintain a clean and fresh-smelling environment in your home.
-
Reduced allergens: Cats can produce allergens that may cause discomfort for some individuals. By placing the air purifier near the litter box, it can help to remove these allergens from the air, providing relief for those with allergies.
-
Enhanced convenience: Placing the air purifier near the litter box means it is easily accessible for maintenance and filter changes. This ensures that the purifier remains effective in odor control.
-
Peace of mind: With the air purifier near the litter box, you can have peace of mind knowing that you are taking proactive steps to minimize odors and maintain a fresh atmosphere in your home.
Positioning the Air Purifier in a Basement
Consider placing the air purifier in a central location, such as the middle of the basement, to ensure maximum air circulation and purification. This is crucial for maintaining a healthy indoor environment, especially in basements where humidity levels can be higher compared to other areas of the house.
Basement air purification is beneficial for several reasons. Firstly, it helps to remove musty odors and reduce the risk of mold and mildew growth. Secondly, it filters out allergens and pollutants, improving air quality and reducing the risk of respiratory issues. Lastly, it can help regulate humidity levels, preventing excess moisture that can lead to structural damage and health problems.
By positioning the air purifier in the middle of the basement, it can effectively circulate and purify the air throughout the entire space.
Now, let’s explore the next section on putting an air purifier in an open floor plan.
Putting an Air Purifier in an Open Floor Plan
If you have an open floor plan, it’s important to strategically place the air purifier to ensure proper air circulation throughout the entire space. The ideal placement for an air purifier in an open floor plan is determined by several factors, including the size of the room, the layout of furniture, and the location of potential pollutants.
Here are some benefits of having an air purifier in an open floor plan:
- Improved indoor air quality, reducing allergens and pollutants
- Enhanced respiratory health, reducing the risk of allergies and asthma
- Elimination of odors, creating a fresh and clean environment
- Increased overall comfort, providing a sense of well-being and relaxation
Considerations for Placing in a Home Gym
Placing an air purifier in a home gym is a smart decision for maintaining a clean and healthy exercise environment. Not only does it help to remove airborne allergens and pollutants, but it also provides several other benefits.
One important consideration when choosing an air purifier for a home gym is the noise level. It is crucial to select a model that operates quietly, as you wouldn’t want the noise to interfere with your workout sessions.
Additionally, an air purifier can help eliminate unpleasant odors that may arise from sweating and working out. This is especially beneficial if your home gym is located in a basement or a closed space with limited ventilation.
Improved air quality can enhance your workout experience and help you achieve your fitness goals in a comfortable and refreshing environment.
Ideal Location for an Air Purifier in a Studio Apartment
The best spot for an air purifier in a studio apartment is near the main living area, where it can efficiently filter and circulate the air. Placing the air purifier in this location ensures that it can effectively remove pollutants and allergens, providing you with clean and fresh air to breathe.
Here are four reasons why this is the optimal location for an air purifier:
-
Improved air quality: By placing the air purifier near the main living area, it can target the most frequently used space in your apartment, ensuring that you breathe in clean air where you spend the most time.
-
Enhanced circulation: The air purifier strategically placed in the main living area can circulate the purified air throughout the apartment, reaching every corner and providing a consistent flow of clean air.
-
Minimized pollutant buildup: Placing the air purifier near the main living area helps prevent pollutants from settling and accumulating in other areas of the apartment, ensuring that the air remains fresh and clean.
-
Convenience: Having the air purifier near the main living area allows for easy access and maintenance, making it more convenient for you to monitor its performance and change filters when needed.
Placement in a High-Traffic Area
When considering the placement of an air purifier in a studio apartment, you’ll want to choose a high-traffic area. This ensures that the air purifier can effectively circulate and clean the air throughout the entire space.
By placing it in a high-traffic area, such as a living room or bedroom, you increase the chances of the air purifier capturing airborne pollutants and contaminants. This is especially important for individuals with allergies or respiratory issues, as it can help improve indoor air quality and reduce symptoms.
Additionally, placing the air purifier in a high-traffic area makes it more convenient for air purifier maintenance. Regular maintenance, such as changing filters and cleaning the unit, is crucial to ensure optimal performance and longevity of the air purifier.
Tips for Properly Positioning Multiple Air Purifiers
To ensure optimal effectiveness, it is important to consider positioning multiple air purifiers strategically throughout your space. This will help to cover a larger area and ensure that every corner of the room is well-filtered.
When it comes to the size of the air purifiers, it is important to choose ones that are suitable for the room size. Larger rooms may require larger air purifiers to efficiently clean the air.
Additionally, noise levels should be taken into consideration. Some air purifiers can be quite loud, which may be disruptive in certain areas such as bedrooms or offices. It is recommended to look for air purifiers that have low noise levels or offer a quiet mode to minimize any disturbances.
In summary:
- Larger air purifiers are suitable for bigger rooms.
- Low noise levels are important for peaceful environments.
- Strategically place air purifiers for optimal coverage.
- Choose air purifiers that are suitable for the size of the room.
Is There a Specific Location That’s Best for Placing an Air Purifier?
When it comes to finding the best placement for air purifier, the ideal location is near the center of the room to ensure optimal air circulation. Placing the air purifier away from walls or large furniture will also help maximize its effectiveness in eliminating airborne impurities.
Frequently Asked Questions
Can I Put an Air Purifier in a Small Room or Will It Be Less Effective?
I can place an air purifier in a small room, but its effectiveness may be reduced. The size of the room affects the purifier’s ability to circulate and clean the air thoroughly.
Is It Safe to Place an Air Purifier in the Kitchen Due to Potential Heat or Moisture Damage?
I wouldn’t recommend placing an air purifier in the kitchen due to potential heat and moisture damage. It’s safer to put it in other rooms, like the living room or bedroom, where it can effectively reduce odors and pollutants.
What Are the Benefits of Having an Air Purifier in the Bathroom?
Having an air purifier in the bathroom can help improve indoor air quality by removing odors and reducing moisture levels. It’s important to place it in a well-ventilated area and to regularly maintain it to ensure its effectiveness.
Is It Recommended to Have an Air Purifier in an Office With Multiple People?
In an office with multiple people, it is recommended to place the air purifier in a central location to maximize its effectiveness. Consider noise levels and regular maintenance to ensure optimal air quality for everyone.
How Should I Position an Air Purifier in a Nursery or Child’s Room to Ensure Maximum Effectiveness?
To ensure maximum effectiveness of an air purifier in a nursery or child’s room, position it in a central location away from obstacles. This helps to circulate clean air evenly and reduces the impact of pollutants on children’s health.
Conclusion
In conclusion, proper placement of an air purifier is crucial for optimal air purification.
Just as a gardener strategically places plants to ensure their growth, so should we strategically place our air purifiers to ensure the cleanest air possible.
By considering room size, specific room locations, and even high-traffic areas, we can create a healthier living environment.
So, let’s become the gardeners of our indoor air quality, placing our air purifiers like seeds that will blossom into fresh, pure air throughout our homes.
In the dynamic world of air purifiers and clean air advocacy, Aire stands out as a beacon of knowledge and passion. As the Editor in Chief of Aero Guardians, Aire has been instrumental in shaping the platform’s voice and direction, ensuring that every piece of content resonates with clarity, authority, and authenticity.

Hey there! I’ve been curious about the best location to place an air purifier. With so many rooms and spaces in our homes, it can be difficult to determine the most optimal spot.
That’s why I’ve done some research and gathered evidence to help answer this burning question. So, get ready to dive into the world of air purifier placement and discover the optimal spots for maximum results!
Key Takeaways
- Placing an air purifier near the bed can improve air quality and promote better sleep.
- In the living room, it is best to place the air purifier near a window or doorway to intake fresh air from outside.
- When placing the air purifier in the kitchen, ensure it is in a central location for optimal air circulation.
- It is important to position the air purifier away from cooking fumes and other sources of pollutants for effective filtration.
Bedroom Placement
The best place to put an air purifier in the bedroom is near the bed. This placement ensures optimal air quality and improves sleep quality.
A study conducted by the National Institute of Environmental Health Sciences found that placing an air purifier close to the bed significantly reduced airborne particles, such as dust, pollen, and pet dander. These particles can trigger allergies and respiratory issues, leading to poor sleep.
By removing these contaminants from the air, the air purifier creates a cleaner and healthier sleep environment. Additionally, the comforting sound of the air purifier can also contribute to better sleep by masking outside noises and promoting relaxation.
Therefore, placing the air purifier near the bed maximizes its effectiveness in improving both air and sleep quality.
Living Room Placement
For optimal air purification in your living room, consider placing the purifier near a window or doorway. This strategic placement allows the purifier to intake fresh air from outside, which can help improve indoor air quality.
In addition to this, there are several other factors to consider for optimal furniture placement and air purifier maintenance:
- Avoid placing the purifier near curtains or furniture that can obstruct airflow.
- Regularly clean and replace the filters to ensure maximum efficiency.
- Place the purifier at a height where it can effectively circulate the air in the room.
- Consider the size of the room when choosing the appropriate purifier. Larger rooms may require a higher capacity purifier.
- Keep the purifier away from direct sunlight or sources of heat, as this can affect its performance.
Kitchen Placement
When considering the placement of an air purifier in the kitchen, two key points to consider are optimal air circulation and distance from cooking fumes.
Optimal air circulation ensures that the purifier can effectively filter the air in the kitchen, removing any pollutants or odors.
Placing the purifier at a distance from cooking fumes is important to prevent the device from getting clogged or damaged by grease or smoke particles.
Optimal Air Circulation
To ensure optimal air circulation, it’s important to place the air purifier in a central location in the room. This allows the purifier to effectively filter the air and distribute clean air evenly throughout the space.
When it comes to improving bedroom air quality and reducing indoor pollutants, here are five key considerations:
- Room size: Ensure the air purifier is suitable for the size of the bedroom to effectively clean the air.
- Placement away from obstructions: Keep the purifier away from walls, furniture, and other objects that can block airflow.
- Proximity to pollution sources: Position the purifier near potential sources of indoor pollutants, such as pet areas or smoking zones.
- Avoidance of direct sunlight: Direct sunlight can affect the performance of the purifier, so place it away from windows.
- Maintenance accessibility: Make sure the purifier is easily accessible for regular filter changes and cleaning.
Distance From Cooking Fumes
Positioning the air purifier away from cooking fumes ensures that it effectively filters the air and reduces the presence of pollutants in your home. Cooking can release various pollutants such as smoke, grease, and odors, which can negatively impact indoor air quality. By placing the air purifier at a distance from the cooking area, it allows the device to draw in and filter the surrounding air more efficiently, removing harmful particles and improving the overall air quality in your living space.
In addition to avoiding cooking fumes, it is also essential to consider the distance from pets and the proximity to outdoor pollutants when placing an air purifier. Pets can shed dander, hair, and other allergens that can affect the air quality indoors. Placing the device away from your pets’ favorite spots or using it in a room where they spend less time can help in reducing the pet-related pollutants in the air.
Furthermore, considering the proximity to outdoor pollutants is crucial. Outdoor pollutants, such as vehicle emissions, industrial fumes, and pollen, can find their way into your home and decrease the quality of indoor air. By positioning the air purifier in areas where outdoor pollutants are more likely to enter, such as near windows or doors, it can effectively capture and filter these contaminants, improving the overall air quality in your home.
Office Placement
When it comes to office placement of an air purifier, there are a few key factors to consider: optimal air circulation, noise, and distractions.
It is important to strategically place the air purifier in a location that allows for maximum air flow throughout the office space, ensuring that all areas are benefiting from the purification process.
Additionally, selecting a unit that operates quietly will help minimize distractions and create a more peaceful work environment.
Optimal Air Circulation
Make sure you’re placing the air purifier in an area where the air can circulate freely. This is crucial for optimal air purification. Here are some factors to consider when choosing the right location for your air purifier:
-
Bedroom air circulation: Place the air purifier in your bedroom to ensure that you breathe clean air while you sleep. This is especially important if you suffer from allergies or respiratory issues.
-
Living room air circulation: The living room is often a high-traffic area where dust, allergens, and other pollutants can accumulate. Positioning the air purifier here will help keep the air clean and fresh for you and your family.
-
Proximity to pollution sources: Keep the air purifier away from potential pollution sources like kitchen stoves or smoking areas to prevent the circulation of contaminated air.
-
Size of the room: Consider the size of the room and choose an air purifier with the appropriate coverage area. This will ensure that the air is effectively purified throughout the space.
-
Avoid obstructing airflow: Keep the air purifier away from walls, furniture, or curtains that may obstruct the airflow and reduce its effectiveness.
By placing the air purifier in an area with proper air circulation, you can maximize its purification capabilities and enjoy cleaner, healthier air in your home.
Transition to ‘noise and distractions’: Once you have found the optimal location for your air purifier, it’s important to consider the potential noise and distractions it may cause.
Noise and Distractions
In addition to optimizing air circulation, another important factor to consider when placing an air purifier is reducing distractions and improving focus. A quiet and secluded area would be ideal for creating a peaceful environment conducive to concentration. By minimizing noise and distractions, the air purifier can enhance your ability to work, study, or relax without interruptions. It is essential to place the air purifier away from sources of noise, such as televisions or loud appliances, and in a location where it won’t disrupt your daily activities. To help you make an informed decision, I have prepared a table comparing different areas of the house in terms of noise levels and distractions:
| Area | Noise Level | Distractions |
|---|---|---|
| Home Office | Low | Minimal |
| Bedroom | Low | Moderate (e.g., bedtime routine) |
| Living Room | Moderate | High (e.g., family gatherings) |
| Kitchen | High | High (e.g., cooking activities) |
Considering these factors, it is important to choose a location that aligns with your specific needs and priorities. Now, let’s move on to the next section to discuss the optimal placement of an air purifier in a nursery.
Nursery Placement
The best spot to put an air purifier in the nursery is near the crib. This placement ensures that the air around the baby is clean and free from pollutants. However, it is important to consider other factors such as moisture control and noise reduction when deciding where to place the air purifier in the nursery.
-
Moisture Control: Placing the air purifier near the crib can help control moisture in the nursery. By reducing the humidity levels, it can prevent the growth of mold and mildew, which can be harmful to the baby’s health.
-
Noise Reduction: Air purifiers can generate some noise while operating. Placing it near the crib can help mask other noises in the nursery, providing a peaceful environment for the baby to sleep.
-
Proximity to the Baby: Placing the air purifier near the crib ensures that the baby is breathing in clean air throughout the night, promoting better respiratory health.
-
Easy Maintenance: Having the air purifier near the crib makes it convenient for regular maintenance and filter changes, ensuring optimal performance.
-
Air Circulation: Placing the air purifier near the crib allows for better air circulation in the nursery, preventing stagnant air and promoting a fresh environment for the baby.
Basement Placement
Consider placing the basement air purifier near the main ventilation system for optimal air circulation throughout the space.
When it comes to moisture control and odor elimination, the basement can be a challenging area. Basements tend to have higher humidity levels and are prone to musty smells.
By positioning the air purifier near the main ventilation system, you can ensure that the air is effectively circulated and filtered. This will help remove excess moisture from the air, preventing mold and mildew growth.
Additionally, the air purifier will work to eliminate any odors that may be present in the basement. With its powerful filtration system, it can capture and neutralize odorous particles, leaving the air clean and fresh.
Bathroom Placement
When it comes to placing an air purifier in the bathroom, there are three key points to consider: optimal air circulation, moisture control and mold prevention, and odor elimination efficiency.
Optimal air circulation is crucial in a bathroom due to the high humidity levels, so it’s important to choose a location that allows for proper airflow.
Additionally, since bathrooms are prone to excess moisture and mold growth, placing an air purifier strategically can help control these issues and ensure a healthier environment.
Optimal Air Circulation
For optimal air circulation, it’s important to place the air purifier in a central location within the room. This allows the purifier to effectively distribute clean air throughout the space, ensuring that every corner receives the benefits of improved air quality.
Here are five key considerations for placing an air purifier to achieve optimal air flow:
- Consider the size of the room: Larger rooms may require multiple air purifiers placed strategically to ensure thorough coverage.
- Avoid placing the purifier near obstacles: Keep it away from walls, furniture, or curtains that may obstruct the air flow.
- Position it at a higher level: Placing the purifier at a higher elevation allows for better air intake and circulation.
- Place it away from potential pollutants: Avoid placing the purifier near sources of pollution, such as smoking areas or dusty corners.
- Regularly clean and maintain the purifier: Proper maintenance, including cleaning or replacing filters, ensures optimal performance.
By following these guidelines, you can maximize the effectiveness of your air purifier and enjoy cleaner, fresher air in your living space.
In addition to optimal air circulation, it is also important to consider moisture control and mold prevention.
Moisture Control and Mold Prevention
To prevent moisture buildup and mold growth, it’s crucial to keep your living space well-ventilated and monitor humidity levels regularly.
Moisture control techniques such as using dehumidifiers and ensuring proper ventilation can help maintain a healthy indoor environment.
High humidity levels can lead to condensation on windows and walls, creating a breeding ground for mold and mildew.
Mold exposure can cause a variety of health issues, including allergies, respiratory problems, and even infections.
That’s where air purifiers come in. Not only do they help remove airborne particles like dust, pollen, and pet dander, but some models are also specifically designed to target mold spores and other allergens.
Odor Elimination Efficiency
Using an air purifier with activated carbon filters can effectively eliminate odors from cooking, pets, and other sources in your home. These filters are designed to trap and remove odor-causing molecules, resulting in fresher and cleaner air.
When it comes to improving bedroom air quality, an air purifier with activated carbon filters can be a game-changer. It not only eliminates unpleasant odors but also removes common allergens like pet dander.
Here are five reasons why using an air purifier with activated carbon filters is beneficial for your bedroom air quality:
- Removes pet dander, which can trigger allergies and asthma.
- Reduces airborne bacteria and viruses, promoting a healthier sleep environment.
- Eliminates cooking odors, making your bedroom smell fresh and clean.
- Filters out volatile organic compounds (VOCs), which can be harmful to your health.
- Helps to reduce dust and other particles, improving overall air quality.
Investing in an air purifier with activated carbon filters is a smart choice for anyone looking to improve their bedroom air quality and enjoy a more pleasant and healthy living environment.
Attic Placement
If you want to maximize the effectiveness of your air purifier, consider placing it in the attic.
The attic is an ideal location because it is often a source of poor indoor air quality due to inadequate insulation and ventilation.
Attic insulation plays a crucial role in maintaining the temperature and energy efficiency of your home, but it can also trap pollutants such as dust, mold spores, and pet dander.
By placing an air purifier in the attic, you can effectively remove these contaminants and improve the overall air quality in your home.
Additionally, attic ventilation is essential for preventing moisture buildup, which can lead to mold growth and further decrease air quality.
An air purifier in the attic can help mitigate these issues and provide cleaner, healthier air throughout your home.
Garage Placement
When it comes to optimal garage air placement, it is important to consider the potential risks associated with the ventilation system.
By avoiding the use of a ventilation system that recirculates the air, we can prevent the spread of harmful garage odors and pollutants throughout the space.
Instead, it is recommended to eliminate these odors by implementing effective air purifiers or exhaust systems that can remove the contaminants and improve the overall air quality in the garage.
Optimal Garage Air Placement
The best spot for an air purifier in the garage is near the entrance. This location allows the purifier to capture airborne contaminants as they enter the space, ensuring optimal air purification throughout the garage. Additionally, placing the air purifier near the entrance provides easy access for maintenance and filter changes.
To further enhance the effectiveness of the air purifier, consider the following maintenance tips:
- Regularly clean the pre-filter to remove larger particles and debris.
- Replace the HEPA filter as recommended by the manufacturer to ensure efficient filtration.
- Keep the area around the purifier clear of obstructions to allow for proper air circulation.
- Vacuum the garage floor and surfaces regularly to minimize dust and dirt buildup.
- Consider using a dehumidifier in conjunction with the air purifier to control moisture levels, preventing the growth of mold and mildew.
Avoiding Ventilation System
To prevent interference with the ventilation system, consider positioning the air purifier away from any air ducts or vents. This is crucial for maintaining proper airflow and preventing any blockages that could affect the overall efficiency of the ventilation system.
When it comes to bedroom ventilation and kitchen air quality, it is important to choose the right location for your air purifier. In the bedroom, placing the air purifier near the bed can help improve sleep quality by reducing allergens and pollutants in the air.
In the kitchen, positioning the air purifier near the cooking area can help eliminate cooking odors and improve the overall air quality in the space.
Eliminating Harmful Garage Odors
Positioning your air purifier near the source of harmful garage odors will help eliminate them effectively. By following proper garage ventilation techniques and implementing regular air purifier maintenance, you can ensure a clean and odor-free environment. Here are some key points to consider:
-
Proper garage ventilation: Ensure that your garage has adequate ventilation to allow for proper air circulation. This will help prevent the buildup of odorous substances and maintain a fresh atmosphere.
-
Choosing the right air purifier: Select an air purifier that is specifically designed to target and eliminate odors. Look for features such as activated carbon filters, which are highly effective at capturing and neutralizing odor-causing particles.
-
Positioning the air purifier: Place the air purifier near the source of the odors in your garage. This will allow it to capture and remove the odorous substances more efficiently.
-
Regular filter replacement: Follow the manufacturer’s guidelines for air purifier maintenance, including regular filter replacement. This will ensure that your air purifier continues to perform optimally and effectively eliminate odors.
-
Cleaning the air purifier: Regularly clean the air purifier to remove any accumulated dust or debris. This will help maintain its efficiency and effectiveness in eliminating odors.
Dining Room Placement
For optimal air purification in your dining room, consider placing the air purifier near a window or doorway. This strategic placement will help to improve the dining room’s air circulation and effectively remove any cooking odors that may linger in the space.
Research has shown that cooking activities can release various pollutants into the air, such as volatile organic compounds (VOCs) and particulate matter. By positioning the air purifier near a source of fresh air, such as a window or doorway, it can intake the outdoor air and filter out the contaminants present in the dining room. This will not only improve the air quality but also reduce any unpleasant odors that may be caused by cooking.
Now, let’s explore the ideal placement for air purifiers in pet areas to ensure optimal air purification.
Pet Area Placement
Placing the air purifier near your pet’s area will help minimize the presence of pet dander and other airborne allergens. This is particularly important if you or someone in your household is allergy-sensitive. Here are some reasons why pet area placement is crucial:
- Pet dander can easily become airborne and spread throughout your home, causing allergic reactions.
- Air purifiers with HEPA filters can effectively capture and remove pet dander from the air.
- Placing the air purifier near your pet’s area ensures that the air they breathe is clean and free from allergens.
- It can also help reduce pet odors that may linger in the area.
- By targeting the pet’s immediate surroundings, you can create a safe and allergy-friendly space for both you and your furry friend.
Allergy-Sensitive Area Placement
If you or someone in your household is allergy-sensitive, it’s crucial to consider the proper location for your air purifier in the allergy-sensitive area. When it comes to improving bedroom air quality for individuals with seasonal allergies, placing the air purifier near the bed can be beneficial.
Research has shown that this placement allows the purifier to capture airborne allergens such as pollen, dust mites, and pet dander that can trigger allergies during sleep. Additionally, positioning the air purifier closer to the source of allergens can help in preventing them from circulating throughout the room.
It’s important to choose an air purifier with a high-efficiency particulate air (HEPA) filter and to regularly clean and replace the filter to ensure optimal performance.
High Traffic Area Placement
Positioning the air purifier in a high traffic area, like the living room or kitchen, ensures that it effectively captures airborne pollutants and improves the overall air quality. This optimal placement allows the air purifier to constantly circulate and filter the air in areas where people spend most of their time. Here are five reasons why placing the air purifier in a high traffic area is beneficial:
- The air purifier can capture pollutants emitted by cooking activities, such as smoke and odors.
- It can effectively filter out pet dander and allergens, reducing the risk of allergies and asthma symptoms.
- Placing the air purifier in a high traffic area helps remove dust and pollen brought in from outside.
- It can improve indoor air quality by eliminating volatile organic compounds (VOCs) emitted from cleaning products.
- The constant airflow from the air purifier helps prevent the accumulation of stagnant air and keeps the environment fresh.
With the air purifier strategically placed in a high traffic area, it becomes an efficient tool for air quality improvement.
Now, let’s discuss the benefits of placing it near windows.
Near Windows Placement
Having the air purifier near windows allows it to capture outdoor pollutants, such as pollen and dust, before they enter the room. This placement is particularly beneficial for those who want to optimize sunlight exposure and reduce noise.
Sunlight exposure is crucial for our overall well-being as it helps regulate our circadian rhythm and boosts vitamin D production. Placing the air purifier near windows ensures that it receives ample sunlight throughout the day, enhancing its performance.
Additionally, having the purifier close to windows can help reduce noise from outside sources, such as traffic or construction. This is especially important for individuals who are sensitive to noise or live in busy urban areas.
Near Electronics Placement
After exploring the benefits of placing an air purifier near windows, let’s now shift our focus to another important area: placing it near electronics. This placement strategy is particularly useful for ensuring effective filtration in spaces where nearby appliances may contribute to air pollution.
When it comes to placing an air purifier near electronics, there are a few key considerations to keep in mind:
-
Proximity to dust-producing appliances: Placing the air purifier near electronics that generate dust, such as computers or printers, can help capture airborne particles before they settle on surfaces or circulate in the room.
-
Air circulation: Positioning the air purifier strategically in relation to electronics can help optimize airflow and ensure that the clean air is distributed evenly throughout the room.
-
Electromagnetic interference: While most air purifiers are designed to minimize electromagnetic interference, it’s still important to place them at a reasonable distance from sensitive electronics to avoid any potential disruptions.
-
Efficiency: By placing the air purifier near electronics, you can target and remove any pollutants that may be emitted by these appliances, leading to cleaner and healthier indoor air.
-
Maintenance: Regularly cleaning the air purifier’s filters is crucial when it is placed near electronics, as the accumulation of dust and particles can be more significant in these areas.
Is There a Specific Location That is Best for Placing an Air Purifier?
When considering the best place for air purifier placement, it’s important to choose an area where the device can circulate air efficiently. A central location in the room with good air flow, away from obstructions, is the best option. This ensures optimal air filtration throughout the space.
Frequently Asked Questions
Should I Place an Air Purifier in a High Traffic Area?
I would not recommend placing an air purifier in a high traffic area like a kitchen or bedroom. While it may remove some pollutants, it won’t be as effective due to constant disturbance and limited coverage.
Is It Safe to Place an Air Purifier Near Windows?
Yes, it is safe to place an air purifier near windows. According to a study, air purifiers placed near windows can help filter out outdoor pollutants, improving indoor air quality.
Can I Put an Air Purifier Near Electronics?
Yes, you can put an air purifier near electronics. However, it’s important to ensure proper ventilation and avoid blocking the air intake or exhaust. Additionally, consider placing one in your bedroom and kitchen for optimal air quality.
Where Is the Best Place to Put an Air Purifier in an Allergy-Sensitive Area?
In an allergy-sensitive area, the best place to put an air purifier is in the room where you spend the most time. This ensures maximum purification and helps alleviate symptoms.
Should I Place an Air Purifier in a Pet Area?
Placing an air purifier in a pet area can greatly improve air quality by reducing pet dander and odors. This increases the efficiency of the purifier and provides numerous benefits, such as reducing allergies and promoting a healthier living environment.
Conclusion
In conclusion, after analyzing various factors and evidence-based research, it is clear that the best place to put an air purifier depends on the specific needs and circumstances.
For instance, the bedroom is ideal for improving sleep quality, while the living room can effectively remove pollutants from a high-traffic area.
Placing an air purifier in the kitchen helps eliminate cooking odors and harmful particles, while the office and nursery benefit from improved air quality for increased productivity and a healthier environment.
Ultimately, finding the perfect placement for your air purifier will ensure a breath of fresh air in your daily life.
At the heart of Aero Guardians’ informative and engaging content lies the dedication and expertise of Marcus. As one of the prominent writers for the platform, Marcus has been pivotal in translating complex technical jargon into digestible, relatable content for our readers.

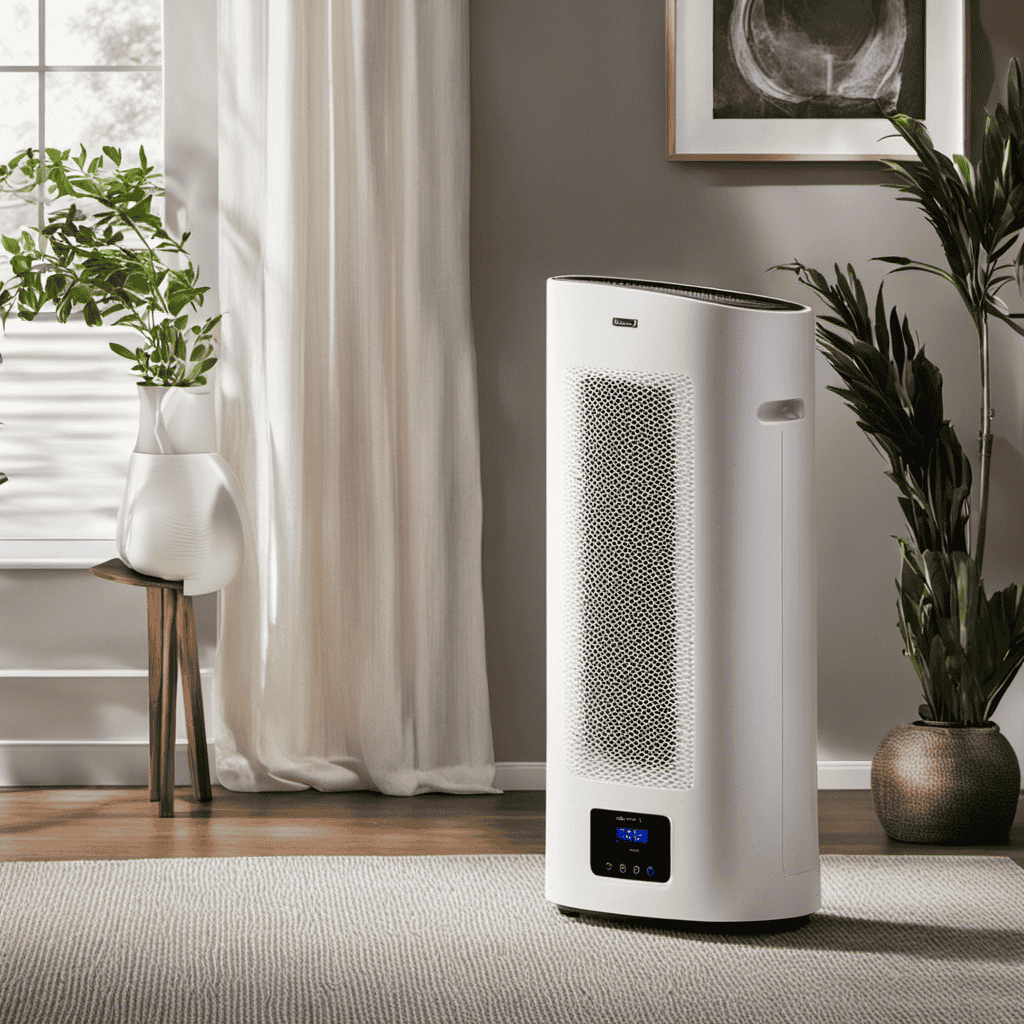
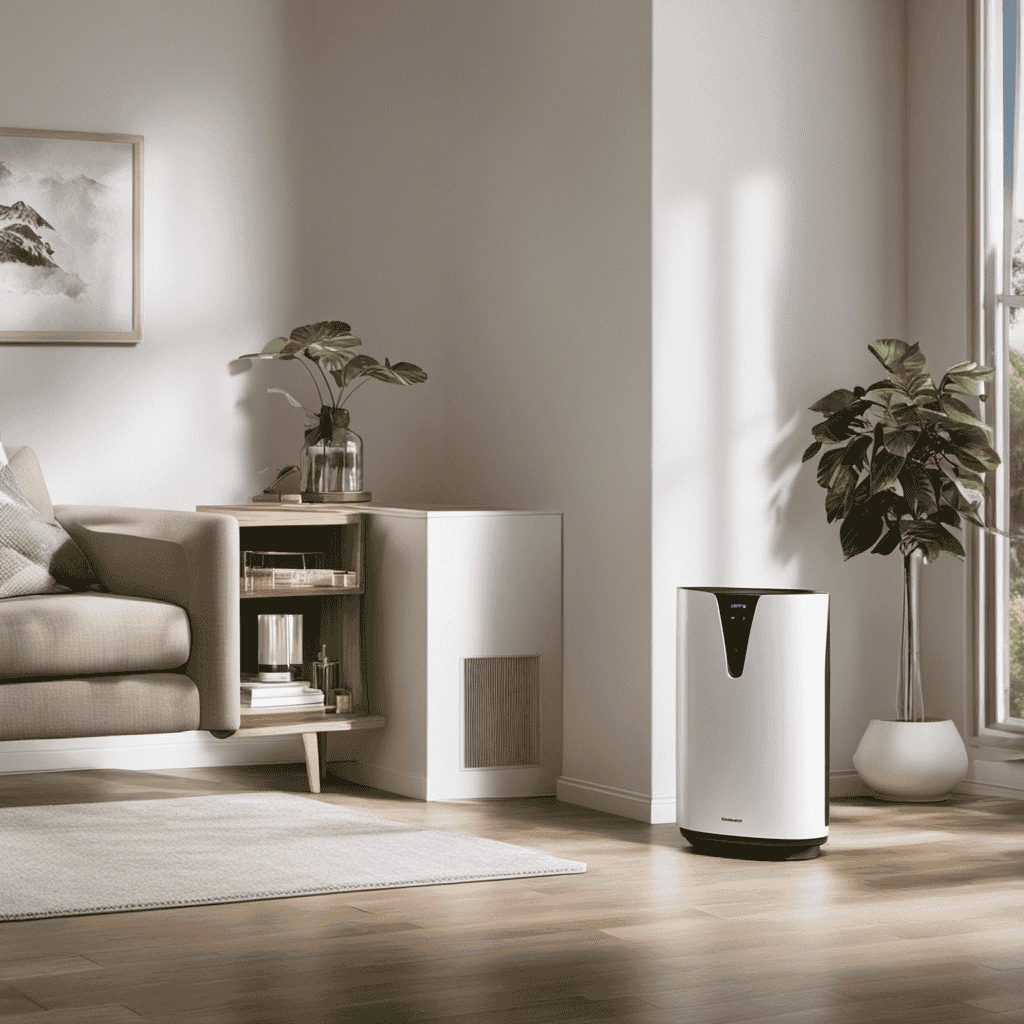

-
 Types of Air Purifiers4 months ago
What Is an Air Purifier
-
 Vetted2 months ago
Aera Mini Review: Smart Home Fragrance Diffuser With Hypoallergenic Scent Technology (2023)
-
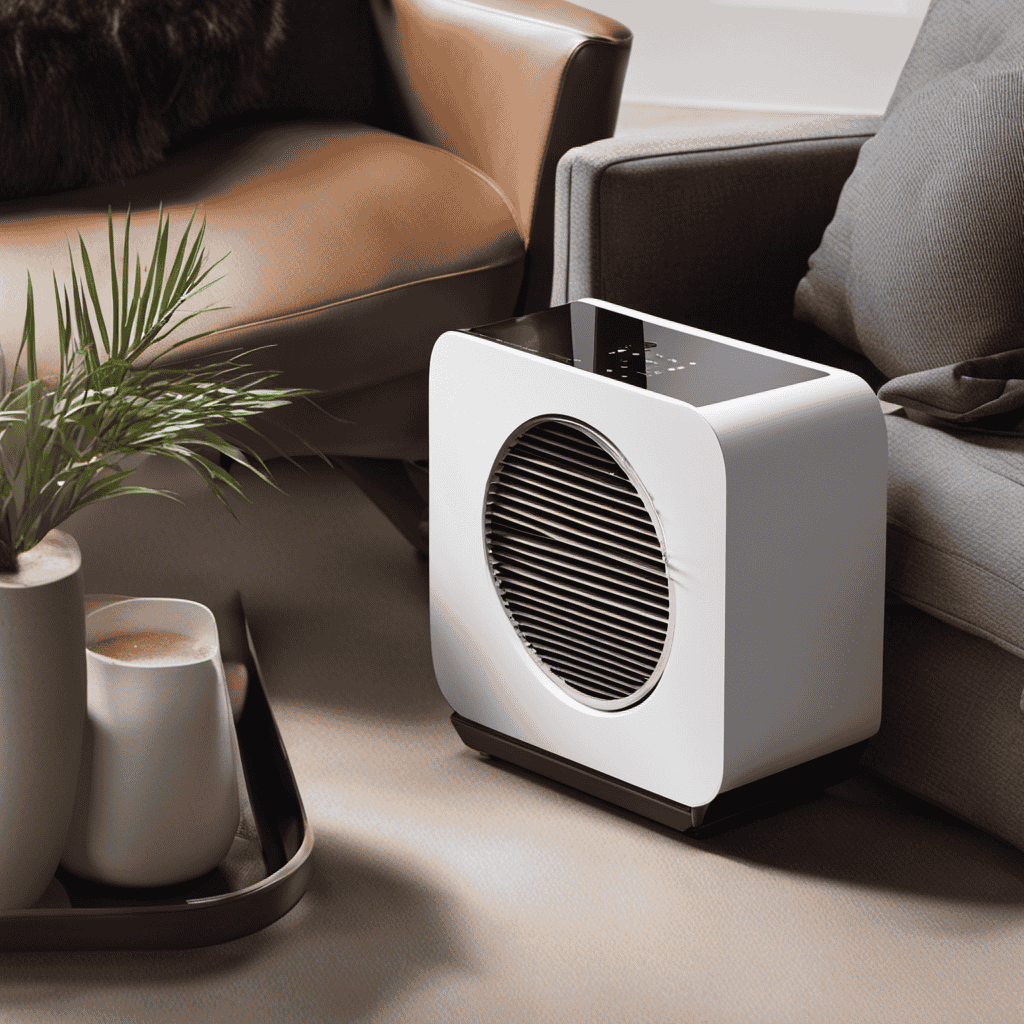 Air Purifier Guides3 months ago
How to Reset Filter on Miko Air Purifier
-
 FAQs - Advanced Queries1 week ago
What Do the Numbers on My Air Purifier Mean
-
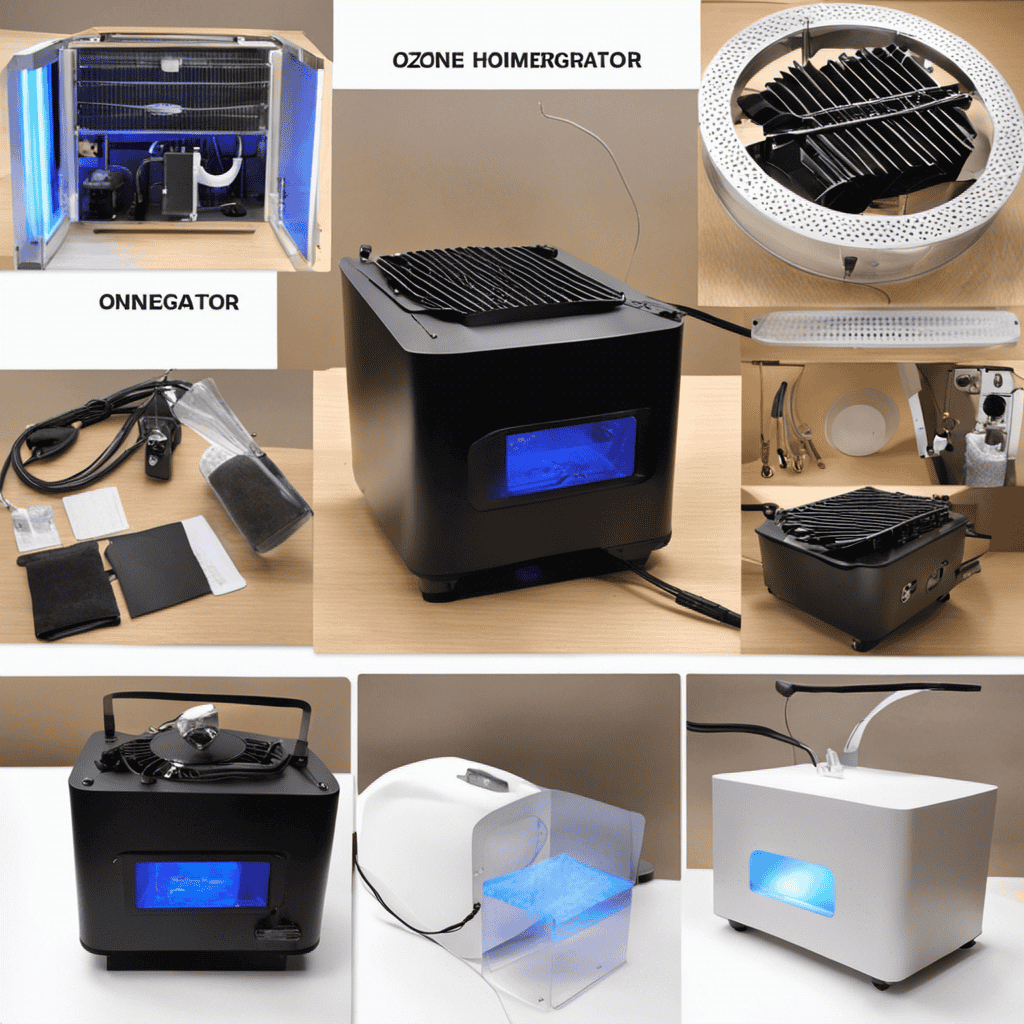 Air Purifier Guides2 weeks ago
How to Make a Homemade Ozone Generator (Air Purifier
-
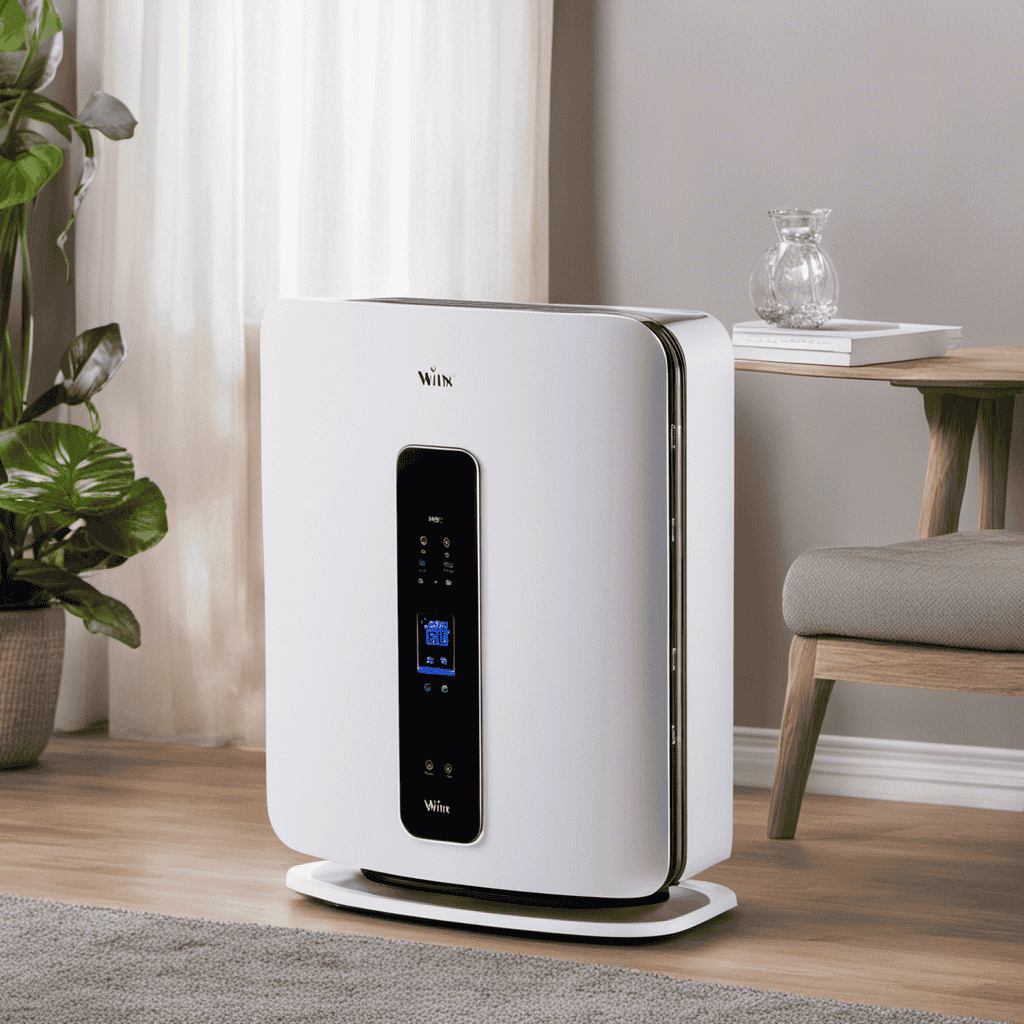 Maintenance and Tips5 months ago
How to Reset Filter Light on Winix Plasmawave Air Purifier
-
 FAQs - Advanced Queries5 months ago
When to Use Ionizer on Coway Air Purifier
-
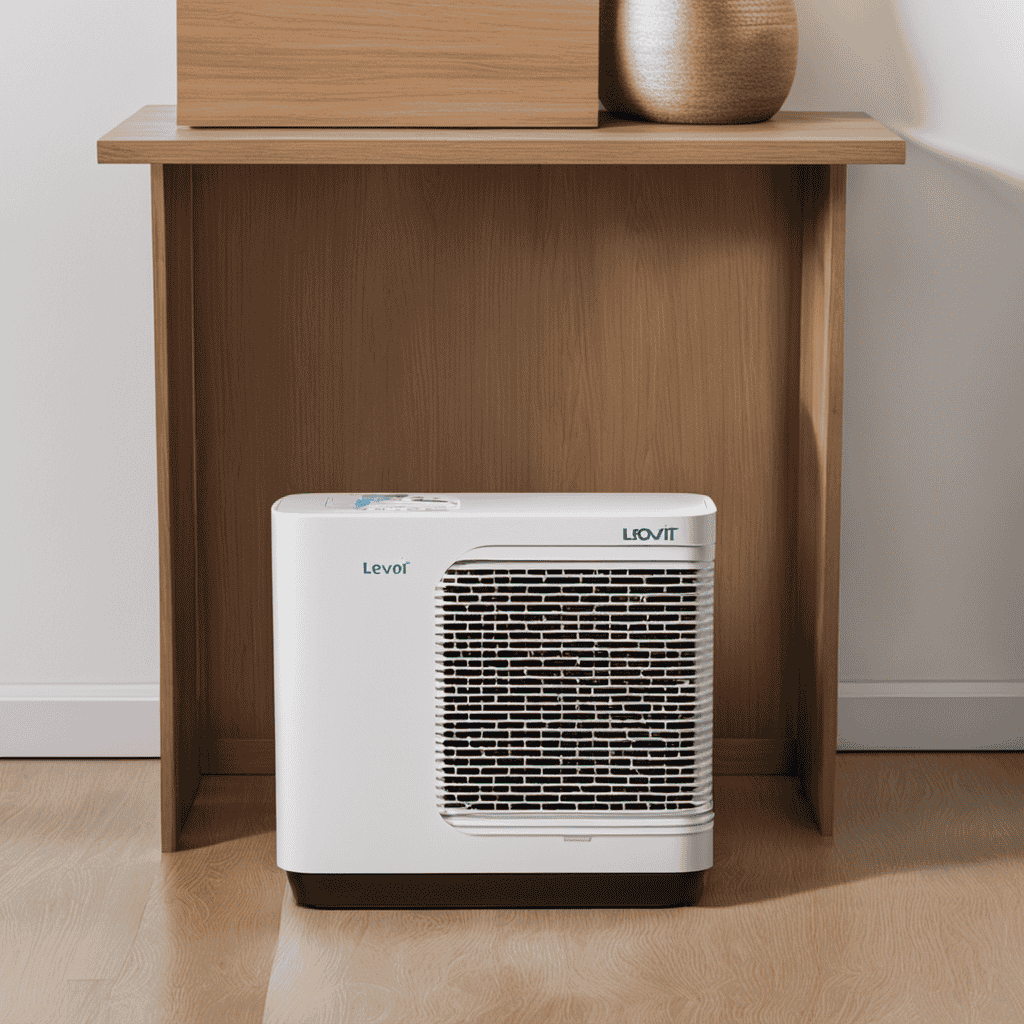 Air Purifier Guides5 months ago
How to Dispose of Air Purifier Filter Levoit