
TL;DR

Get garden gear delivered free — and shop member deals
- Fast, free delivery on millions of items
- Access to Prime Big Deal Days deals on October 6–7
- Prime Video, Amazon Music and more included
Outdoor string lights can make a garden more welcoming and define areas such as patios and dining spots, but the right set depends on its outdoor rating, power source, brightness, and mounting plan. Measure the route, support the cable properly, protect connections as instructed, and follow the manufacturer’s care guidance. LEDs are usually a lower-heat, lower-energy choice, while solar lights work best where the panel gets enough sunlight.
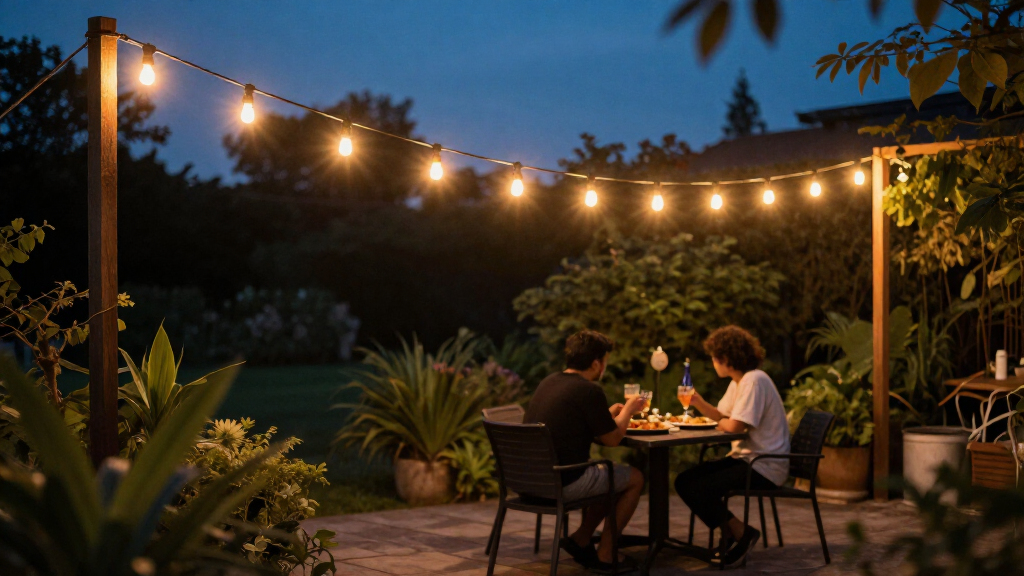
One warm strand can turn a dark patio from a place you pass through into the spot where dinner lingers. The bulbs glow overhead, the garden edges soften, and suddenly you can hear the evening instead of heading indoors.
This guide helps you choose outdoor string lights that suit your garden, then hang and care for them safely. You’ll learn how to compare power sources and brightness, plan a route, and check the details that matter before buying.
Choose an outdoor-marked set and follow its instructions for the IP rating, connections, and weather exposure.
Compare stated lumens for brightness; bulb count alone won’t tell you how much light reaches your patio.
Measure the whole route, including drops and sag, and support long runs as the manufacturer recommends.
Use outdoor-rated outlets and extension leads, protect connections as directed, and never exceed the set’s connection limit.
Inspect and store lights according to the maker’s care guidance, especially before severe weather or winter.
Choose lights that suit your garden and its weather
Outdoor string lights make a garden more welcoming when you match their weather rating, brightness, and power source to the place you plan to use them. This matters because a garden is not one environment: a covered pergola shelters lights from rain and UV, while an exposed fence takes the full force of wind, driven rain, and sun. A set that thrives under a roof can fail in a season on an open wire — not usually dramatically, but through slow damage to seals and cable insulation that shows up as flickering or dead sections. That’s why checking the product label and instructions is worth the few minutes before buying.
Start with a set explicitly marked for outdoor use. Its IP rating describes protection against dust and water; IP44, for example, resists splashing water. The tradeoff is that a higher rating generally means better protection but often a heavier, less flexible cable and a higher price — and no rating guarantees survival in every storm or installation condition, so the manufacturer’s guidance for the lights and their connections still governs what’s safe.
Next, match brightness to the job, because light that’s too dim makes a space feel unfinished while light that’s too harsh flattens the very atmosphere you’re trying to create. Warm white usually suits a relaxed dining area, while a brighter light may help where you prepare food or walk steps. Compare lumens rather than bulb count: a string of many small bulbs can still cast less light than a shorter, brighter set, because bulb size says nothing about output. The implication for planning is simple — decide what each area is for first, then buy light to match that purpose rather than hoping one strand covers everything.
For example, imagine you’re lighting a small table under a roof and a path beyond it. A warm, dimmable strand can soften dinner, while a separate, brighter fixture may make the steps easier to see. Splitting the job between two fixtures costs a little more up front but gives you independent control, so you’re not blazing full brightness every time you want a quiet evening.
LED sets typically use less electricity and produce less heat than incandescent sets — and the heat difference matters outdoors, where a hot incandescent bulb near leaves or a fabric canopy is a bigger concern, and where lower energy use means solar or battery options become practical. The tradeoff: LEDs cost more initially, and on some sets a single failed bulb or controller can end the strand. Check whether bulbs are replaceable and whether the maker permits connecting additional sets. Close spacing and small bulbs create a festive, fairy-light look; large, widely spaced bulbs read as café-style and architectural. Either way, use only compatible sets and stay within the stated connection limit, because exceeding it stresses the power supply even when the connectors physically fit.
Compare plug-in, solar, and battery-powered lights
Outdoor string lights get their power from a plug, a solar panel, or batteries, and each option works best in a different garden. The real question isn’t which is “best” but which tradeoff you can live with: plug-in sets buy consistency at the cost of wiring and outlet access; solar sets buy freedom from mains power at the cost of weather-dependent output; battery sets buy portability at the cost of ongoing attention.
| Power source | Works well when | Check before buying |
|---|---|---|
| Plug-in | You have a suitable outdoor outlet and want steady output. | Outdoor-rated outlet, lead, and protected connections as specified. |
| Solar | The panel can receive enough direct sunlight. | Panel placement, battery condition, season, brightness, and run time. |
| Battery | You want a portable strand or lack a nearby outlet. | Recharge or replacement needs, operating time, and control features. |
Why the differences matter in practice: a plug-in set delivers the same brightness in December as in June, which makes it the safer choice for lighting you rely on — steps, dining areas, anything safety-related. Solar and battery sets are better understood as mood lighting, because their output varies with conditions you don’t control. That doesn’t make them worse; it means you should match them to jobs where a dim evening is a disappointment rather than a hazard.
Picture a patio shaded by a large tree. A solar panel tucked beneath the branches may not receive enough sun to keep the lights glowing through dinner, even if the bulbs themselves look perfect. This is the most common solar disappointment: the lights are fine, the placement isn’t. A panel needs hours of direct light, and in winter, short days plus low sun can halve run time. Place the panel where it can collect light, and check the product’s expected run time against your seasonal conditions — if the maker quotes summer performance, expect less when you need light most.
Controls can make any setup easier to use, and their value depends on your routine. Timers, dimmers, remotes, and app or voice controls vary by product, so confirm they work with that set’s power source and are designed for outdoor conditions. A timer earns its cost quickly on plug-in sets by trimming needless operating hours; a dimmer lets one strand serve both task and mood lighting. But remember what controls can’t do: a timer cannot make an unsuitable plug or connector safe. Convenience features sit on top of sound electrical choices, not in place of them.
Measure your route before you buy
Measure the full route from the power source to the last attachment point, including turns, vertical drops, and any gentle sag you want. The reason this step catches so many buyers out is the gap between two numbers on the package: the usable lit length matters more than the headline total cable length, which may include an unlit lead. Buy on the headline figure and you can come home a metre or two short — which, at the far end of a run, means either a bare patch or a second set you didn’t plan for. A tape measure and a rough sketch can save you from that strand that stops short of the far post.
Say your patio is four metres across, but the cable must travel up a post, cross the seating area, and descend to another support. That route needs more than four metres of lights, especially if you want a soft curve overhead — because the curve isn’t decoration alone, it’s extra cable. A sag of even 10 percent adds meaningful length across a long span, and it also serves a purpose: a gentle curve lets the cable move slightly in wind instead of pulling taut against its attachments, which reduces strain on both the cable and whatever holds it.
Use this quick planning sequence:
- Measure the route from the outlet or panel position to each endpoint — include the vertical climbs, since a metre up and a metre down are two metres the package photo doesn’t show.
- Mark attachment points on sound posts, a pergola, or suitable structures, checking that each one can take a pulling load, not just a resting weight.
- Allow for the shape you want, such as a gentle curve rather than a taut line, and add margin for error — measuring twice is cheaper than an extra shopping trip.
- Check support needs and confirm any extra length is approved for that set, since connection limits are about electrical load, not connector compatibility.
Long runs may need a guide wire or intermediate supports, and the reason is simple physics: most light cables aren’t structural. Hung unsupported across a wide gap, they either sag unattractively or, if pulled tight to remove the sag, transfer tension to the moulded sockets — the weakest points of the strand. A guide wire carries the tension so the lights only carry their own weight. Don’t assume the light cable can do a job it wasn’t designed for; use the installation method the manufacturer recommends. If you have no trees, sturdy purpose-built posts, a pergola, or suitable fence points can provide mounting options, provided they can handle the load and local weather — and provided you’ve thought about where the wire will pull when the wind blows.
Hang the lights safely and protect every connection
Hang garden lights with suitable supports, outdoor-rated power equipment, and connections protected as the manufacturer specifies. The underlying logic of all cable safety outdoors is that electricity plus water plus movement is a combination to control, and every practice below is really about controlling one of those three. Keep cables away from places where people can trip, where furniture can pinch them, or where garden tools might cut them — because a cable damaged by a chair leg or a hedge trimmer isn’t just an annoyance; damaged insulation near moisture is a genuine shock risk. A neat-looking route also makes the setup easier to inspect, which is itself a safety feature: damage you can see is damage you can fix.
For example, if your cable crosses a doorway on its way to the patio, reroute it along a safe edge instead of leaving it stretched across the walking line. A cable at ankle height in a doorway will eventually be caught by a foot, and repeated yanking loosens both plugs and attachment points over time. Use an extension lead only if it is rated for outdoor use and follow its instructions — an indoor lead on a lawn may work on a dry evening, but the failure mode isn’t the dry evening, it’s the damp morning after. Secure plugs and connectors as directed rather than leaving them exposed to puddles or rain, since the joint where two connectors meet is where water enters most easily.
Read the installation instructions before connecting the lights, and disconnect power before inspecting or replacing parts — not as a formality, but because a switched-off strand can still be live if it’s on a timer or a switched circuit you didn’t check. Don’t use a strand with damaged cable or fittings; the cost of a replacement is trivial compared with what deteriorated insulation can cause. If flickering starts, check the power source, timer, connectors, and bulbs according to the instructions; flicker is usually a loose connection or failing bulb, but it can also be an early sign of water ingress, so treat it as information rather than noise, and stop using the set if you find damage.
Outdoor-rated does not mean weatherproof in every situation. Use the set only as its instructions allow, and ask a qualified electrician to handle permanent or complex electrical work. The line between a temporary decorative installation and permanent wiring matters legally as well as practically — permanent outdoor electrical work typically falls under regulations that exist because DIY versions fail in predictable, preventable ways.
Never exceed the manufacturer’s limit for connecting multiple sets. The limit exists because every added strand draws more current through the same plug, cable, and connectors, and heat builds in exactly the places you can’t see — inside moulded joints and along the first cable in the chain. That limit applies even when the connectors fit together, because compatibility of shape says nothing about capacity. Keep the packaging or instructions handy so you can check the approved configuration later, when you’ve forgotten the numbers and the set is halfway up a ladder away from you.
Keep the glow going through changing seasons
Inspect the cable, sockets, seals, bulbs, and supports periodically, and follow the maker’s advice for severe weather and winter storage. The reason maintenance matters more outdoors than in is that garden conditions are dynamic: branches move, wind strains a loose line, and water collects wherever a connector hangs low. Small problems compound — a support that shifts slightly puts tension on a socket, the socket seal opens a fraction, water creeps in, and by spring you’re replacing a strand that a two-minute check in autumn could have saved. A quick look now and then reveals trouble before you switch the lights on, when it’s still cheap to fix.
When the manufacturer recommends taking a set down, disconnect it and store it as directed. The logic of proper storage is preservation of the parts that degrade fastest: cable insulation stiffens in freezing temperatures, and sockets corrode in damp sheds. If the lights need drying first, let them dry before packing — packing moisture against metal contacts for months is how corrosion gets a head start. Coil the strand without tight bends or pulling on the sockets, because repeated tight coiling work-hardens the copper and cracks insulation at the same points each year. Imagine unpacking next spring to find every bulb intact, instead of untangling a brittle knot; that outcome is a direct result of how the set went into the box.
Solar performance can shift with the season, panel shade, and battery condition, so a dimmer winter evening doesn’t always mean the bulbs have failed. Knowing this saves both money and frustration: many working solar sets are discarded in November for problems that are really about short days and a shaded panel. Check the panel position and care instructions first — and note that rechargeable batteries decline over a few seasons, so a set that dimmed gradually may simply need its battery replaced rather than the whole strand. Light can attract insects, too, though the effect varies by brightness and tone; lower brightness or warmer-toned light may help reduce disturbance near a seating area, which is a tradeoff between visibility and insect activity you can tune to your garden.
Before you buy, check outdoor suitability, power source, lumen output, lit length, replaceable bulbs, connection limits, mounting plan, controls, warranty, and care instructions. This list matters because each item corresponds to a distinct way purchases go wrong: the wrong rating fails in weather, the wrong length fails at installation, non-replaceable bulbs fail at first breakage, and a missing care plan fails over winter. A short checklist converts a charming product photo into a decision you can defend — and that’s the difference between lights you enjoy and lights you manage.
Frequently Asked Questions
Can outdoor string lights stay outside all year?
It depends on the product rating, installation, local weather, and manufacturer’s instructions. Outdoor-rated does not mean suitable for every condition, so check whether the maker recommends taking the set down during severe weather or winter.
Are solar garden string lights bright enough?
Solar lights can work well for decorative lighting, but brightness and run time depend on sunlight, panel placement, battery condition, and season. They may suit a softly lit seating area better than a spot where you need strong task lighting.
How do I hang string lights without trees?
Use suitable posts, a pergola, or sound fence attachment points, and consider a guide wire for longer runs. Check that supports can handle the load and local weather, and don’t rely on the light cable to carry significant tension unless its instructions allow it.
Can I connect multiple sets or use an outdoor extension cord?
Connect sets only when the manufacturer says they are connectable, and stay within the stated limit. Use an extension lead rated for outdoor use, follow its instructions, protect connections as directed, and route it to avoid trips or damage.
What should I check if my garden lights flicker or stop working?
Follow the product instructions to check the power source, timer, connectors, and bulbs. Disconnect power before inspecting or replacing parts, and stop using the set if its cable or fittings are damaged.
Conclusion
Measure the route, match the set to your weather and power source, and plan its supports before you buy. A little care with those details gives you a strand that glows over dinner instead of sagging across the path.
Fall yard work Picks
leaf blowers
As an affiliate, we earn on qualifying purchases.