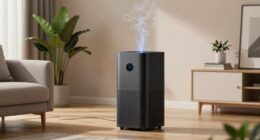

Hey there! Have you ever thought about how to properly maintain your air purifier? Don’t worry, I’ve got all the information you need right here.
In this article, I’ll walk you through the step-by-step process of cleaning your air purifier, ensuring that it continues to work efficiently and effectively.
We’ll gather the necessary tools, remove and vacuum the filters, and even test its performance.
So, if you’re ready to breathe cleaner air, let’s dive right in and learn how to clean an air purifier like a pro!
Key Takeaways
- Regular cleaning and maintenance of an air purifier is important for optimal performance and improved air quality in the home.
- Cleaning prevents filter clogging and extends the lifespan of the filters, ensuring clean and fresh indoor air.
- Proper disassembly and reassembly techniques should be followed to avoid damage to the unit.
- Cleaning supplies such as a microfiber cloth, mild detergent, and compressed air can be used for effective cleaning.
Why Clean Your Air Purifier Regularly
You should clean your air purifier regularly to ensure that it continues to effectively remove pollutants from the air in your home. Cleaning the air purifier not only improves its performance but also keeps the air quality in your home at its best.
One important aspect of cleaning is filter replacement. Over time, the filters in your air purifier become clogged with dirt, dust, and other particles. This reduces their efficiency in capturing pollutants and allergens from the air. By replacing the filters regularly, you can maintain optimal air quality improvement.
It is recommended to check your air purifier’s manual for guidance on when and how to replace the filters. Regular cleaning and filter replacement will help your air purifier function effectively and keep the air in your home clean and healthy.
Gather the Necessary Tools and Materials
To get started, make sure you have all the tools and materials you’ll need.
Cleaning an air purifier requires a few specific items to ensure a thorough job. First, you’ll need a soft-bristle brush or a small vacuum cleaner with a brush attachment. This will help you remove any dust or debris that may have accumulated on the surface of the purifier.
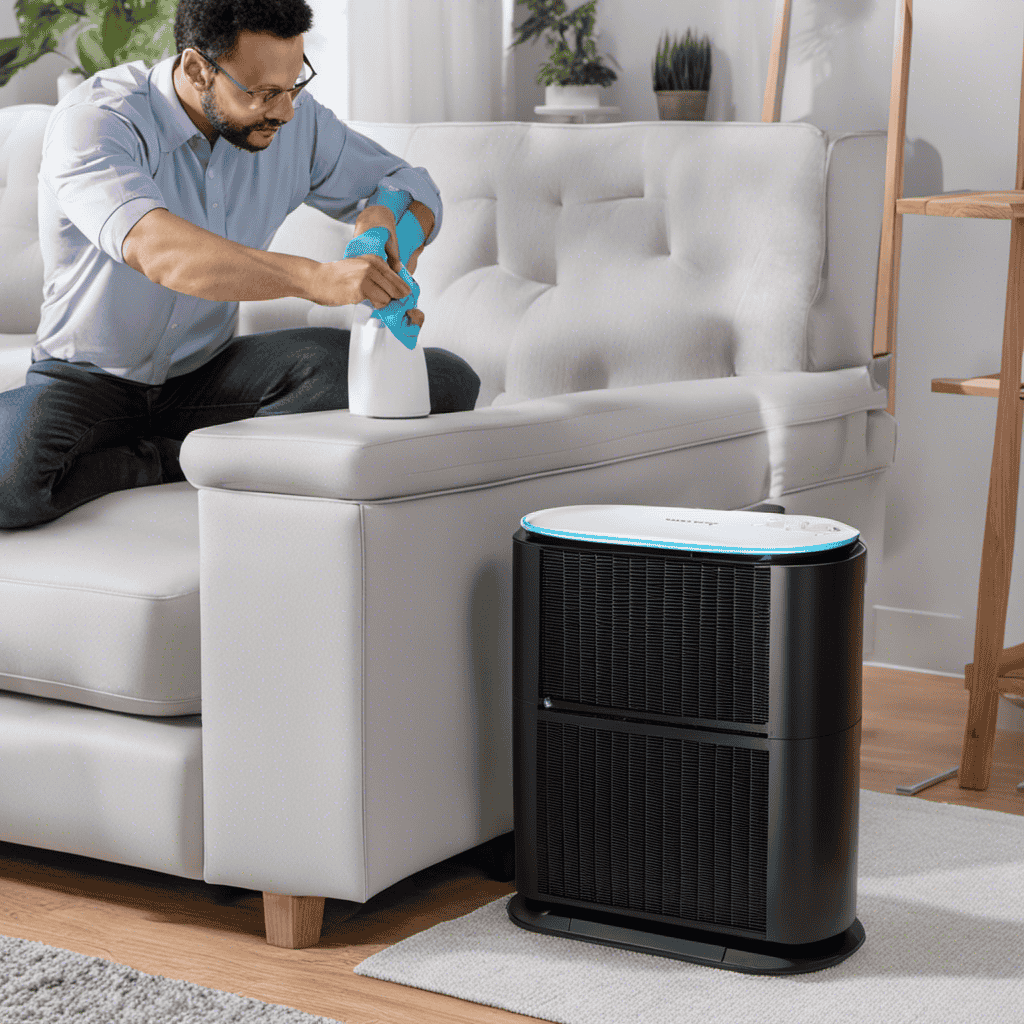
Next, gather a microfiber cloth or a lint-free cloth to wipe down the exterior of the purifier. Additionally, you’ll need a mild detergent or a cleaning solution specifically designed for air purifiers. Avoid using harsh chemicals or abrasive cleaners as they can damage the purifier.
Lastly, have a spray bottle filled with water to dampen the cloth when cleaning. With these cleaning tools and materials at hand, you’ll be ready to effectively clean your air purifier.
Turn off and Unplug the Air Purifier
When it comes to cleaning an air purifier, there are several important factors to consider.
First and foremost, it’s crucial to prioritize safety precautions during the cleaning process to avoid any accidents or injuries.
Additionally, understanding and implementing proper disassembly techniques will ensure that you can clean each component thoroughly and effectively.
Lastly, having the right cleaning supplies and knowing the appropriate methods to use will help you maintain the optimal performance of your air purifier.
Safety Precautions During Cleaning
Before starting, make sure you’ve unplugged the air purifier to ensure your safety during the cleaning process. Cleaning an air purifier requires proper safety precautions to avoid any accidents or injuries.
Here are some important guidelines to follow:
- Use gentle cleaning products specifically designed for air purifiers to avoid damaging the unit.
- Follow the manufacturer’s instructions on cleaning techniques to ensure proper maintenance.
- Wear protective gloves and a mask to prevent any contact with dust or harmful particles.
By taking these safety precautions, you can ensure a safe and effective cleaning process for your air purifier.
Once you have completed the cleaning, it is important to move on to the next step: proper disassembly techniques.
Proper Disassembly Techniques
Once you’ve ensured your safety, it’s time to learn the proper disassembly techniques for your unit. Before starting, it is important to take disassembly precautions to avoid any damages or accidents.
First, make sure to unplug your air purifier from the power source to prevent electric shocks.
Next, refer to the user manual or manufacturer’s instructions for specific disassembly steps. Keep track of each part you remove and organize them to ease the reassembly process.
Take note of any screws, clips, or connectors that need to be removed or detached. When disassembling, handle the parts gently to avoid any breakage or damage.
Once you’ve cleaned the necessary components, it’s crucial to follow proper reassembly techniques to ensure the air purifier functions correctly.
Cleaning Supplies and Methods
To effectively maintain your unit, it’s important to gather the necessary cleaning supplies and choose suitable cleaning methods. Here are some cleaning supplies and proper techniques that I highly recommend:
-
Cleaning Supplies:
-
Microfiber cloth: It’s gentle and won’t scratch the surface of your air purifier.
-
Mild detergent: Opt for a non-abrasive and fragrance-free detergent to avoid damaging the unit.
-
Compressed air: Use it to blow away dust and debris from hard-to-reach areas.
-
Proper Techniques:
-
Turn off and unplug the air purifier before cleaning.
-
Gently wipe the exterior with a damp microfiber cloth.
-
Remove and clean the filters according to the manufacturer’s instructions.
-
Use compressed air to clean the fan blades and vents.
-
Allow all parts to dry completely before reassembling.
Remove the Filters From the Air Purifier
Make sure you’ve unplugged the air purifier before removing the filters.
Proper storage techniques and maintenance cost analysis are essential aspects of prolonging the life of your air purifier.
When it comes to removing the filters, it is crucial to follow the manufacturer’s instructions for your specific model. Typically, you will need to open the front or back panel of the device and locate the filters. Gently pull out the filters, being careful not to damage them.
Once removed, you can clean the filters using a vacuum cleaner or wash them with water and mild detergent, if they are washable. After cleaning, make sure the filters are completely dry before reinstalling them.
Properly storing the filters in a clean and dry place will help maintain their effectiveness and prevent any damage.
As for maintenance cost analysis, it is important to consider the cost of replacement filters and the frequency of filter replacements when choosing an air purifier. Some models may have higher upfront costs but lower maintenance costs in the long run, while others may have lower upfront costs but higher maintenance costs.
Analyzing these factors can help you make an informed decision and choose an air purifier that fits your budget and needs.
Vacuum the Exterior of the Air Purifier
When it comes to maintaining an air purifier, two key points to consider are dust removal techniques and maintenance frequency recommendations.
Dust removal techniques can vary depending on the type of air purifier. Commonly, they include vacuuming the exterior, wiping down the surface with a damp cloth, and using compressed air to blow out any trapped dust.
As for maintenance frequency, it is generally recommended to clean the air purifier every 3-6 months, or as needed based on the manufacturer’s instructions and the level of dust accumulation in your environment.
Regular maintenance is crucial to ensure the effectiveness and longevity of your air purifier.
Dust Removal Techniques
One effective way to clean an air purifier is by using a soft brush to gently remove dust. Dust can accumulate on the surface of the air purifier over time, reducing its efficiency and potentially causing it to release dirty air back into the environment. Regular maintenance is crucial to ensure that the air purifier continues to function optimally.
Here are some dust removal techniques and maintenance frequency recommendations:
- Use a soft brush to gently sweep away dust from the exterior of the air purifier.
- Clean the pre-filter regularly to prevent dust buildup.
- Consider using a vacuum cleaner with a brush attachment to remove dust from the air intake vents.
Regularly cleaning your air purifier will not only improve its performance but also contribute to better indoor air quality. It is recommended to clean the air purifier every 2-4 weeks, depending on the level of dust and pollutants in your environment.
Maintenance Frequency Recommendations
Now that we know how to remove dust from our air purifiers, let’s talk about maintenance frequency recommendations.
It is important to clean your air purifier regularly to ensure optimal performance and longevity. The frequency of maintenance will depend on factors such as the manufacturer’s recommendations, the environment in which the air purifier is used, and the model of the device.
Generally, it is recommended to clean the filters every 3 to 6 months and deep clean the unit every 6 to 12 months.
Regular cleaning of your air purifier has several benefits. It helps to maintain the efficiency of the filters, ensuring that they can effectively trap pollutants. It also improves the airflow and prevents the accumulation of dirt and debris, which can lead to reduced performance.
Additionally, regular maintenance helps to prolong the lifespan of your air purifier, saving you money in the long run.
Clean the Pre-Filter
To clean the pre-filter, you’ll need to gently remove it from the air purifier. This is an essential step in maintaining the efficiency and performance of your air purifier.
Here are some cleaning techniques and maintenance tips to ensure your pre-filter stays in optimal condition:
-
Regular vacuuming: Use a soft brush attachment to remove dust and debris from the pre-filter. This helps to prevent clogging and maintain airflow.
-
Washing with mild detergent: If your pre-filter is washable, gently wash it by hand with a mild detergent and warm water. Rinse thoroughly and let it air dry completely before reinstalling.
-
Replacement schedule: Depending on the manufacturer’s recommendations, you may need to replace the pre-filter every 3 to 6 months. This ensures the filter continues to effectively capture pollutants and allergens.
Wash or Replace the HEPA Filter
When it comes to filter maintenance for your air purifier, there are a few key points to keep in mind.
First, it’s important to regularly clean or replace the HEPA filter to ensure optimal performance.
Secondly, understanding the frequency of filter replacement will help you maintain clean air in your home.
Lastly, following these maintenance tips will help prolong the lifespan of your filters and keep your air purifier running efficiently.
Filter Maintenance Tips
Make sure you’re regularly replacing the filters in your air purifier to maintain its efficiency. Filter replacement is an essential part of air purifier maintenance that often gets overlooked. It not only ensures optimal performance but also contributes to improved air quality in your home or office.
Here are three reasons why filter maintenance is crucial:
-
Cleaner Air: By regularly replacing the filters, you remove harmful pollutants, allergens, and contaminants from the air, leading to cleaner and healthier indoor air quality.
-
Efficient Operation: Over time, filters become clogged with dirt and debris, causing the air purifier to work harder. By replacing the filters, you allow the purifier to operate at its full capacity, effectively removing pollutants from the air.
-
Longevity: Proper filter maintenance extends the lifespan of your air purifier. By regularly replacing the filters, you prevent damage caused by excessive wear and tear, saving you money in the long run.
Frequency of Replacement
You should regularly replace the filters in your air purifier to ensure its efficiency and maintain cleaner, healthier indoor air quality. The maintenance frequency of air purifier filters depends on various factors such as the type of filter, the air quality in your area, and the usage of the purifier.
As a general guideline, it is recommended to replace the pre-filter every three months, the HEPA filter every six to twelve months, and the carbon filter every six months. However, it’s important to check the manufacturer’s instructions for your specific model as the replacement schedule may vary.
Regularly replacing the filters will help optimize the performance of your air purifier and ensure that it continues to effectively remove pollutants and allergens from your indoor air.
Clean or Replace the Carbon Filter
To clean or replace the carbon filter, all you need to do is gently remove it from the air purifier and either wash it or install a new one. Carbon filter maintenance is an essential part of keeping your air purifier working effectively. Here are some key points to consider:
- Regular cleaning or replacement of the carbon filter ensures optimal performance and extends the lifespan of your air purifier.
- The frequency of filter replacement depends on various factors such as the manufacturer’s recommendations, the air quality in your area, and the usage of the air purifier.
- It is recommended to check the condition of the carbon filter every three to six months and replace it when necessary.
By following these maintenance tips, you can ensure that your air purifier continues to provide clean and fresh air for you and your family.
Now, let’s move on to the next step: cleaning the ionizer plates (if applicable).
Clean the Ionizer Plates (If Applicable
When it comes to maintaining optimal performance of my ionizer, I know that regular cleaning of the ionizer plates is crucial. Cleaning the ionizer plates helps remove any dirt, dust, or other particles that may have accumulated over time, ensuring that the ionizer functions effectively.
There are various cleaning techniques that can be used, such as using a soft brush or cloth to gently wipe the plates, or soaking them in a vinegar solution.
Regular cleaning of the ionizer plates is important to maintain its efficiency and ensure that it continues to provide clean and fresh air in my living space.
Ionizer Plate Maintenance
First, make sure to unplug the air purifier before cleaning the ionizer plate. The ionizer plate is a crucial component of the air purifier that helps to remove airborne particles and improve indoor air quality. To ensure optimal performance, regular maintenance is necessary.
Here are some ionizer plate maintenance techniques and common troubleshooting tips to keep in mind:
- Clean the ionizer plate gently with a soft cloth or brush to remove accumulated dirt and debris.
- Avoid using harsh chemicals or abrasive materials that could damage the plate.
- Check for any signs of corrosion or discoloration on the plate, as this may indicate a need for replacement.
- If the ionizer plate is not functioning properly, double-check the connections and ensure it is securely installed.
- In case of persistent issues, consult the user manual or contact the manufacturer for further assistance.
Cleaning Techniques for Ionizers
Regular maintenance is crucial for keeping your ionizer plate in optimal condition and ensuring it effectively removes airborne particles.
To clean your ionizer plate, start by unplugging the unit and removing the plate from the air purifier. Gently wipe the plate with a soft cloth or sponge dampened with water and mild dish soap.
For stubborn stains, you can use a mixture of water and vinegar or a specialized ionizer cleaning solution. Avoid using harsh chemicals or abrasive materials, as they can damage the plate.
After cleaning, rinse the plate thoroughly with water and allow it to dry completely before reinserting it into the air purifier. Regular cleaning will help maintain the efficiency of your ionizer and keep it working effectively.
Importance of Regular Cleaning
To ensure optimal performance, it’s important that you regularly maintain and clean your ionizer plate. Neglecting this important task can lead to a decrease in the efficiency of your air purifier and may even cause it to malfunction.
Here are some maintenance benefits and cleaning techniques that you should be aware of:
-
Regular maintenance ensures that your ionizer plate continues to effectively remove pollutants from the air, providing you with clean and fresh indoor air.
-
Cleaning the ionizer plate removes accumulated dust, allergens, and other particles, preventing them from being released back into the air.
-
Proper cleaning techniques, such as gently wiping the plate with a soft cloth or using a mild detergent, help to prolong the lifespan of your ionizer plate.
By regularly maintaining and cleaning your ionizer plate, you can enjoy the full benefits of your air purifier and ensure that it continues to work efficiently.
Now, let’s move on to the next section where we will discuss how to clean the fan and vents.
Clean the Fan and Vents
When cleaning your air purifier, be sure to start by cleaning the fan and vents. This is an important step in maintaining the optimal performance of your air purifier.
To clean the fan, first, make sure the device is turned off and unplugged. Then, use a soft brush or a vacuum cleaner with a brush attachment to gently remove any dust or debris from the fan blades.
Next, move on to the vents. Use a damp cloth or a brush to wipe away any dust or dirt that may have accumulated on the vent grills. Be sure to clean both the intake and exhaust vents thoroughly.
Regular fan maintenance and vent cleaning will help ensure that your air purifier continues to provide clean and fresh air for you and your family.
Wipe Down the Exterior of the Air Purifier
Start by using a damp cloth to wipe down the exterior of your air purifier, making sure to remove any dust or dirt that may have accumulated. Regularly cleaning the exterior of your air purifier is essential for maintaining its efficiency and prolonging its lifespan.
Here are some emotions you may experience while cleaning the exterior of your air purifier:
- Relief: Removing the dust and dirt gives a sense of relief, knowing that you are improving the air quality in your home.
- Satisfaction: Seeing the clean and shiny exterior of your air purifier can bring a sense of satisfaction, knowing that you are taking good care of your appliance.
- Peace of Mind: Cleaning the exterior of your air purifier regularly ensures that it is functioning optimally, providing you with clean and fresh air.
To ensure effective dust removal techniques and proper maintenance, it is recommended to wipe down the exterior of your air purifier at least once every two weeks or more frequently if you live in a dusty environment.
Reassemble the Filters and Put Them Back Into the Air Purifier
Now that the exterior of the air purifier is clean, it’s time to reassemble the filters and put them back into the unit. This is a crucial step in the cleaning process, as it ensures that the air purifier can effectively filter and purify the air in your space.
To begin the reassembly process, carefully place the filters back into their designated slots. Make sure they fit securely and snugly in place. Take extra care not to damage or bend the filters during this step.
Once the filters are in place, follow the manufacturer’s instructions to properly secure them. This may involve fastening clips, latches, or screws. Ensure that the filters are firmly attached to prevent any air leaks.
After reassembling the filters, double-check that everything is in its proper place and securely fastened. Once you are satisfied, you can proceed to plug in the air purifier and resume its normal operation.
Plug in and Turn on the Air Purifier
To power on the unit, simply plug in the air purifier and press the power button.
Before doing so, it is important to take some safety precautions. Ensure that the unit is not plugged into a damaged or overloaded electrical outlet. Additionally, make sure your hands are dry before handling the power cord or the air purifier.
Once plugged in, gently press the power button to turn on the unit. As the air purifier starts running, you may feel a sense of relief knowing that you’re taking steps to improve the air quality in your home. The hum of the motor and the soft glow of the power indicator can create a calming ambiance in the room.
Take a deep breath and enjoy the fresh air that your air purifier is providing.
Test the Air Purifier’s Performance
Once you’ve plugged in and powered on the air purifier, it’s time to test its performance. Performance testing is crucial to ensure that the air purifier is effectively removing pollutants from the air and improving the overall air quality in your space. One way to measure the performance of an air purifier is through air quality measurement. This can be done using a device called a particle counter, which measures the number and size of particles in the air. By comparing the particle count before and after running the air purifier, you can determine its effectiveness. Another method is using a gas sensor to measure the levels of specific pollutants, such as VOCs or carbon dioxide. By conducting these tests regularly, you can ensure that your air purifier is working optimally and providing you with clean and healthy air.
| Test Method | Purpose |
|---|---|
| Particle Count | Measures the number and size of particles in the air |
| Gas Sensor | Measures the levels of specific pollutants, such as VOCs or carbon dioxide |
Establish a Regular Cleaning Schedule
Remember to establish a regular cleaning schedule for optimal maintenance of your device. Cleaning your air purifier regularly is crucial to ensure its effectiveness and longevity. Here are some reasons why maintaining a regular cleaning frequency is important:
-
Improved air quality: Regular cleaning removes accumulated dust, allergens, and pollutants, ensuring that your air purifier continues to provide clean and fresh air.
-
Prolonged filter life: Cleaning the filters regularly prevents them from becoming clogged, allowing them to function efficiently and extend their lifespan.
-
Energy efficiency: A clean air purifier consumes less energy, saving you money on utility bills.
Frequently Asked Questions
How Often Should I Clean My Air Purifier?
I clean my air purifier regularly to ensure optimal performance. I change the filters every 3-6 months, depending on the manufacturer’s recommendation. To remove dust, I gently wipe the exterior and use a vacuum attachment for hard-to-reach areas.
Can I Clean the Filters With Water?
Yes, you can clean the filters of an air purifier with water. There are various cleaning methods and alternative solutions available, but using water is one of the most common and effective ways to clean the filters.
Can I Use Regular Household Cleaning Products to Clean My Air Purifier?
Yes, you can use regular household cleaning products to clean your air purifier. However, it is important to check the manufacturer’s instructions for recommended cleaning methods and any alternative cleaning solutions that may be suggested.
Should I Clean the Ionizer Plates Even if They Don’t Look Dirty?
Yes, it’s important to clean the ionizer plates regularly, even if they don’t look dirty. This helps maintain the effectiveness of the air purifier and ensures optimal performance. Cleaning frequency and maintenance tips should be followed for best results.
How Do I Know if My Air Purifier Is Working Properly After Cleaning?
After cleaning my air purifier, I check if it’s working properly by monitoring the air quality and airflow. I also inspect the filters for any signs of wear or damage. Regular air purifier maintenance and troubleshooting are crucial for optimal performance.
Is the Cleaning Process for Vollara Air Purifier the Same as Other Air Purifiers?
When it comes to cleaning Vollara air purifier, the process is similar to other air purifiers. Start by unplugging the unit and removing the filter. Use a vacuum to remove dust and debris, then wipe down the exterior with a damp cloth. Be sure to follow the manufacturer’s instructions for best results in cleaning Vollara air purifier.
Conclusion
In conclusion, keeping your air purifier clean is essential for maintaining its performance and ensuring the quality of the air in your home.
According to a study conducted by the National Institute for Occupational Safety and Health, a dirty air purifier can actually worsen indoor air quality and contribute to respiratory issues.
Therefore, it is crucial to follow a regular cleaning schedule and thoroughly clean all the filters and exterior of the air purifier.
By doing so, you can effectively remove pollutants and allergens from the air, creating a healthier environment for you and your family.