
Were you aware that the air inside can be as much as five times dirtier than the air outside? This is precisely the reason it’s essential to equip your air purifier with a Hepa filter.
In this article, I’ll guide you through the step-by-step process of putting in a Hepa filter in your air purifier, Hepa first. By following these detailed instructions, you’ll be able to ensure clean and healthy air for you and your family.
So let’s get started and improve the air quality in your home!
Key Takeaways
- Indoor air can be significantly more polluted than outdoor air.
- Hepa filters are designed to trap and remove small particles from the air.
- Hepa filters can capture particles as small as 0.3 microns in size.
- Proper installation and disposal of Hepa filters are important for maintaining cleanliness and environmental safety.
Top picks for "hepa filter purifier"
Open Amazon search results for this keyword.
As an affiliate, we earn on qualifying purchases.
Step 1: Understand the Importance of a Hepa Filter in an Air Purifier
Before you begin, it’s important to understand why a Hepa filter is crucial in an air purifier.
A Hepa filter, which stands for High-Efficiency Particulate Air filter, is designed to trap and remove small particles from the air.
It is made up of a dense mesh of fibers that can capture particles as small as 0.3 microns in size.
This is important because many harmful pollutants, such as dust, pollen, pet dander, and mold spores, are smaller than what the naked eye can see.
By using a Hepa filter in an air purifier, you can effectively remove these pollutants from the air, improving indoor air quality and reducing the risk of respiratory issues.
The benefits of Hepa filters include reducing allergies and asthma symptoms, preventing the spread of airborne diseases, and creating a cleaner and healthier living environment.
Now that you understand the importance of a Hepa filter, let’s move on to step 2: gathering the necessary tools and equipment for the installation process.
Step 2: Gather the Necessary Tools and Equipment
Before diving into the installation process, it’s crucial to gather the necessary tools and equipment.
For the installation of an air purifier, some required tools include a screwdriver, pliers, and a level.
Additionally, it’s essential to have the equipment needed for assembly, such as the air purifier unit, mounting brackets, and screws.
To ensure a smooth installation process, gathering these necessary installation tools is of utmost importance.
Required Tools for Installation
You’ll need a screwdriver and a pair of pliers to install the HEPA filter in the air purifier. Here are the required tools for a successful installation:
-
Screwdriver: This tool is essential for removing any screws that secure the filter compartment in the air purifier. Make sure to choose a screwdriver that fits the screws properly to avoid damaging them.
-
Pliers: These are necessary for handling the filter properly. They will help you grip and maneuver the filter during the installation process. Ensure that the pliers have a comfortable grip to prevent any strain on your hands.
-
Cleaning cloth: Before installing the HEPA filter, it’s important to clean the air purifier’s filter compartment. A soft cleaning cloth will help you remove any dust or debris that may have accumulated.
Once you have gathered these tools, you’ll be ready to move on to the next step of assembling the air purifier.
Equipment Needed for Assembly
To assemble the air purifier, gather the necessary equipment such as a screwdriver, pliers, and a cleaning cloth. Before starting the filter installation process, it’s important to ensure that all the equipment is prepared and ready to use.
Begin by checking that the screwdriver is the right size for the screws on the purifier. Next, make sure the pliers are in good working condition, with a firm grip for any adjustments needed during assembly. Lastly, ensure that the cleaning cloth is clean and lint-free to avoid any contamination.
Having the right equipment prepared beforehand will help make the filter installation process smoother and more efficient.
Gathering Necessary Installation Tools
Make sure you have all the tools ready before starting the installation process. Here are the necessary tools for installing a HEPA filter in your air purifier:
-
Screwdriver: You’ll need this to remove the old filter and secure the new one in place.
-
User manual: Refer to the manual for specific instructions on how to properly install the HEPA filter.
-
Replacement HEPA filter: Ensure that the filter is compatible with your air purifier model and has a high efficiency rating to effectively remove pollutants from the air.
Understanding filter efficiency and the importance of regular filter maintenance is crucial for maintaining clean air in your home.
Proper installation and regular filter maintenance will ensure that your air purifier operates at its best, providing you with clean and healthy air to breathe.
Step 3: Locate the Filter Compartment in Your Air Purifier
Once you’ve found the filter compartment in your air purifier, it’s time to move on to the next step. This is a crucial part of air purifier maintenance and troubleshooting.
The filter compartment is usually located at the back or the side of the purifier. It may be secured with screws or simply slide open with a latch. Before opening the compartment, make sure the air purifier is turned off and unplugged.
Once opened, carefully remove the old filter and dispose of it properly. Take note of the orientation of the old filter as you will need to insert the new one in the same way. Make sure to clean any dust or debris in the compartment before inserting the new filter.
Once cleaned, align the new filter properly and secure the compartment back in place. Finally, plug in the air purifier and turn it on to start enjoying clean and purified air.
Step 4: Remove the Old Filter and Dispose of It Properly
Now that we have located the filter compartment, it’s time to remove the old filter and dispose of it properly. Here’s how you can do it:
-
Turn off the air purifier and unplug it from the power source to ensure safety.
-
Open the filter compartment by following the manufacturer’s instructions. This may involve removing a cover or unlocking a latch.
-
Carefully remove the old HEPA filter from its place. Be cautious not to damage it or release any trapped particles back into the air.
-
Check with your local waste management facility for specific guidelines on how to dispose of the old filter. Some filters can be recycled, while others may need to be treated as hazardous waste.
By disposing of the old filter properly, you are not only maintaining the cleanliness of your air purifier but also ensuring the safety of the environment.
Now, let’s move on to the next step: preparing the new HEPA filter for installation.
Step 5: Prepare the New Hepa Filter for Installation
When it comes to the installation process of a filter, there are a few key points to keep in mind.
Firstly, it is important to handle the filter properly, ensuring that it is not damaged or contaminated during the process.
Secondly, understanding the proper installation process is crucial for ensuring optimal performance and effectiveness of the filter.
Lastly, it is important to highlight the benefits of HEPA filters, such as their ability to capture and remove particles as small as 0.3 microns, providing cleaner and healthier air.
Filter Installation Process
To start the filter installation process, you’ll need to carefully remove the cover of the air purifier. Here’s a step-by-step guide to help you with the process:
- Turn off the air purifier and unplug it from the power source.
- Locate the filter compartment on the air purifier, usually found at the back or side.
- Gently remove the cover by sliding it or unscrewing the screws, depending on the model.
Proper filter maintenance is crucial for optimal performance and longevity. Regularly cleaning or replacing the filters ensures that the air purifier functions efficiently and effectively. The filter lifespan varies depending on factors such as usage, air quality, and the specific filter type. It’s recommended to check the manufacturer’s guidelines for the recommended filter replacement schedule.
Now that you know how to remove the cover and understand the importance of filter maintenance, let’s move on to the next section: proper filter handling.
Proper Filter Handling
Properly handling the filter is essential for maintaining its effectiveness and ensuring the longevity of your air purifier.
Filter maintenance is crucial in order to keep your air purifier functioning optimally. To maximize the filter lifespan, it is important to handle it with care. When removing the filter, be gentle and avoid touching the filter media directly. This will prevent any damage or contamination that could affect its performance.
Additionally, regular cleaning of the filter is necessary to remove accumulated dust and particles. Follow the manufacturer’s instructions for cleaning and replacing the filter. It is recommended to replace the filter as per the recommended schedule to maintain its efficiency.
Benefits of HEPA Filters
Now that we understand how to handle HEPA filters properly, let’s explore the benefits of using these filters in air purifiers.
HEPA filters are highly efficient in removing airborne particles, making them a popular choice for improving indoor air quality. Here are some key benefits:
-
High Efficiency: HEPA filters have a minimum efficiency of 99.97% in capturing particles as small as 0.3 microns. This means they can effectively trap dust, pollen, pet dander, and even bacteria and viruses.
-
Improved Air Quality: By removing harmful pollutants from the air, HEPA filters help reduce allergy and asthma symptoms. They also eliminate unpleasant odors, creating a fresher and cleaner living environment.
-
Easy Maintenance: Regular maintenance of HEPA filters is crucial for optimal performance. This typically involves vacuuming or washing the filter, and some models may require periodic replacement. By following the manufacturer’s instructions, you can ensure that your HEPA filter continues to operate efficiently and effectively.
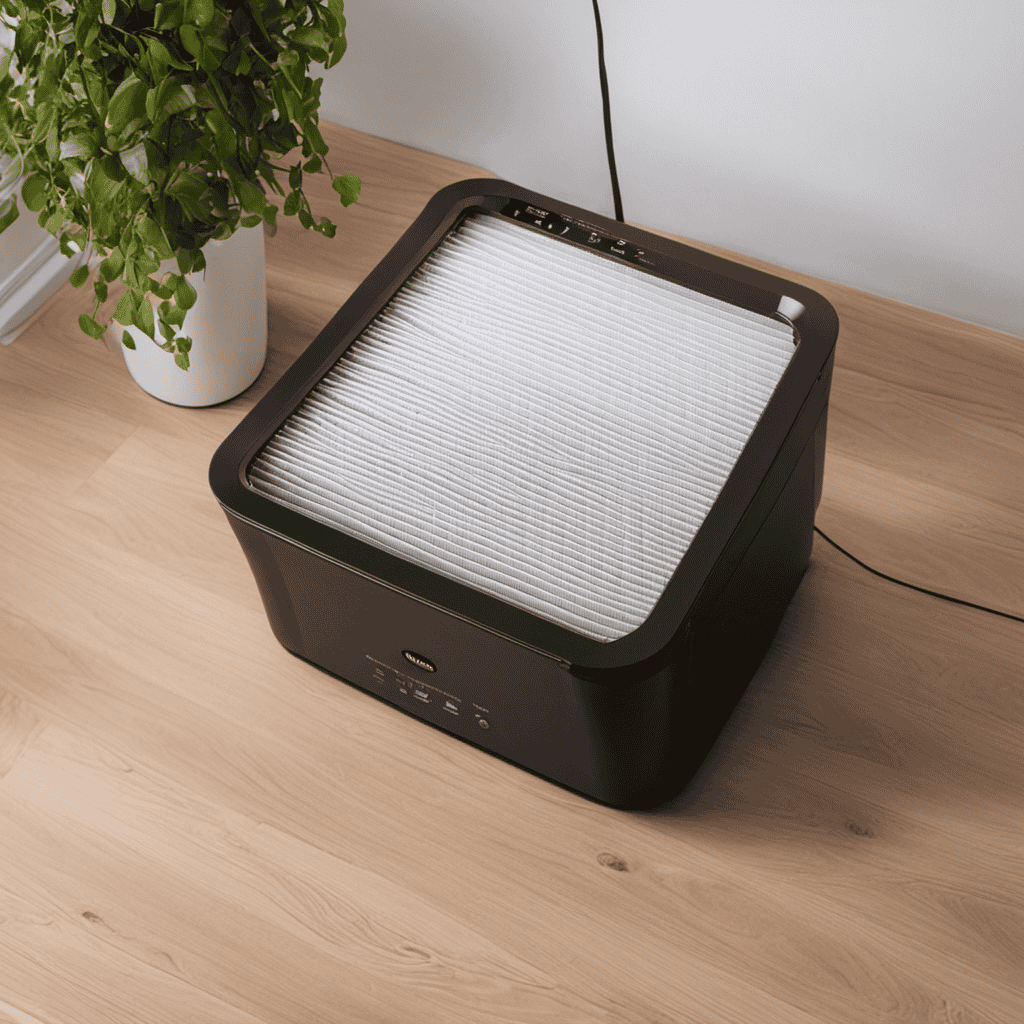
Step 6: Insert the Hepa Filter Into the Air Purifier
Simply slide the HEPA filter into the air purifier, making sure it fits securely.
Proper filter installation is crucial for the optimal performance of your air purifier. To begin, locate the filter compartment on the air purifier. Most air purifiers have a designated area where the filter should be inserted.
Gently open the compartment and remove any protective covering or packaging from the new filter. Take note of the arrow or label indicating the correct orientation of the filter. Align the filter accordingly and slide it into the compartment.
Ensure that the filter is snugly fit and the compartment is securely closed. If you encounter any issues during installation, such as difficulties sliding the filter or a loose fit, refer to the manufacturer’s instructions or contact their customer support for troubleshooting assistance.
Step 7: Secure the Filter Compartment and Test the Air Purifier
After ensuring a snug fit and securely closing the compartment, you can test the air purifier’s performance. Here are three things to keep in mind when maintaining your air purifier and replacing its filters:
-
Regularly check the filter replacement indicator: Most air purifiers have a built-in indicator that alerts you when it’s time to replace the filter. This indicator is typically based on the number of hours the purifier has been in use or the level of pollutants it has captured.
-
Follow the manufacturer’s instructions for filter replacement: Each air purifier model may have slightly different instructions for replacing the filters. It’s important to carefully read and follow the manufacturer’s guidelines to ensure proper installation and performance.
-
Keep track of filter replacement schedule: Set a reminder or mark a calendar to keep track of when your filters need to be replaced. Regularly replacing filters is crucial for maintaining the efficiency and effectiveness of your air purifier.
Frequently Asked Questions
How Often Should the Hepa Filter Be Replaced in an Air Purifier?
I replace the HEPA filter in my air purifier every 6 to 12 months. Signs that indicate the need for replacement include reduced airflow, a dirty or discolored filter, and a decrease in air quality.
Can Any Type of Hepa Filter Be Used in Any Air Purifier Model?
Yes, any type of HEPA filter can be used in any air purifier model as long as it is compatible. Using a HEPA filter has many advantages, such as removing 99.97% of airborne particles.
Are There Any Specific Cleaning Instructions for the Hepa Filter?
Cleaning instructions and maintenance tips for the HEPA filter include regular vacuuming to remove dust and debris, and replacing the filter every 6 to 12 months. Check the manufacturer’s guidelines for specific instructions on your air purifier model.
Will Using a Hepa Filter in My Air Purifier Increase My Energy Consumption?
Using a HEPA filter in my air purifier won’t increase energy consumption. It can improve the performance by removing microscopic particles, allergens, and pollutants. The benefits include cleaner air and reduced risk of respiratory issues.
Can the Hepa Filter Be Reused After Cleaning It?
Yes, the HEPA filter can be reused after cleaning it. Cleaning the filter regularly helps to maintain its effectiveness in removing particles from the air. It also prolongs the lifespan of the filter, saving you money in the long run.
Conclusion
In conclusion, after understanding the importance of a Hepa filter in an air purifier, gathering the necessary tools and equipment, and locating the filter compartment, the next step is to remove and dispose of the old filter. Once that is done, you can prepare the new Hepa filter by unpacking it and making sure it is clean and undamaged.
The next step is to insert the new filter into the air purifier. This is usually done by sliding it into the designated slot or compartment. Once the filter is in place, it is important to secure the filter compartment properly to ensure that the filter stays in position during operation.
Finally, it is crucial to test the air purifier to ensure that it is working correctly with the new Hepa filter. This can be done by turning on the air purifier and checking for proper air flow and filtration.
By following these steps, you can ensure that your air purifier is functioning efficiently and effectively in providing clean and purified air.